Structural design of a prestressed I-section (EN)
1 New project
Let’s launch IDEA StatiCa, go to the Concrete tab and select the application RCS. Create a new project by clicking Create a new project. In the next dialog, stay with default general Eurocode settings and select a 1D staged/prestressed/composite section as you see on the screenshot.

This will create a blank project with the possibility to input prestressed sections. At the beginning you will add one more extreme, so you can check the section at the prestressing stage and also at the end of the design working life. To do that, go to Sections and add a New extreme. At last, rename the extremes and set time to 7 and 18250 days (50 years).

2 Design
Start with the input of the cross-section. In the Cross-section tab, start with the I-section with haunched flanges in ribbon and type in all dimensions as you can see in the picture.

After that, you will see the cross-section in the scene and you will change its material now.

Let´s continue with the introduction of tendons. Switch the tab in Navigator to Prestressing and run Reinforcement editor.

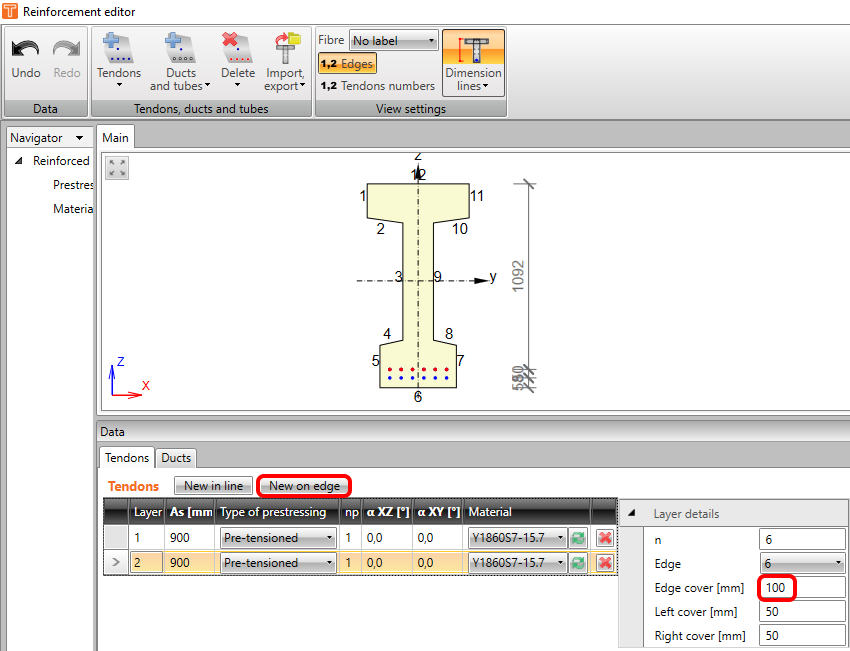
At first, input pre-tensioned tendons as New on edge. To see the edge numbers, turn them on in the ribbon. Change the type to Pre-tensioned and adjust the properties as follows:

Let´s add the second row of tendons by clicking on New on edge again. Change edge cover.
You can combine pre-tensioned tendons with post-tensioned ones in different stages. But their input is done in one place and governed by np (order of prestressing). Let´s add the last tendon as New in line. Change type, np, and properties as seen in the screenshot.

Proceed to the Design member tab in the navigator. Stay with the default values of exposure classes. The important changes for this tutorial are in Construction stages tab. Add one more construction stage and change the time for the second and third construction stage. Also tick the checkbox in the prestressing column for the third construction stage (number 2 appears next to it, which indicates that all tendons with np=2 will be introduced at this stage, in our case post-tensioned tendon).

In the Action stages tab, one can input the effects of permanent loads as an increment for each stage in characteristic values. Our example introduces just one permanent load at the time of prestressing. Fill in the table as follows:

Continue in the Internal forces tab with the transfer of All permanent effects and effects of prestressing. You will complement these values with the design values of variable effects. Please notice that the previous input values have been automatically multiplied by the corresponding partial factors (e.g. 1500*1,35=2025).

Please switch to the extreme named Prestressing and click All again. You won´t introduce any variable load in this stage. After that, you can go back into End of design working life.

3 Reinforcement
Before the checks, you need to reinforce the section. The best option in cases of rectangular, T and I-sections is to use a template. Adjust its properties according to the screenshot.

This should be a result of your effort:

4 Check
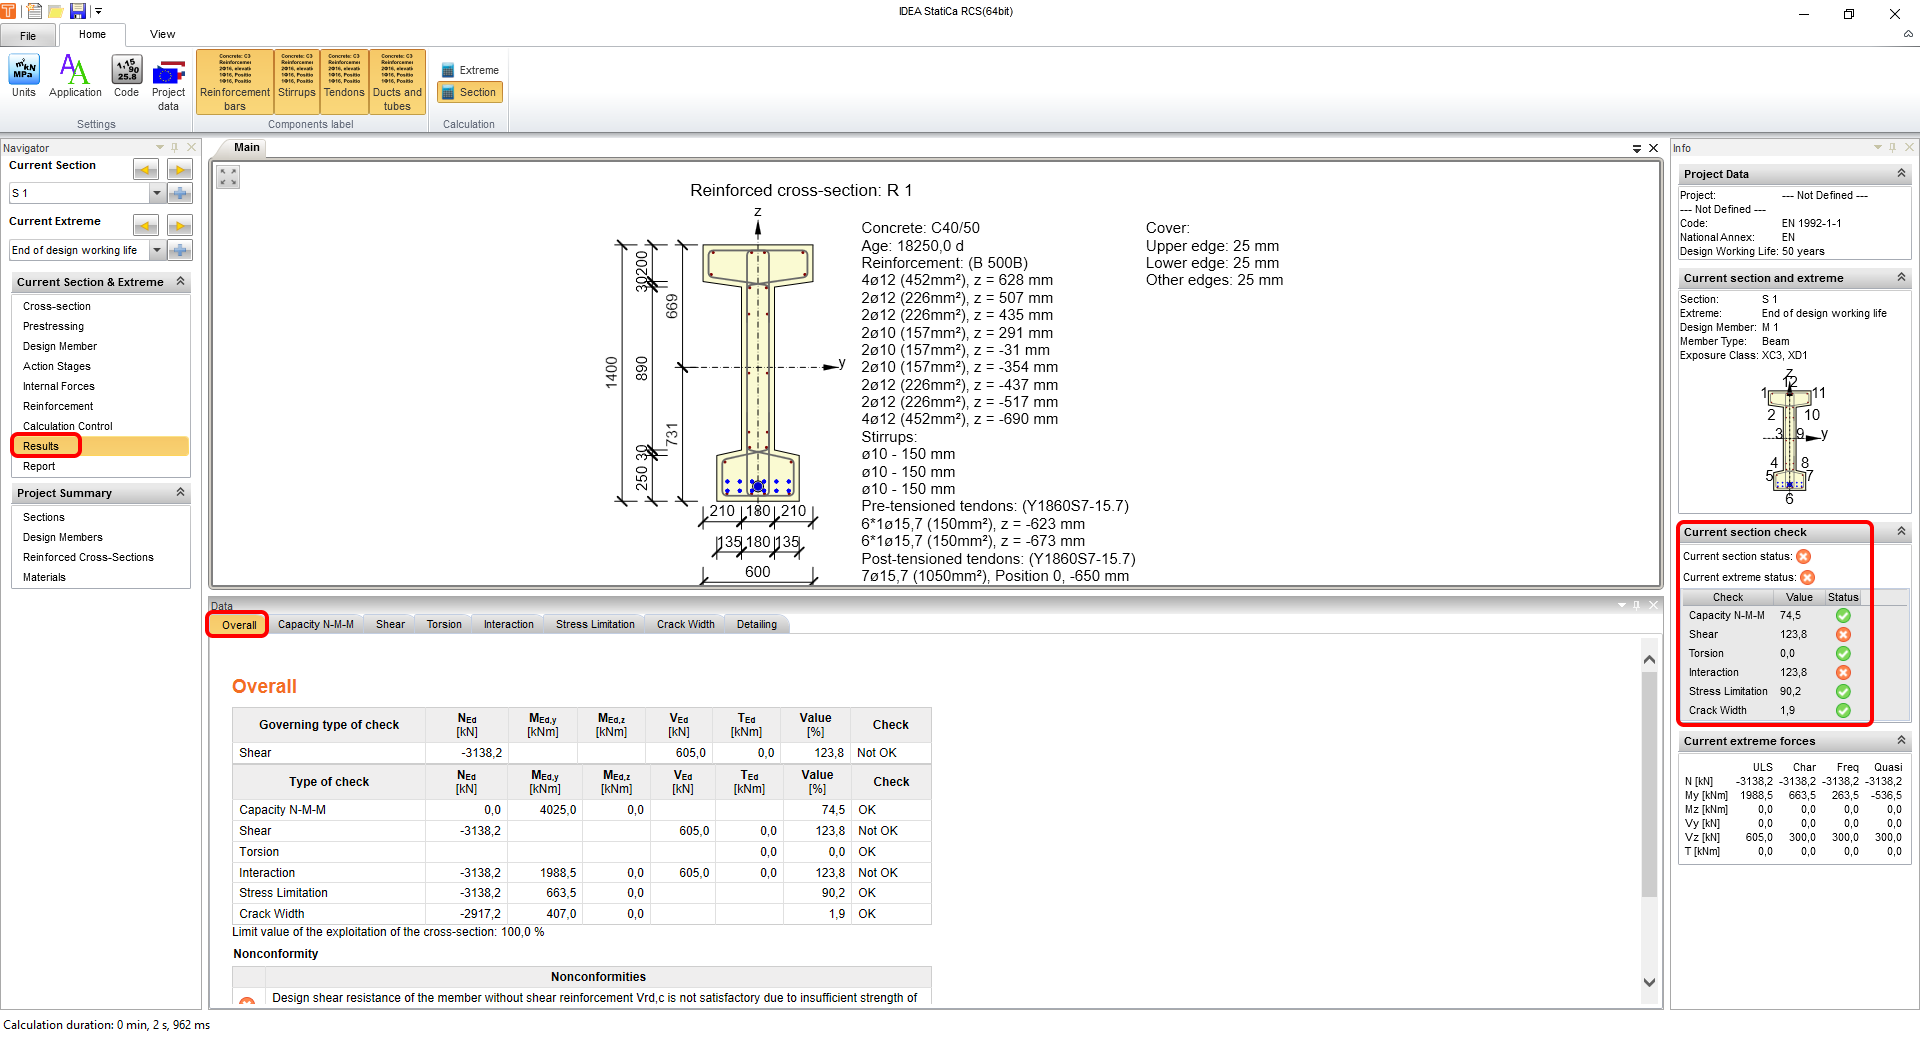
To run the checks, just click on Results in the navigator. The first thing you see after calculations is a summary of all the checks. The fastest way to ensure everything is OK is to look at the right side of the screen. In this example you see, that shear and subsequently interaction checks are not passing. This is the result of the default conservative value of the compressive strut angle.
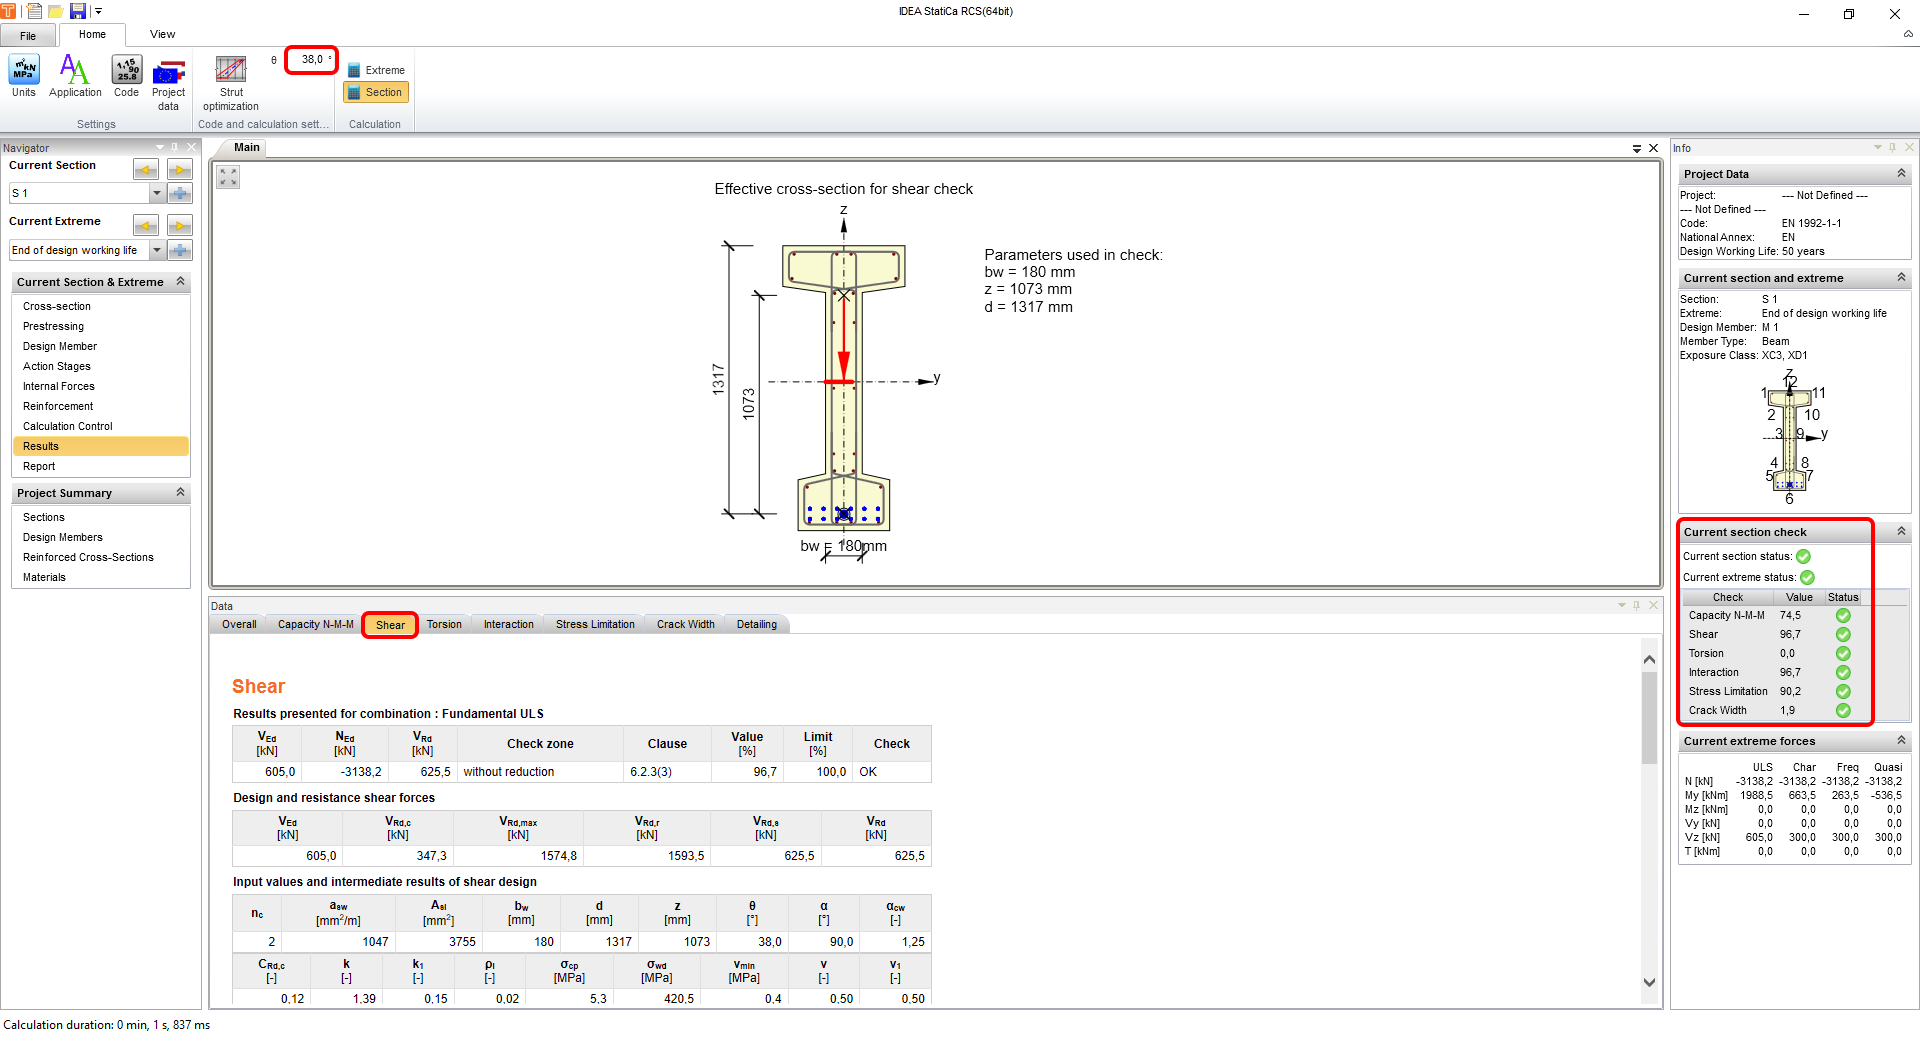
To change that, go to the Shear tab and change the angle manually to 38° or use strut optimization. After the change, both extremes will be recalculated and with all checks passing.
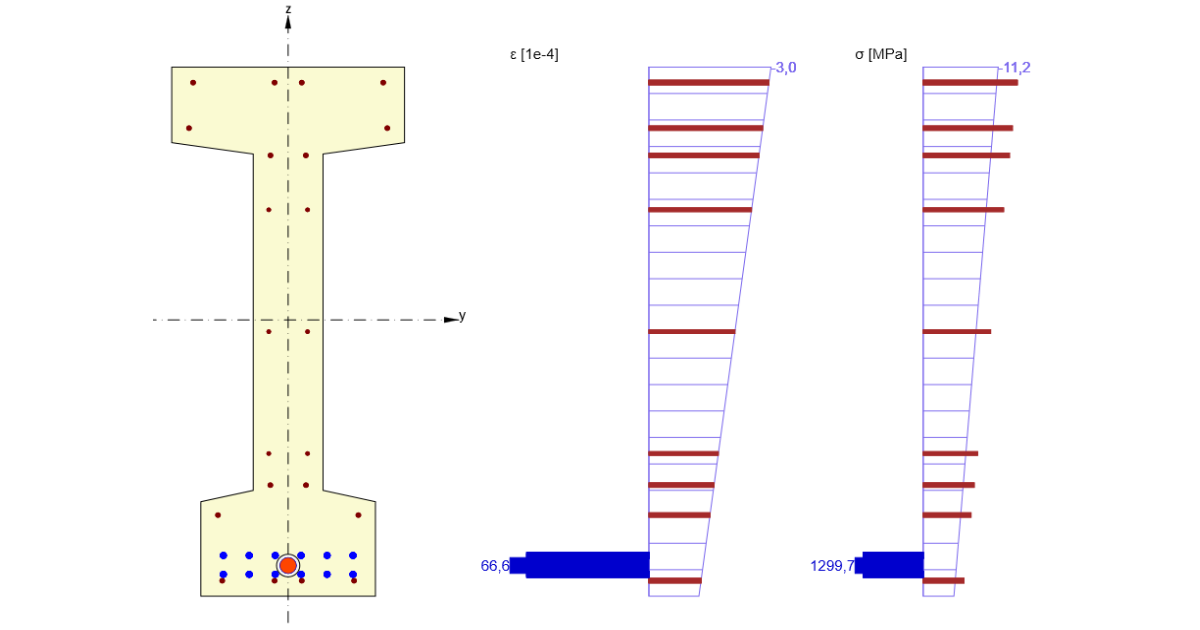
To see the difference between the stages, you will use Stress limitation checks as they provide quickly understandable information about the behavior of the section. These are the results at the end of the design working life:

On the other hand, you can expect the opposite fibers to be extreme without variable load. Switch Current extreme to Prestressing and all results will be displayed.

The interesting result at this stage would also be the decompression state which is a part of the crack width results. As you can see in results, IDEA StatiCa RCS automatically checks all the correspondent combinations with the respect to r,inf and r,sup factors according to given exposure classes and national annexes.

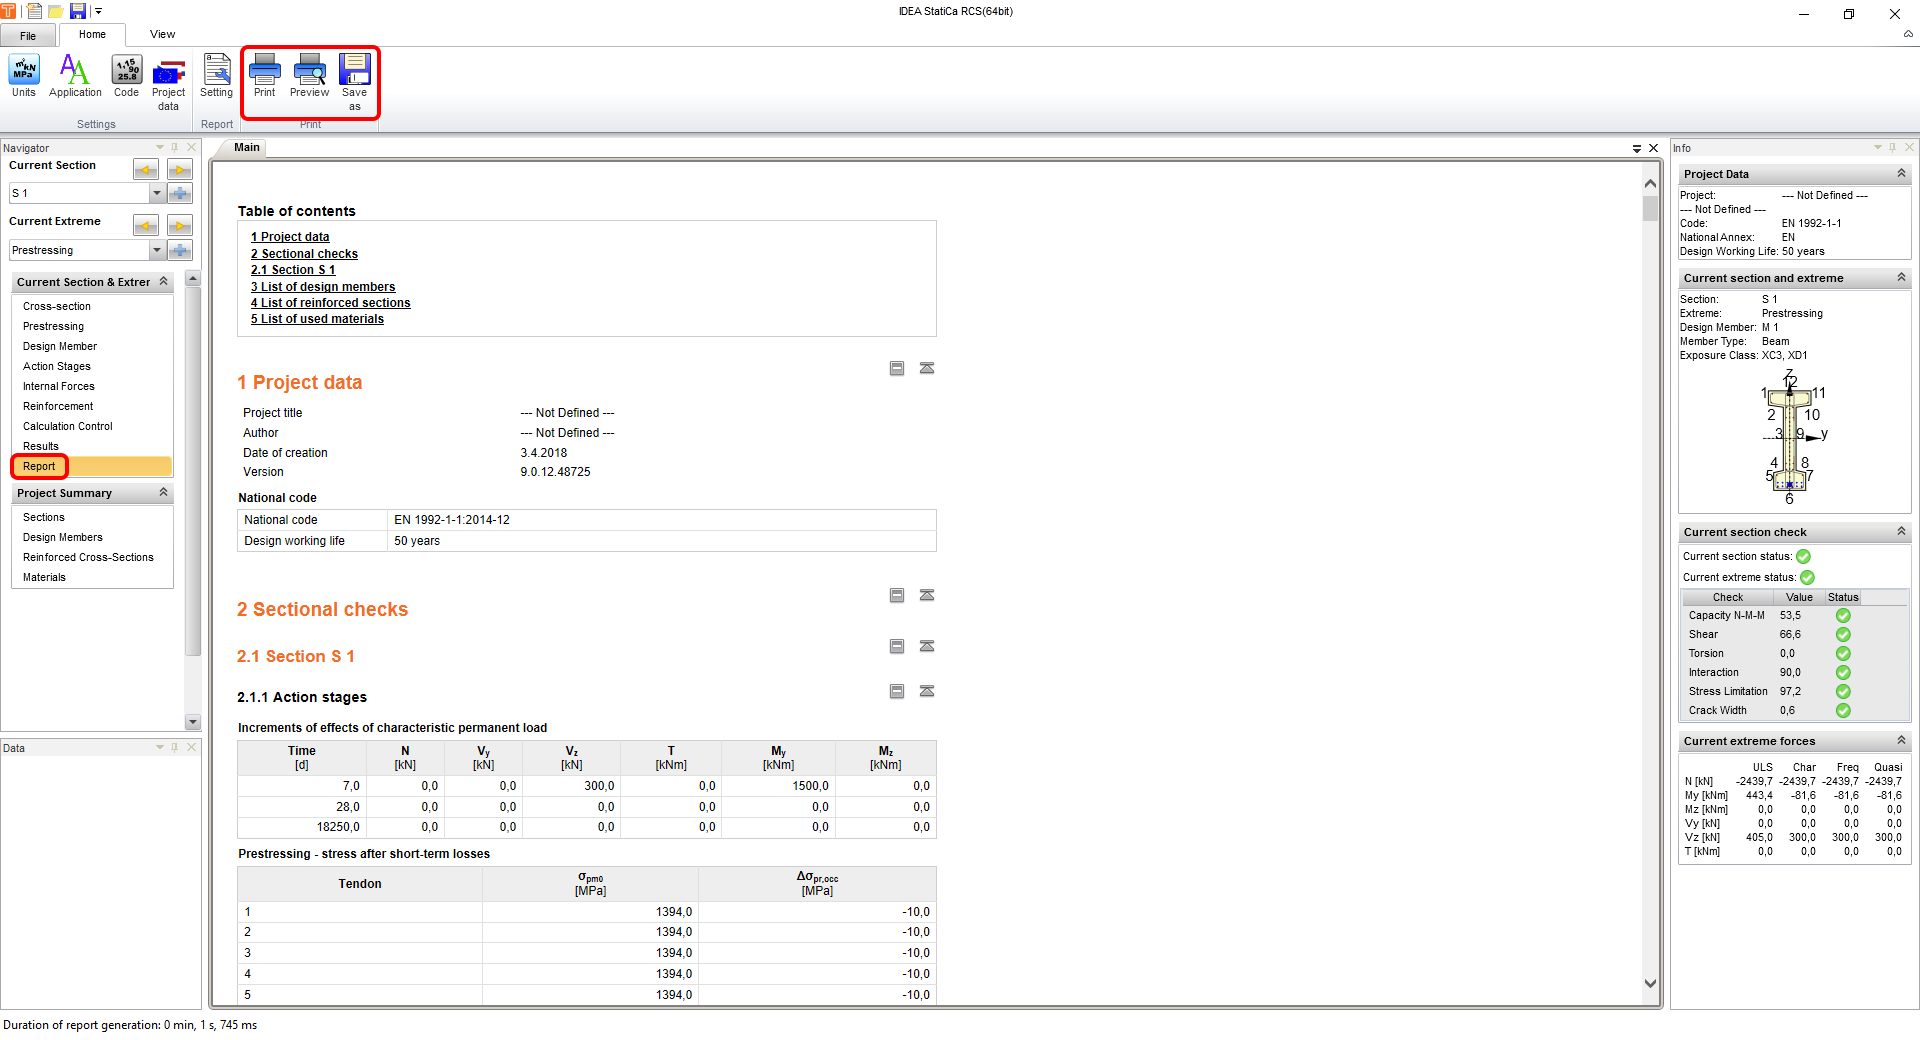
5 Report
At last, go to the Report Preview/Print. IDEA StatiCa offers a fully customizable report to print out or save in an editable format.
You have designed, reinforced, and code-checked a prestressed I-section according to Eurocode.