Stop at limit strain
How it works
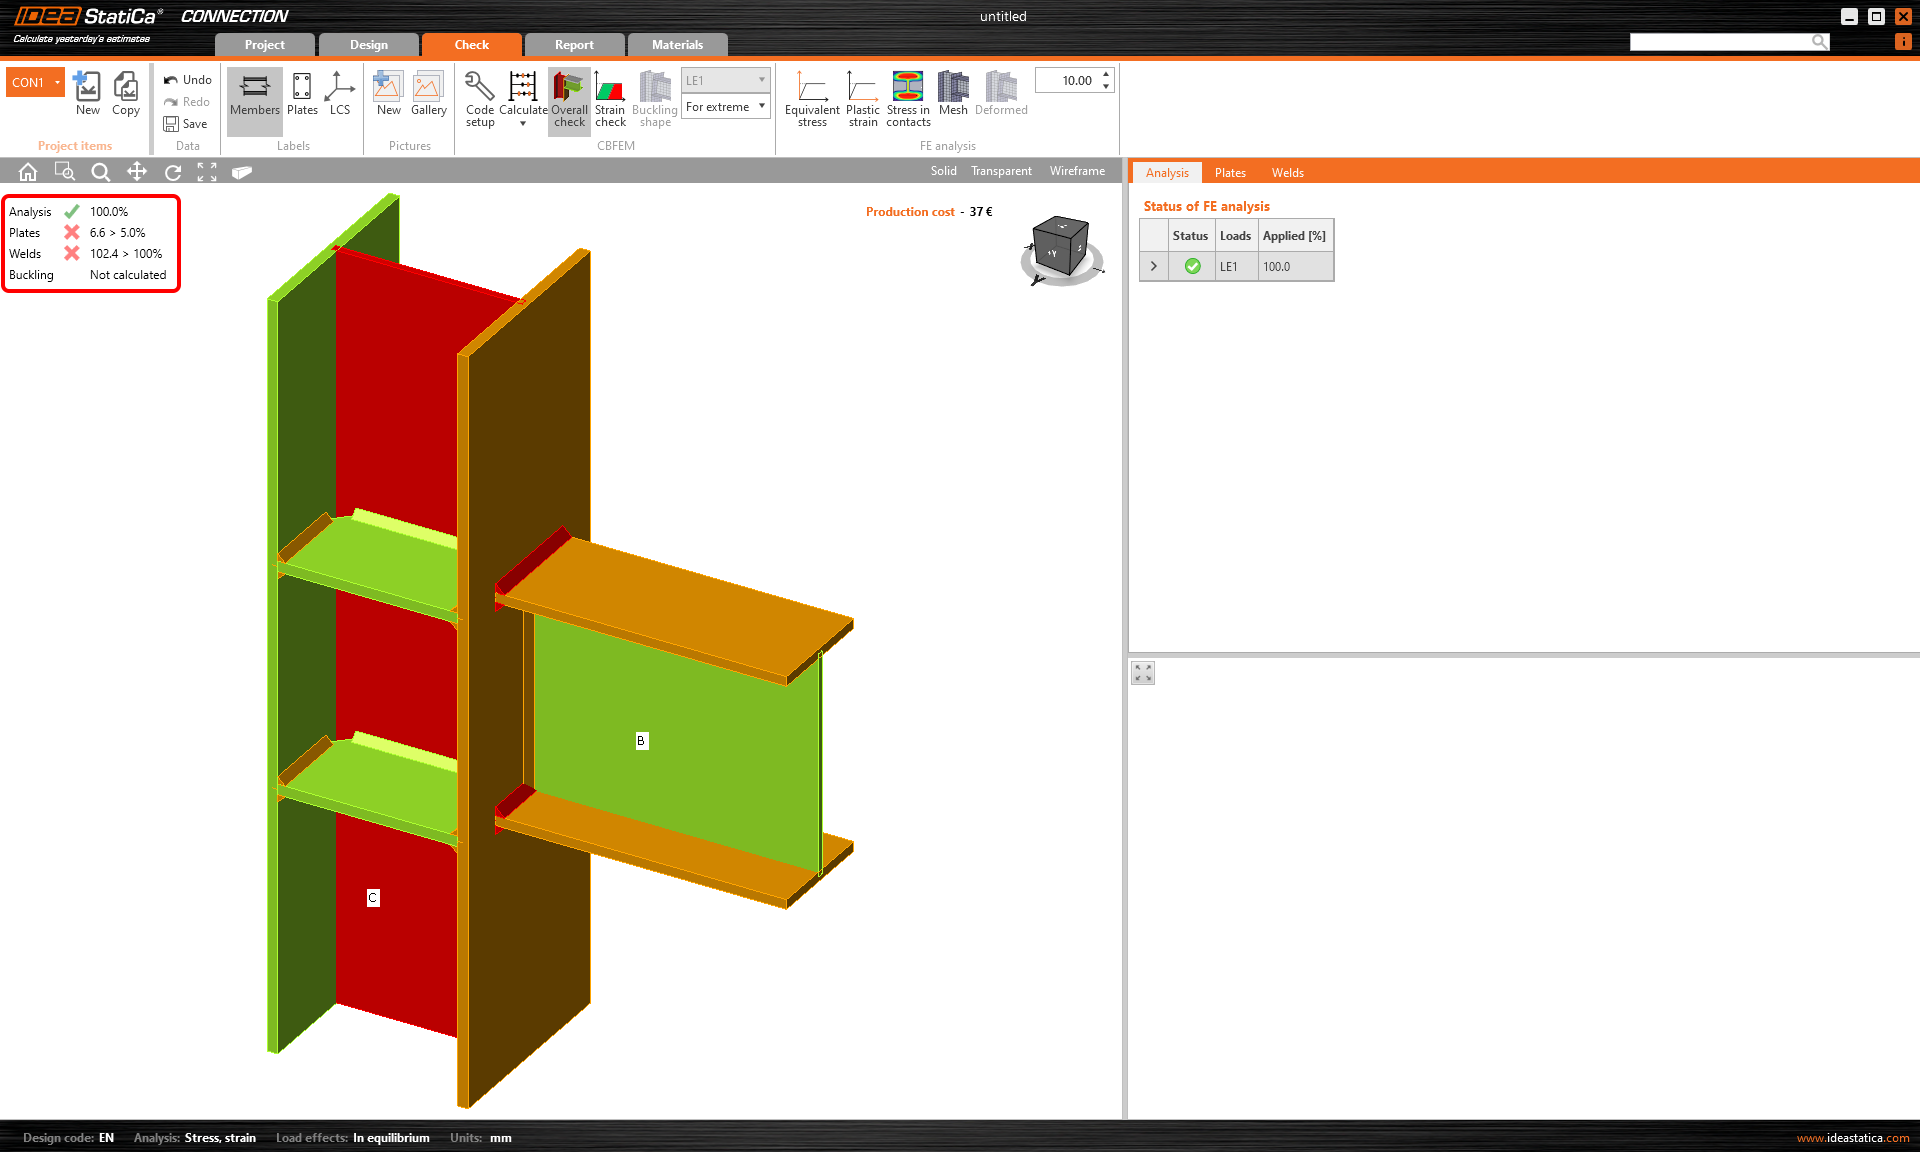
The Stop at limit strain functionality in IDEA StatiCa Connection is turned off by default. I.e., even though the structure is overloaded, once you run the analysis, it stops after 100% of the input load is applied (in most cases. In some, the software is not able to apply 100%. For what might be the reason, see the Connection analysis 0% or doesn't reach 100% article) And you will see corresponding results.
However, there can be cases the connection may be too complex, and the analysis takes a long time. Or you assume that the structure will fail, so you want to quickly see how much of the load the joint is able to handle.
To find out what is the weakest part of a joint or connection and which member or component collapses as the first one, we recommend using Stop at limit strain.
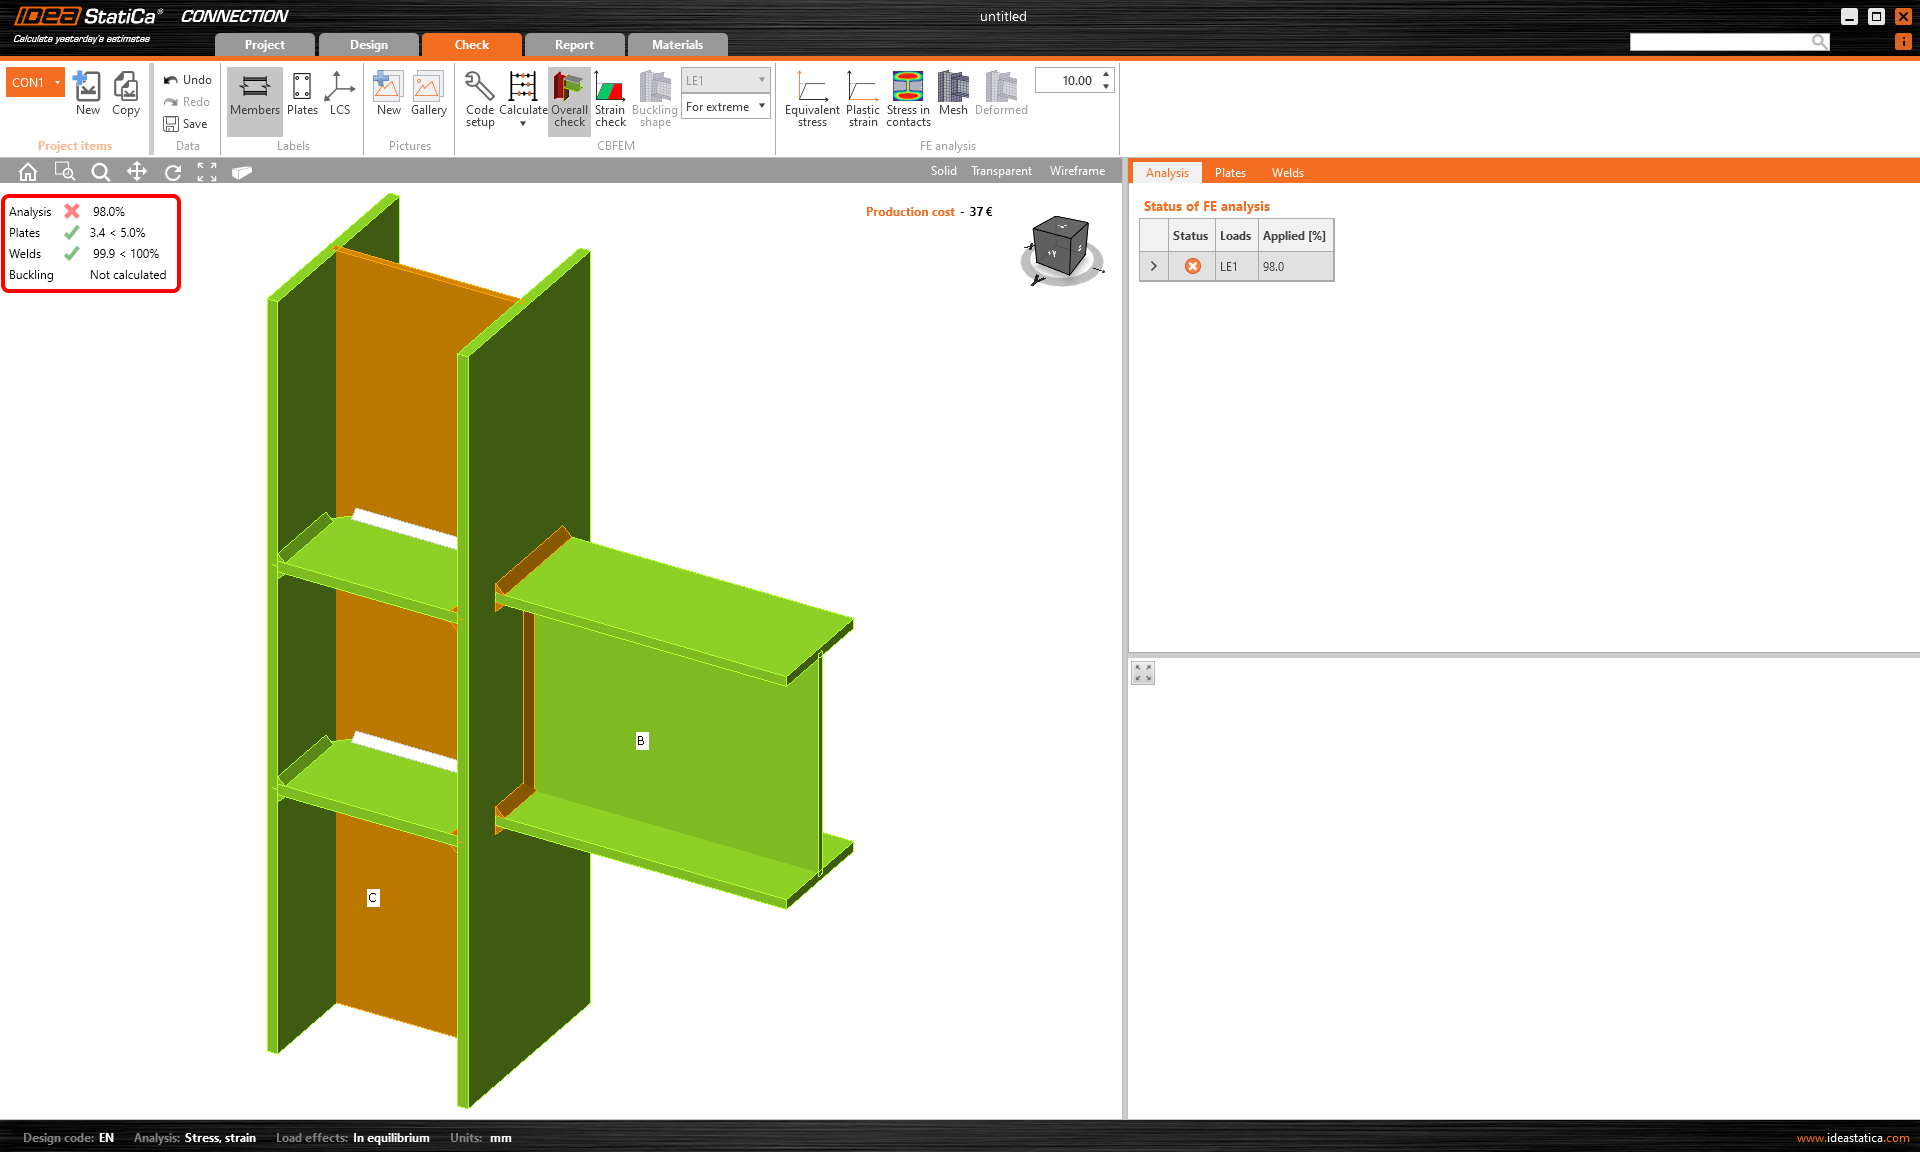
This functionality stops the finite element analysis iteration process when one of the code checks reaches the limit value. Only the relevant percentage of the input load is applied in that case.
Where to find it
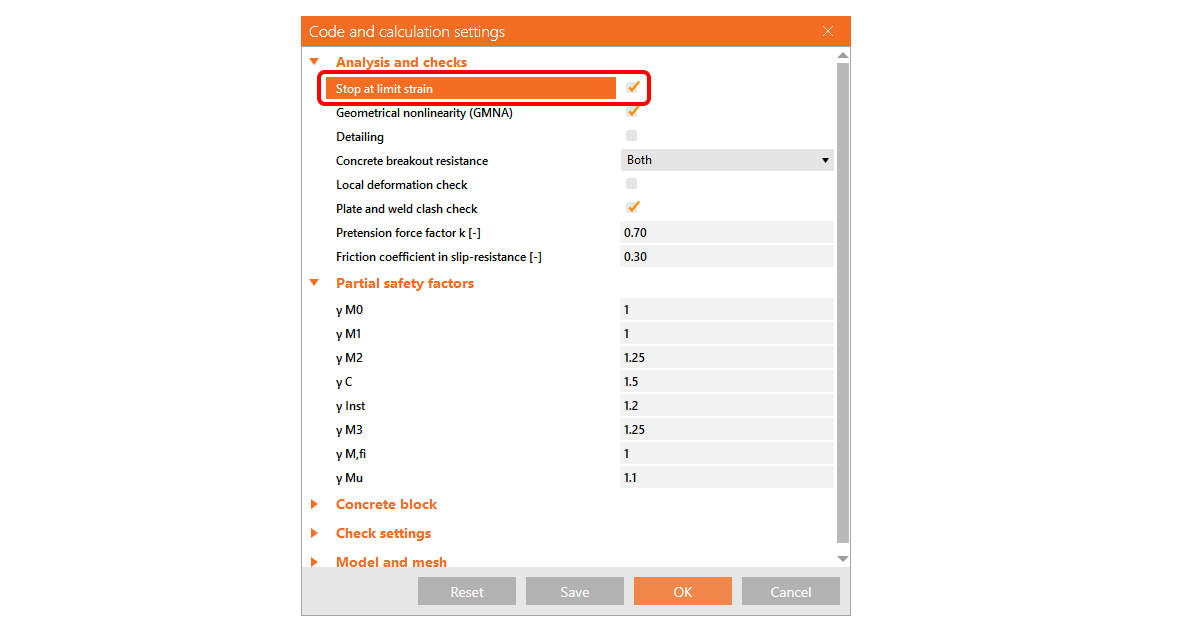
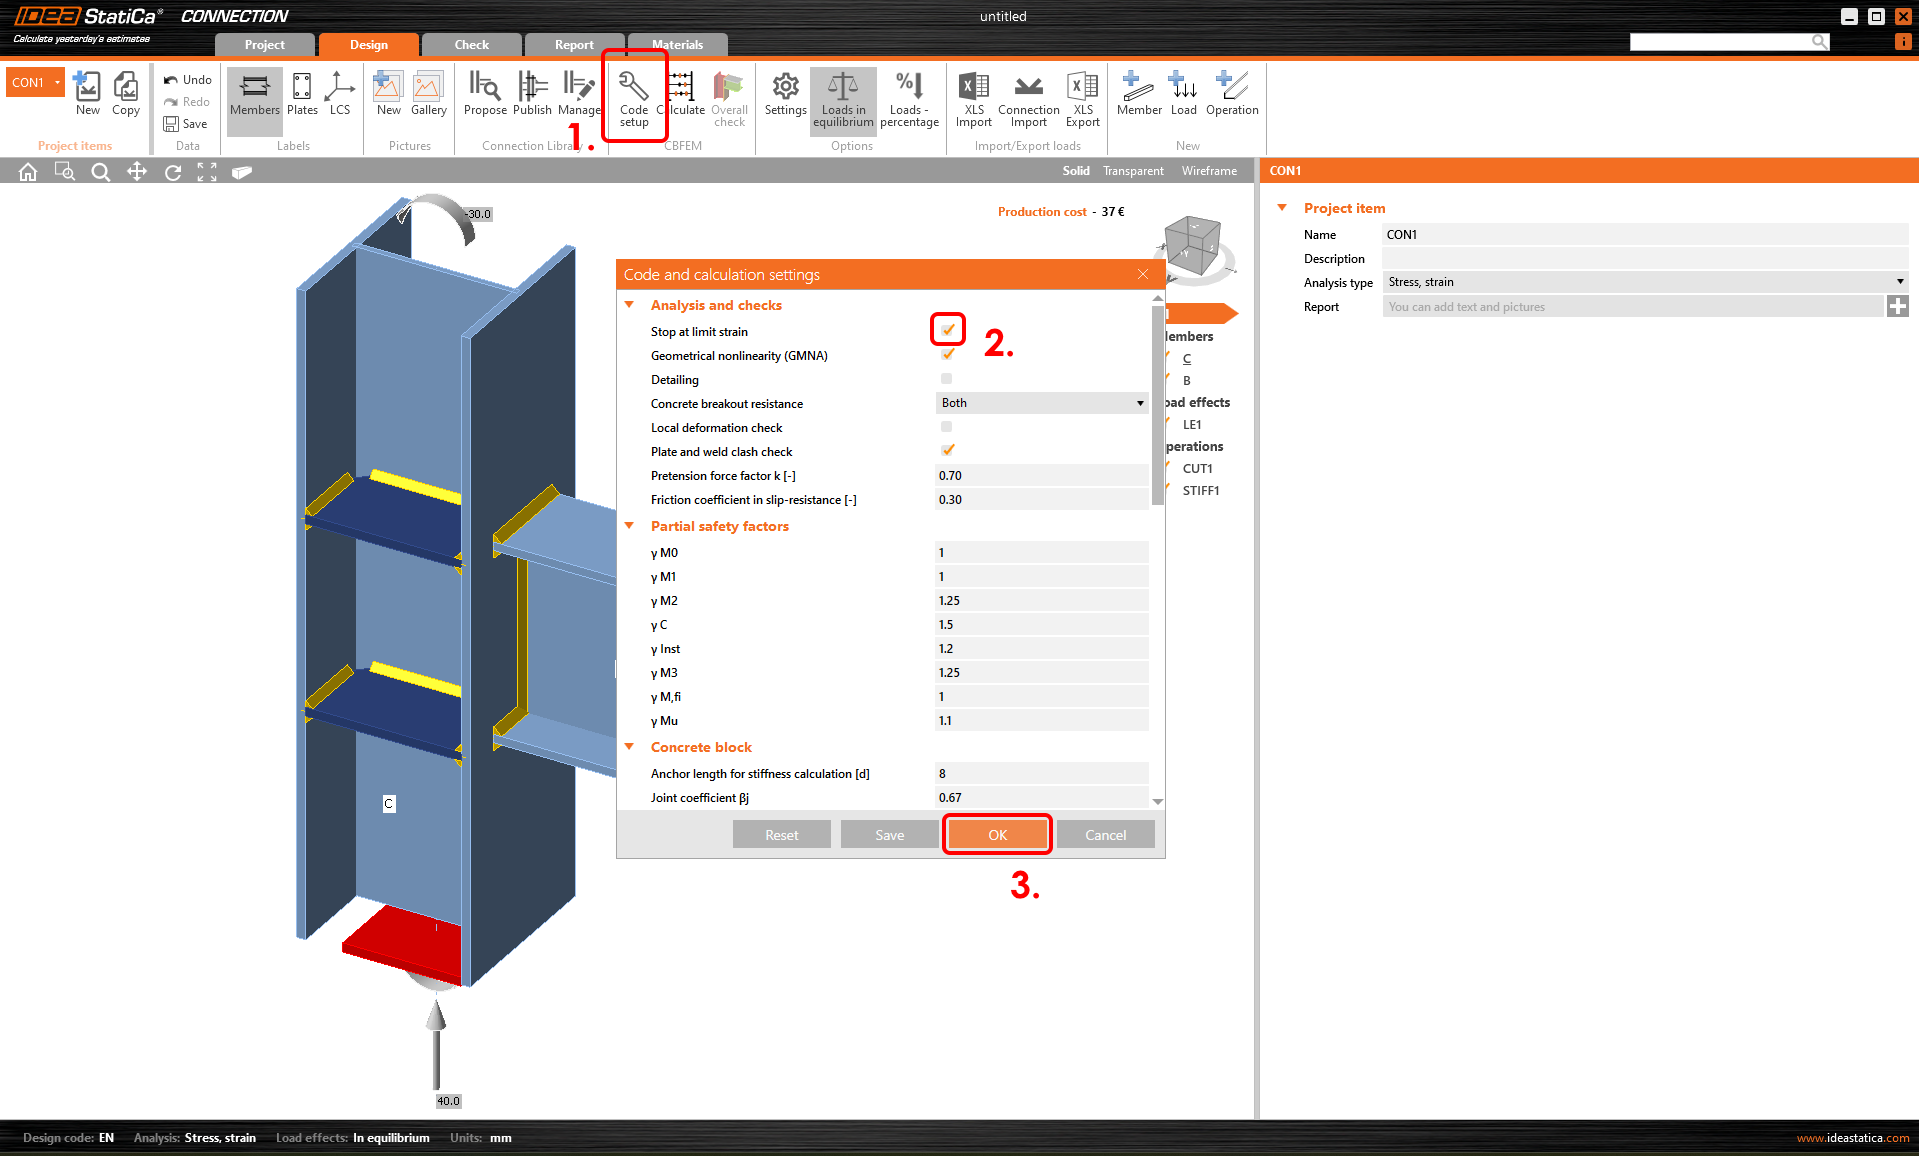
If you want to activate the Stop at limit strain feature, select the Code setup button in the top ribbon in the Design or Check section. The Code and calculation settings wizard appears.
Tick the checkbox for Stop at limit strain and confirm OK.


