1 A kapcsolat aktiválása
- Töltse le és telepítse (rendszergazdaként) az IDEA StatiCa legújabb verzióját
- Győződjön meg arról, hogy az Advance Design támogatott verzióját használja
- Szükség esetén telepítse a Microsoft Access Database Engine 2016 x64 verzióját
Mindkét program telepítése után futtassa az IDEA StatiCa-t, és kezdje a BIM elemmel. A BIM varázslóban folytassa az Activate your BIM Link... elemmel. A folyamat során megjelenik a "Futtatás rendszergazdaként" értesítés. Kérjük, erősítse meg az Igen gombbal.
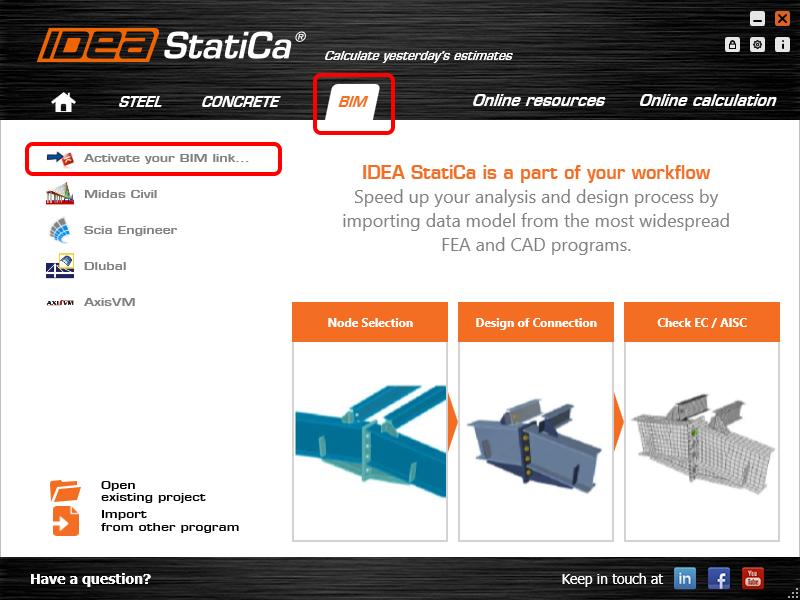
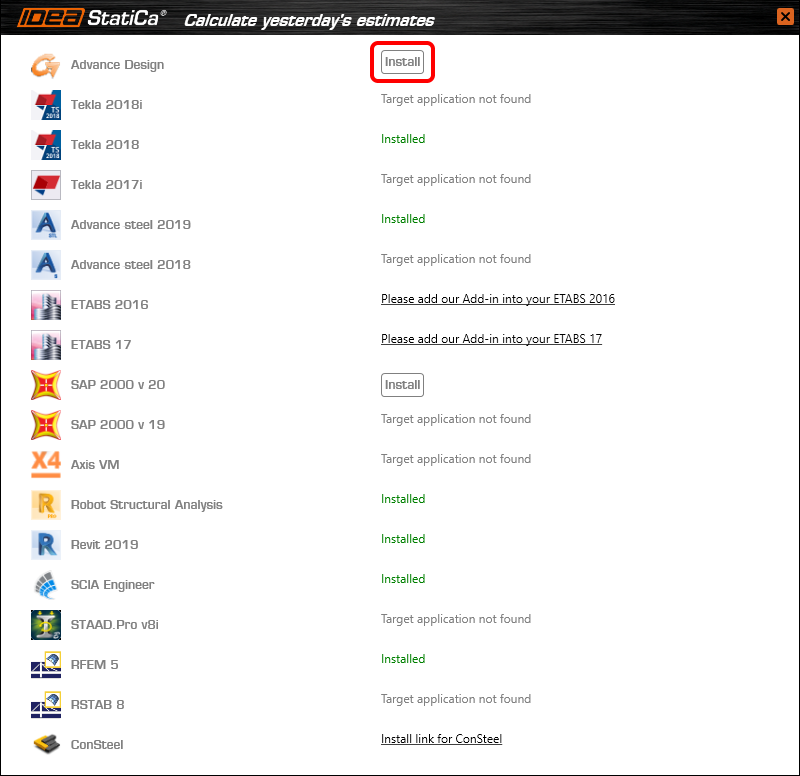
Válassza az Advance design lehetőséget, és kattintson a Telepítés gombra. Megkezdődik az integráció folyamata.
2 A kapcsolat használata
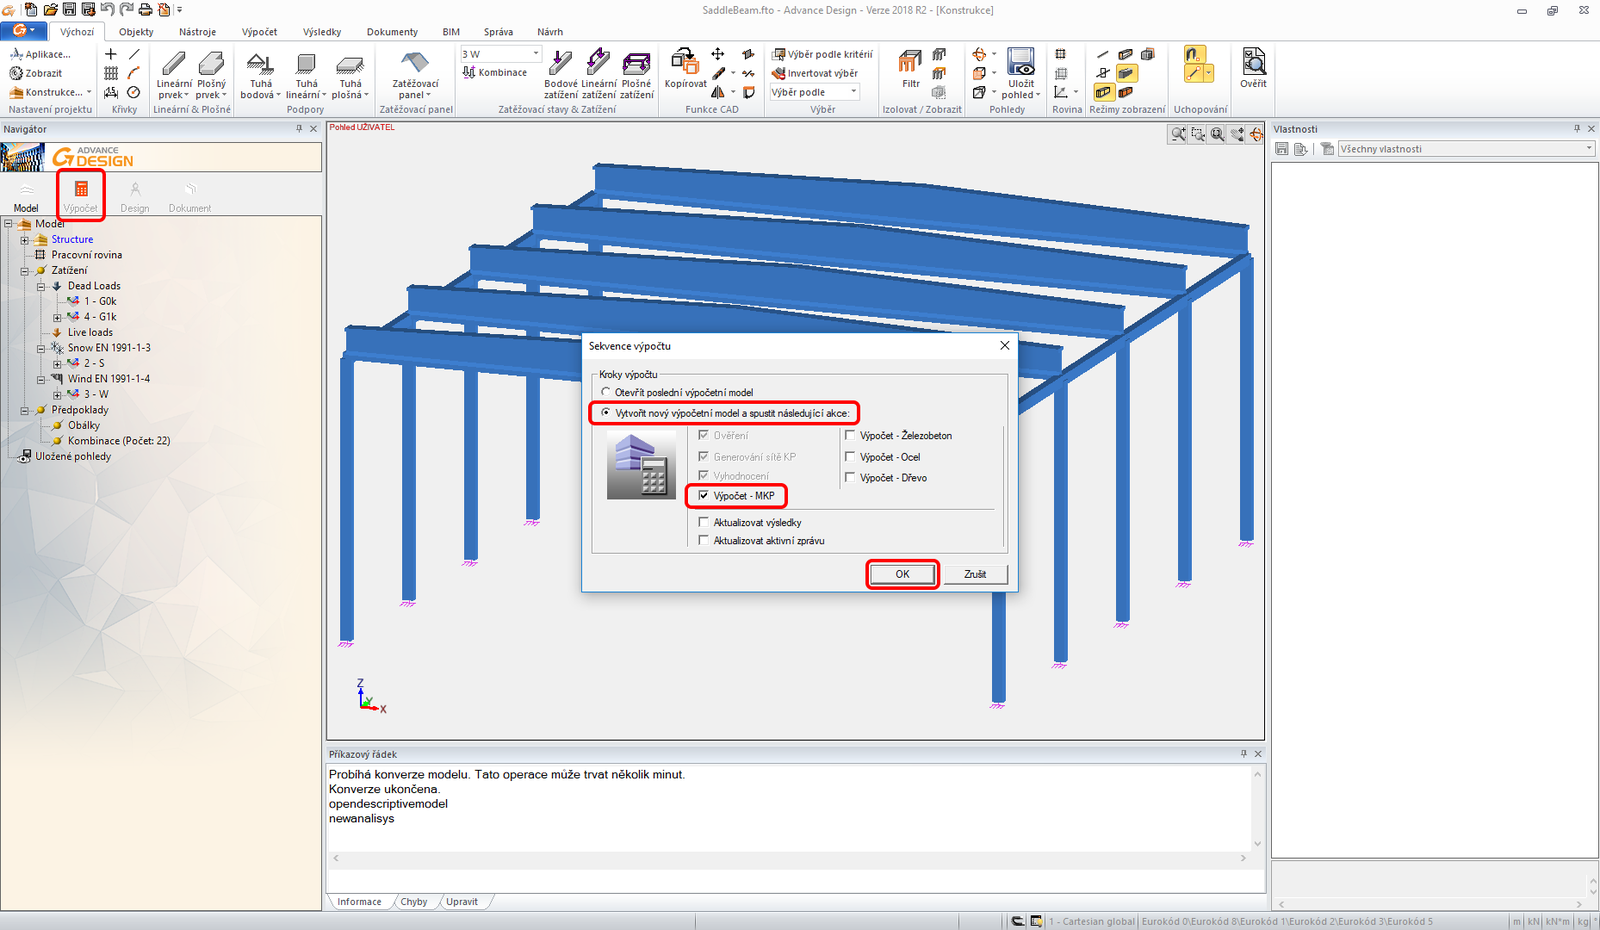
Nyissa meg a csatolt projektet az Advance Design-ban.

Futtassa a végeselem-módszer analízist.
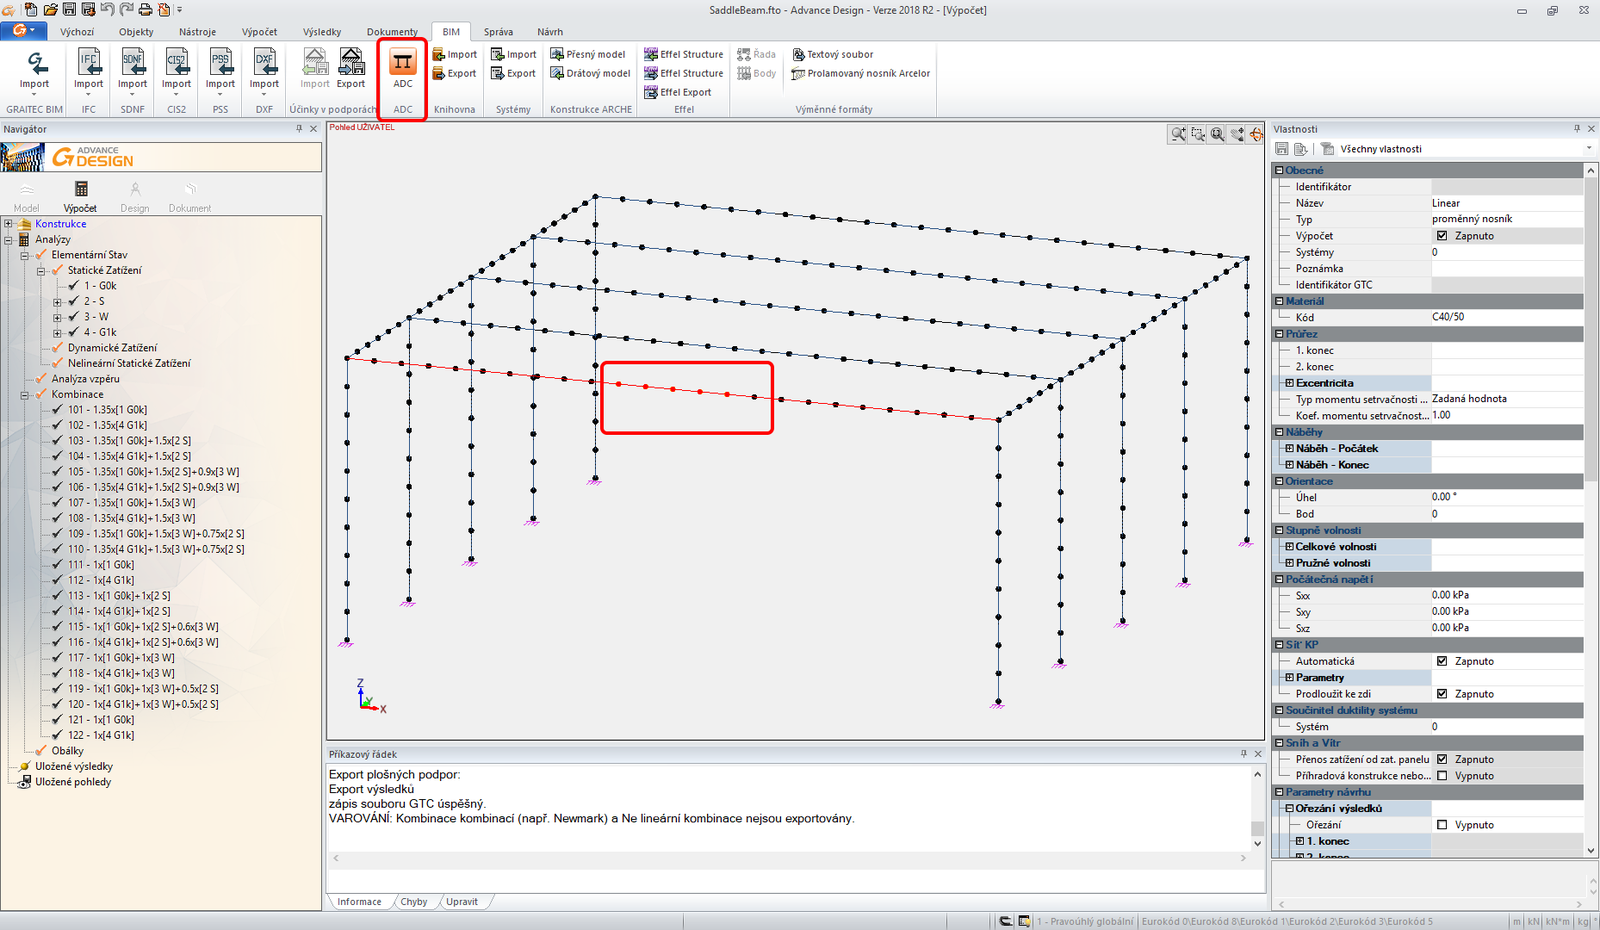
Amikor megjelennek az eredmények, válassza ki az első sorban lévő két gerendát, és exportálja az ADC paranccsal a felső szalagon.
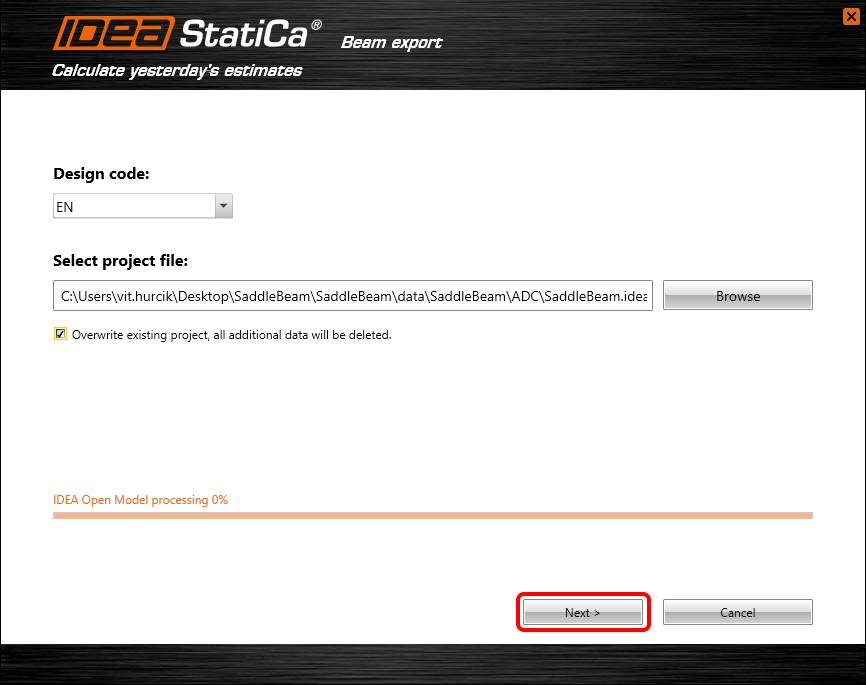
Az importálási varázsló automatikusan megjelenik. Folytassa a Tovább gombbal.
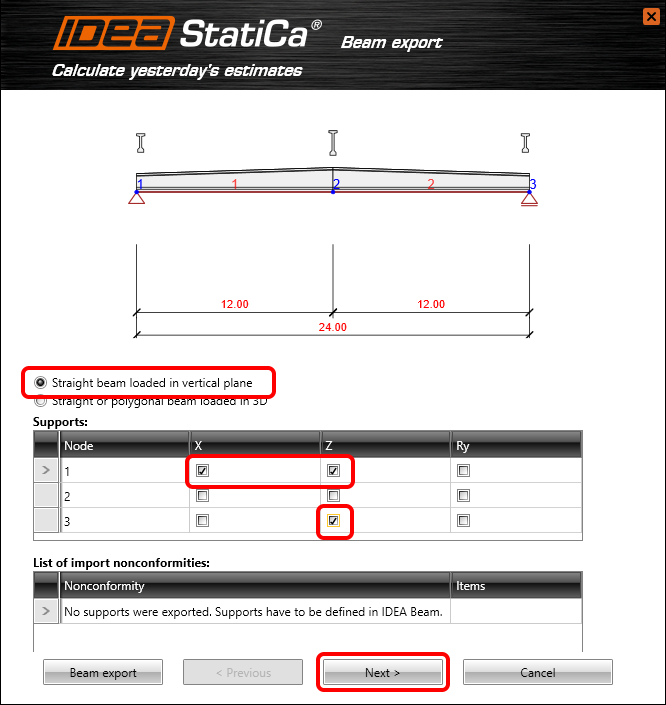
Folytassa a támaszok definíciójával az alábbi ábra szerint.
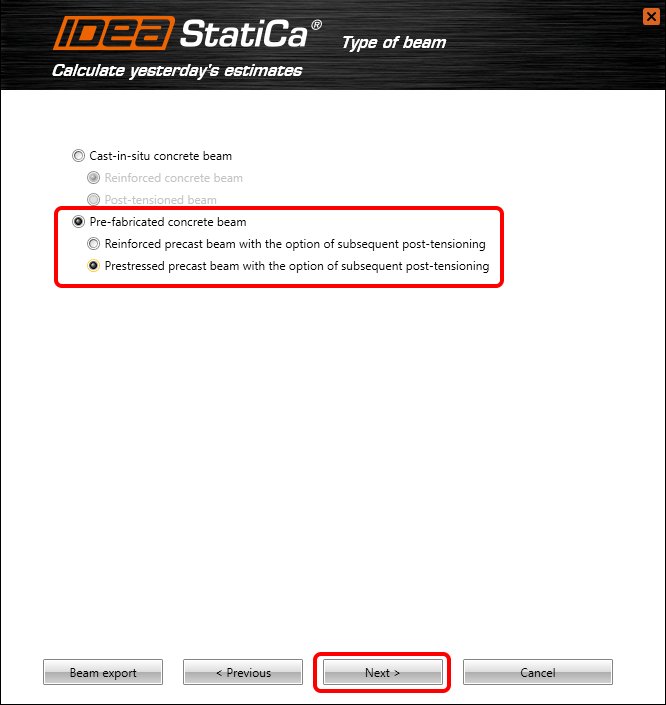
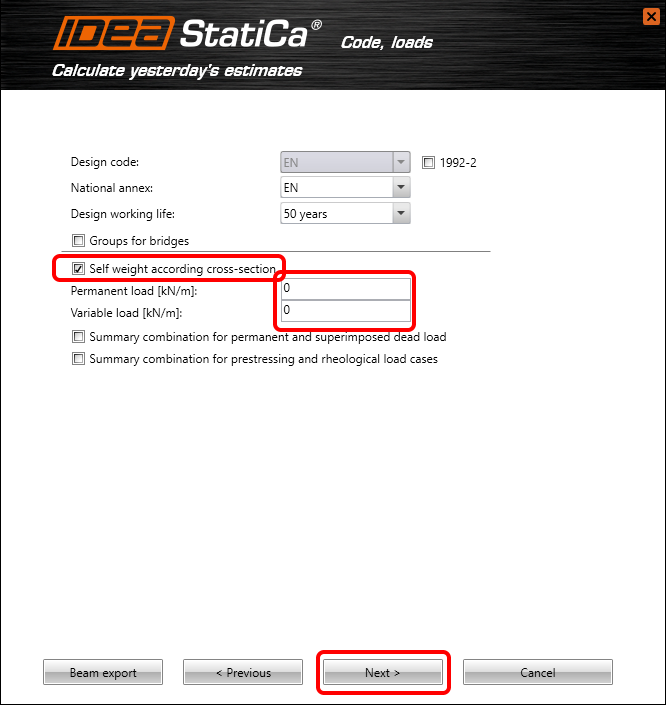
Módosítsa a gerenda típusát előfeszített előregyártott betongerendára, utólagos utófeszítéssel.
Folytassuk a terhelések definíciójával.
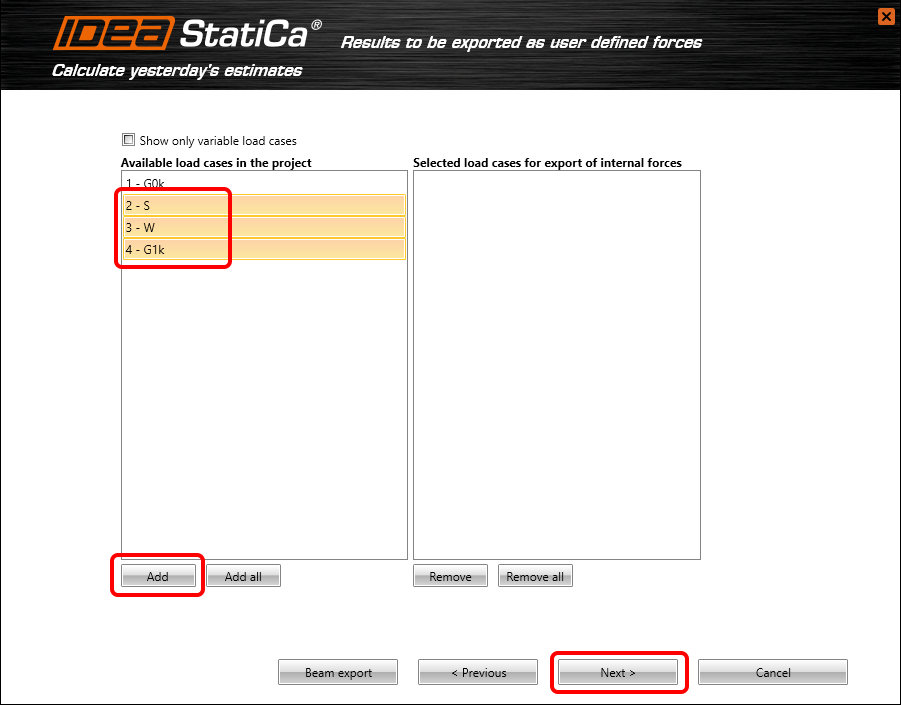
Ki kell választania, hogy az Advance Design mely eredményei kerüljenek importálásra az IDEA StatiCa Beam-be. Kövesse az alábbi ábrát.
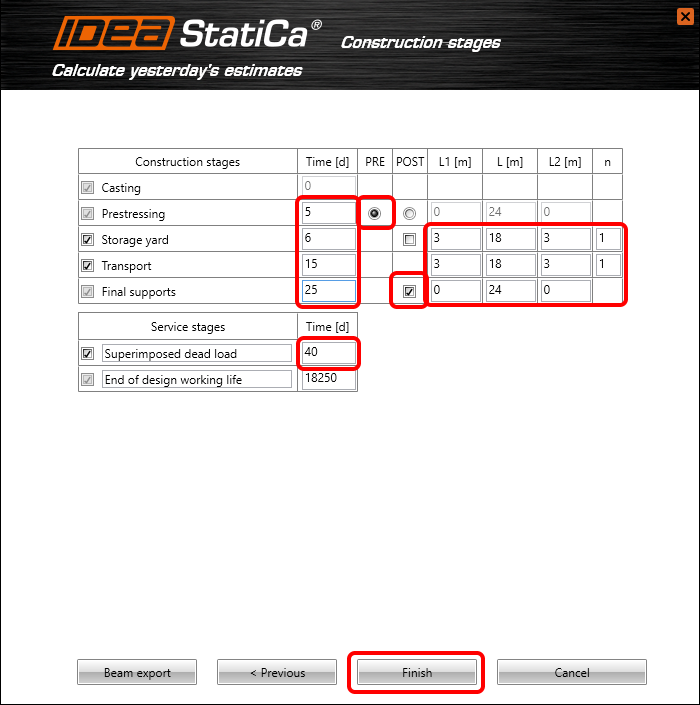
Figyelmet kell fordítani az építési szakaszok helyes meghatározására. Állítsa be a tulajdonságokat az alábbi ábra szerint.
3 Tervezés
Az automatikus adatátvitel befejeződött, és az IDEA StatiCa Beam a generált projekttel elindul.
Az első lépésben módosítani kell a Teheresetetek tulajdonságait.
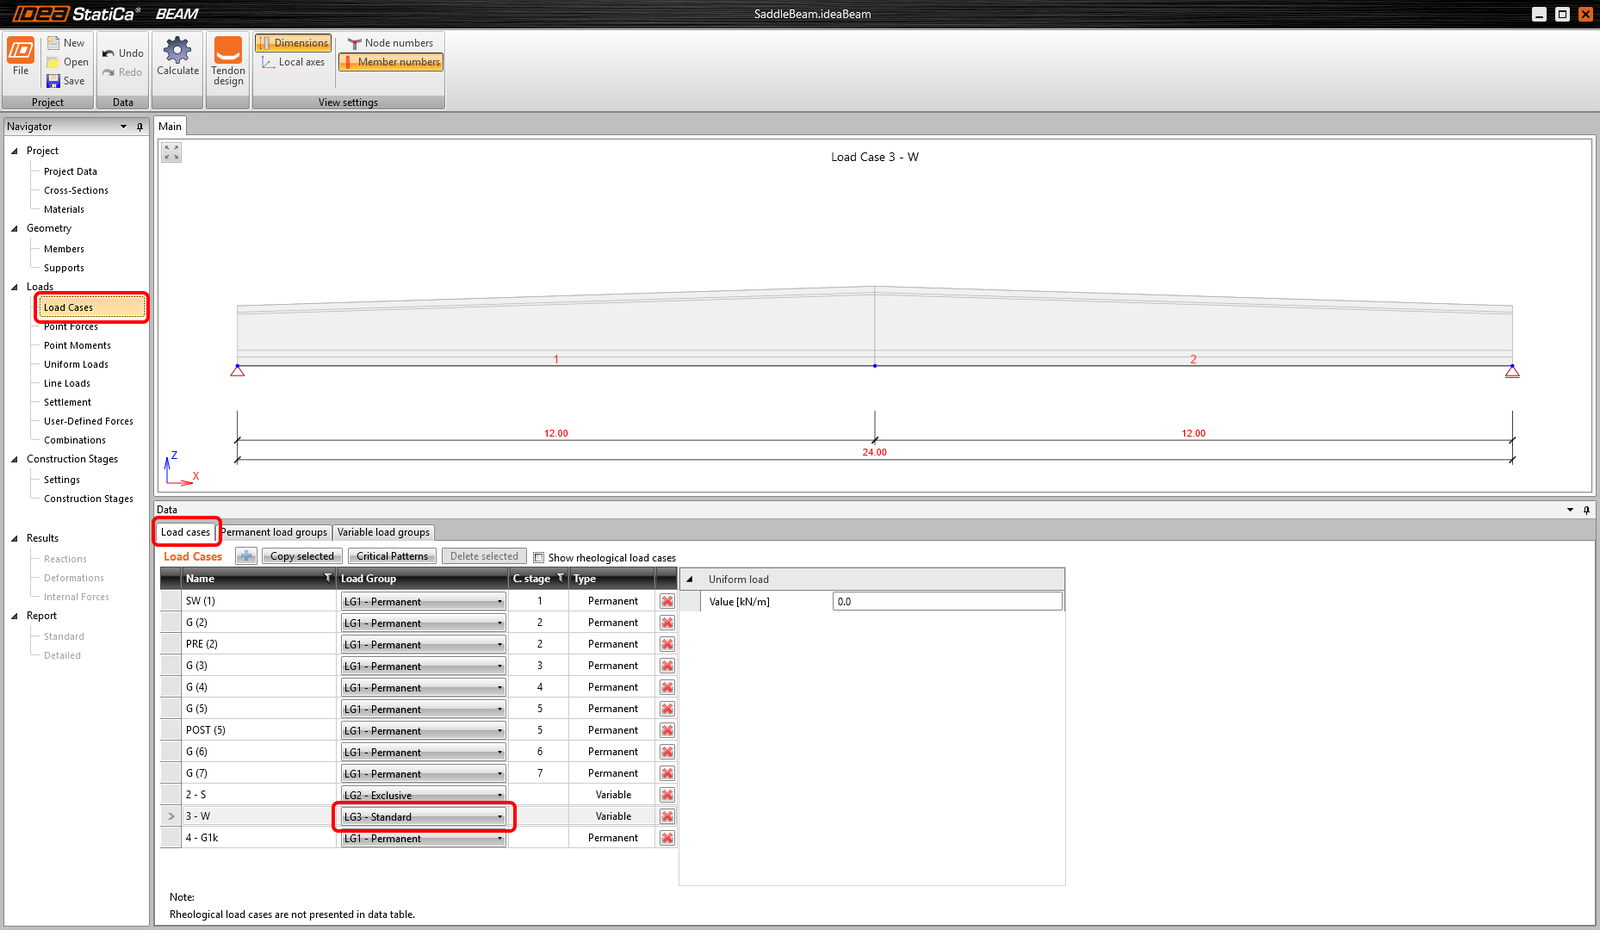
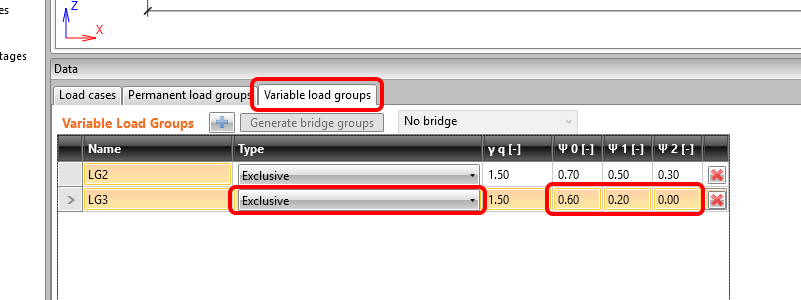
Módosítsuk a Változó tehercsoportok paramétereit is.
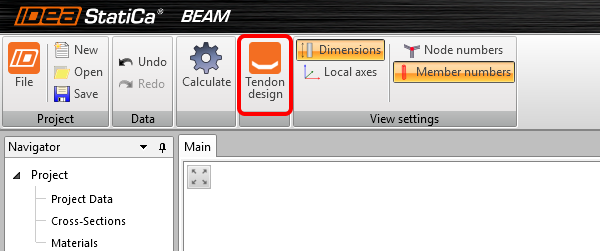
A felső szalagon lévő paranccsal továbbléphet a Feszítőkábel tervezőhöz.
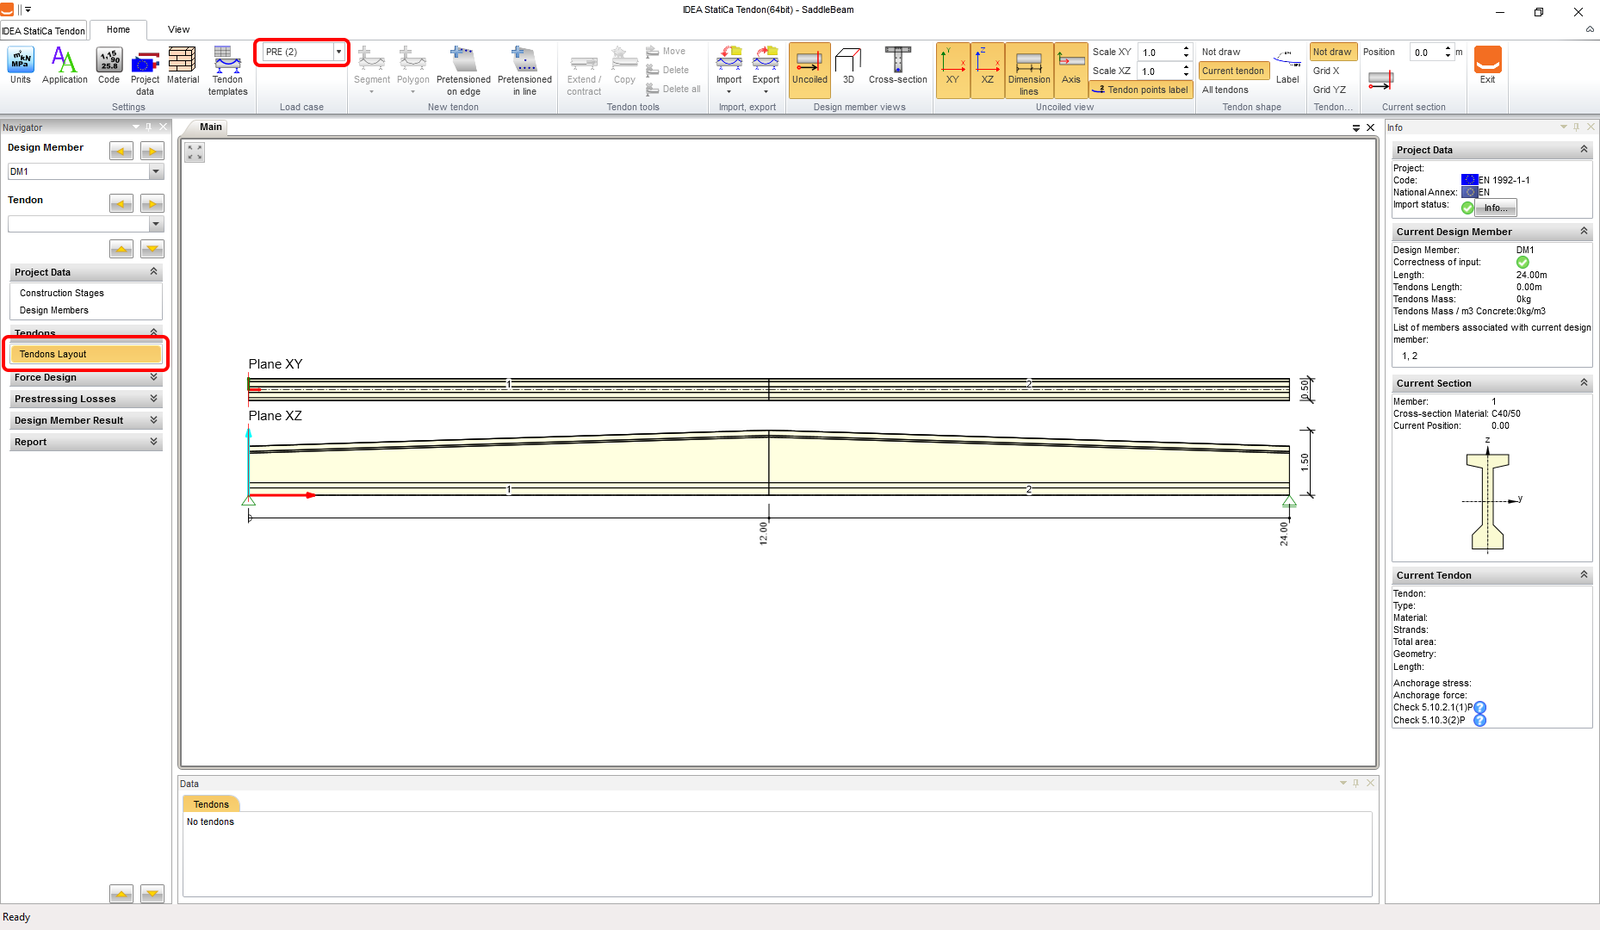
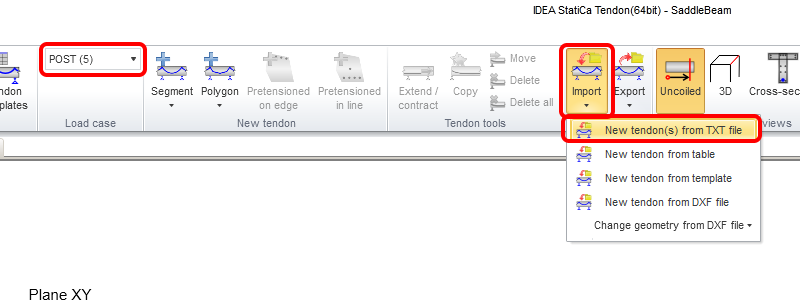
Válassza ki a Feszítőkábelek elrendezését, és kezdje el a feszítőkábelek definiálását. Figyeljen arra, hogy melyik Teheresethez definiálja a feszítőkábeleket.
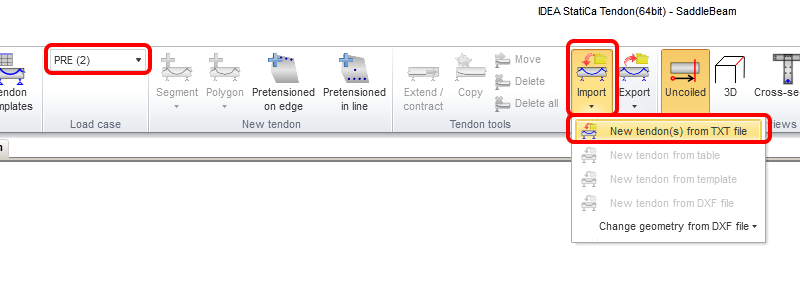
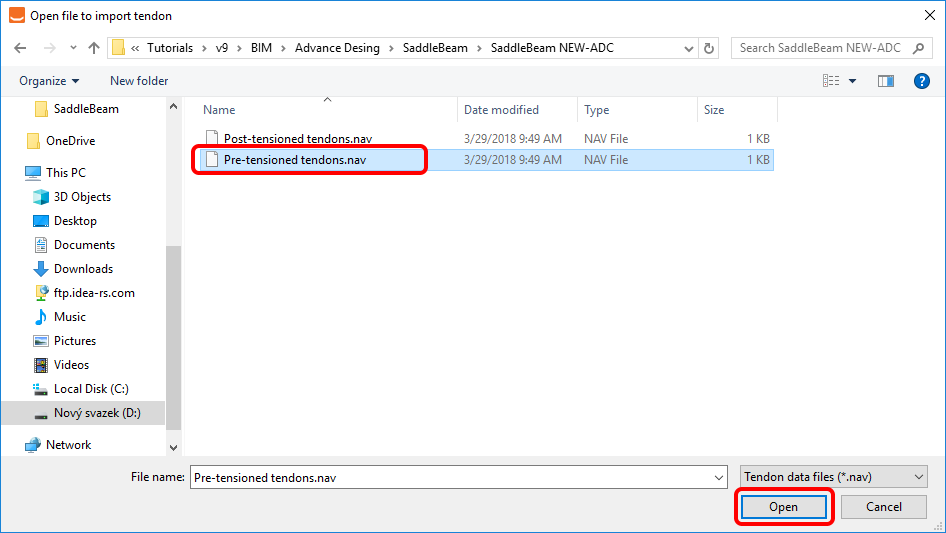
Most importálhatja a feszítőkábeleket TXT fájlból.
Importálja az Előfeszített feszítőkábelek.nav sablont. Megtalálhatja az oktatóanyag weboldalának forrásfájljai között.
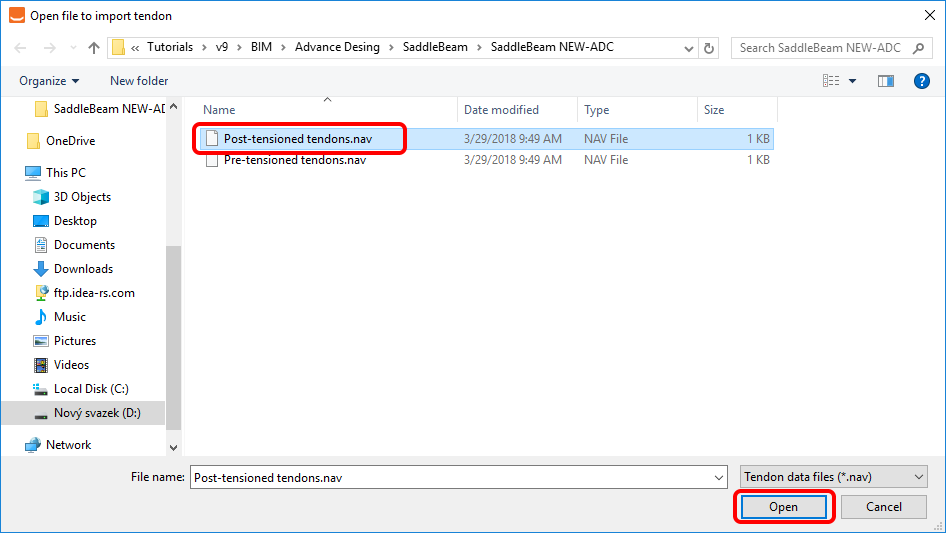
Tegyük ugyanezt az utófeszített feszítőkábelekkel is.
A megfelelő sablon az Utófeszített feszítőkábelek.nav.
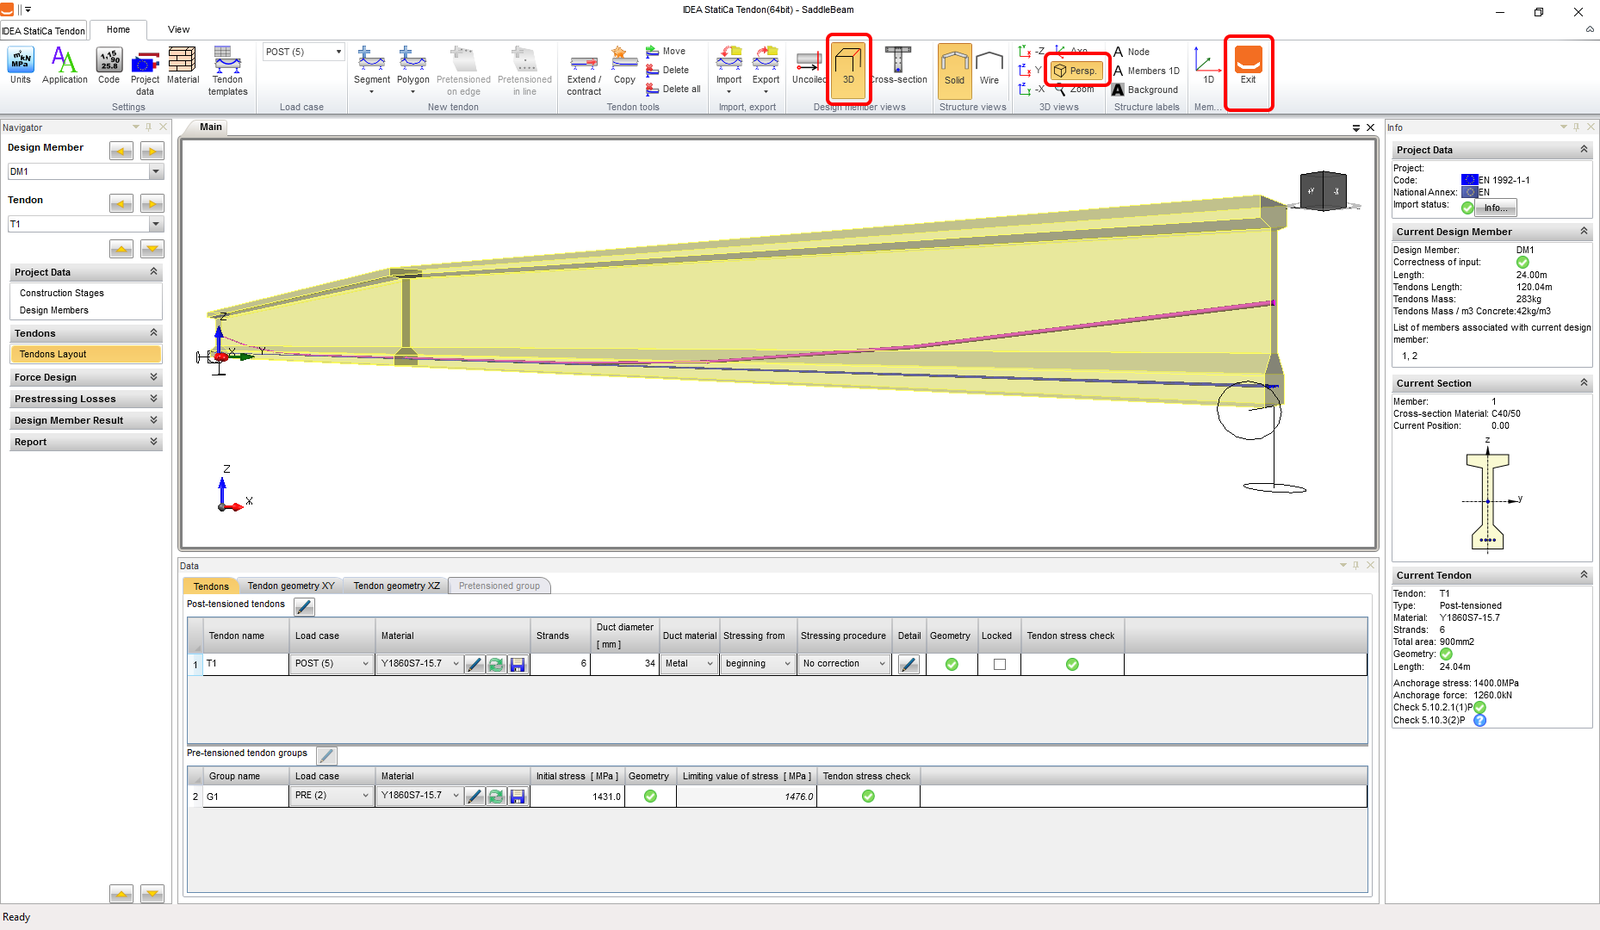
A ceruza ikonnal módosítani kell az utófeszített feszítőkábelek T1 csoportjának részleteit. Állítsunk be eltérő lehorgonyzási feszültséget. Kövesse az alábbi ábrát.
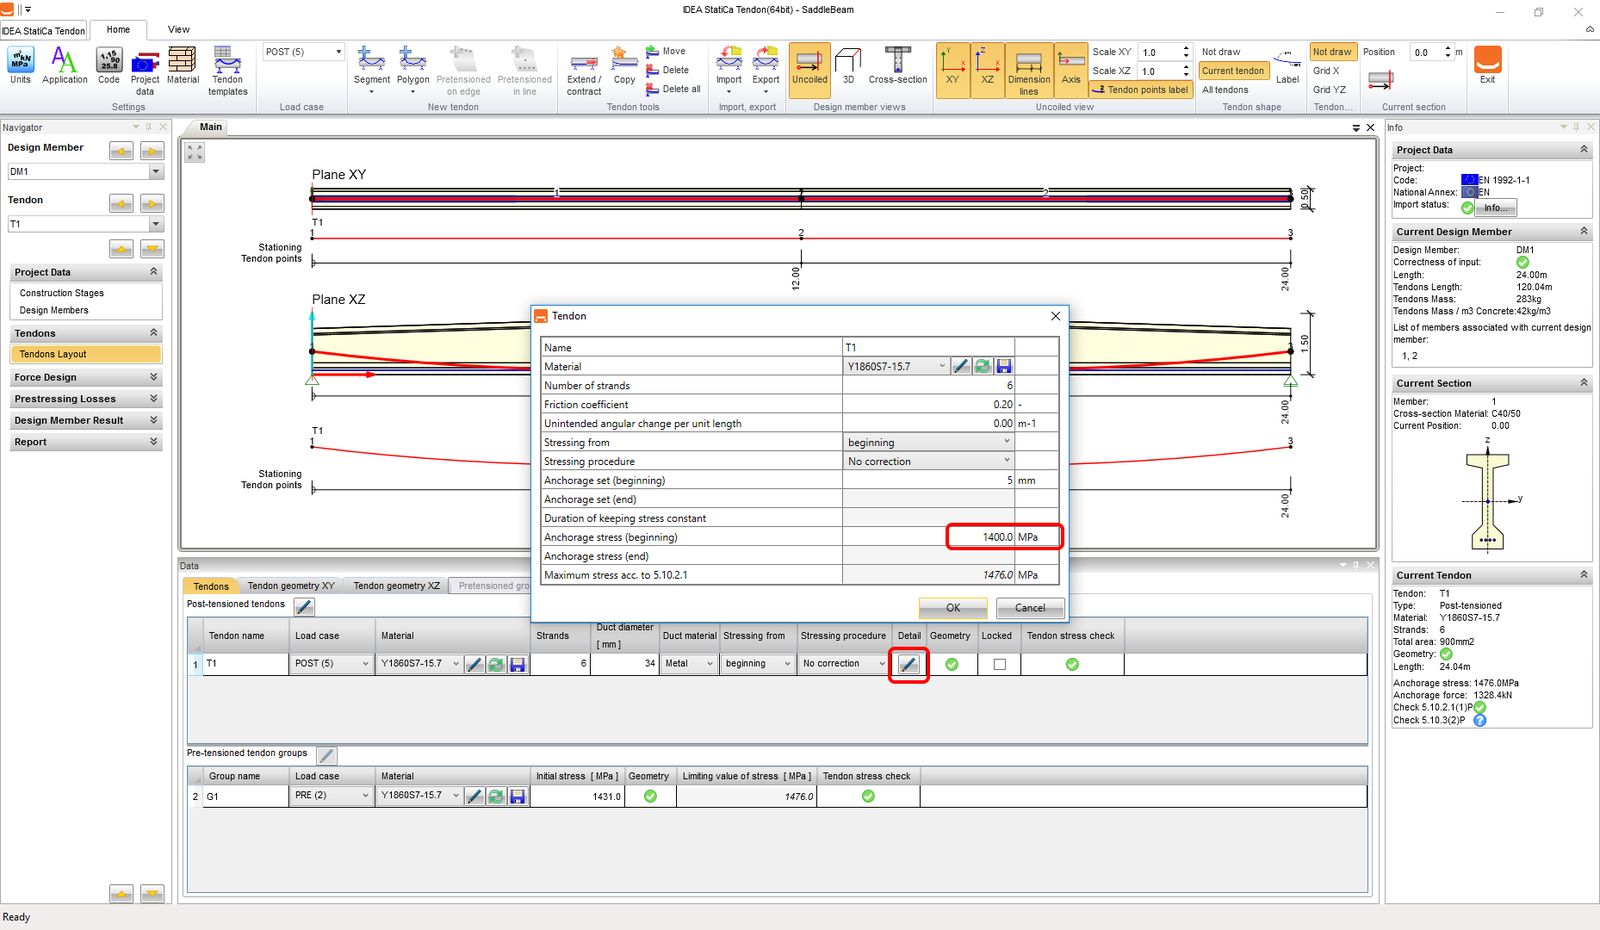
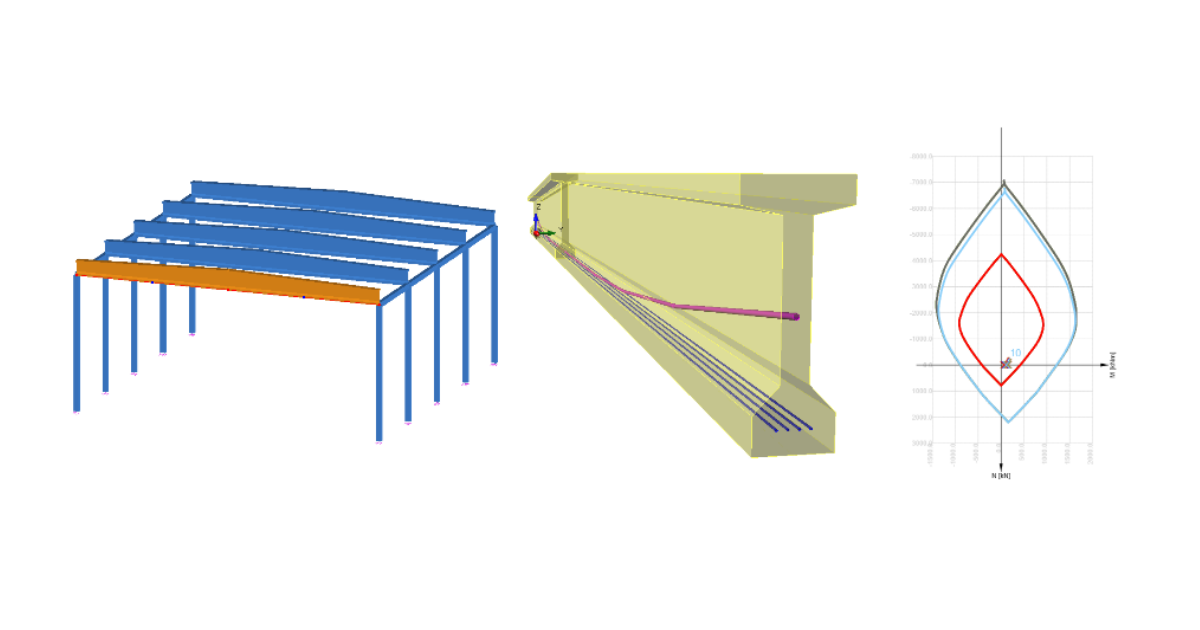
A definiált feszítőkábeleket ellenőrizheti a 3D nézetben. Ezt követően lépjen ki a Feszítőkábel tervezőből.
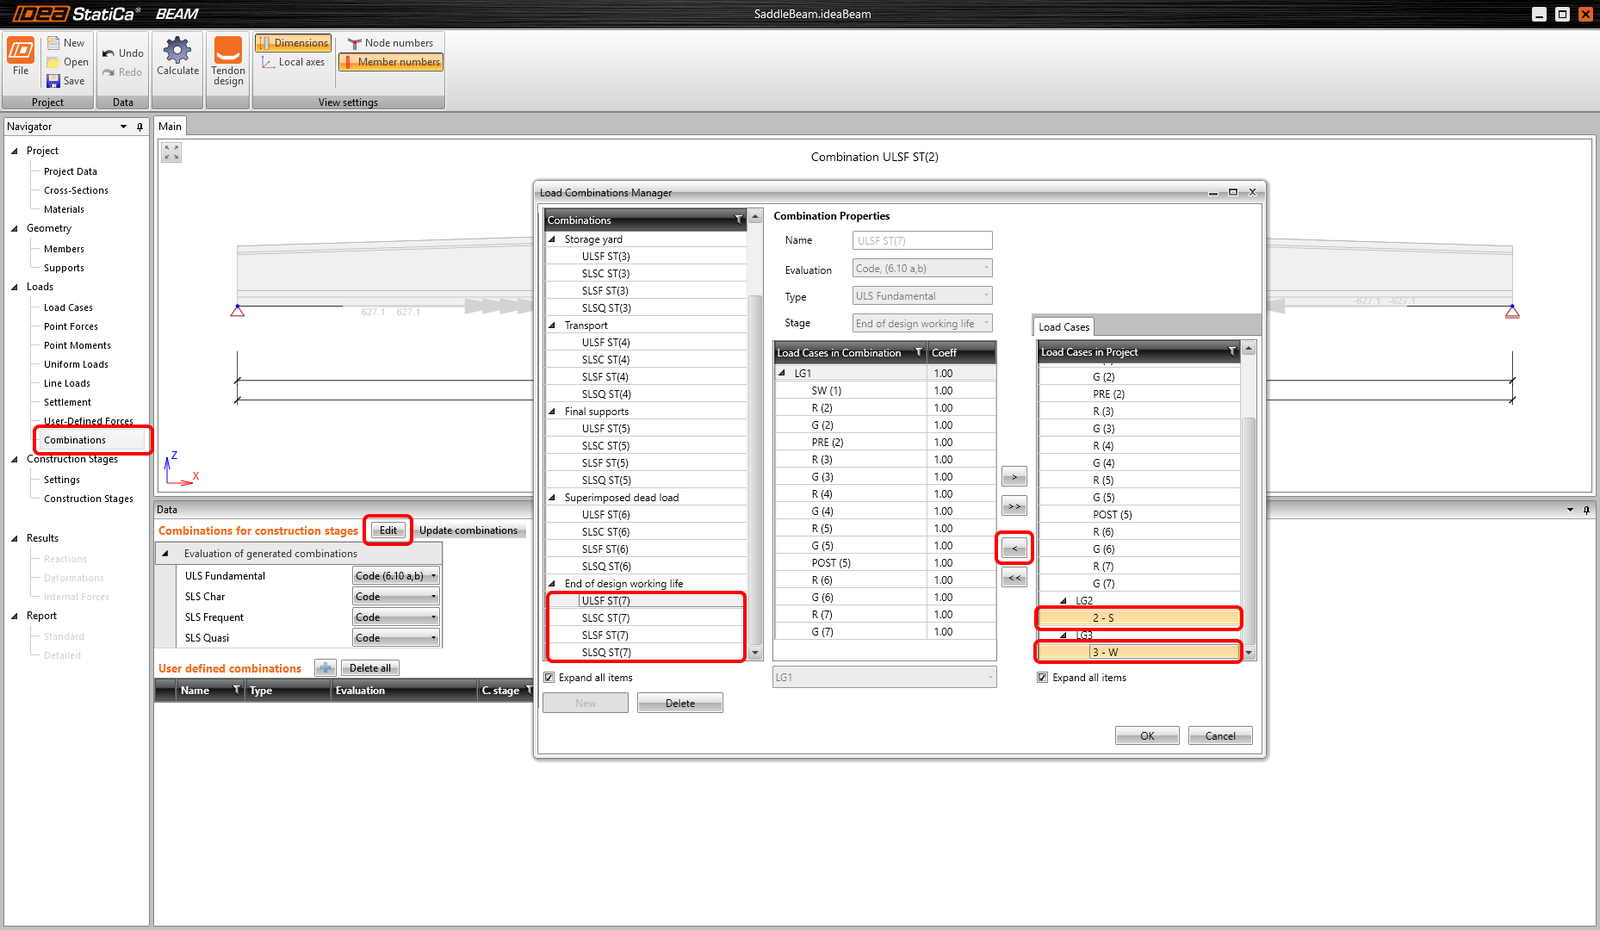
Folytathatja a kombinációk módosításával. A tervezési élettartam végére vonatkozó összes kombinációhoz hozzá kell adni a 2-S és 3-W tehereseteket.
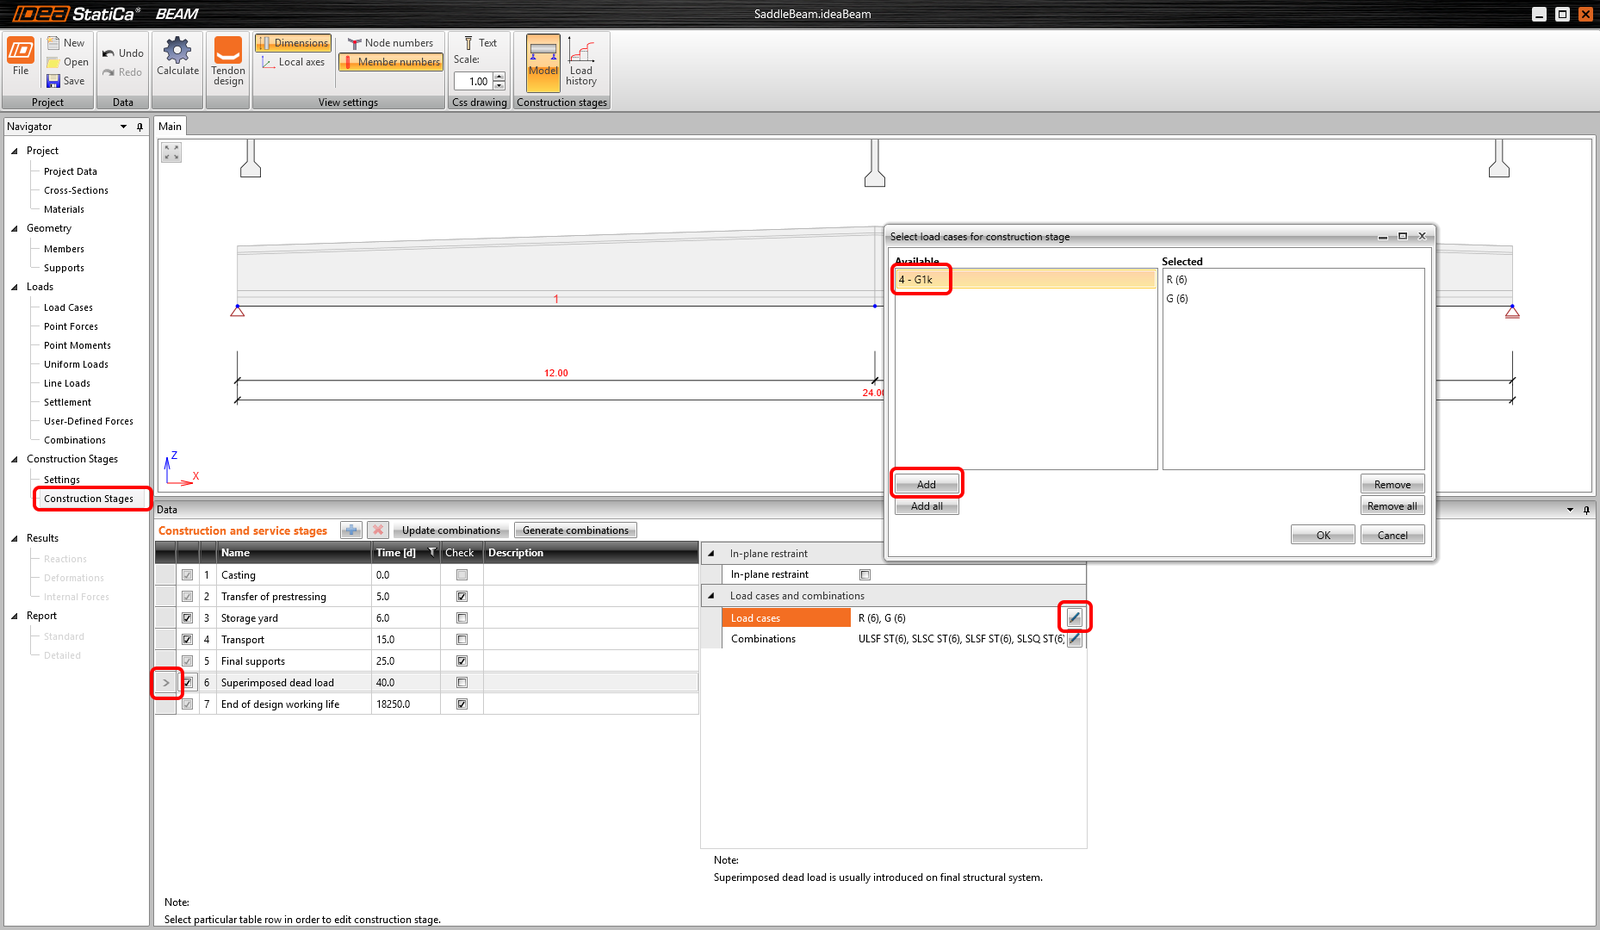
Most módosítani kell az építési szakaszokat. Adjuk hozzá a G1k importált teheresetét a 6. építési szakaszhoz: Utólagos állandó teher.
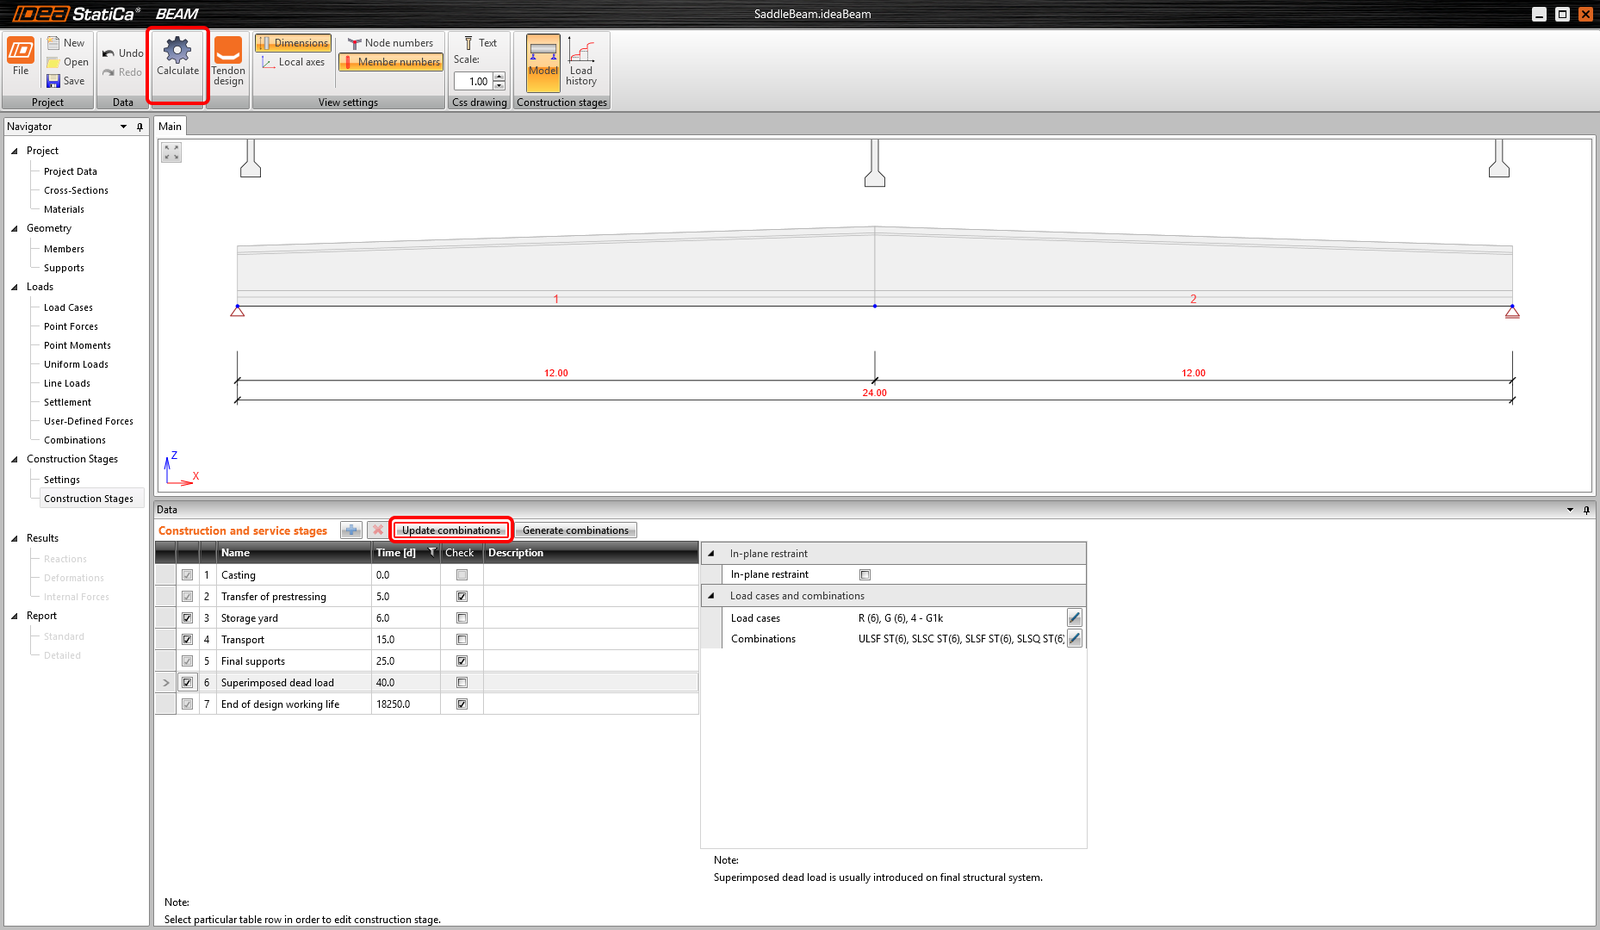
Most használjuk a gyors automatikus Kombinációk frissítése parancsot, majd a felső szalagon a Számítás parancsot.
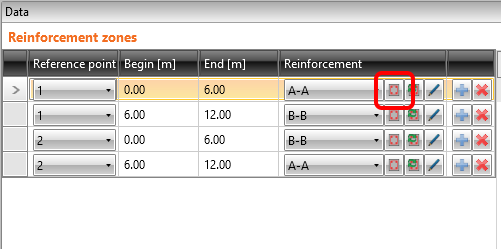
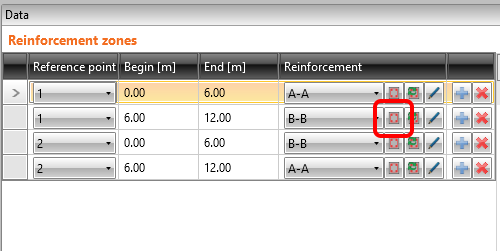
Most definiálhatja a gerenda vasalását. Definiáljunk két Zónasablont a gerenda hossza mentén. Végül el kell végezni az Ellenőrzési pozíciók beállítását.

Definiálhatja magát a vasalást az A-A zónához.
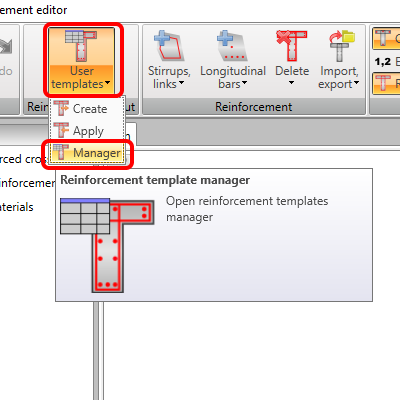
A Vasalásszerkesztő megnyitása után meg kell nyitni a Vasalássablon-kezelőt.
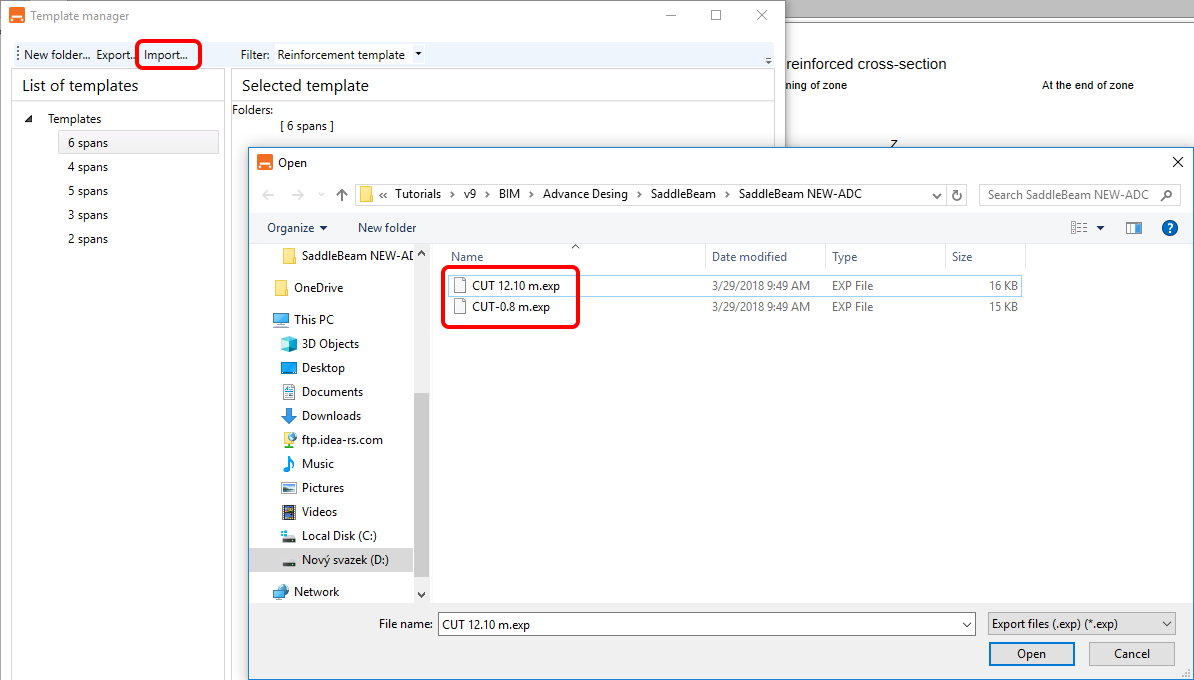
Ezt követően importálni kell a két vasalássablont. Megtalálhatja az oktatóanyag forrásfájljai között.
A Vasalásszerkesztőben ismét Alkalmazza a sablont.
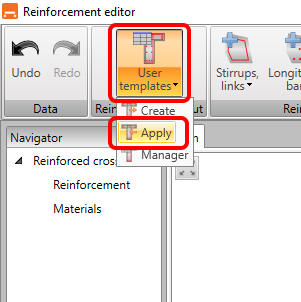
Válassza az Advance Design-Rez 0.8m sablont.
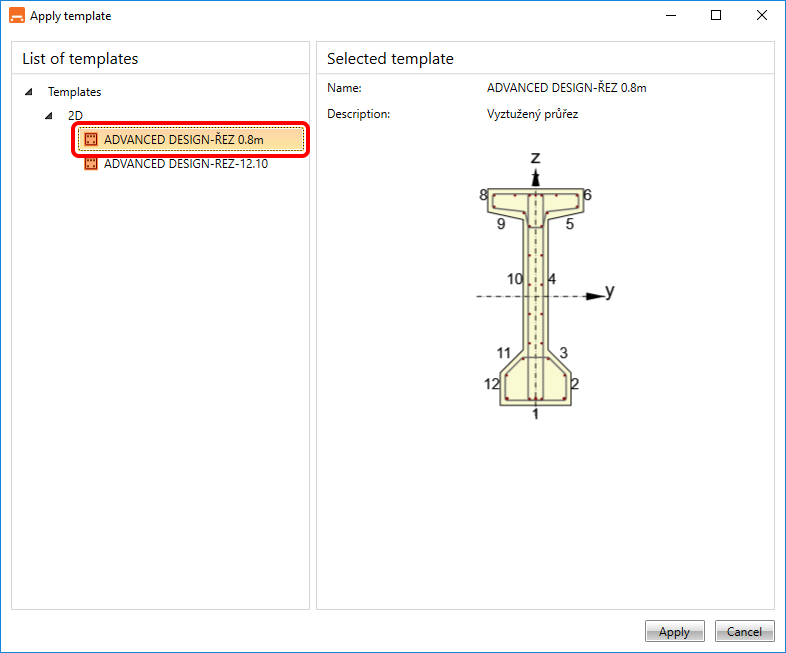
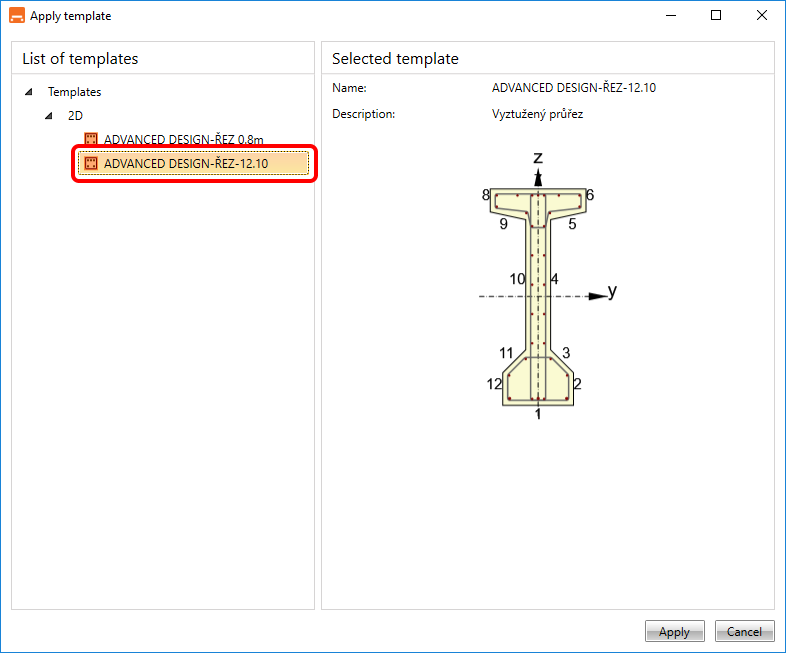
Elkészítette az A-A zóna vasalását. Tegyük ugyanezt a B-B zónával is.
Válassza az Advance Design-Rez 12.10m sablont.
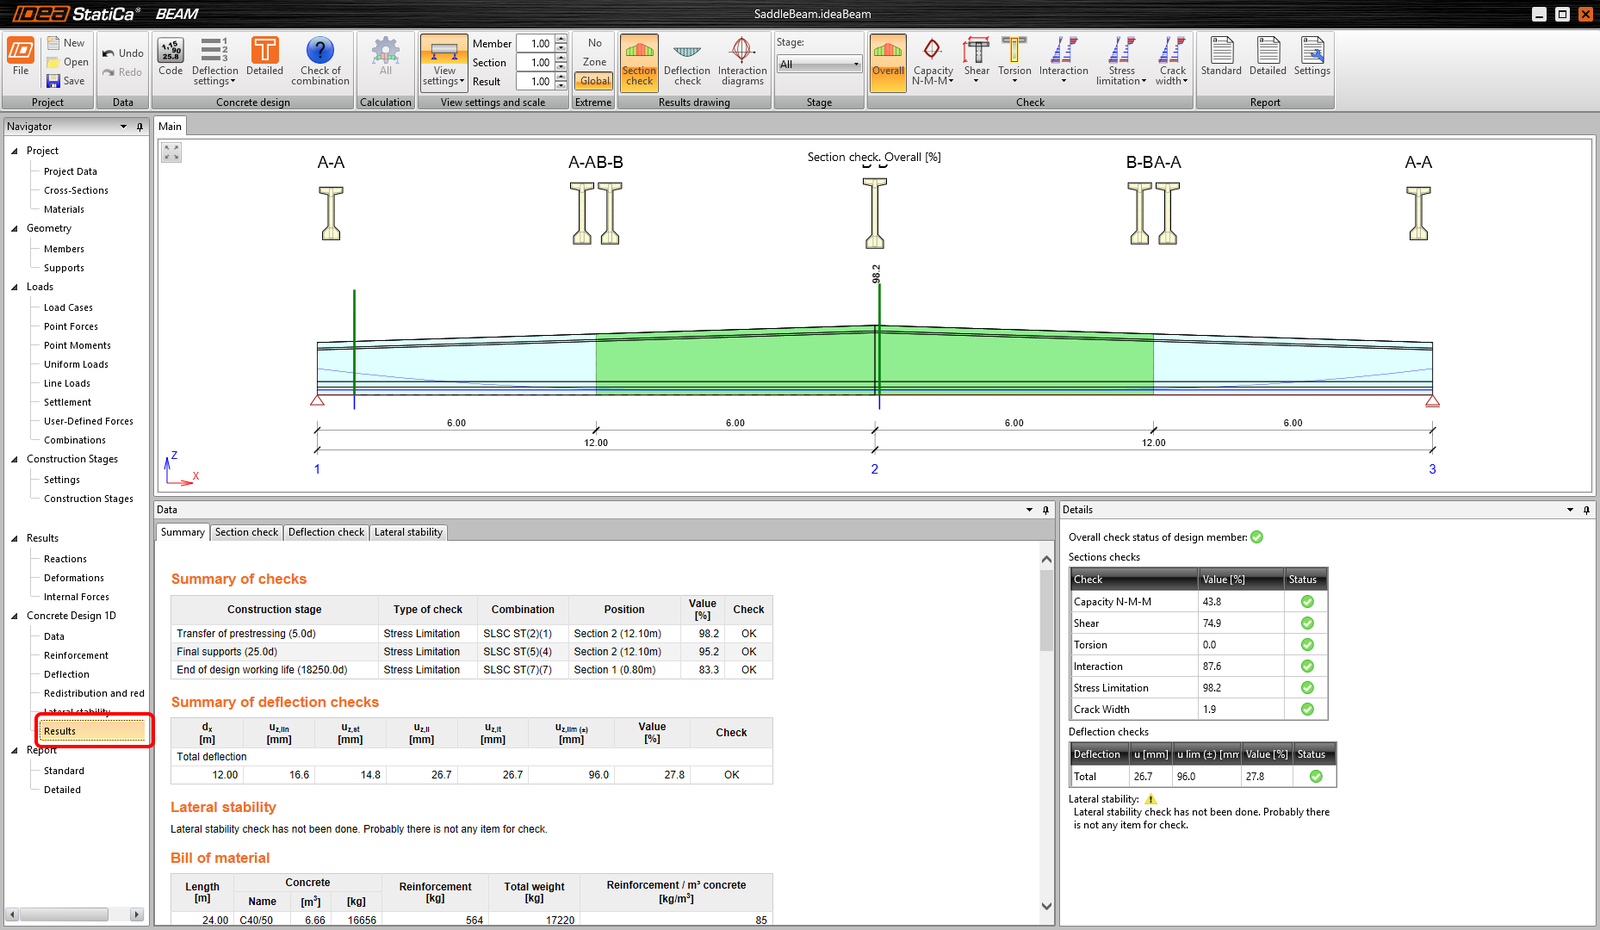
5 Ellenőrzés
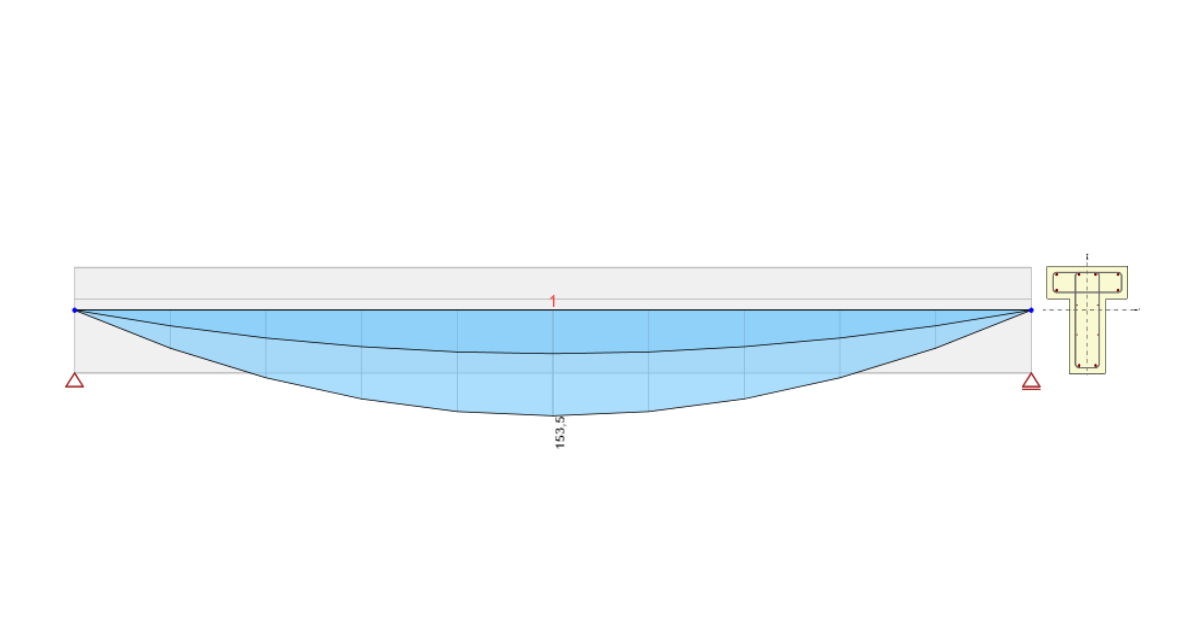
Lépjen az Eredmények fülre, és az analízis automatikusan elindul. Az eredmények a számítás után jelennek meg.
6 Jelentés
Végül lépjen a Részletes jelentés fülre. Az IDEA StatiCa teljes mértékben testreszabható jelentést kínál, amely kinyomtatható vagy szerkeszthető formátumban menthető.
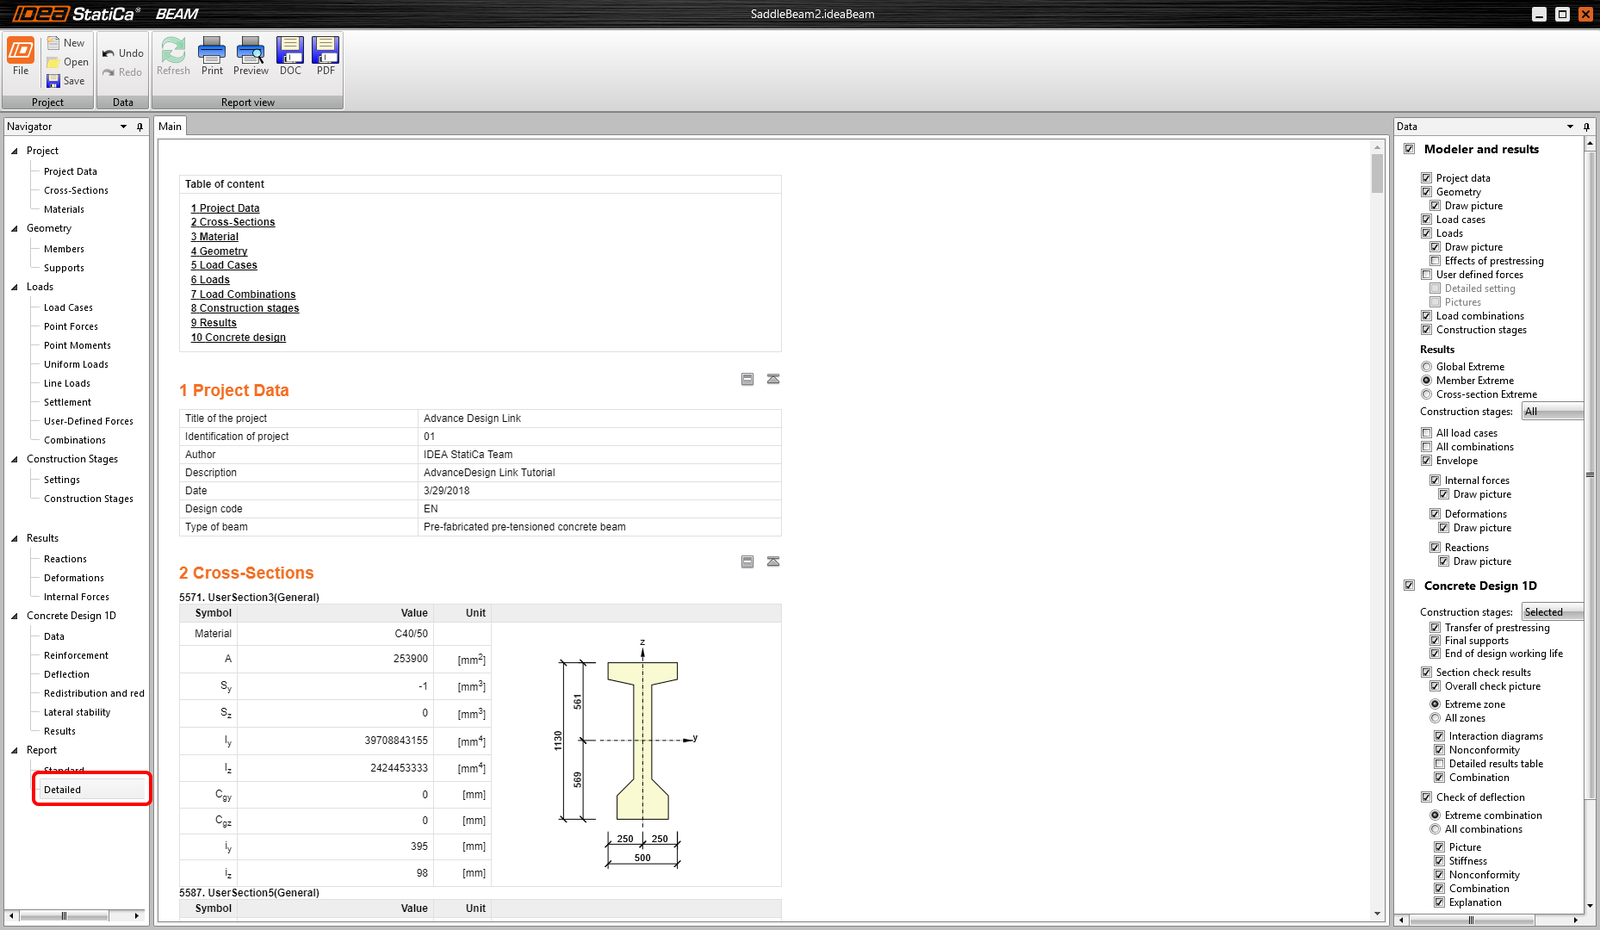
Megtervezte, vasalta és elvégezte az előfeszített előregyártott gerenda szabványellenőrzését az Eurocode szerint az Advance Design és az IDEA StatiCa Beam szoftver segítségével.
- Concrete
- Reinforced concrete
- Tutorials
Vasbeton gerenda szerkezeti tervezése (EN)
Tovább olvasom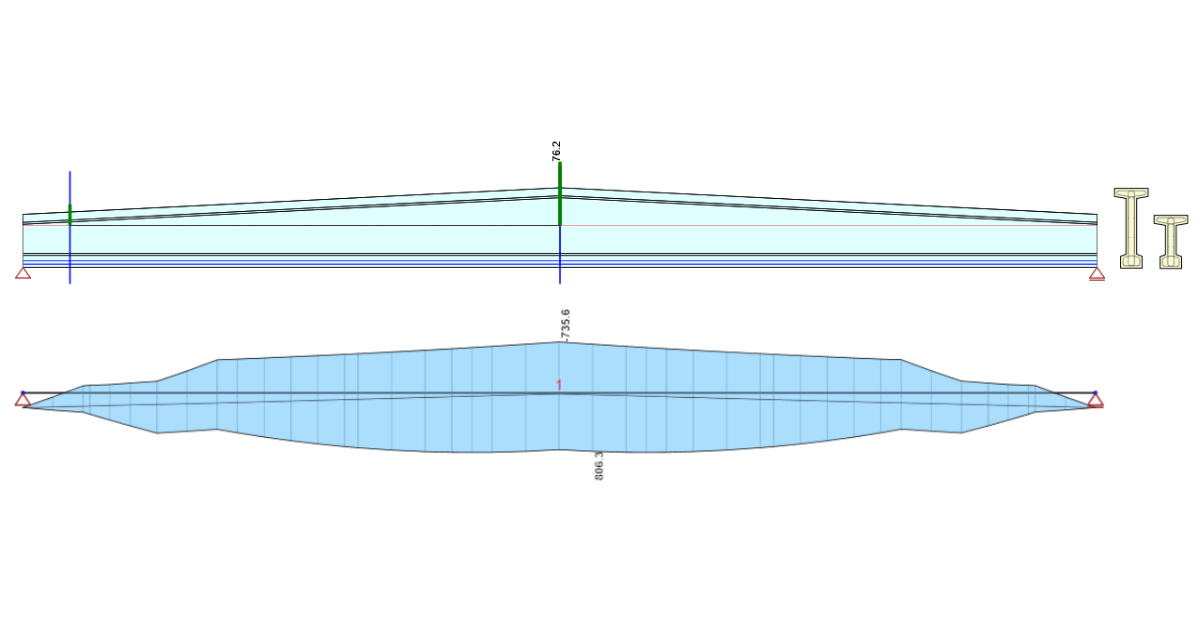
- Concrete
- Prestressed concrete
- Tutorials
Előfeszített beton nyereggerenda szerkezeti tervezése (EN)
Tovább olvasom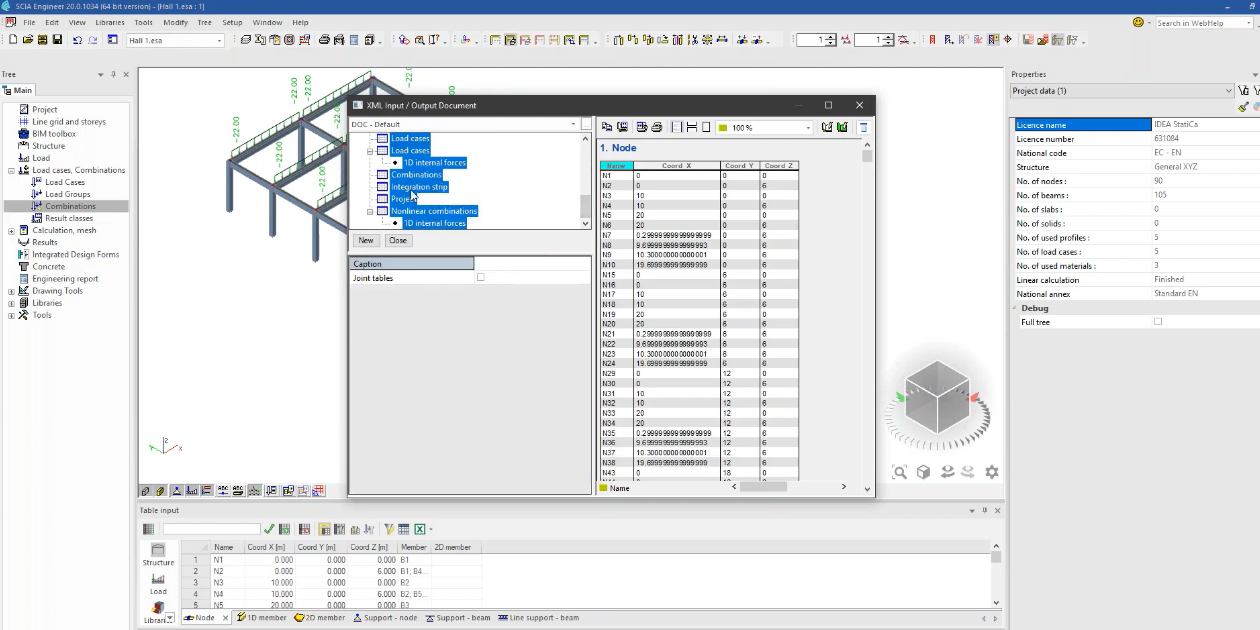
- Concrete
- Reinforced concrete
- Prestressed concrete
- Knowledge base