Grasshopper API link – parametric optimization of a connection weld
Grasshopper - Plugin Installation
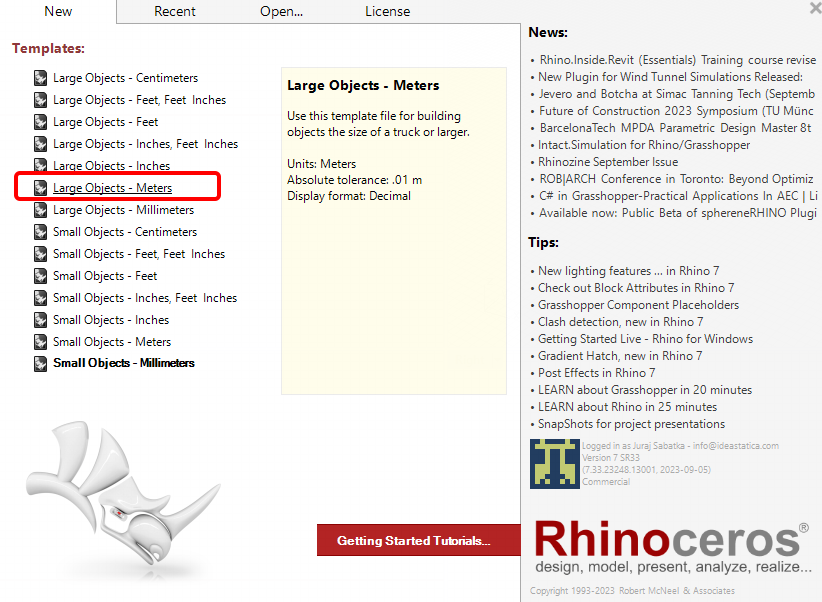
You can get a trial version of Rhino3d and Grasshopper from the Rhino3d website. Run Rhinoceros and select the template with Meters:
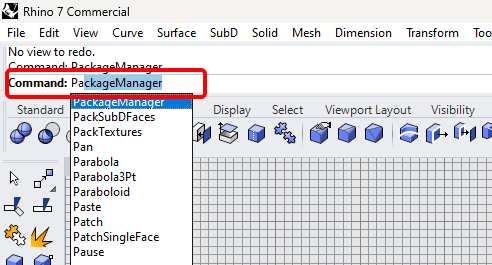
In the Command line, please enter "Package Manager":
A new window appears; select IDEAStatiCa and click Install. The plugin will be downloaded and installed. To become active, a restart of Rhinoceros is necessary.

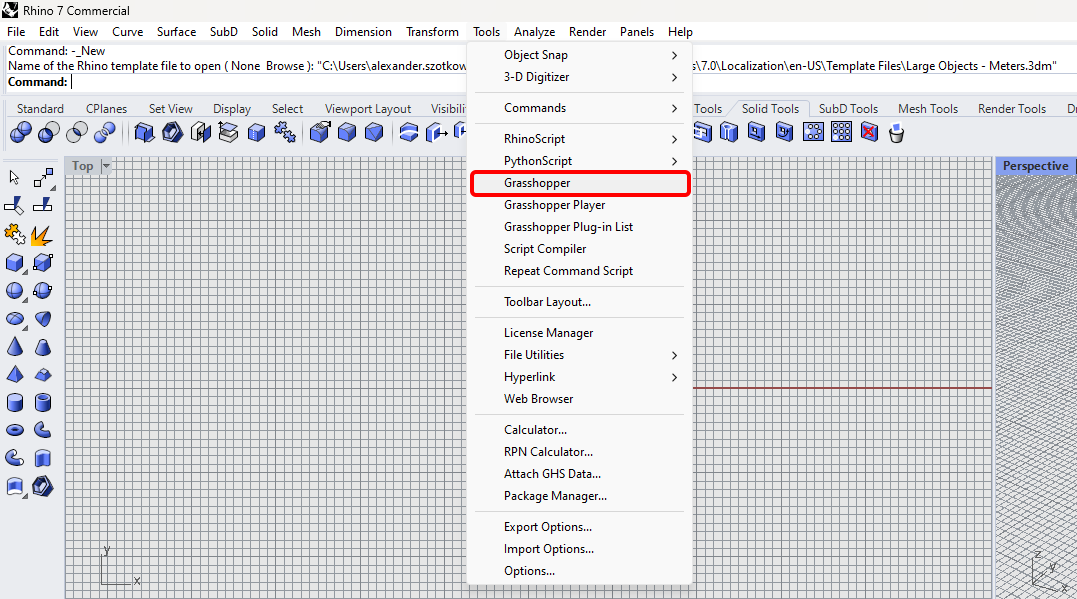
To start Grasshopper with the IDEA StatiCa plugin, select Tools / Grasshopper in the Rhihoceros tab.
As you can see, the plugin is already incorporated.

Learn about the components and commands in the IDEA StatiCa plugin for Grasshopper in the article Description of Grasshopper plugin components.
Anemone plugin
As Grasshopper can not work with loops, you must install another plugin that can handle this. In this example, we will use Anemone, which enables you to create loops in Grasshopper.

Remark: place the .gha file in Grasshopper libraries, right-click properties, check the "unblock" box, press apply, close everything and restart Rhino.
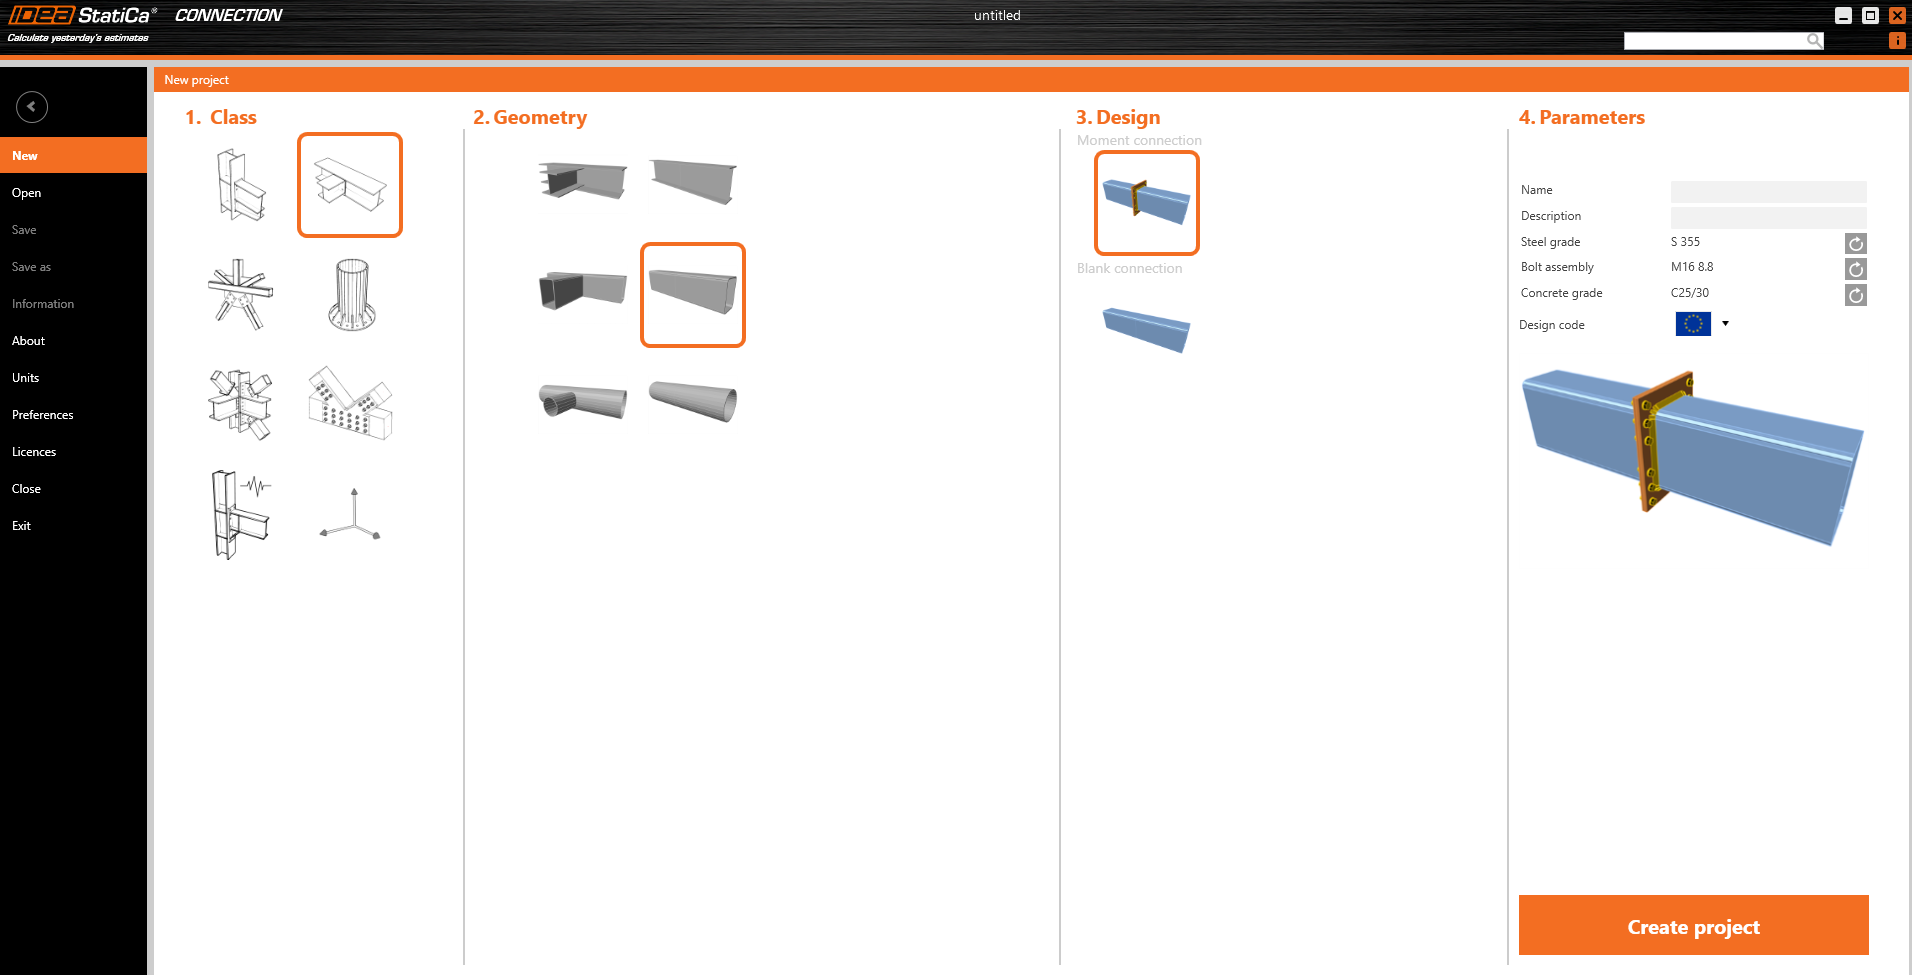
IDEA StatiCa Connection – Design of a joint and set parameters
For the example, you will create a simple moment connection using a template:
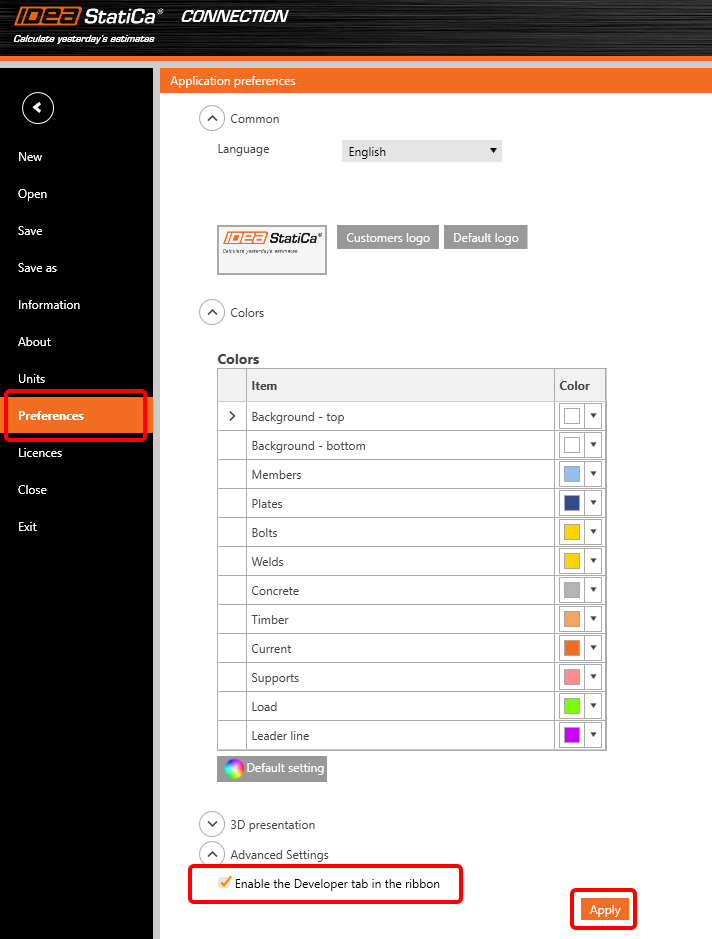
To be able to work with parameters, it is necessary to enable the Developer tab in Preferences / Advance Settings:
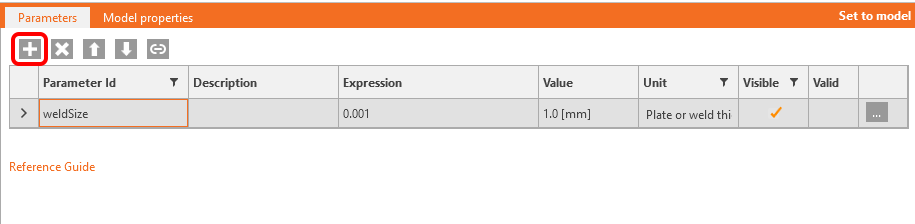
Now, you have to set the parameter for welds. Click on the plus button in the Developer tab and change the text according to the picture:
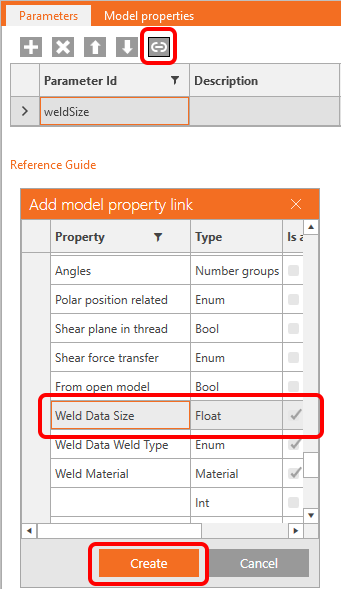
To connect this parameter with the appropriate welds, click on the link button and select the property field as seen in the following picture:
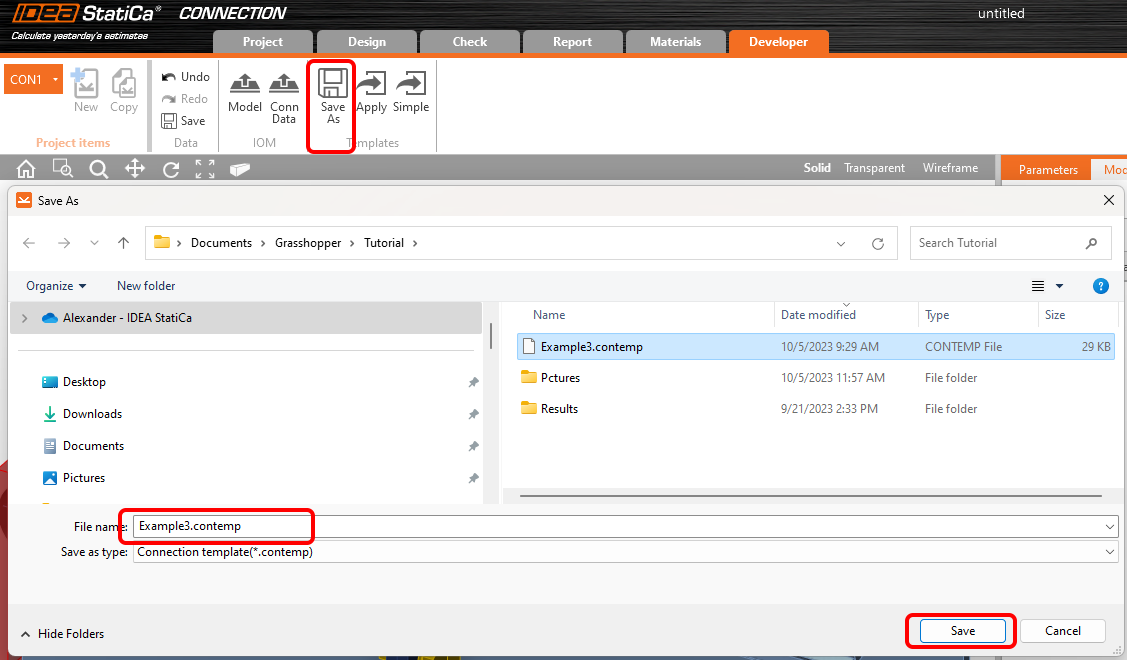
Now, you can save this joint with the operation, and the parameter to a template named Example3.contemp with the button Save as.
Close the file and open a new file, now without any template operations:

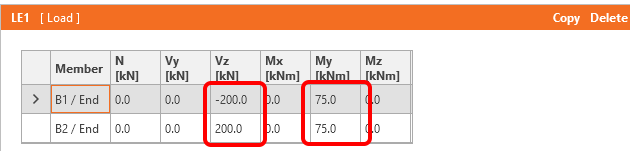
Go to the Loads effects and change the loads according to the following picture:
Now, save this file under the name Example3.ideaCon.
Grasshopper - Merge the *ideaCon and *contemp files, determine the weld thickness.
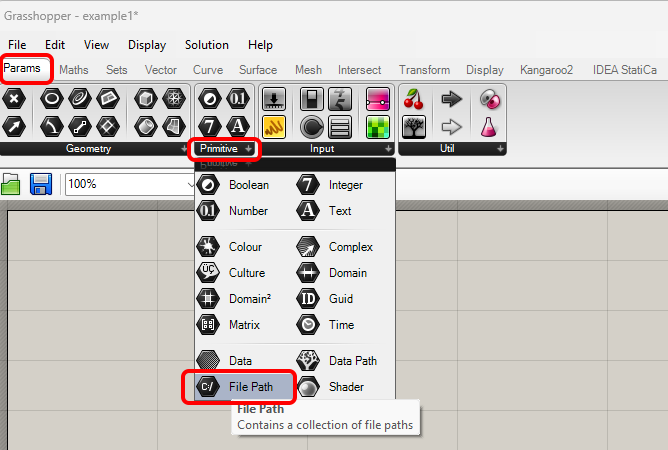
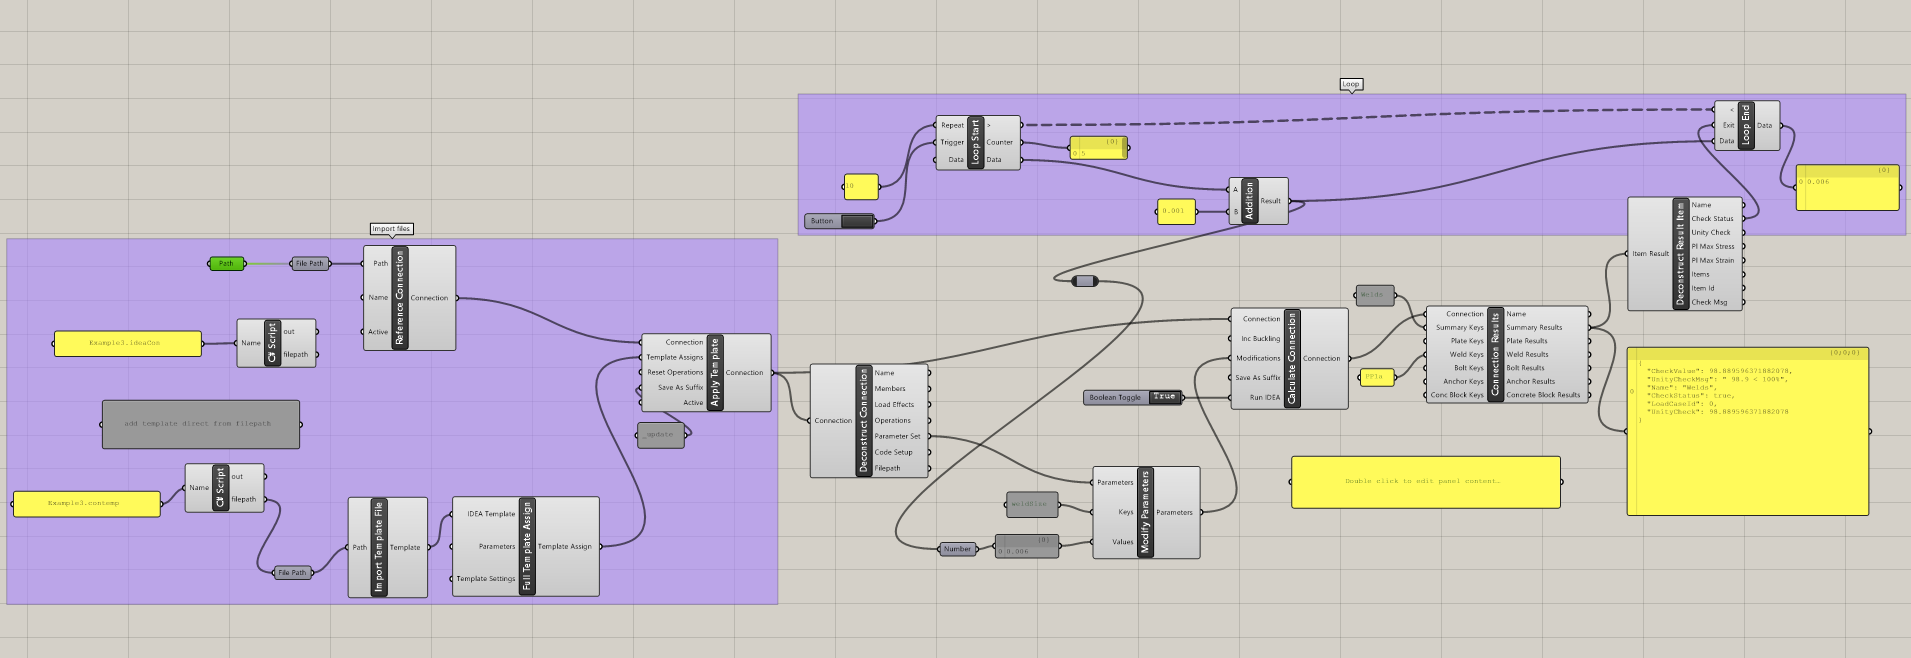
Create a new document and add the following components to merge *.ideaCon and *.contempt files. Select the tab Params in the upper ribbon, and place the component File Path on the Canvas.
Right-click on the component and select the file Example3.ideaCon we saved before.
Note: If you open the attached file, you must change this path accordingly.
Or you can use the components Params / Panel and Maths / C# Script to import the files Example3.contemp and Example3.ideaCon.
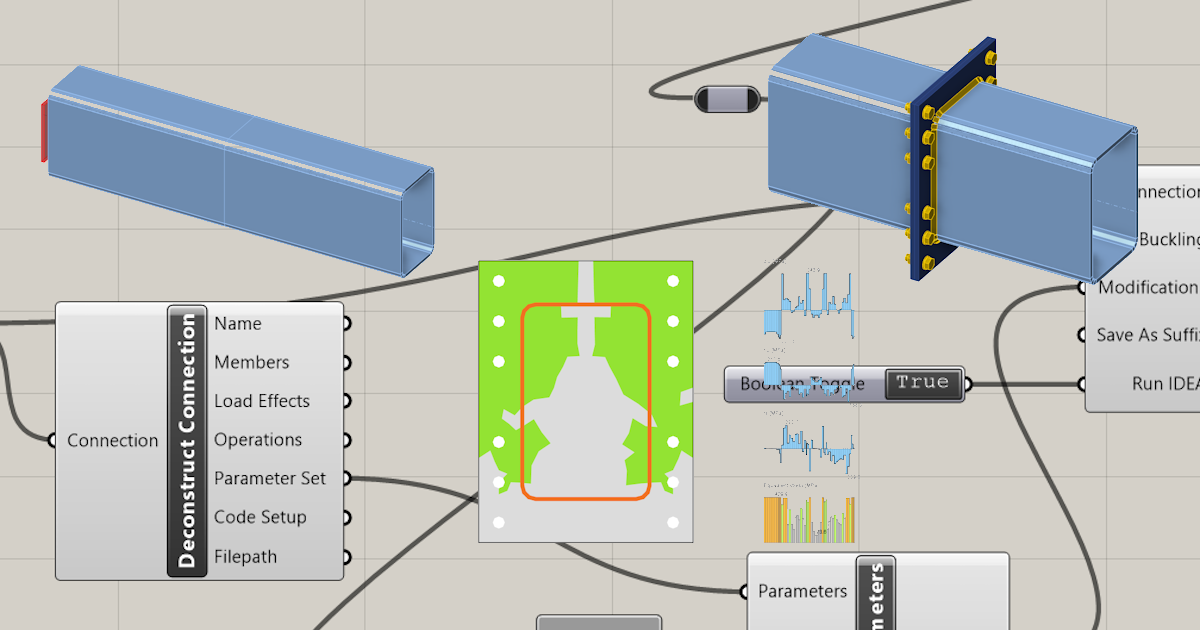
Now, connect the following components to the canvas as displayed in the picture.
Import File:
IDEA StatiCa / Connection / Reference Connection
IDEA StatiCa / Connection / Import Template file
IDEA StatiCa / Connection / Full Template Assign
IDEA StatiCa / Connection / Apply Template (for creating a result file Example3_update.ideaCon)
Calculation and Results:
IDEA StatiCa / Connection / Deconstruct Connection
IDEA StatiCa / Connection / Modify Parameters
IDEA StatiCa / Connection / Calculate Connection
IDEA StatiCa / Connection / Connection Results
IDEA StatiCa / Connection / Deconstruct Result Items
Anemone Components to iterate weld dimension:
Anemone / Class / Loop Start
Anemone / Class / Loop End
Params / Maths / Operators / Addition
We use the Component Params / Input / Button to start the iteration.
The iteration runs ten times from 0,001 m with a step of 1 mm until the CheckStatus value turns True.
Interpretation of the results
For this specific connection, you will have satisfying results using
- Weld Thickness 6 mm
More complex examples can be found on your PC in the directory
“%appdata%\McNeel\Rhinoceros\packages\7.0\IDEAStatiCa\0.1.1\Examples.zip”
Csatolt letöltések
- Example3.zip (ZIP, 65 kB)