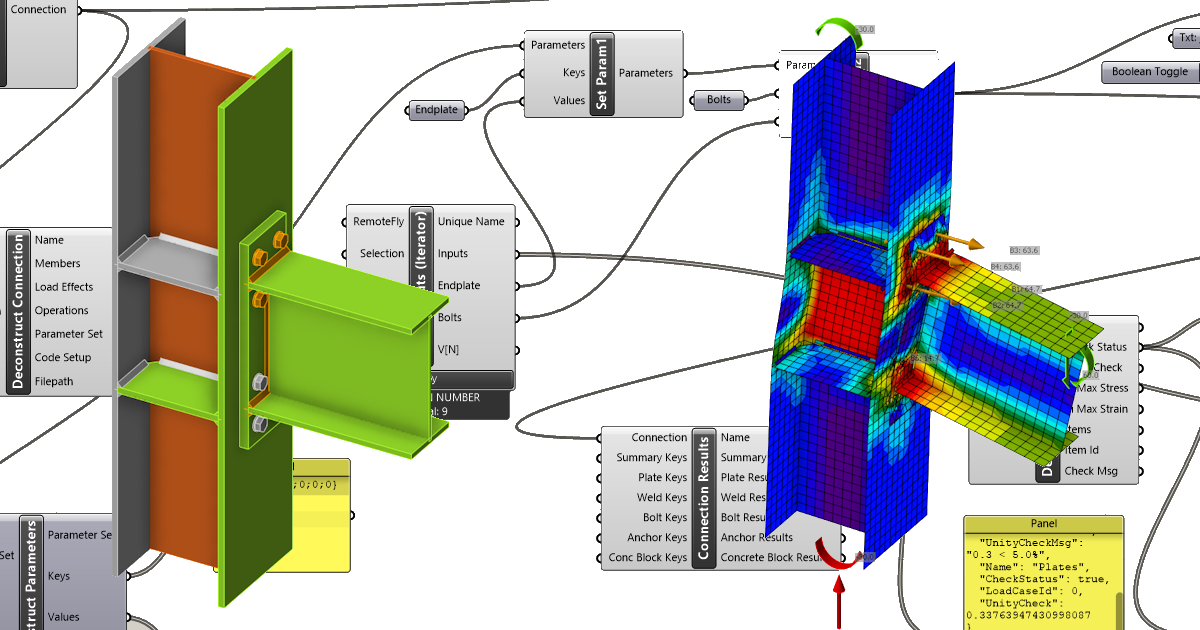
Grasshopper API link - how to import and calculate parametric connection model
Grasshopper - Installazione del plugin
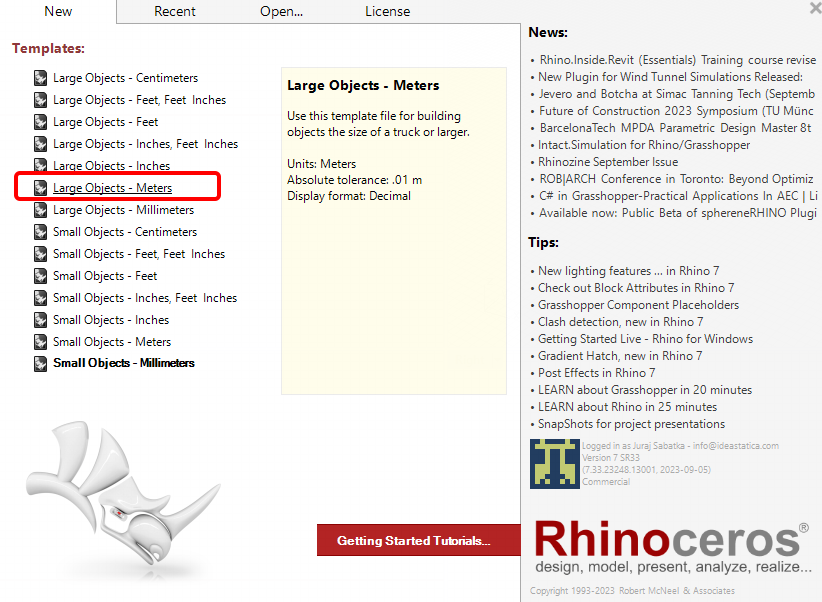
È possibile ottenere una versione di prova di Rhino3d e Grasshopper dal sito web di Rhino3d. Esegui Rhinoceros e seleziona il modello con Meters:
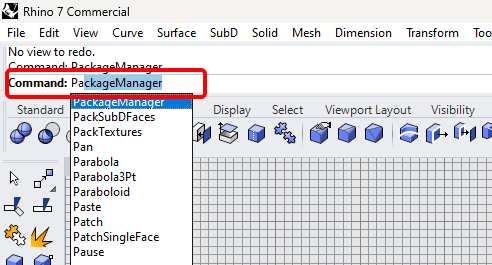
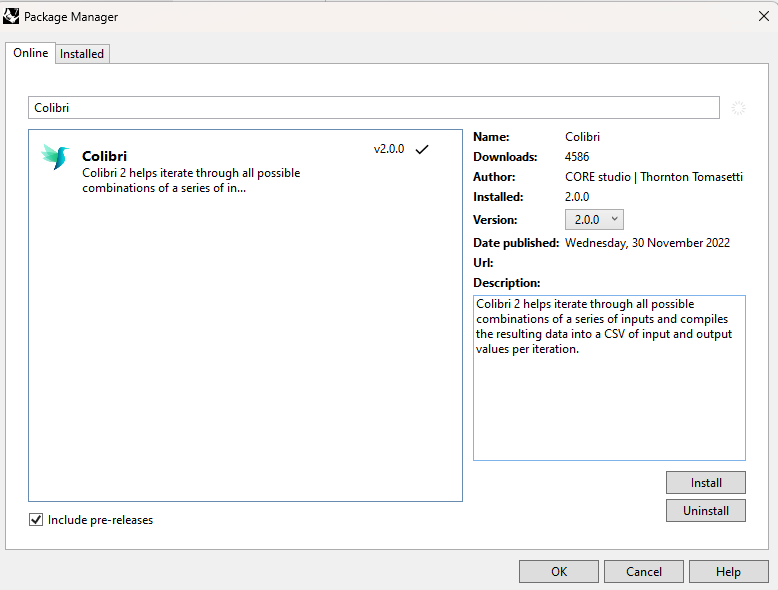
Nella riga di comando, inserisci "Package Manager":
Appare una nuova finestra; selezionare IDEAStatiCa e fare clic su Installa. Il plugin verrà scaricato e installato. Per essere attivo, è necessario riavviare Rhinoceros.

Per avviare Grasshopper con il plugin IDEA StatiCa, selezionare Strumenti / Grasshopper nella scheda Rhihoceros.
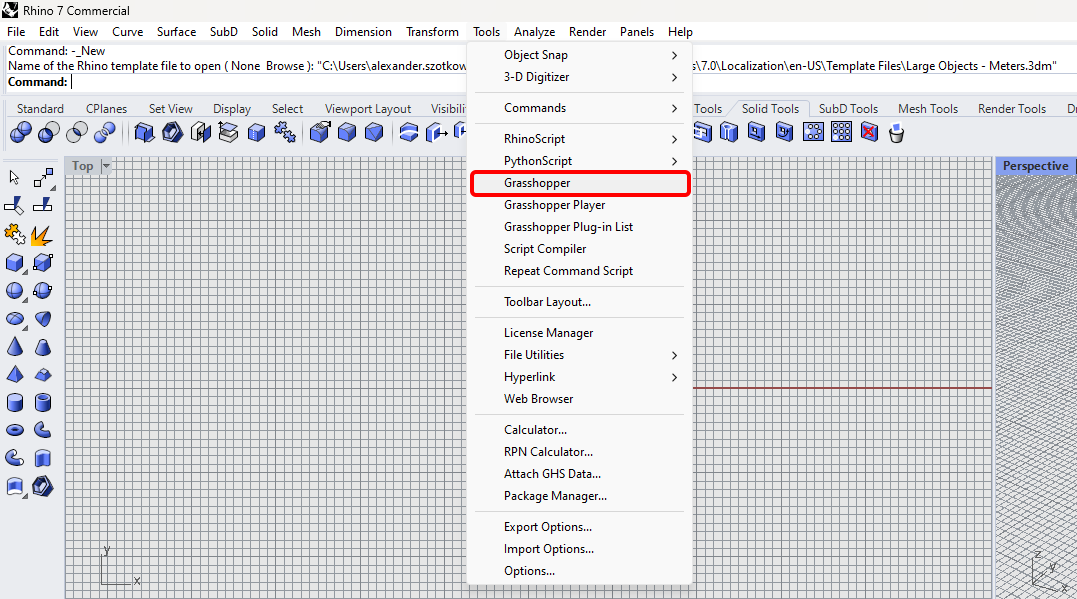
Come si può vedere, il plugin è già incorporato.

Per conoscere i componenti e i comandi del plugin IDEA StatiCa per Grasshopper, consultare l'articolo Descrizione dei componenti del plugin per Grasshopper.
Colibri plugin
As Grasshopper can not work with loops, you have to install another plugin - COLIBRI, which you will use in this tutorial.
IDEA StatiCa Connection – Design of a joint and set parameters
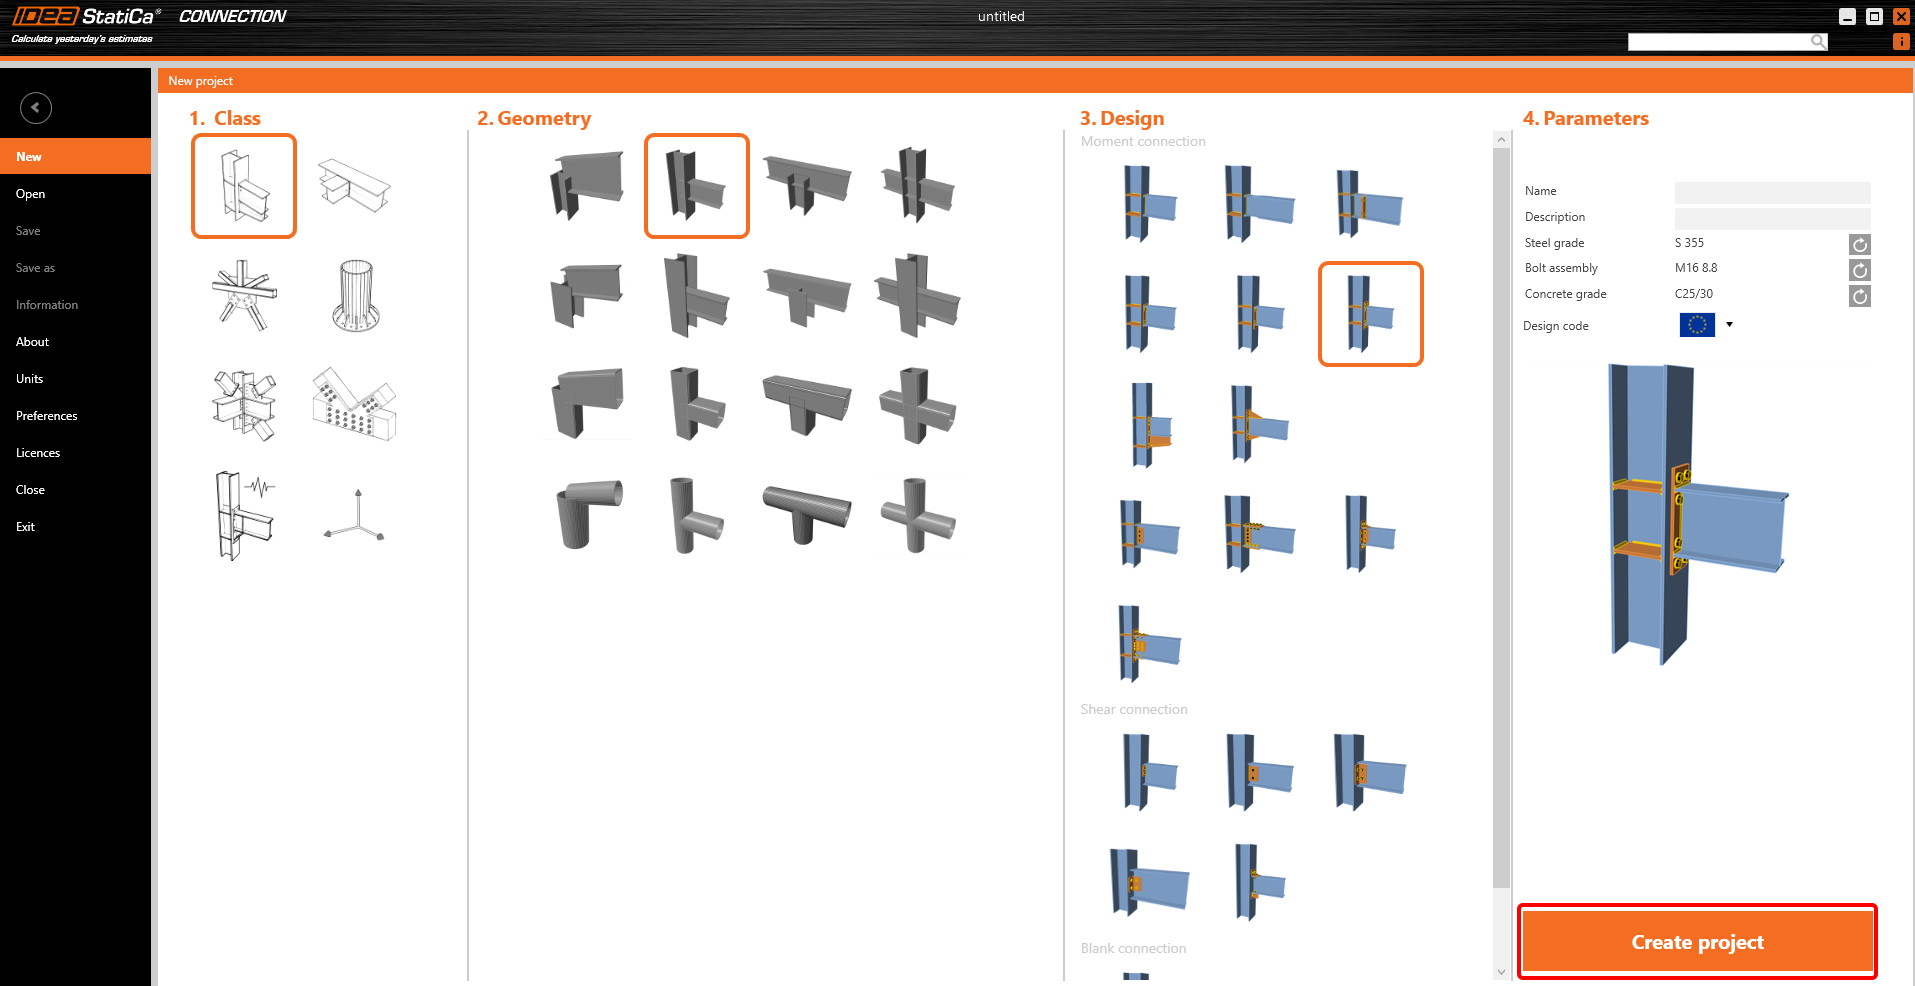
For the example, you will create a simple moment connection using a template:
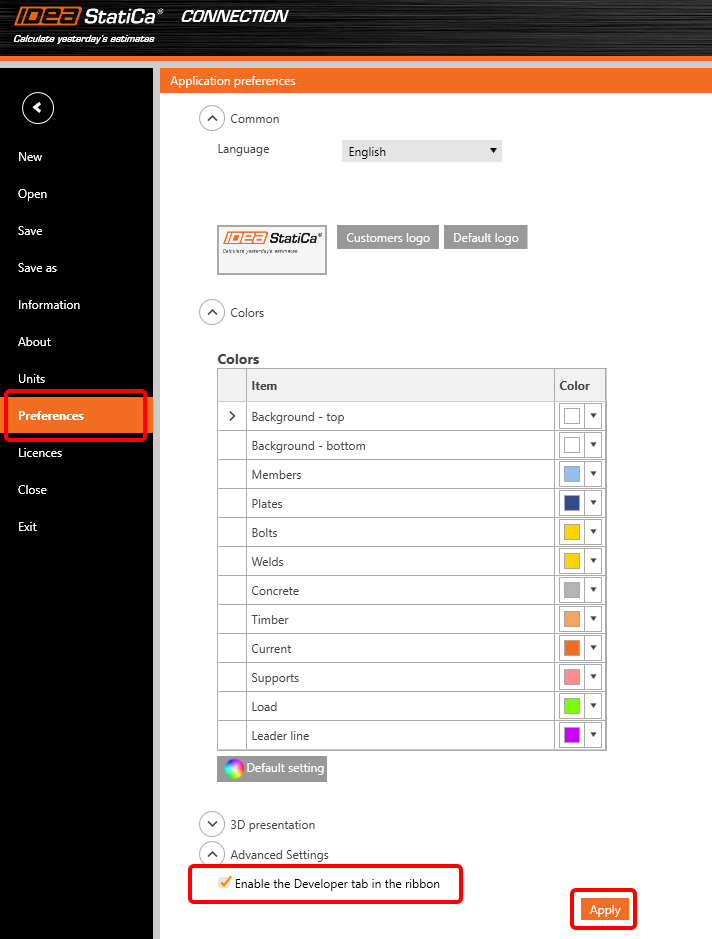
To be able to work with parameters, it is necessary to enable the Developer tab in Preferences / Advance Settings:
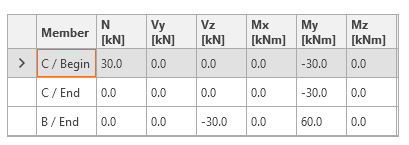
In the beginning, you have to set the loads according to the following picture:
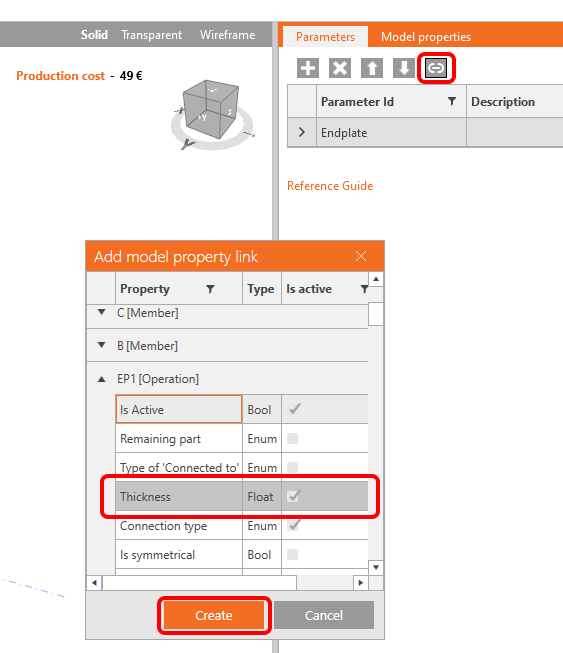
Now, you have to set two parameters for this connection. The first one will be the thickness of the Endplate. Click on the plus button in the Developer tab and change the text according to the picture:

To connect this parameter with the appropriate Endplate thickness, click on the link button and select the property field as seen in the following picture:
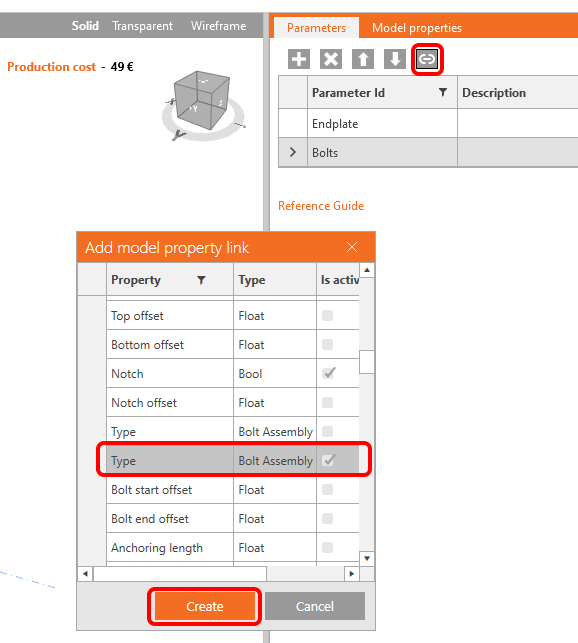
As the second parameter, you will set the diameter of the bolts:

Remark: The expression is a text, so it is necessary to use apostrophes.
Connect this parameter with the corresponding operation:
Now, you can check the links in the tab Model properties:

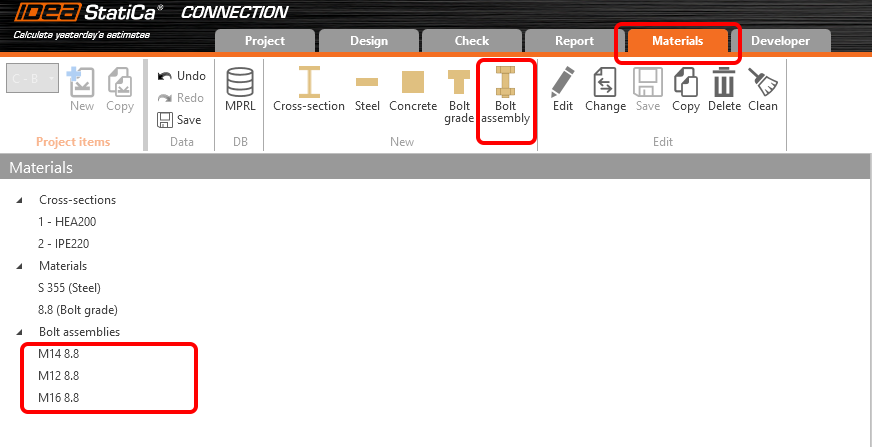
As the goal is to play with the diameter of the bolts, we have to add the appropriate bolt assemblies to the file:
Finally, you can save this connection under the name Example2.ideaCon.
Grasshopper - Import the *ideaCon file and modify the parameters
Create a new document, select the tab Params in the upper ribbon, and place the component File Path on the Canvas.
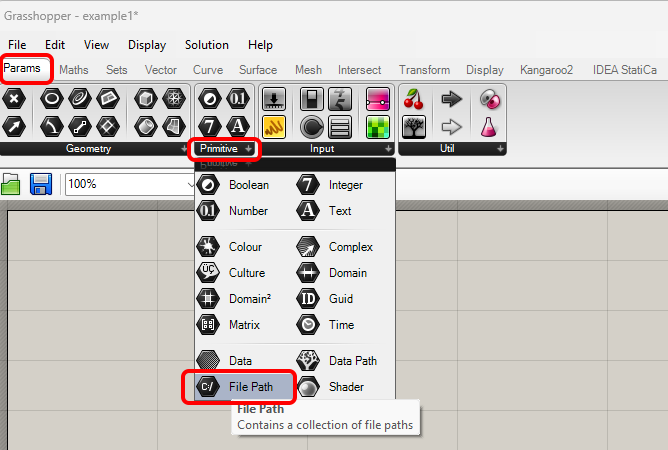
Right-click on the component and select the file Example2.ideaCon we saved before.
Note: If you open the attached file, you must change this path accordingly.
Now, add the following components to the canvas and connect them as displayed in the picture.
Import File:
IDEA StatiCa / Connection / Reference Connection
IDEA StatiCa / Connection / Deconstruct Connection
IDEA StatiCa / Connection / Modify Connection
View Parameters:
IDEA StatiCa / Connection / Deconstruct Parameters
Here, you can add components Params / Input / Panel to see the values of our parameters.
Modify Parameters:
IDEA StatiCa / Connection / Modify Parameters (1)
IDEA StatiCa / Connection / Modify Parameters (2)
IDEA StatiCa / Connection / Modify Connection
For the modified file with different results, we set the Suffix _updated.
Calculation and Results:
IDEA StatiCa / Connection / Calculate Connection
IDEA StatiCa / Connection / Connection Results
IDEA StatiCa / Connection / Deconstruct Result Items
Here, again, you can add components Params / Input / Panel to see the values of the results.
Colibri Components to iterate combinations of parameters:
TTTollbox / Colibri Inputs
TTTollbox / Colibri Outputs
TTTollbox / Colibri Aggregator
For the Input, the first Value list contains 3 values (0.010, 0.015, 0.020) for the thickness of the End plate.
The second one contains three values (M12 8.8, M14 8.8, M16 8.8) for the bolt diameter.
The results are stored in the data.csv file. By default, it is stored in c:\Colibri; here, you should set the path to C:/IDEA. Please make sure you have authorized access.

Click the Colibri Inputs / Fly button to go through the whole iteration. After a while, the CSV file is created.
The straightforward results with True / False can be seen when opening it.

Interpretation of the results
For this specific connection, you will have satisfying results using either
- Bolts M16 8.8 with Endplate thickness of 10 mm
or
- Bolts M14 8.8 with Endplate thickness of 15 mm
More complex examples can be found on your PC in the directory
“%appdata%\McNeel\Rhinoceros\packages\7.0\IDEAStatiCa\0.1.1\Examples.zip”
Related recordings
Part 1 - set up of parameters in IDEA StatiCa Connection
Part 2 - upload of connection and display in Rhino
Part 3 - loop process over the parameters
Part 4 - results interpretation
Download allegati
- Example2.zip (ZIP, 64 kB)