
Parametric design in IDEA StatiCa Connection - Basics (01)
1 Set up the environment
To use parameters in your daily job, you must first enable the Developer tab. Go to Preferences and check the Developer mode.

In the upper ribbon, a tab Developer appears.

2 Set up parameters
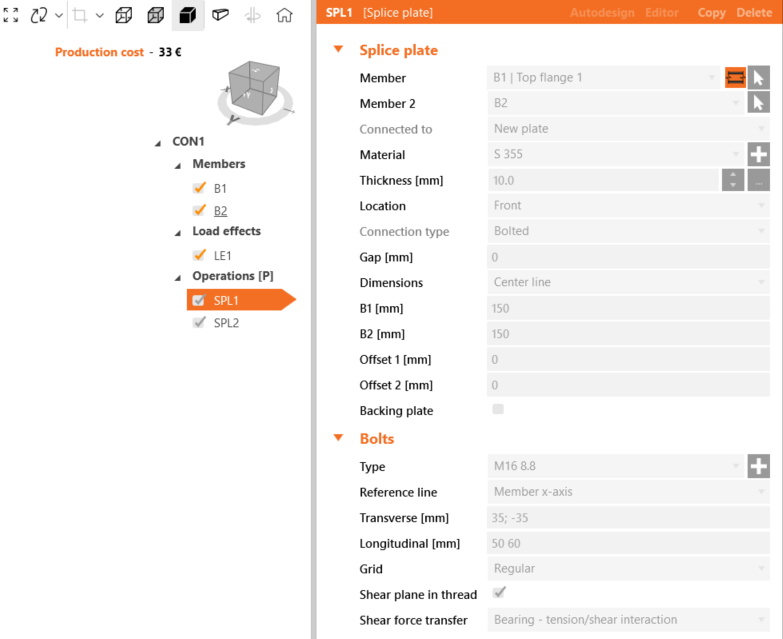
First, let's create a splice joint using a simple template.
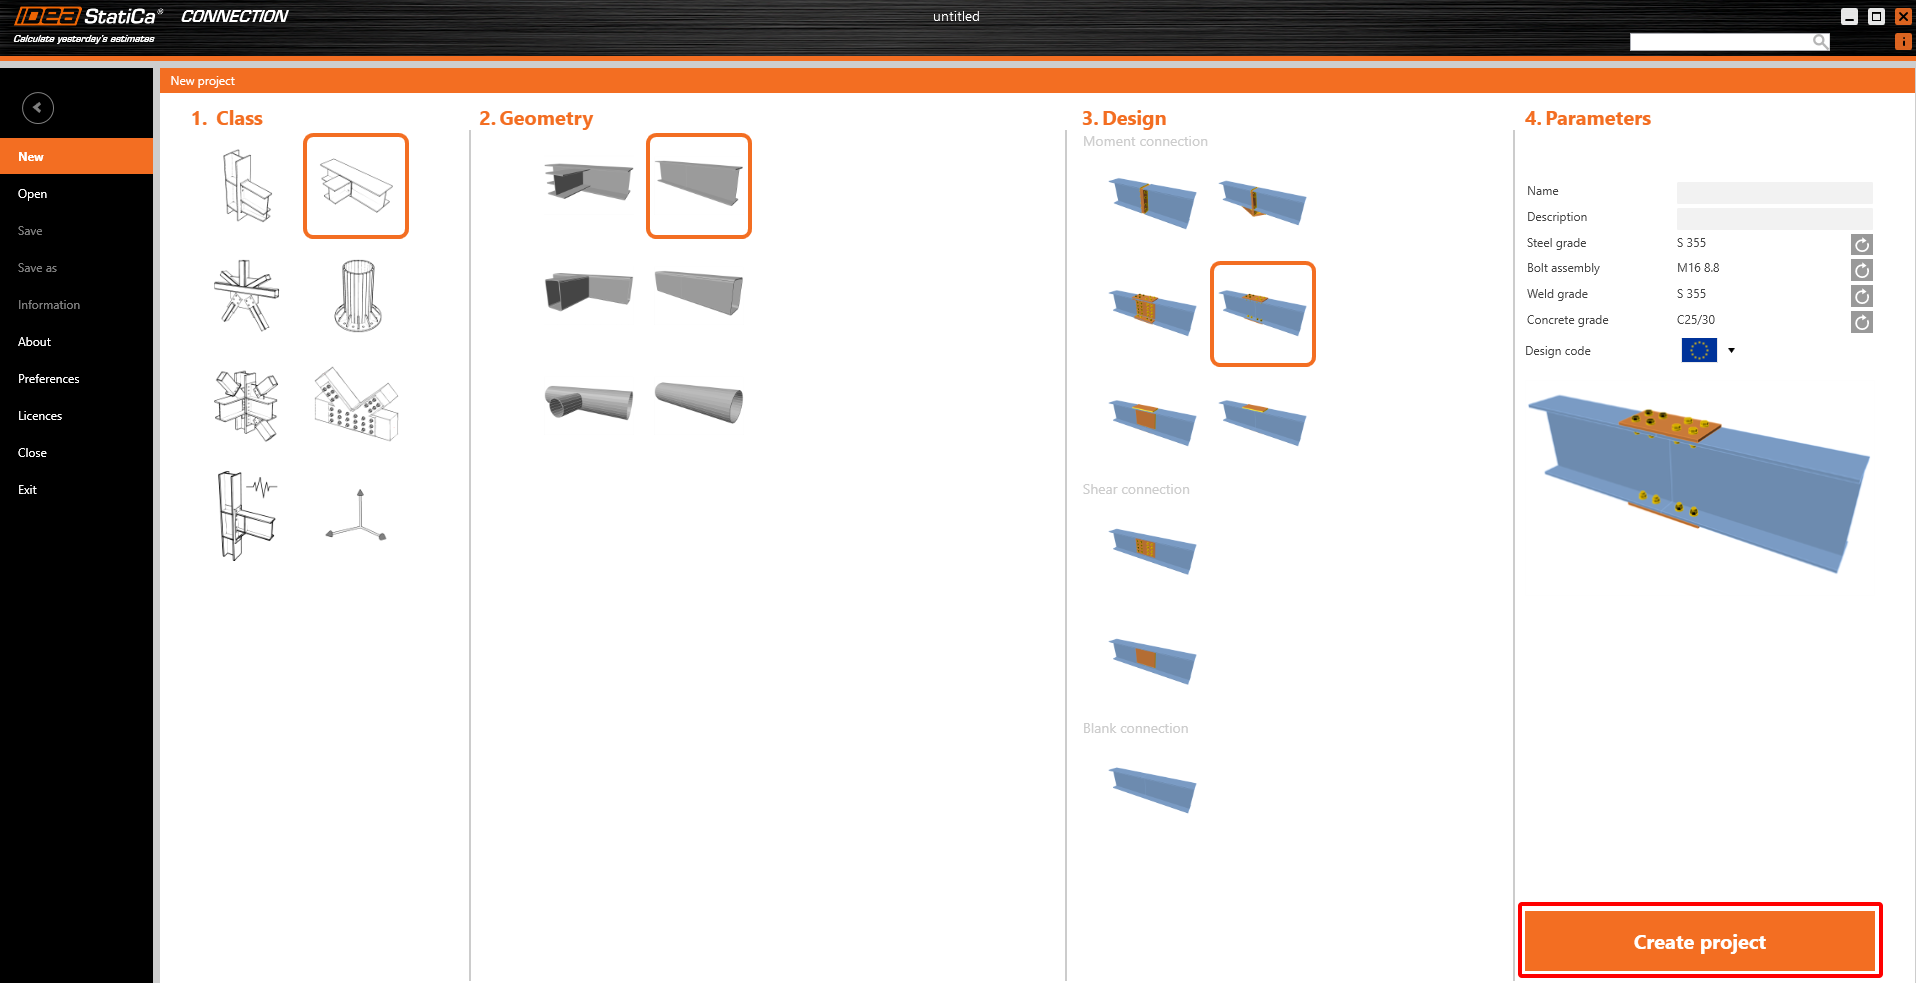
Go to the Developer tab, click on the Plus button, and change the text according to the picture:

Parameter ID - Unique ID for recognizing within the software
Description - Arbitrary text
Expression - Text, Number, Function, Boolean, Value. For more, see the Reference Guide
Value - The value inputted in the Expression cell displayed in the unit system
Unit - Several possibilities (length, area, stress,...), SI Units necessary
Visible - When the box is checked, the parameter is visible in the Design tab in the Operations section.
The parameter has to be related to Property of Member, Operation etc..
Assign the parameter Pl_Th as thickness property.
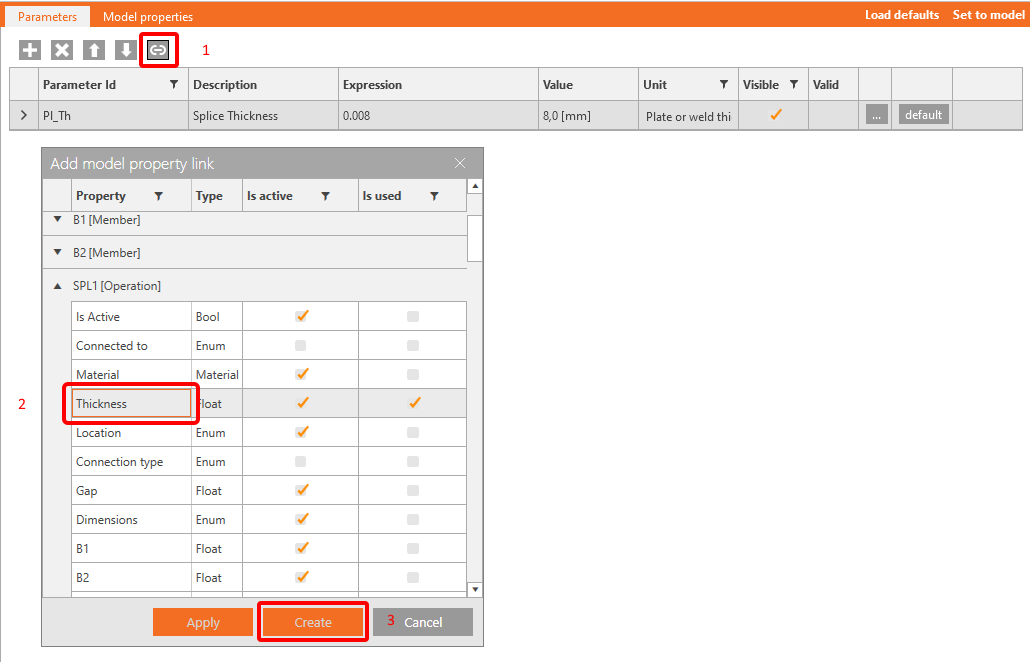
Duplicate for Operation SPL2[Operation].
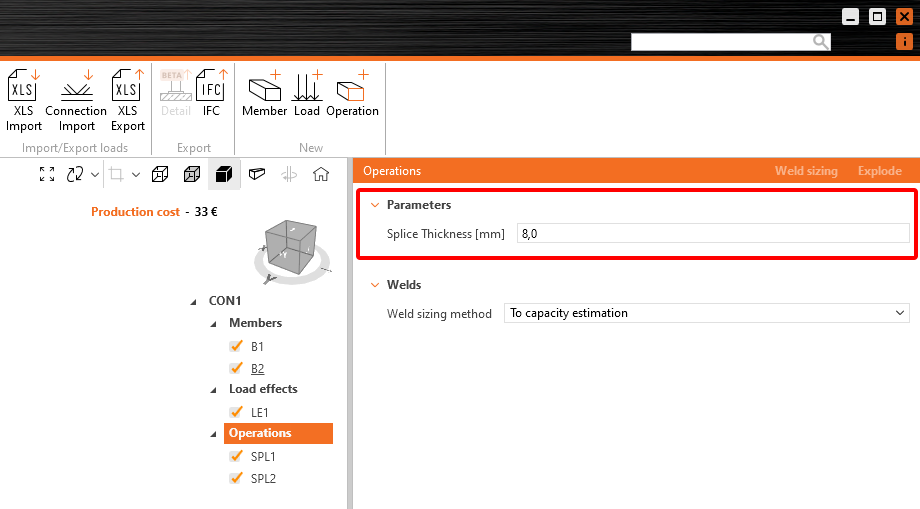
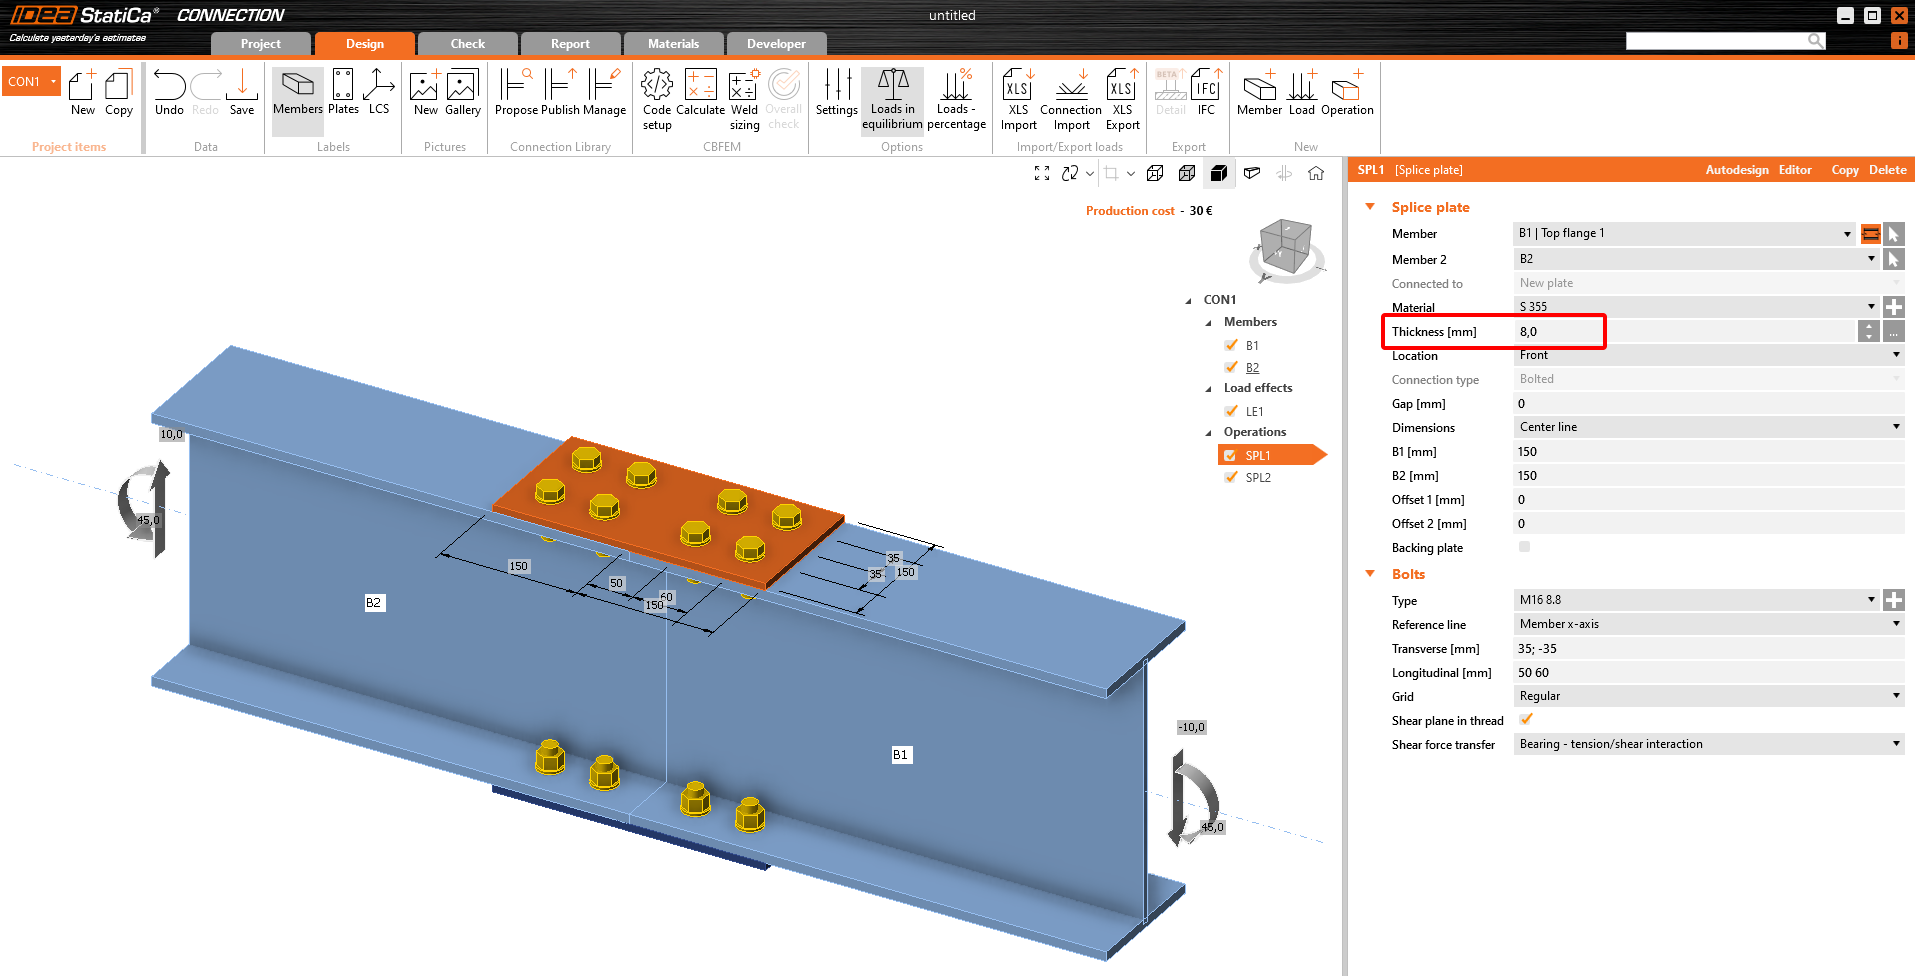
To check whether the parameter is active, see the Tab Model properties. Now, you can click on Set to model. The plates will take over our new value 0.008 m.

3 Validation of the parameters
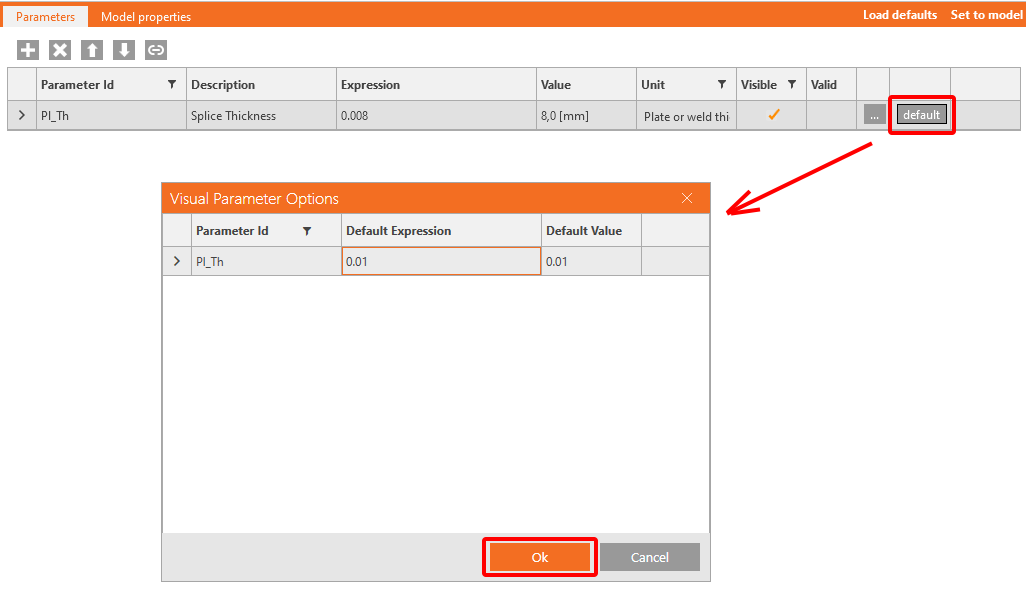
Sometimes, your parameter has a default value. In this case, clicking on default opens a new window Visual Parameter Options. You can set a Default Expression for this parameter. Here, we put the value to 0.01.
Now click on the three dots (...) A new window titled Parameter Validation opens. Here, please fill in the value Pl_Th >= 0.01. You can decide whether the rule is only a Warning or a Restriction. If Restriction is set, you won't be able to set your values to the Operations in the Model. Set Warning, a yellow triangle appears in the table.
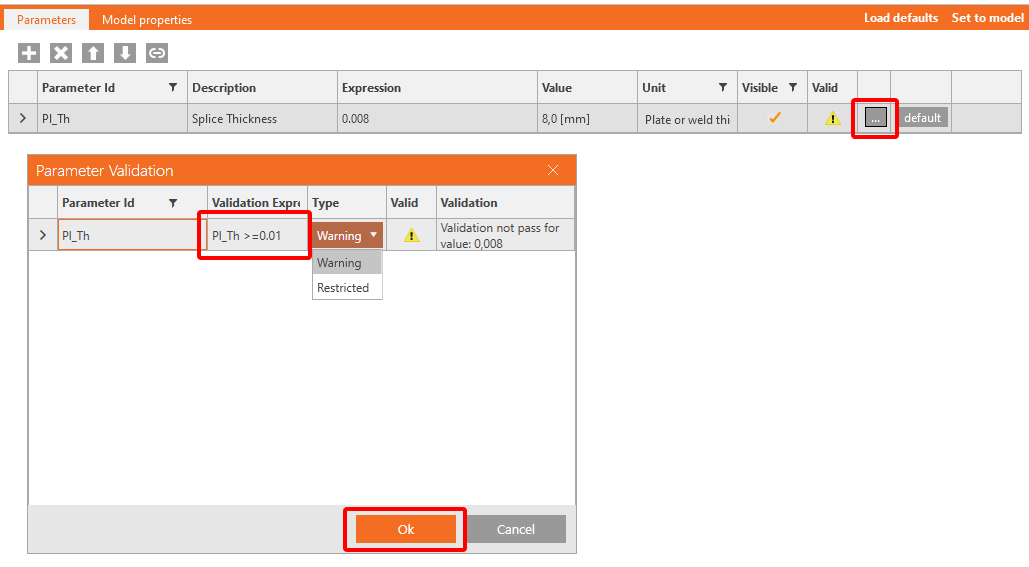

Using the button Load defaults will overwrite the 8 mm to 10 mm value in this Parameters tab.
4 Publish to Connection library
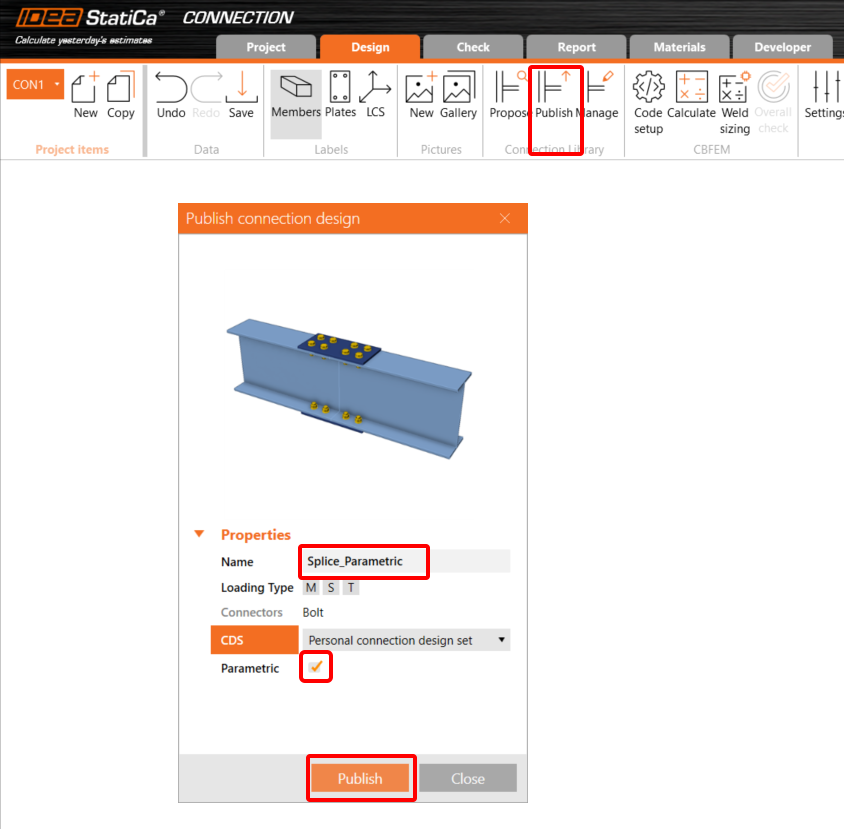
Go to the Connection Library, select Publish, a new window "Publish connection design" appears.
Enter a unique name for your new template, select your personal or company set and click on Publish. The item Parametric is checked automaticaly.
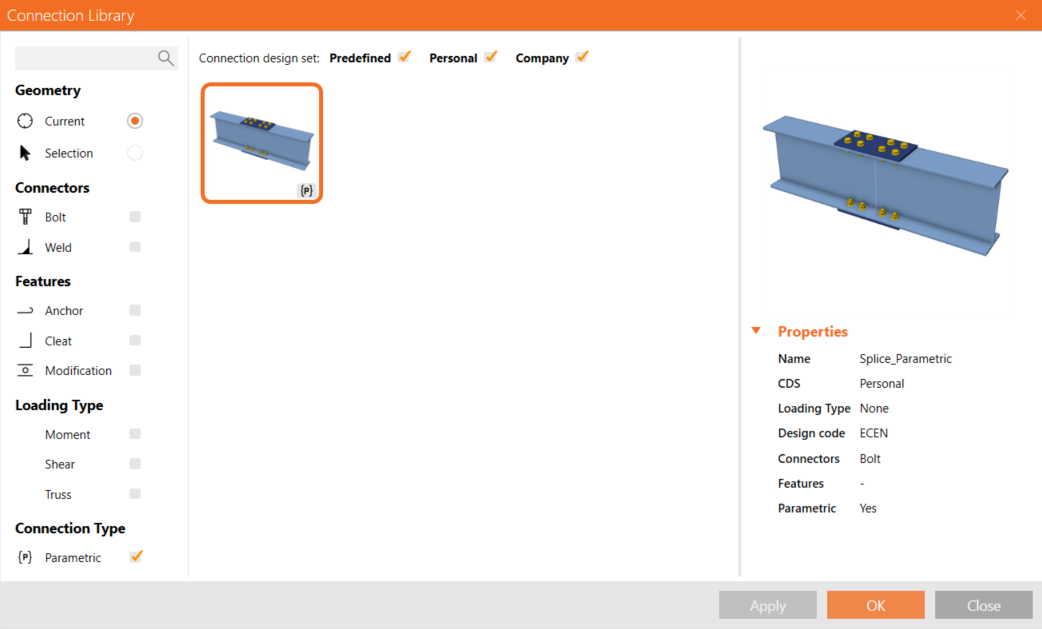
5 Template usage
The template you have created can now be used in similar joints. You can se in the right bottom corner a sign (P) for Parametric.
If you have not enabled the Developer tab, after applying this template to another joint, you will be able to access only the field with the Thickness of the splice; all other items are greyed out and not accessible by the user.
6 Get more from Parametric
We recommend that you review the advanced users tutorial to learn how to take advantage of all the options that parametric design allows.
You have acquired the skills to utilize parameters, create parametric templates, and undertake fundamental parameter-related tasks. This marks the inaugural tutorial within the IDEA StatiCa tutorials series.
Download allegati
- parameters-basic.ideaCon (IDEACON, 58 kB)