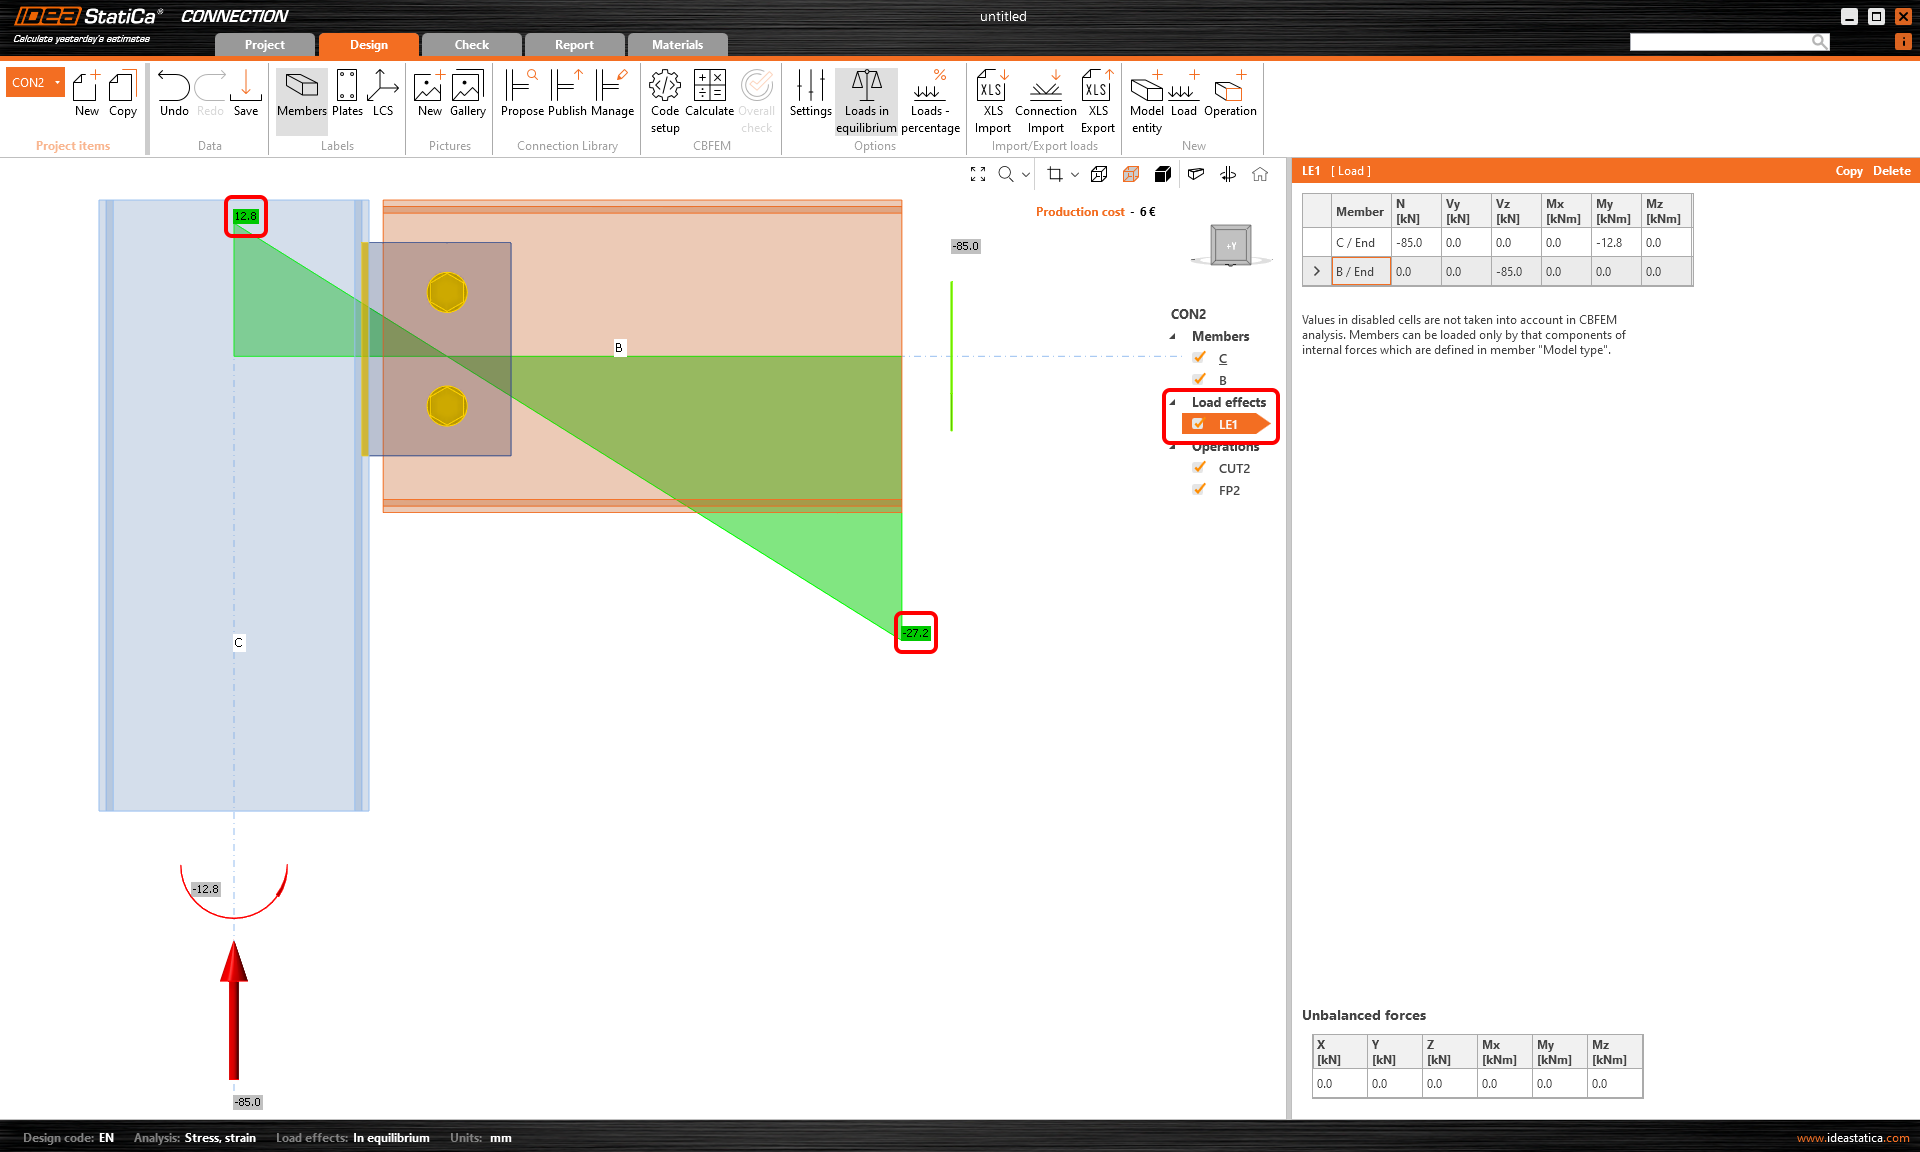
Shear force position input and visualization
An option for setting the shear force position in a connection has been implemented to ensure smoother modeling. On top of that, you can see the bending moment diagram due to unit shear force immediately!
Let's have a look at the features one by one.
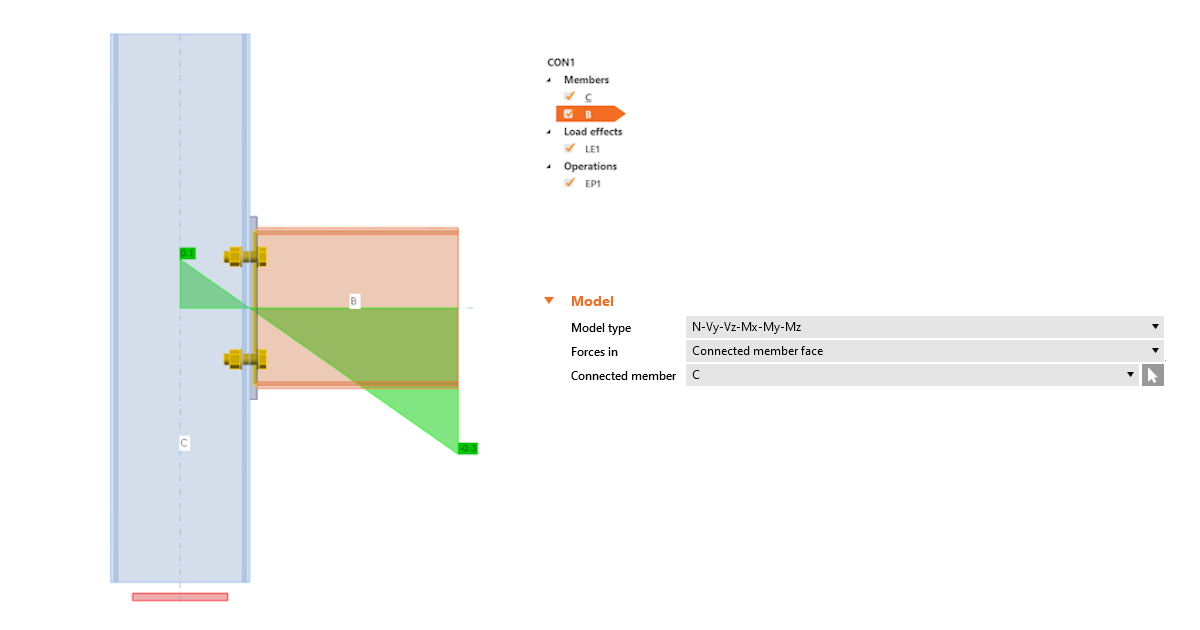
Shear force position at the member face
In many cases, the shear force position is assumed at the member face. You can face this situation when designing a connection with, e.g., a cleat, a short end plate, a flexible support, etc. We have developed a way of inputting the shear force position so you can become more efficient and get rid of tedious, repetitive work.
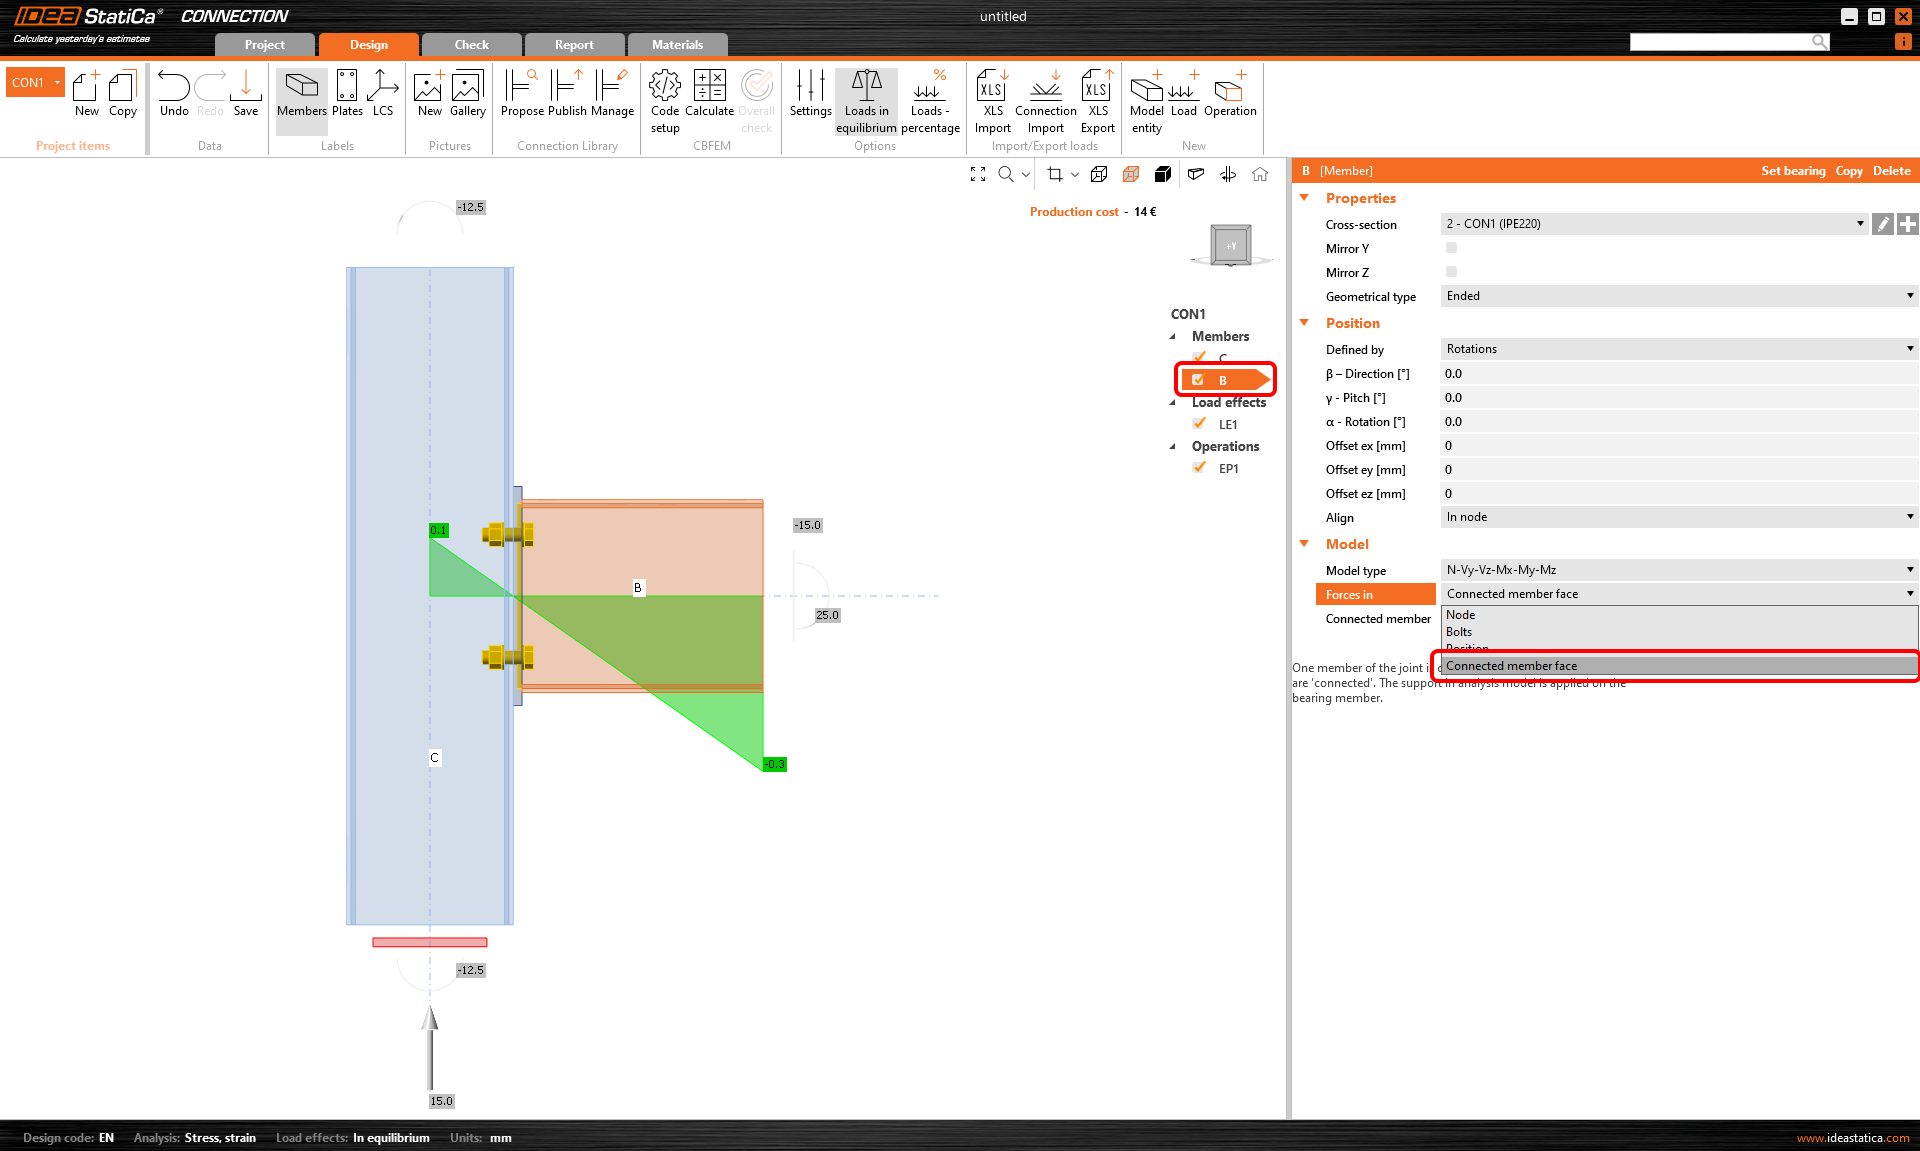
You can set the position using the Connected member face functionality. The software will set it automatically according to the connected member's surface. That means no more manual adjusting using coordinates. And with the change of cross-sections, the position is still kept.
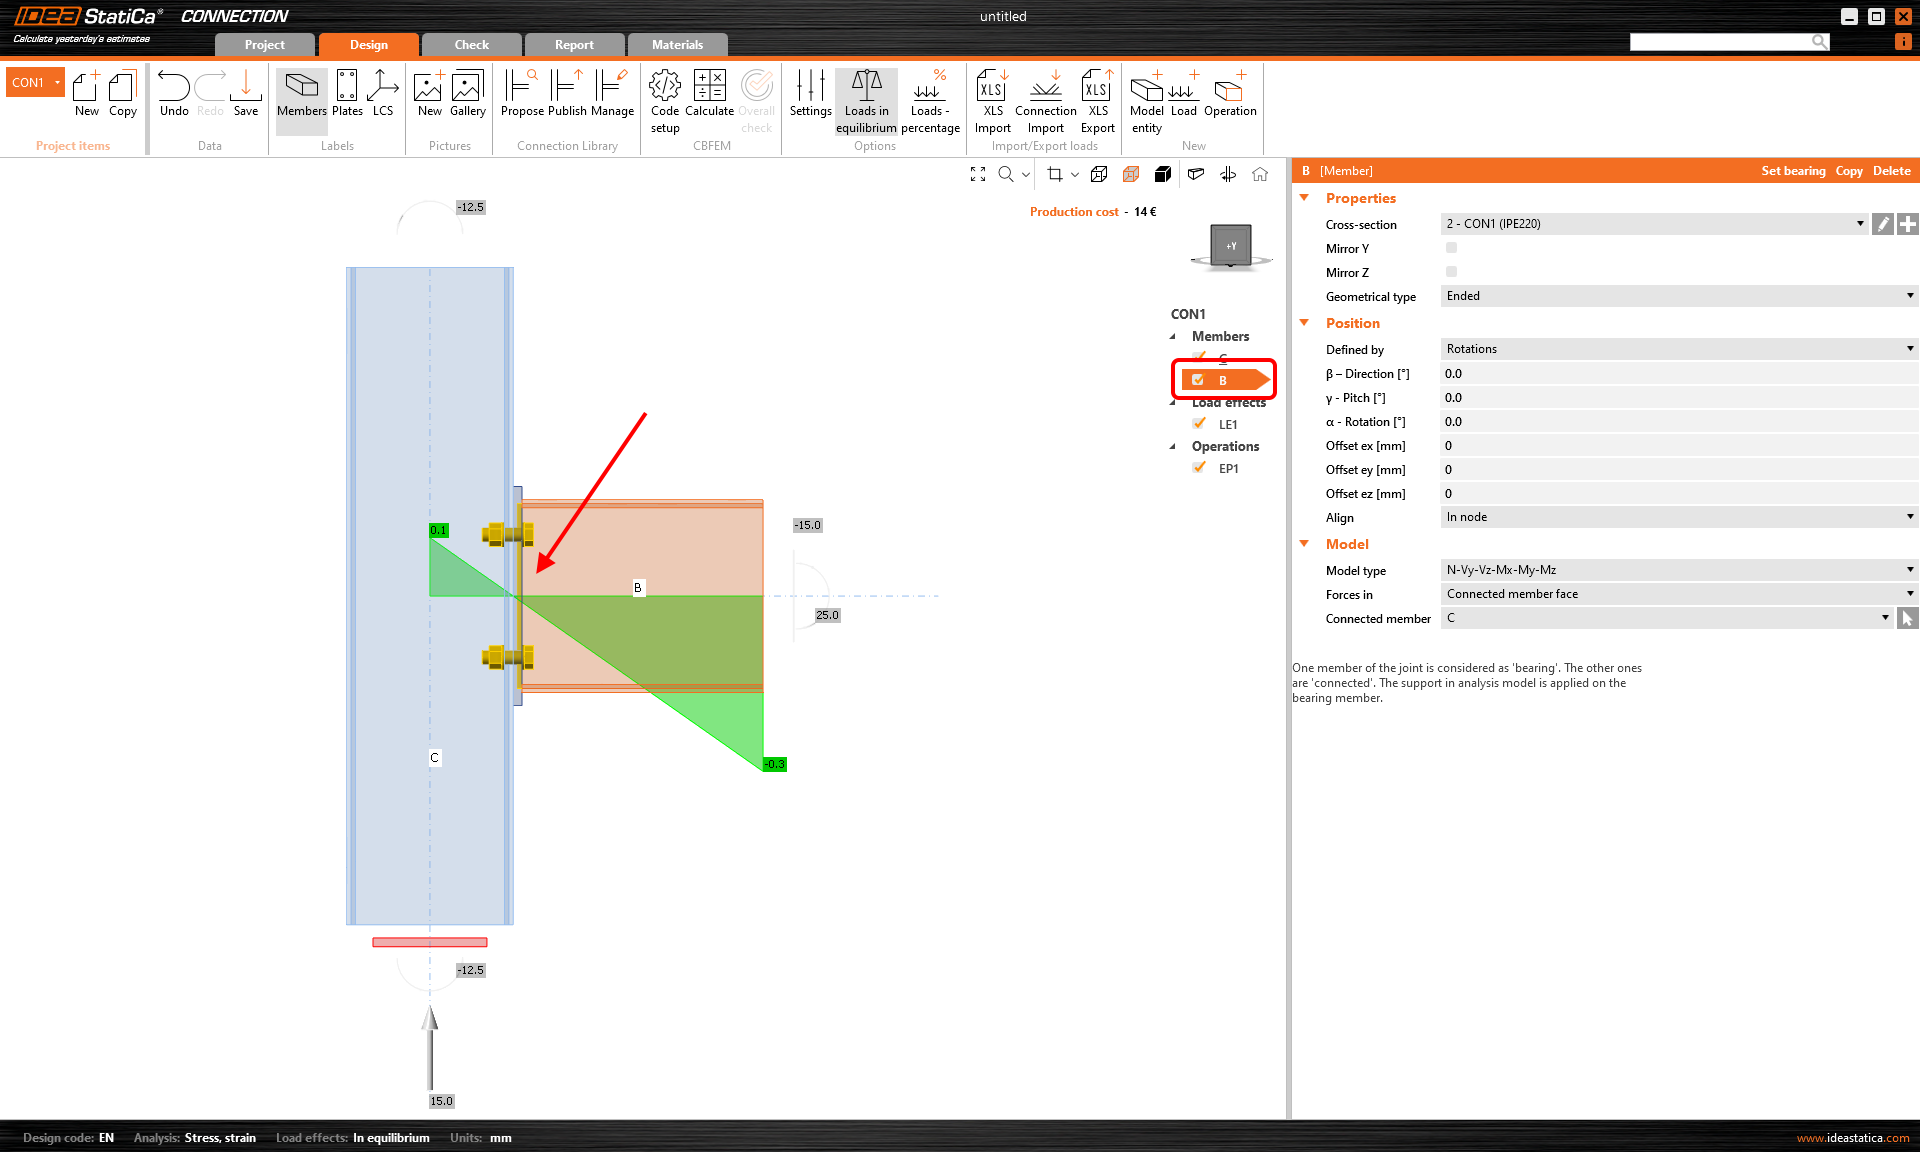
How does it work? Simply select the member for which you want to set the force position, and select the Connected member face option in the Forces in section under Model in the property tab. It is recommended to always select the connected member manually.
The method and position are also shown in the report.
A better way of shear force position visualization
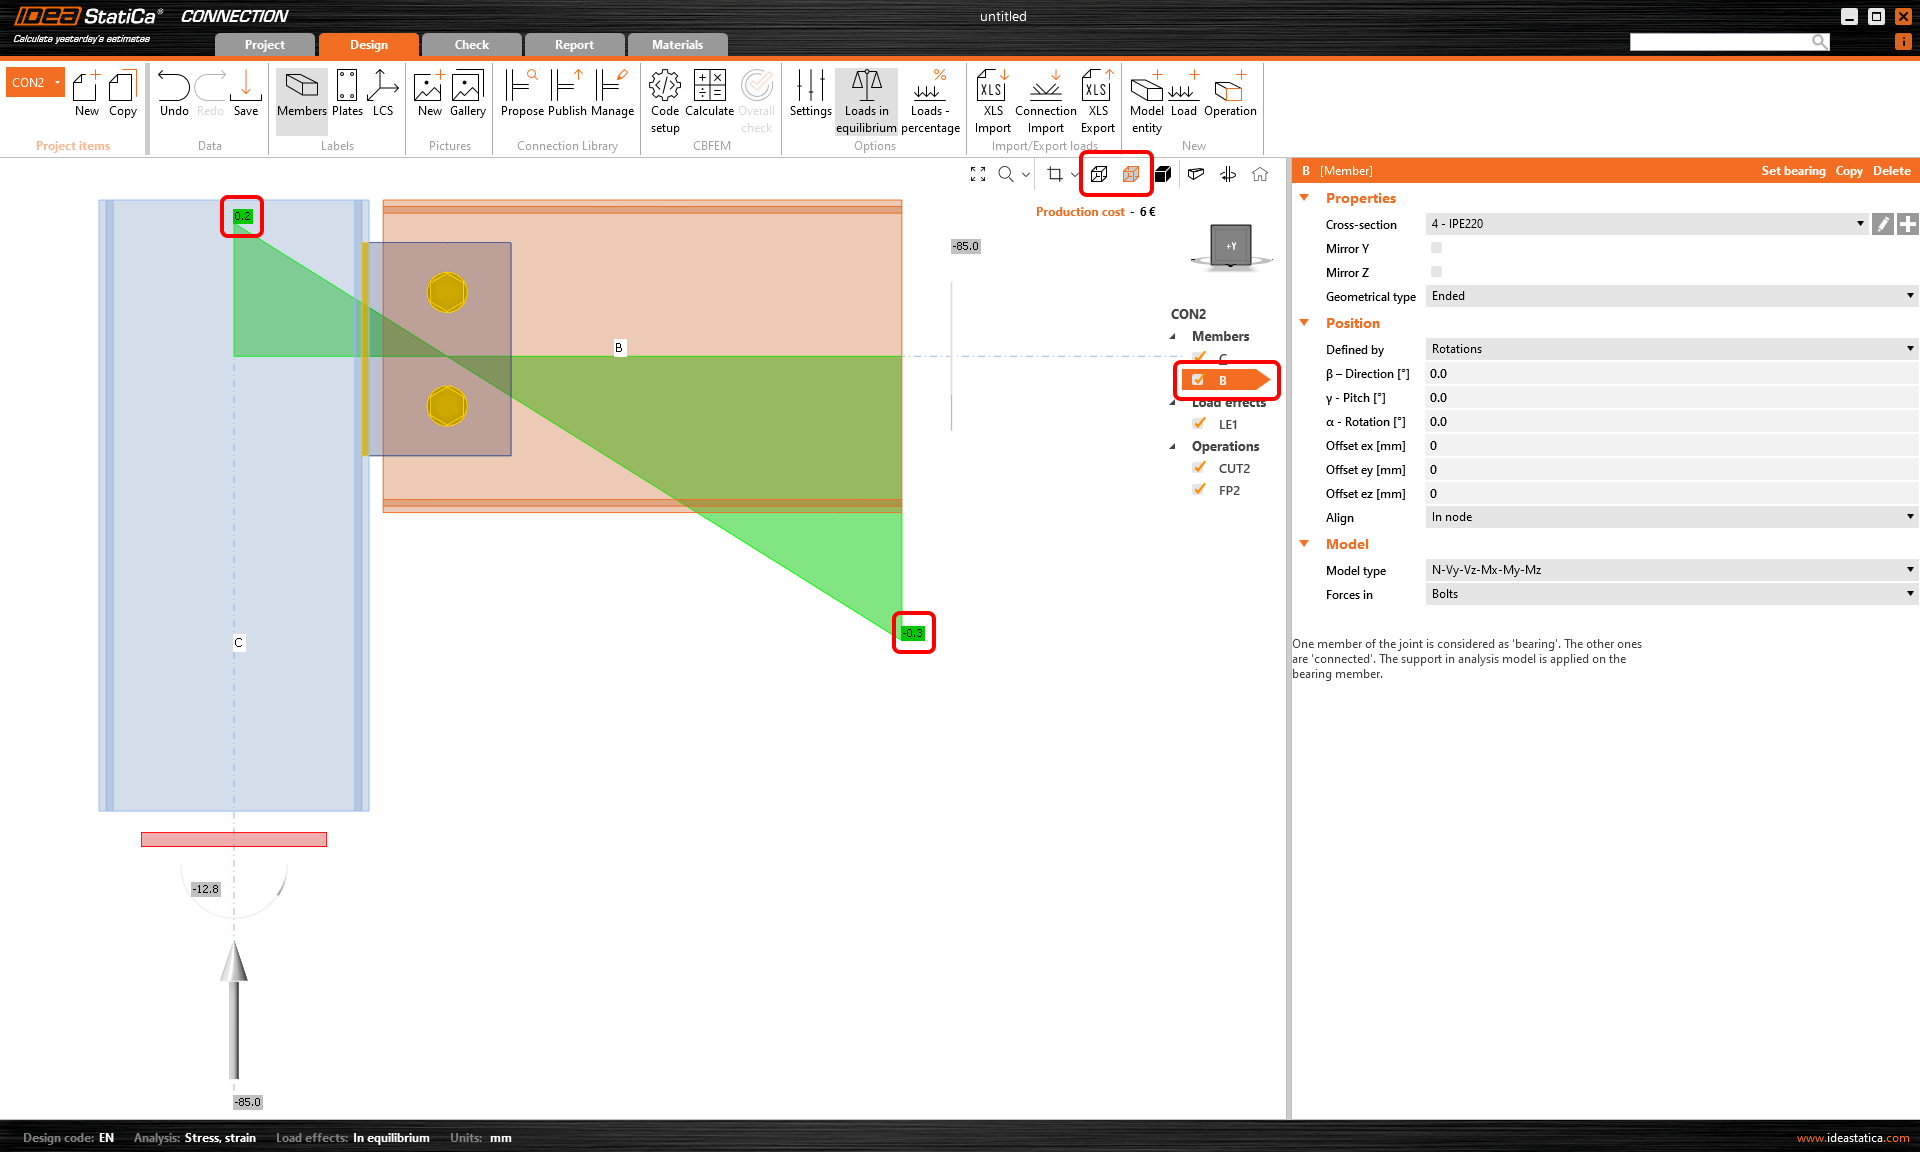
The Connection application now shows you the value of the bending moment from the unit shear force Vz=-1 for every modeled connection. The unit is according to the unit setting (e.g., Vz= -1 kN or -1 kip). The bending moment also respects the unit settings (e.g., kNm or kip-ft).
The diagram can be shown in Transparent or Wireframe visualization mode, i.e., select the member for which you want to see the diagram, and use one of these modes.
The real moment diagram using the load effects input is still shown in the Load effects section.
Available in IDEA StatiCa Steel and IDEA StatiCa Complete editions.


