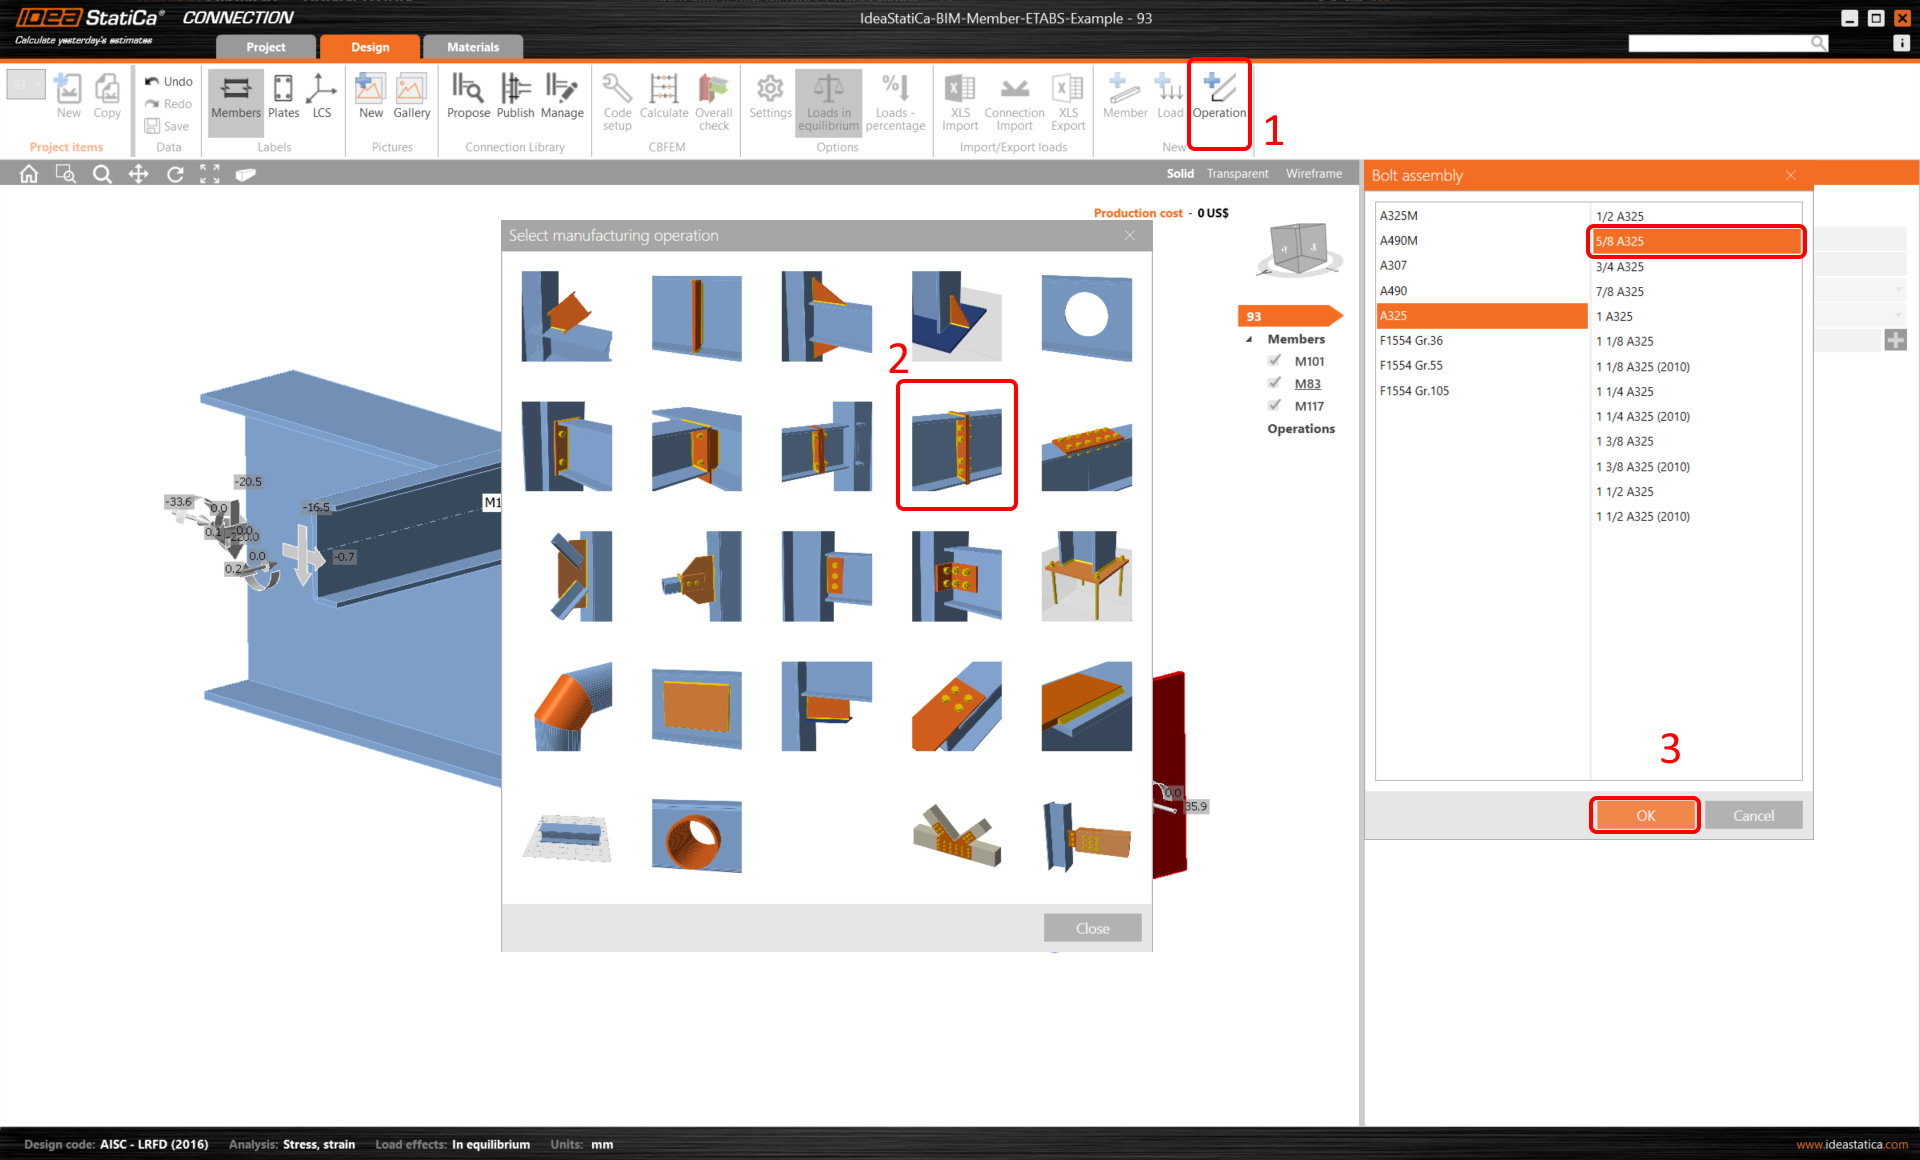
Click on Operation and select Plate to plate. Chose bolt A325 3/8 size.
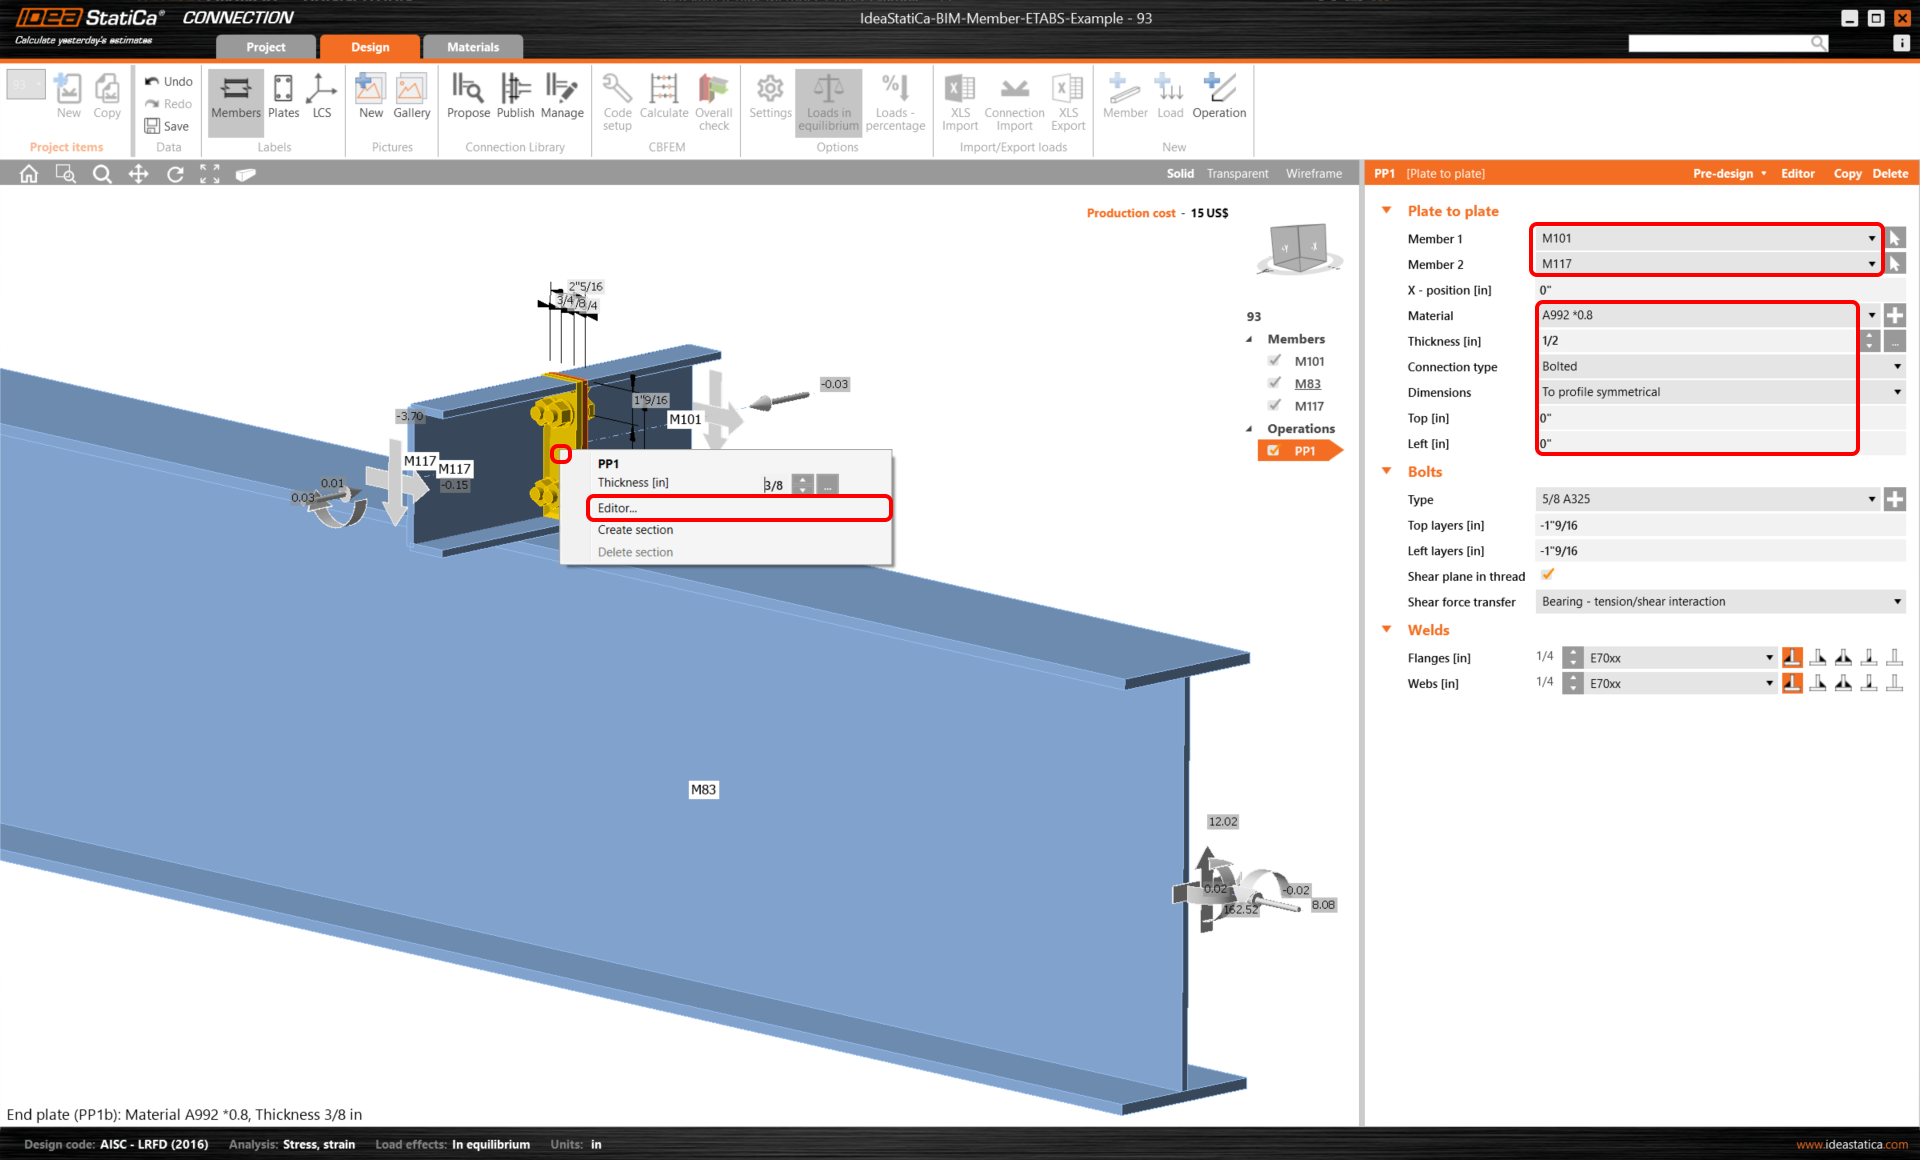
Change the values according to the following picture. Remember, according to AISC 360-16, use the material where the modulus of elasticity in tension/compression and shear is reduced by a factor of 0.8. After that, click on Editor.
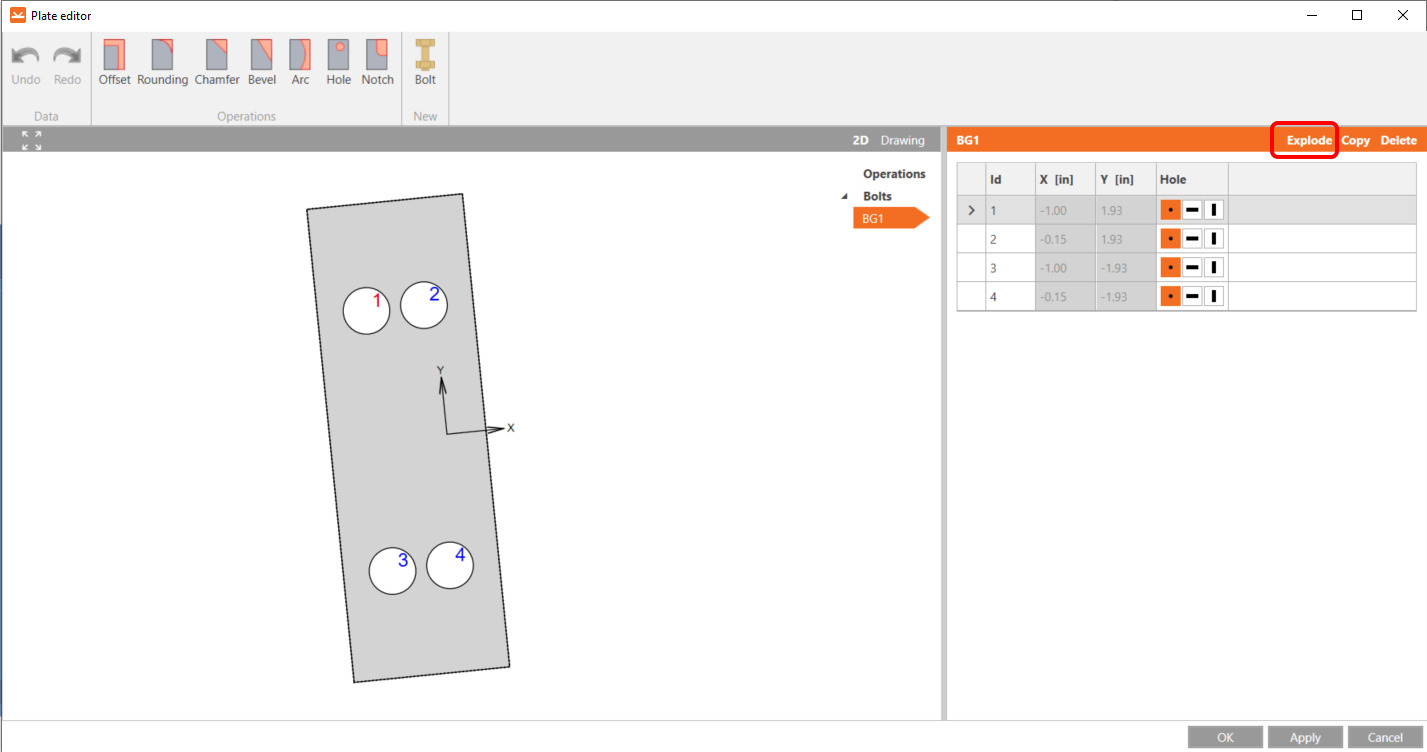
Click on Explode, delete the bolts Nr. 2 and 4, and click OK.
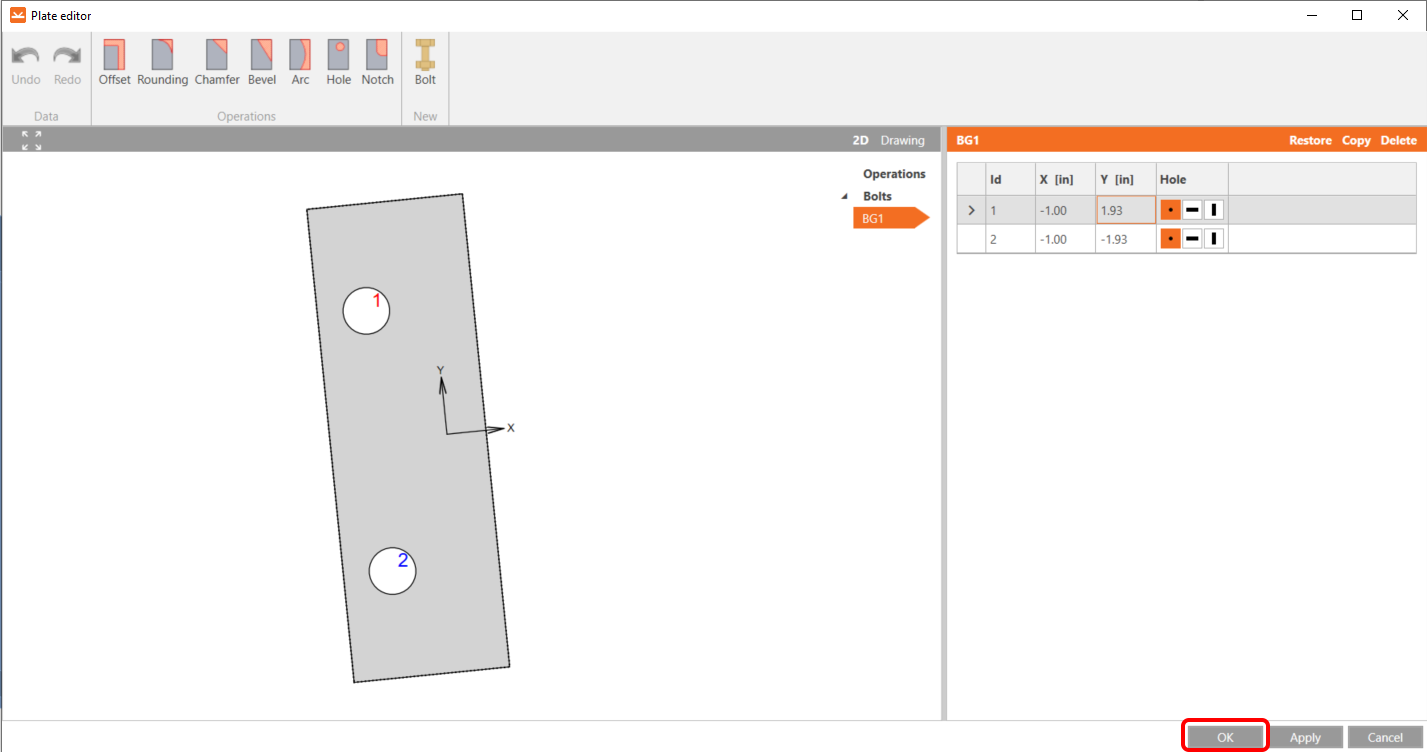
After you will make the changes, the element should look like this. Continue by clicking ok.
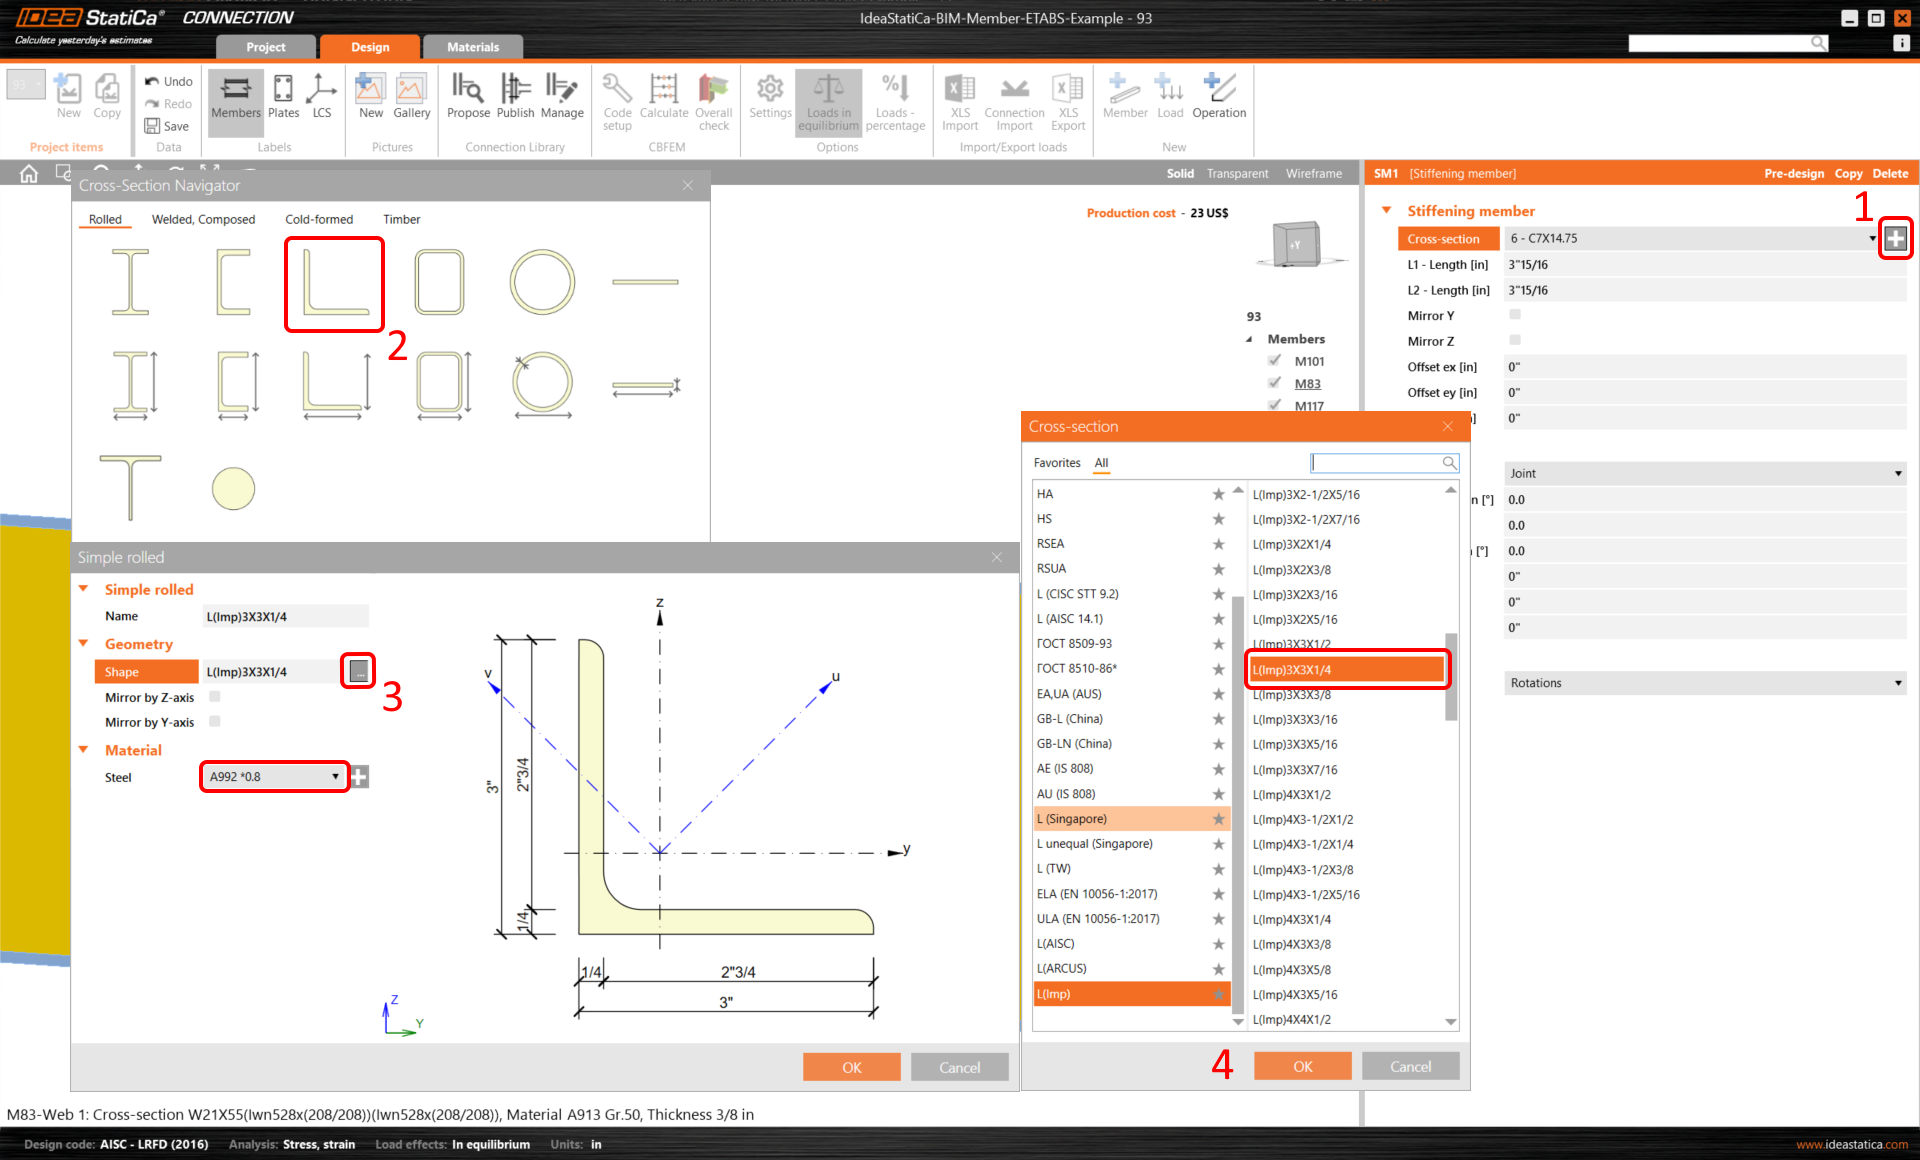
The next Operation is the Stiffening member, firstly add a new L-profile L(Imp)3x3x1/4 according to the following steps on the picture.
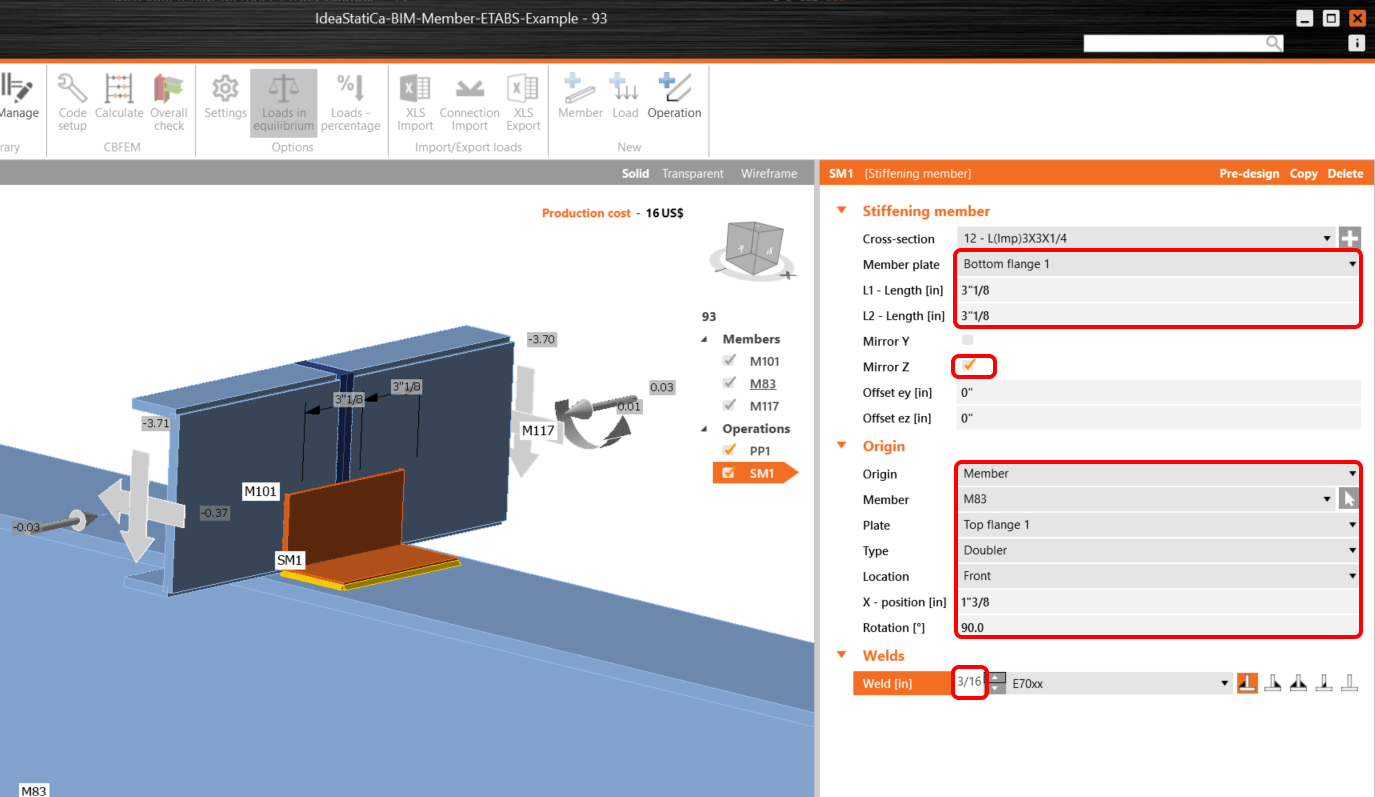
Then change the values according to the following instructions, the stiffening member should be positioned as shown.
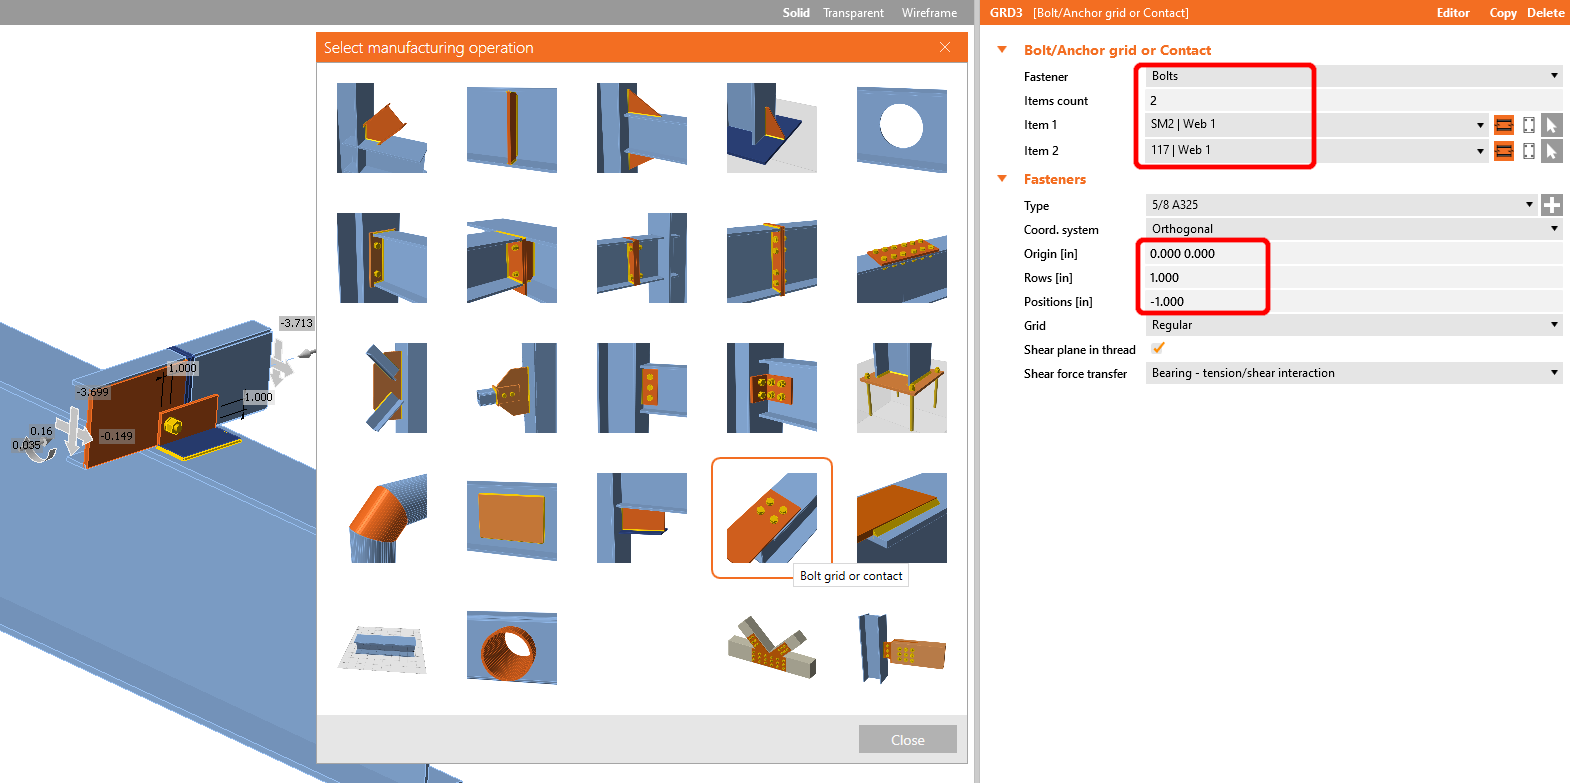
Add the operation Bolt/Anchor grid with the following values.
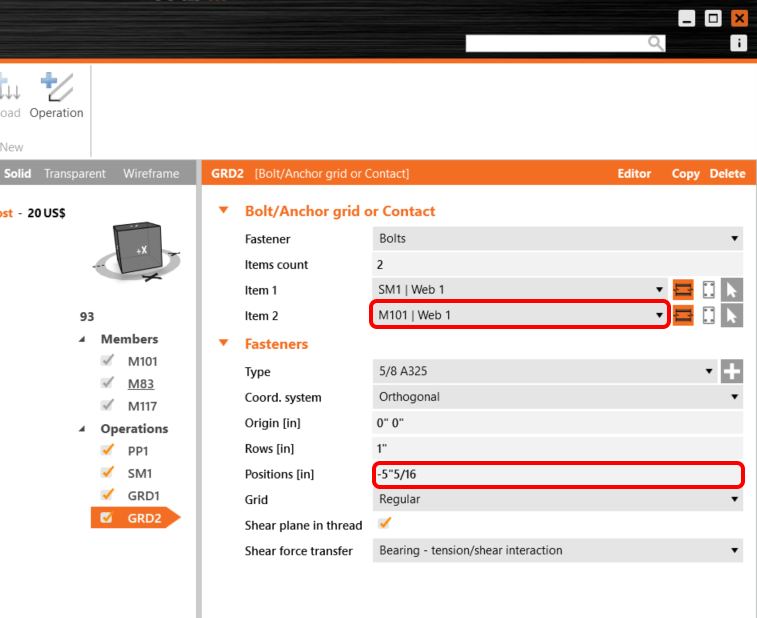
Copy the GRD1 operation and change the selected values, as shown in the picture.
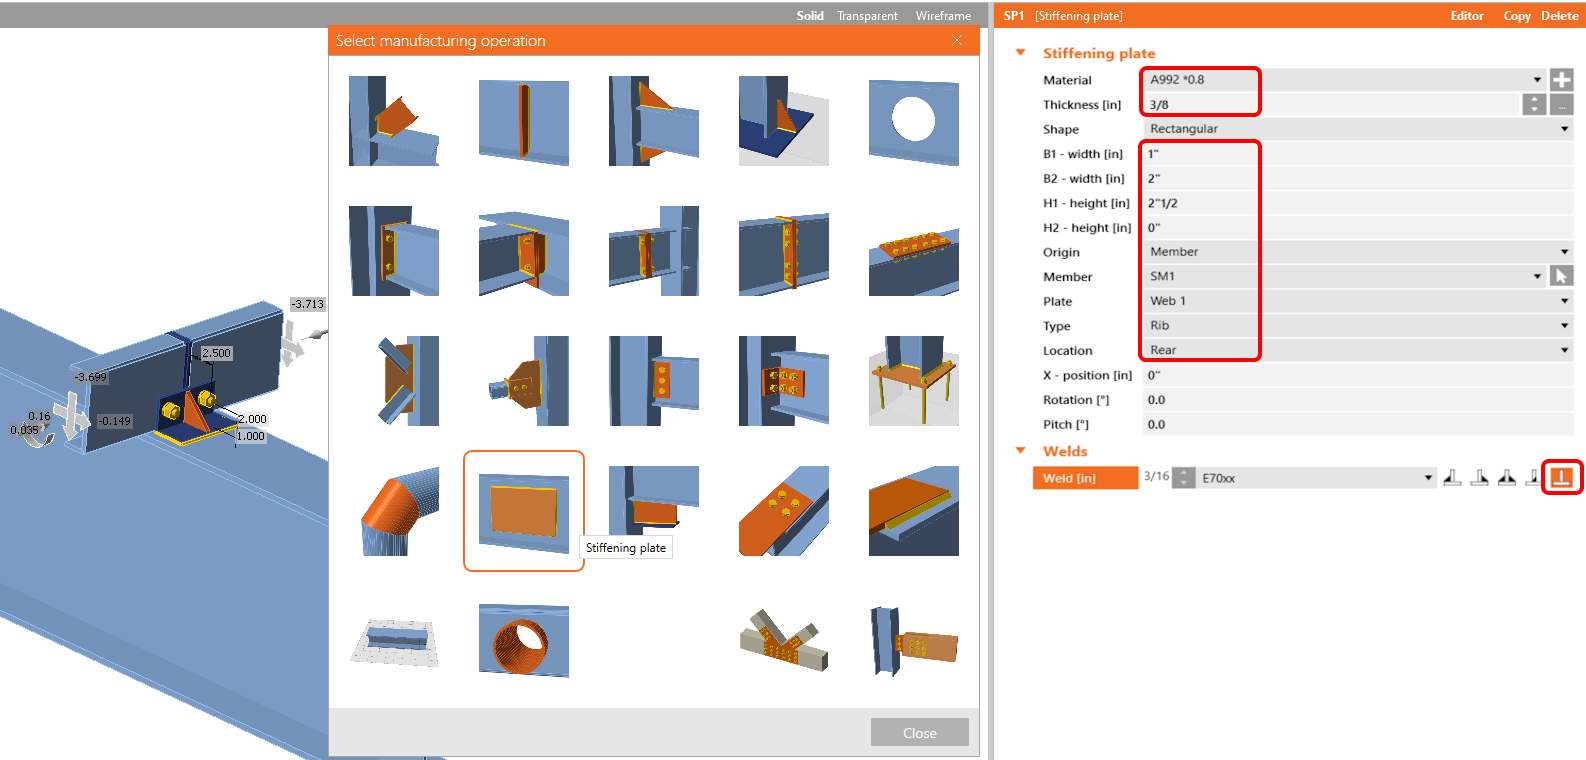
Now add a Stiffening plate to the joint with the following values.
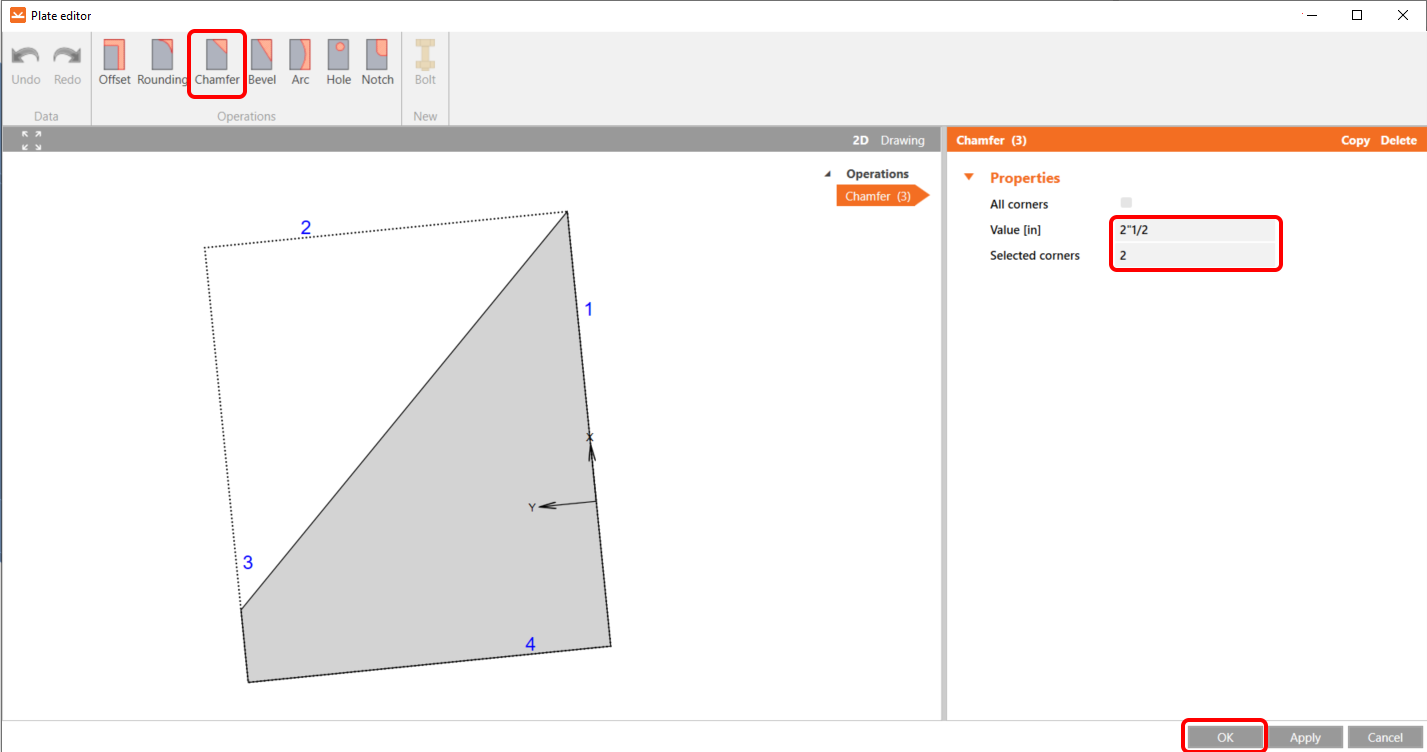
After that, In the Editor, make changes using the chamfer operation, and set it up according to the image.
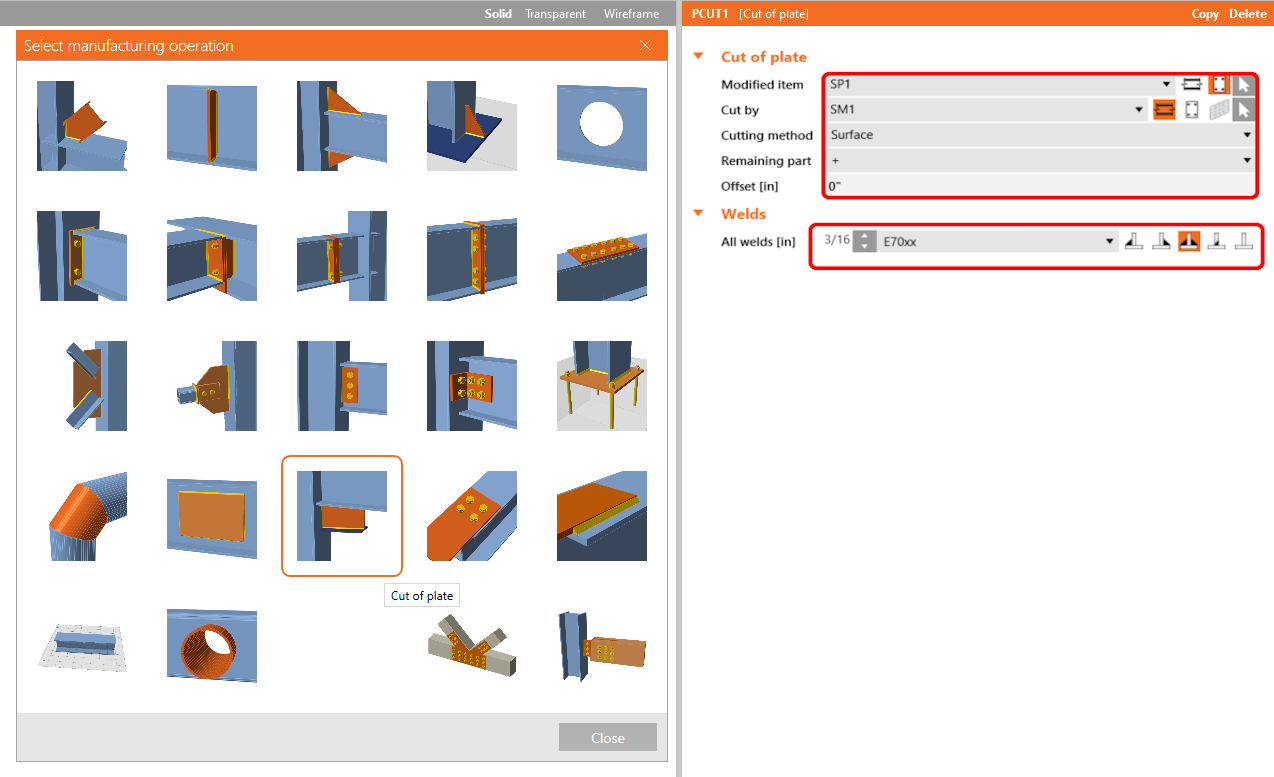
The last operation is the Cut of plate operation, using which we will connect our stiffening plate to the stiffening member by welds.
Now click on Save and close the module Connection.
