Tekla Structures BIM link for connection design (EN)
How to activate the link
- Download and install the latest version of IDEA StatiCa
- Make sure that you are using a supported version of your FEA/BIM solution
IDEA StatiCa integrates BIM links into your FEA/BIM solutions during its installation. You can check the status and activate more BIM links for software installed after in the BIM link installer.
Please note that some FEA solutions require additional steps to fully activate their BIM link to IDEA StatiCa.
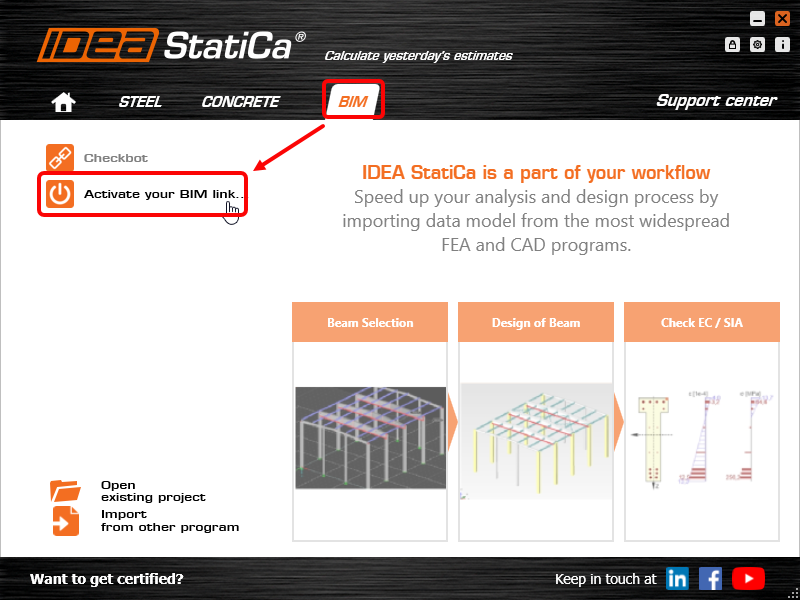
Open IDEA StatiCa and navigate to the BIM tab and open the BIM link installer (Activate your BIM link...).
A notification "Do you want to allow this app to make changes to your device?" may appear, if so, please confirm with the Yes button.
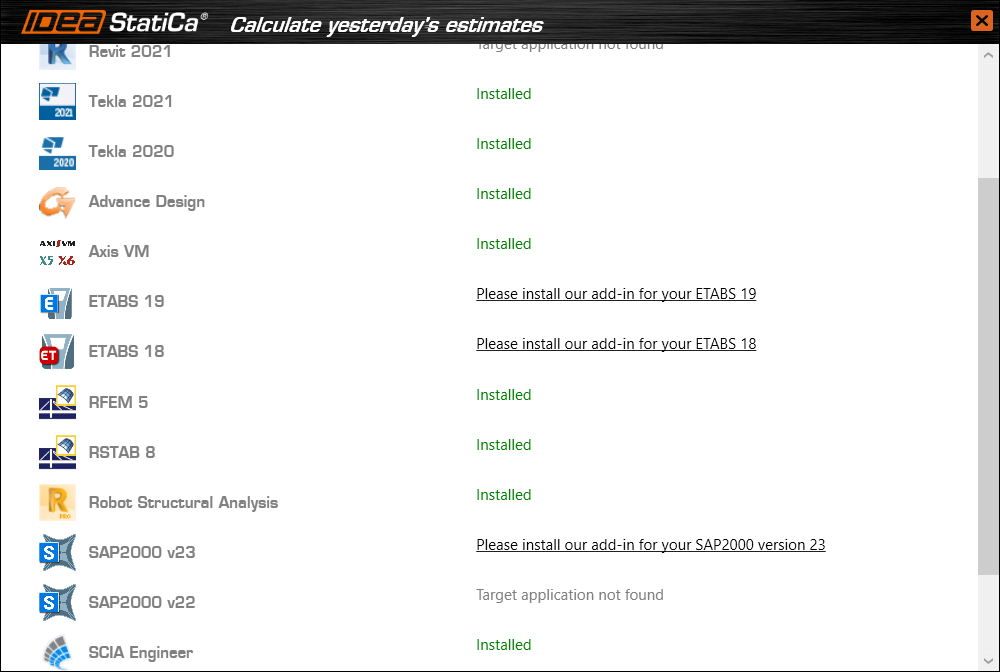
The BIM link for the selected software (if found) is installed. The screen also tells you the status of other BIM links that may have already been installed.
Download the attached project and open it in Tekla Structures.
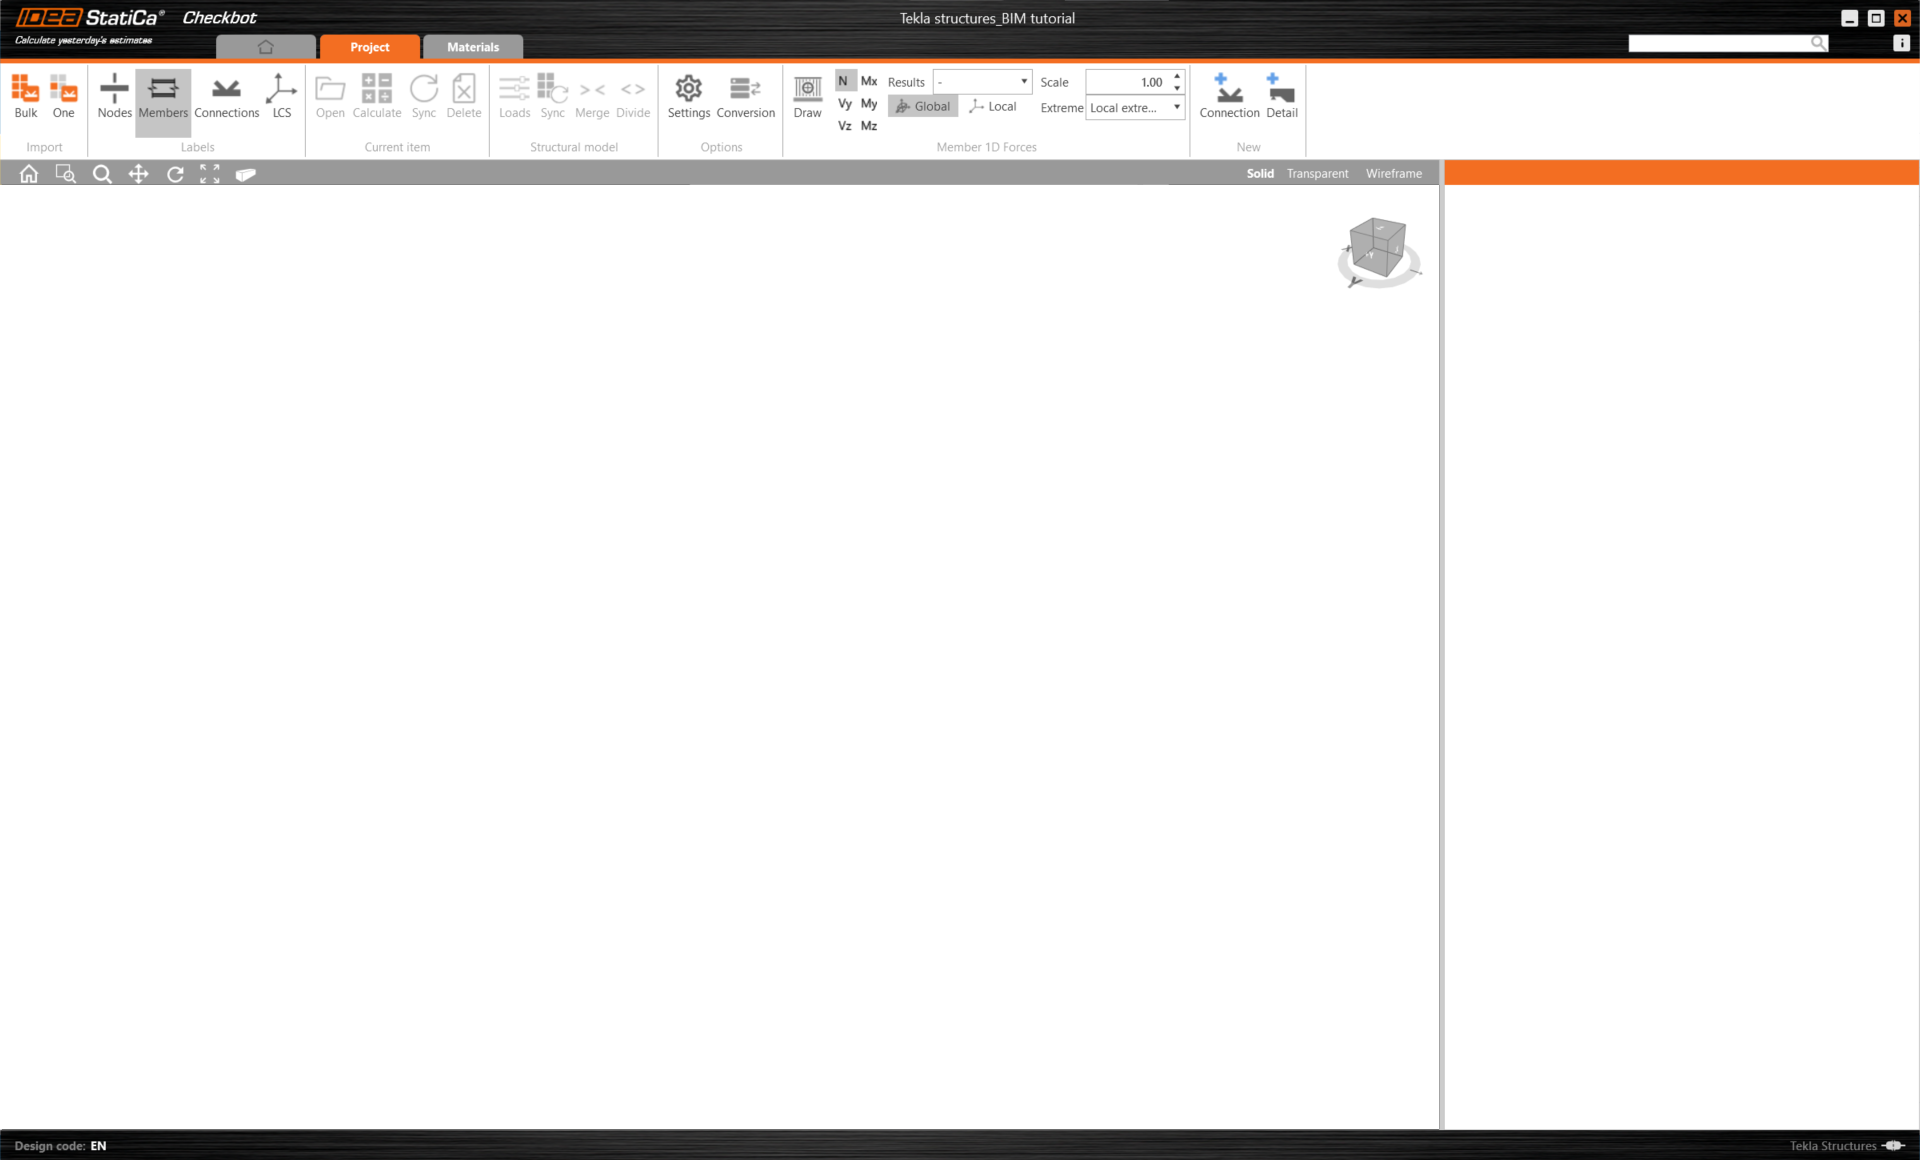
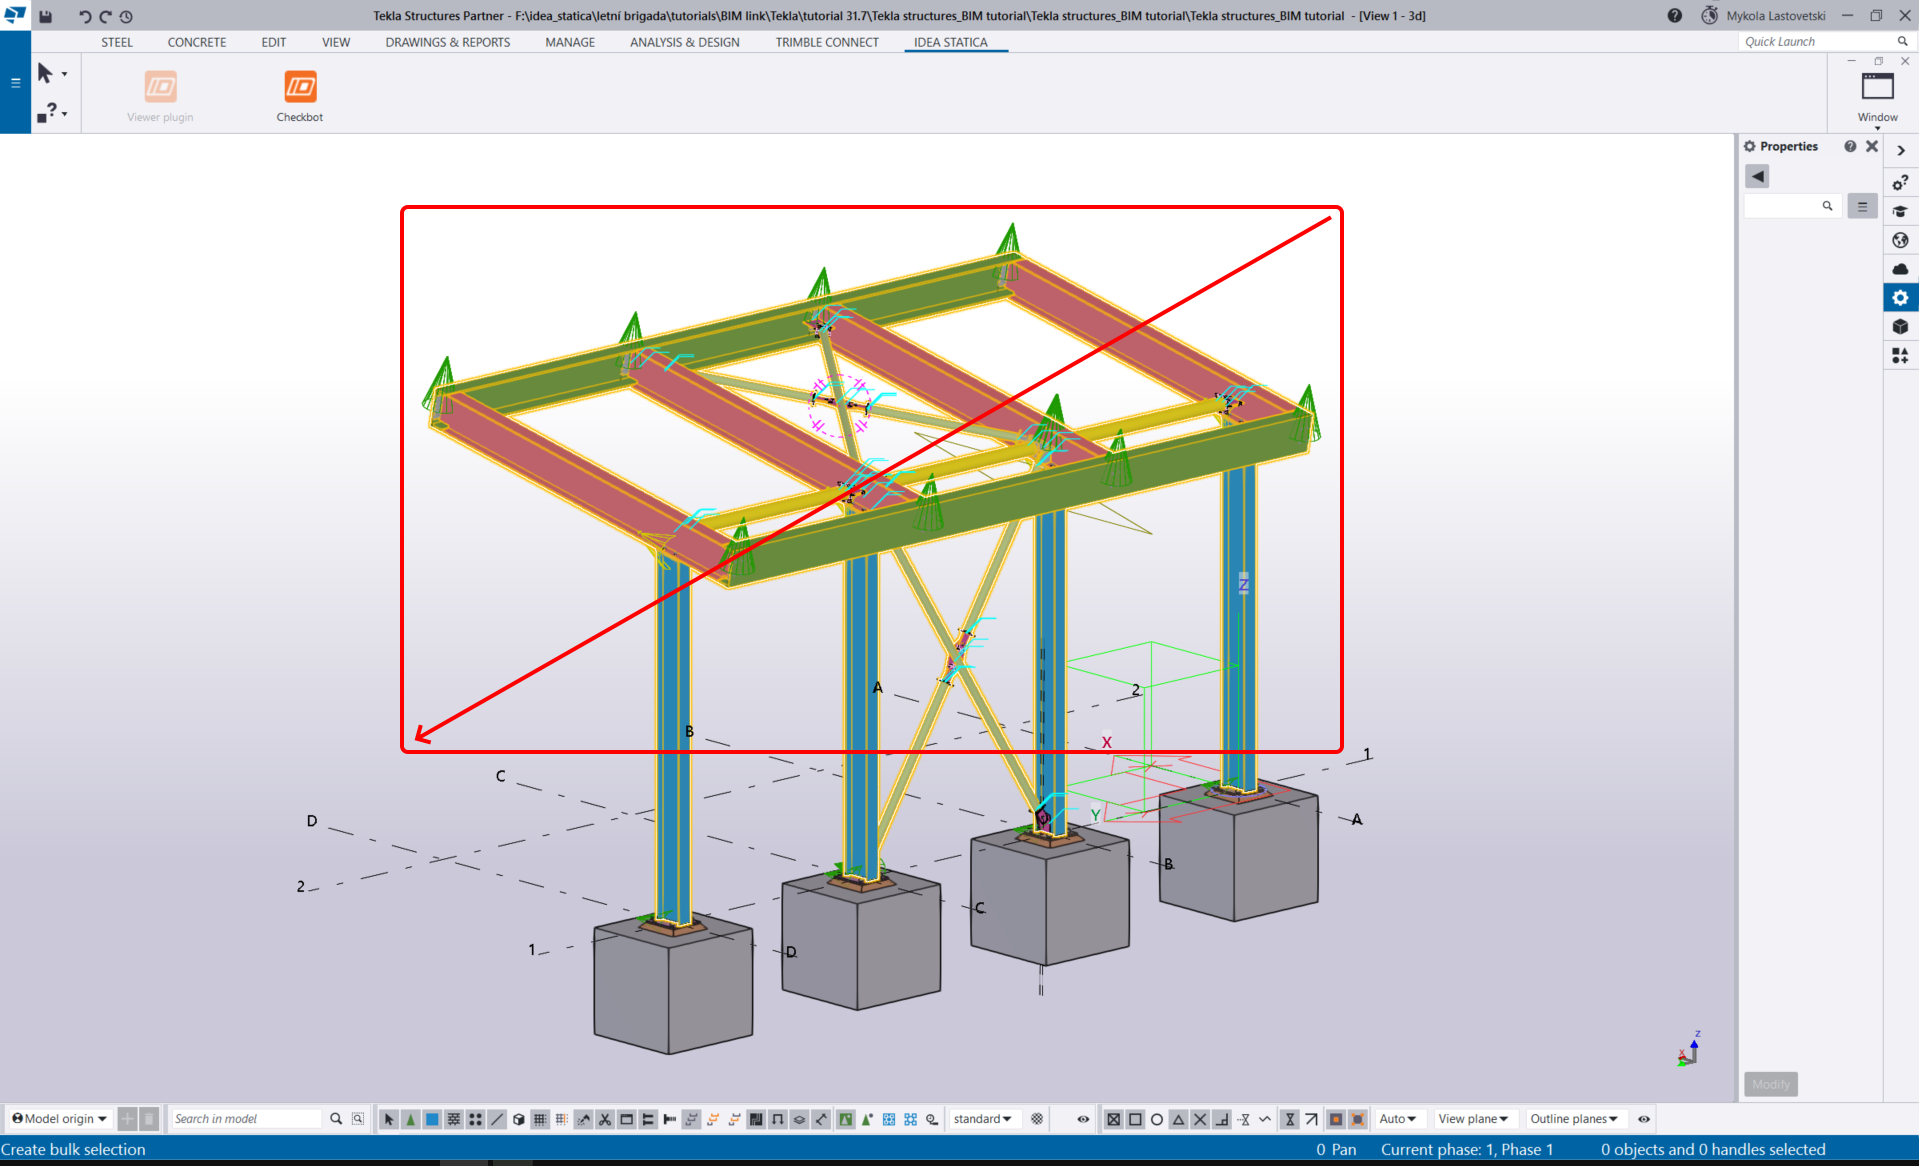
The BIM link is automatically integrated. You can find it in the top ribbon under IDEA StatiCa -> Checkbot. This will open the Checkbot application.
Select the New option with project type Steel and design code EN. Then select Create project.
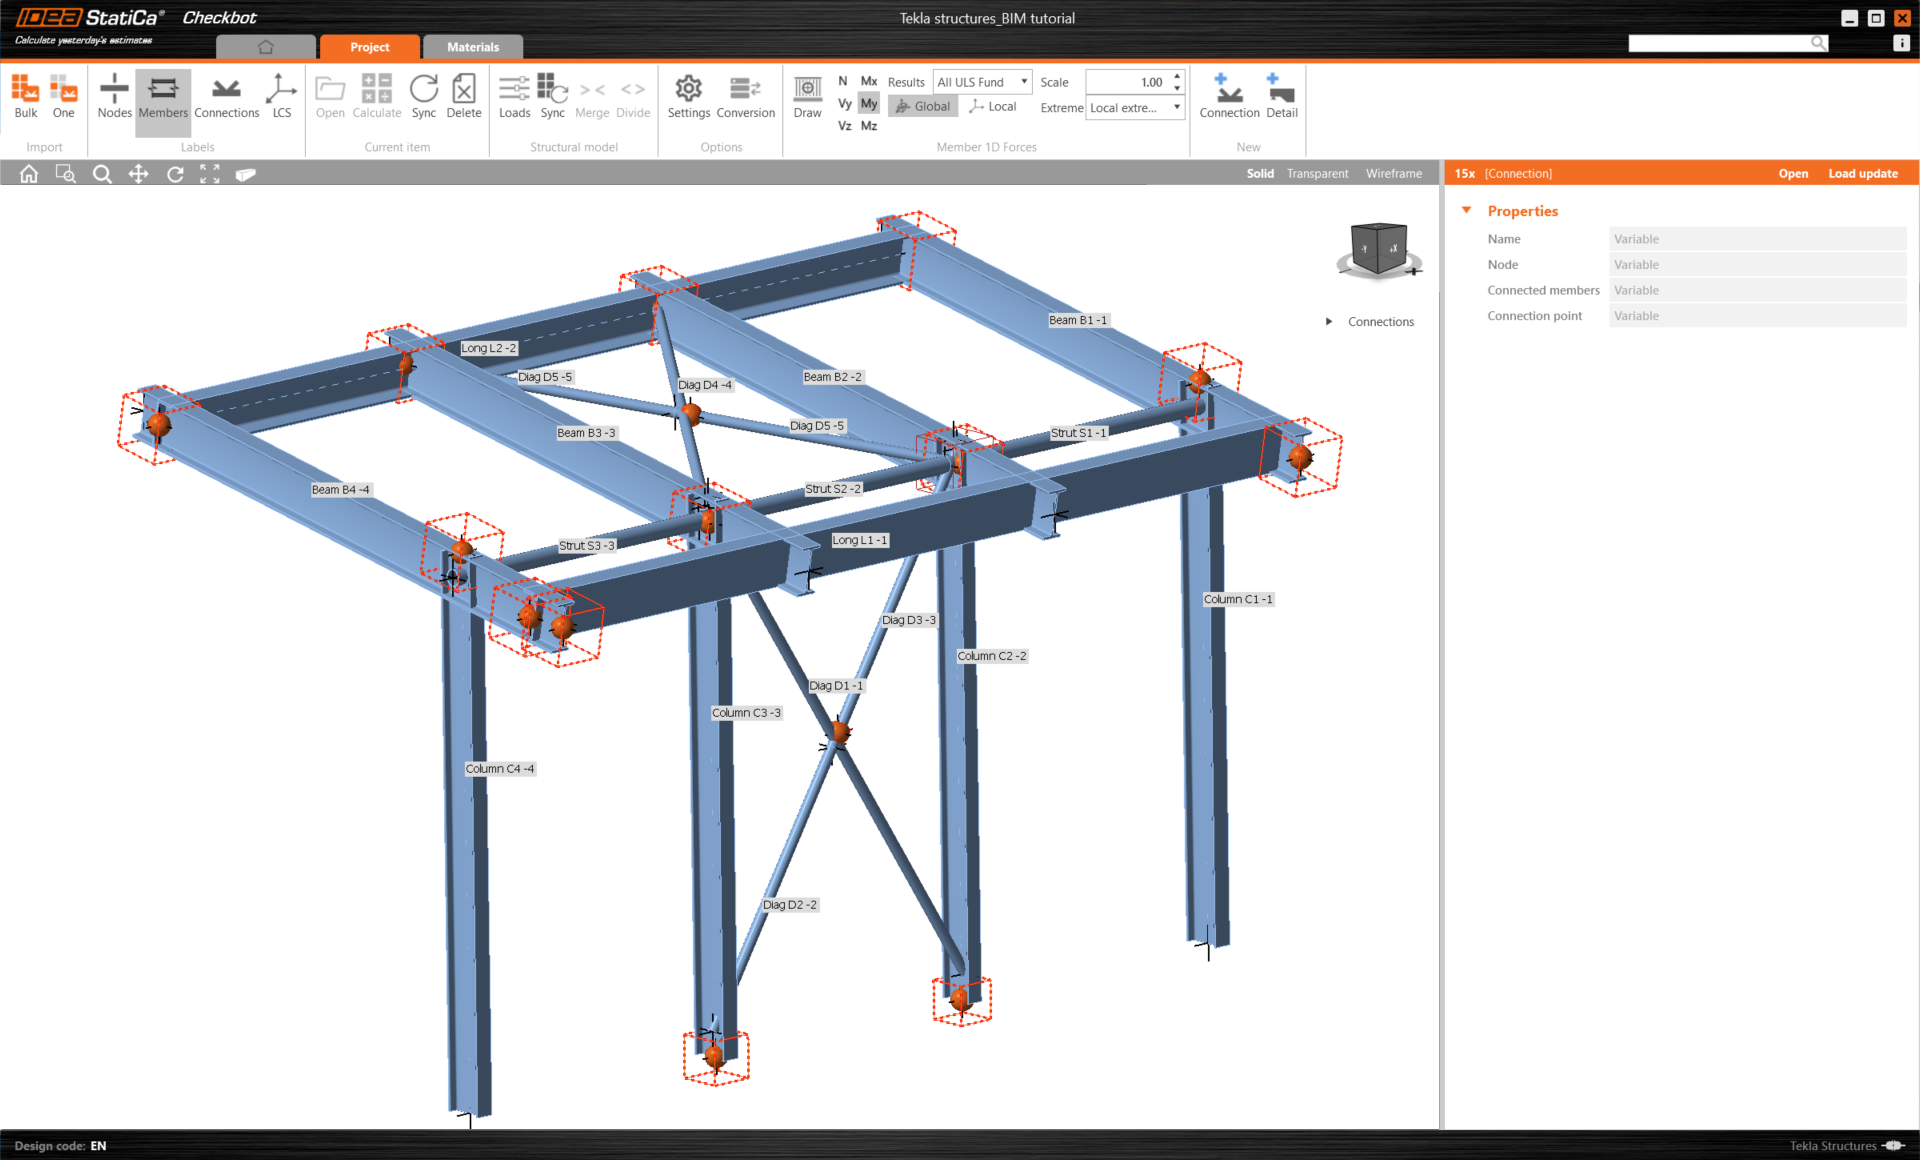
The new Checkbot project is ready to import connections from Tekla Structures.
Import
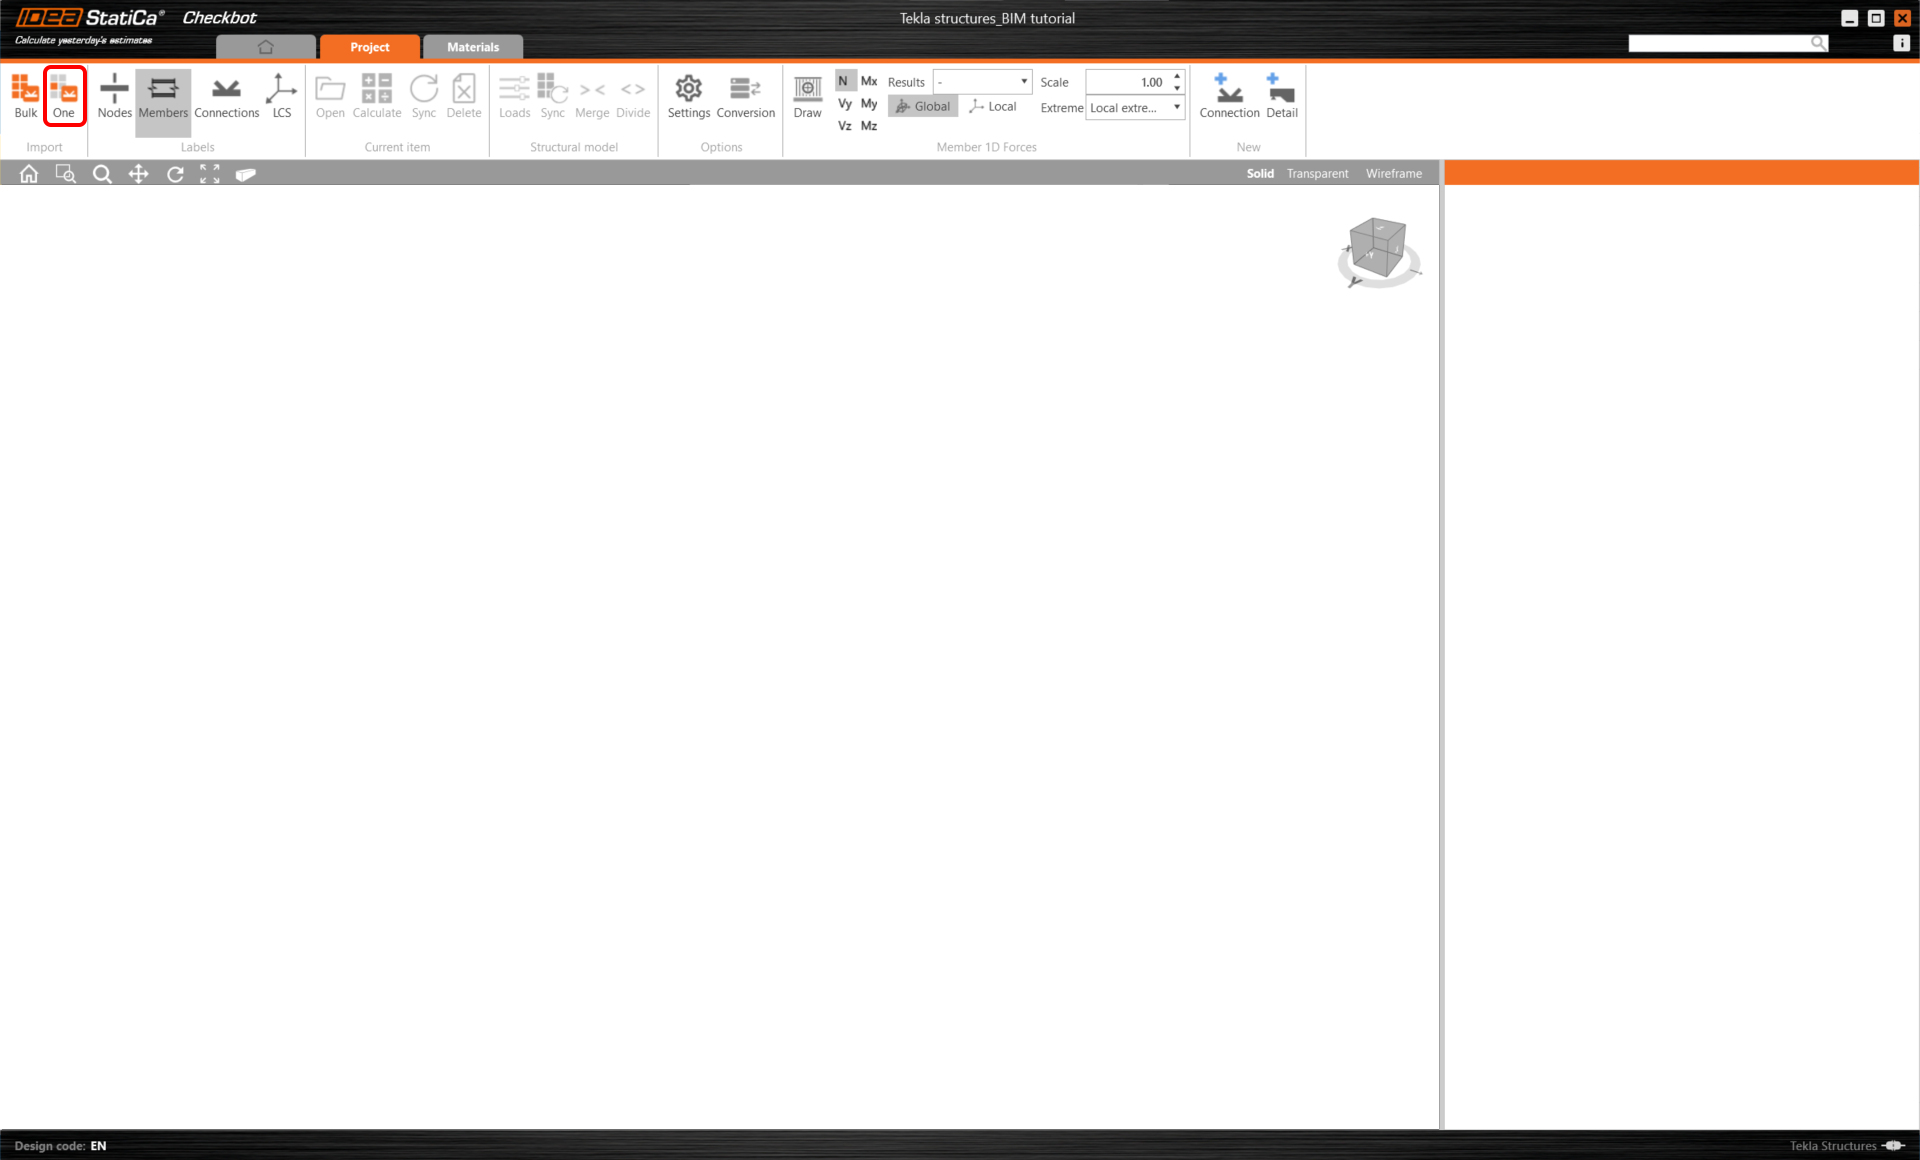
In the Checkbot application, click on the One button in the top ribbon.
Then in the Tekla structures model, follow these steps:
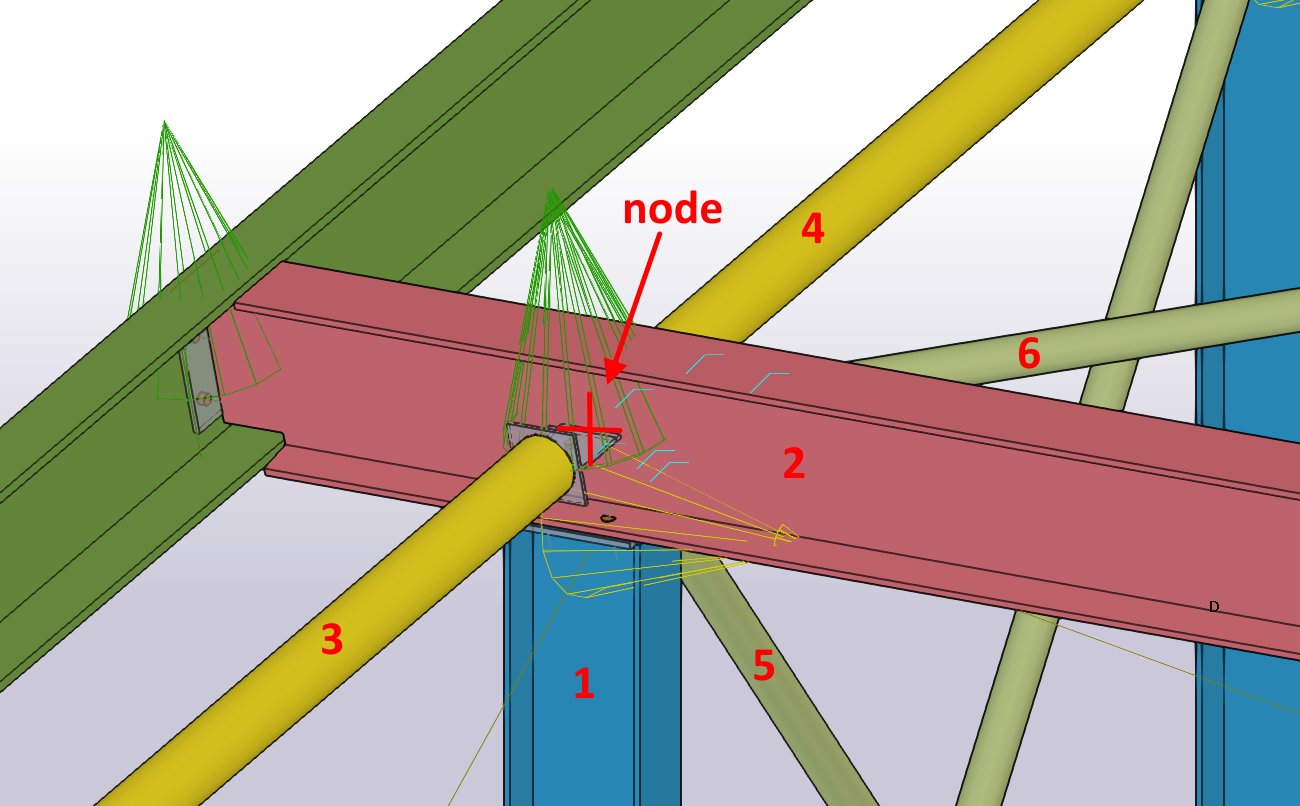
- Select the node position representing the center of the connection.
- Select the members related to the joint. In this case, it was selected in the order of construction sequence - the first one will be set as the bearing member in the Connection app. Confirm with the spacebar.
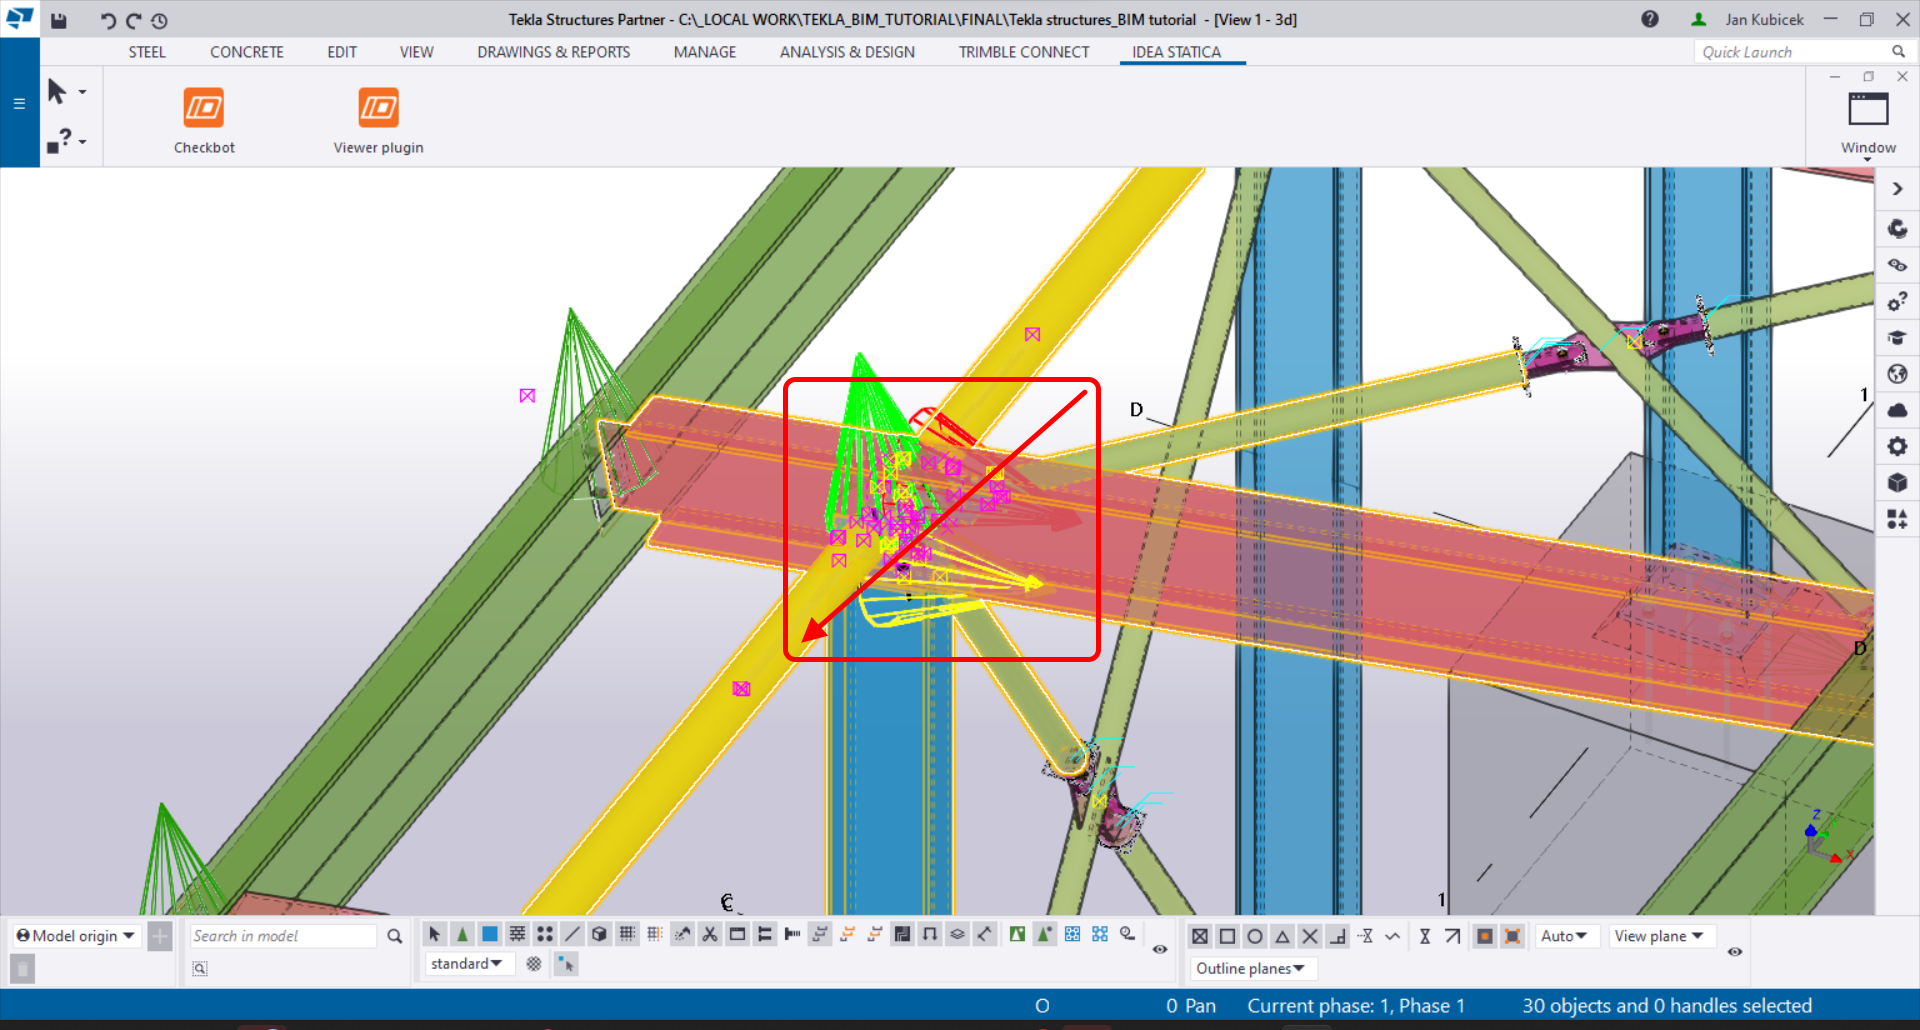
- Then select all the connection components (bolts, welds, plates, etc.) by dragging the mouse from the right-top to the left-bottom corner and confirm with the spacebar.
This will import all of the selected parts of the structure into Checkbot - with the same coordinates, orientations, and section sizes as per the BIM model. The joint center is specified by you according to the members' intersection.
A notification "Do you want to import also recommended welds?" may appear. Since we have all welds created in the BIM model, select the No button.
Note that the 3D workspace is designed to show an overview of the imported structure and not a detailed view of the actual connections.
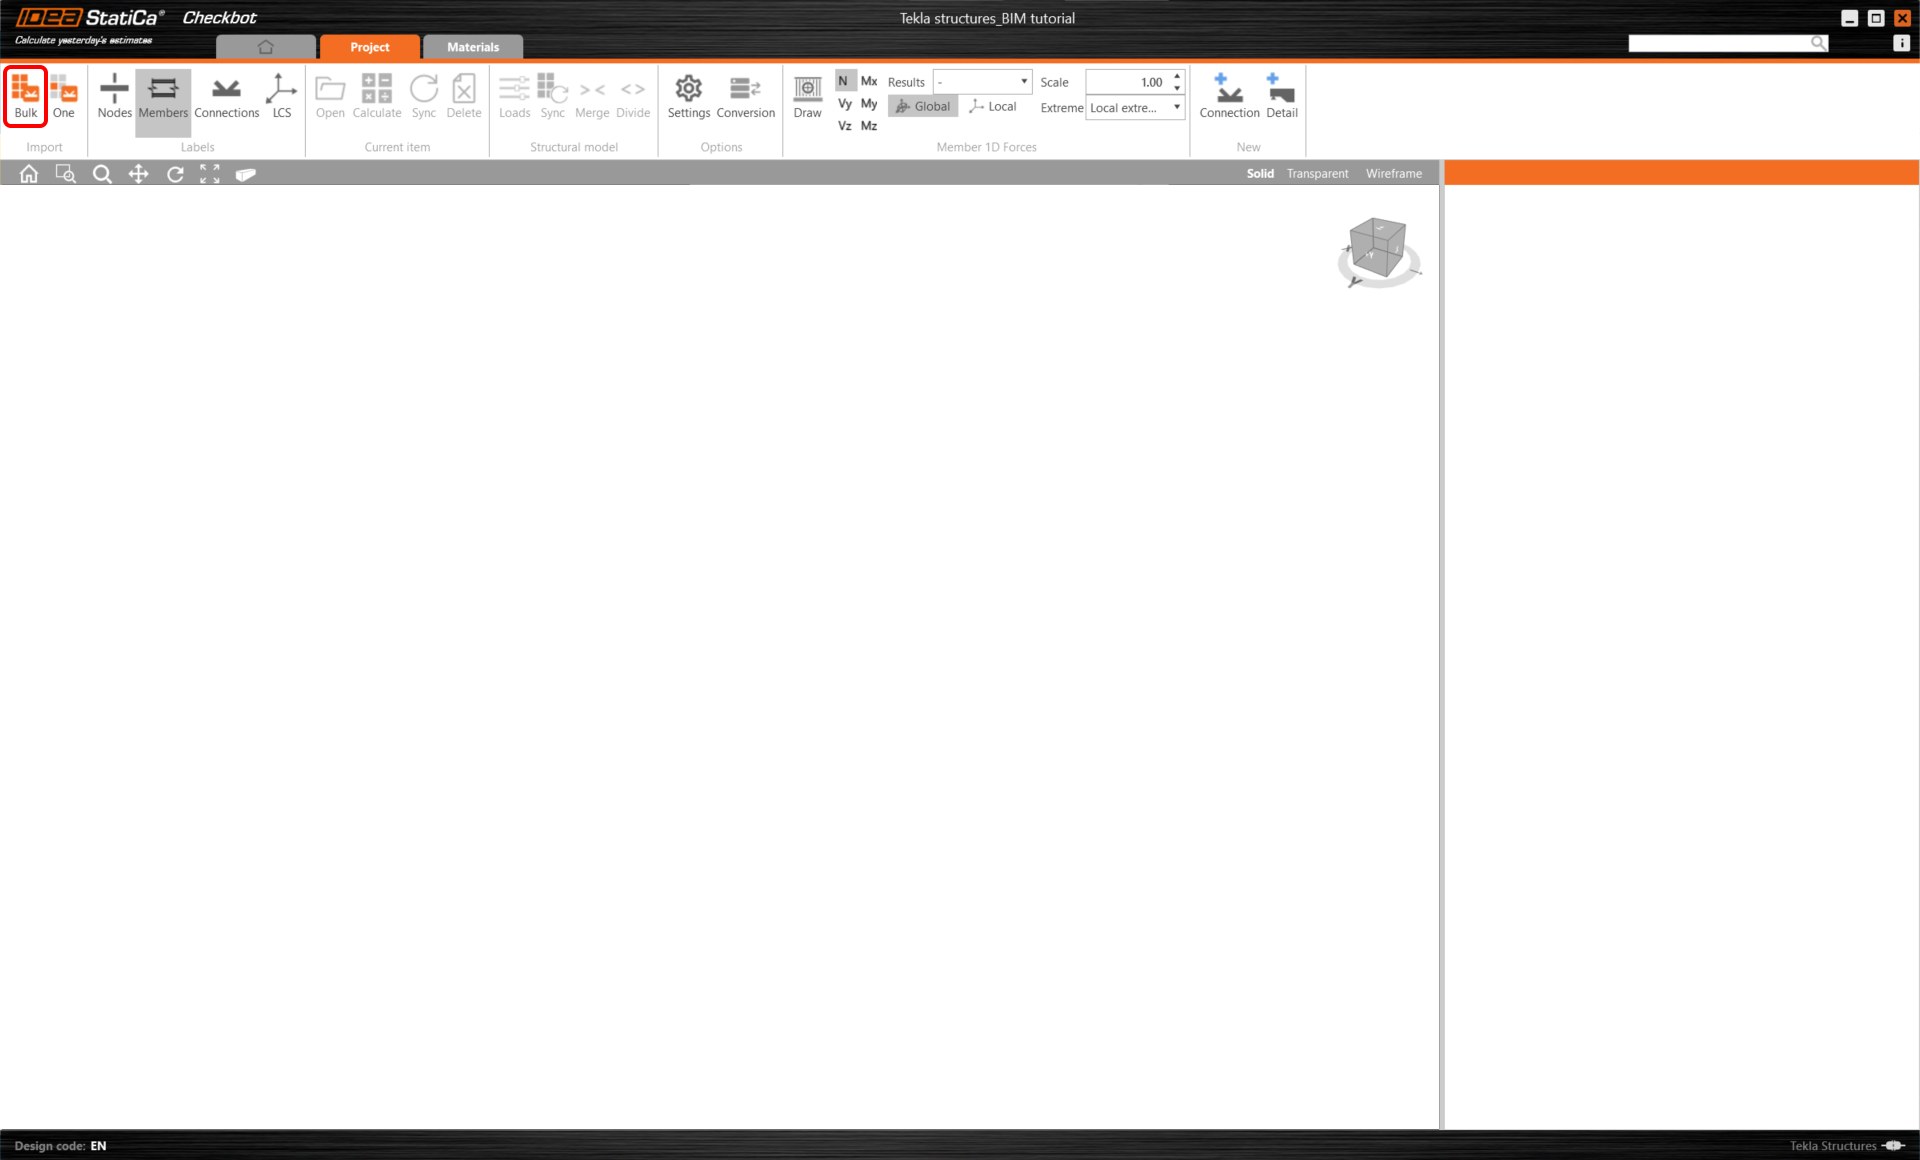
Another option is to do the Bulk import. It is faster, but note that the node and member numbering might be different, which would affect the correct XLS import of the load effects and the equilibrium in the joint.
Select the inside columns with bracing, making sure you also select all of the connection components (bolts, welds, plates, etc.). Lead the selection area from the right-top to the left-bottom corner.
After selecting all the connection parts, confirm the selection with the spacebar. The joint center is created automatically by the software according to the member's intersection.
For several FEA/BIM solutions, you can also import multiple connections into Checkbot. Instead of selecting one node and the connected members, you can select several nodes and members at once using the selection methods within the application.
Due to possible time consumption, we recommend not importing all of the connections at the same time but building up the connections incrementally.
Geometry
The settings of members are taken from the Tekla Structures. You can, however, change the section profile and axis eccentricity of any member in the right part of Checkbot screen but this will break the link with the BIM application in this session unless it's synchronized again.
In the list of project items under Connections and with a connection highlighted in Checkbot you can either right-mouse click and select Open or click the ribbon command Open to start designing, code-checking, and reporting.
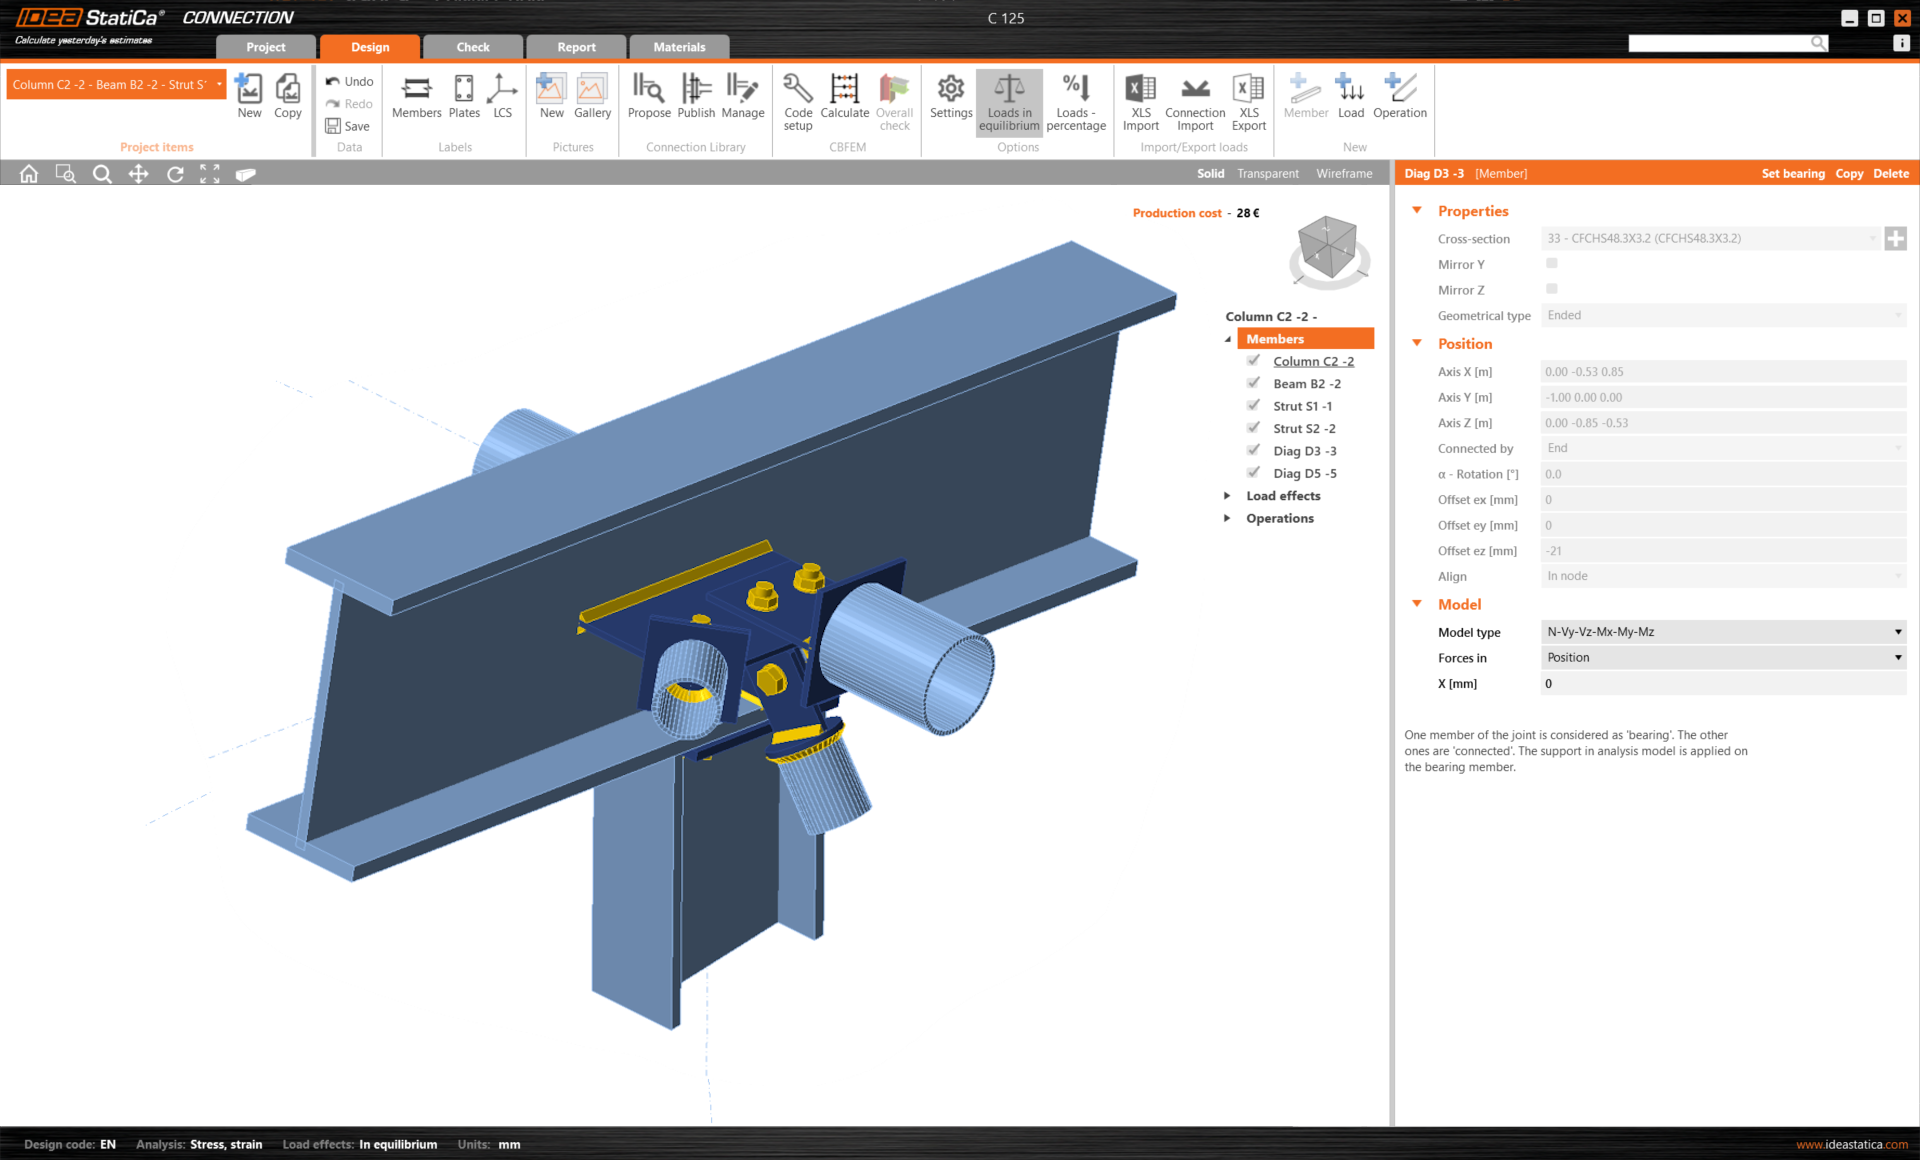
The imported connection is opened in the IDEA StatiCa Connection application.
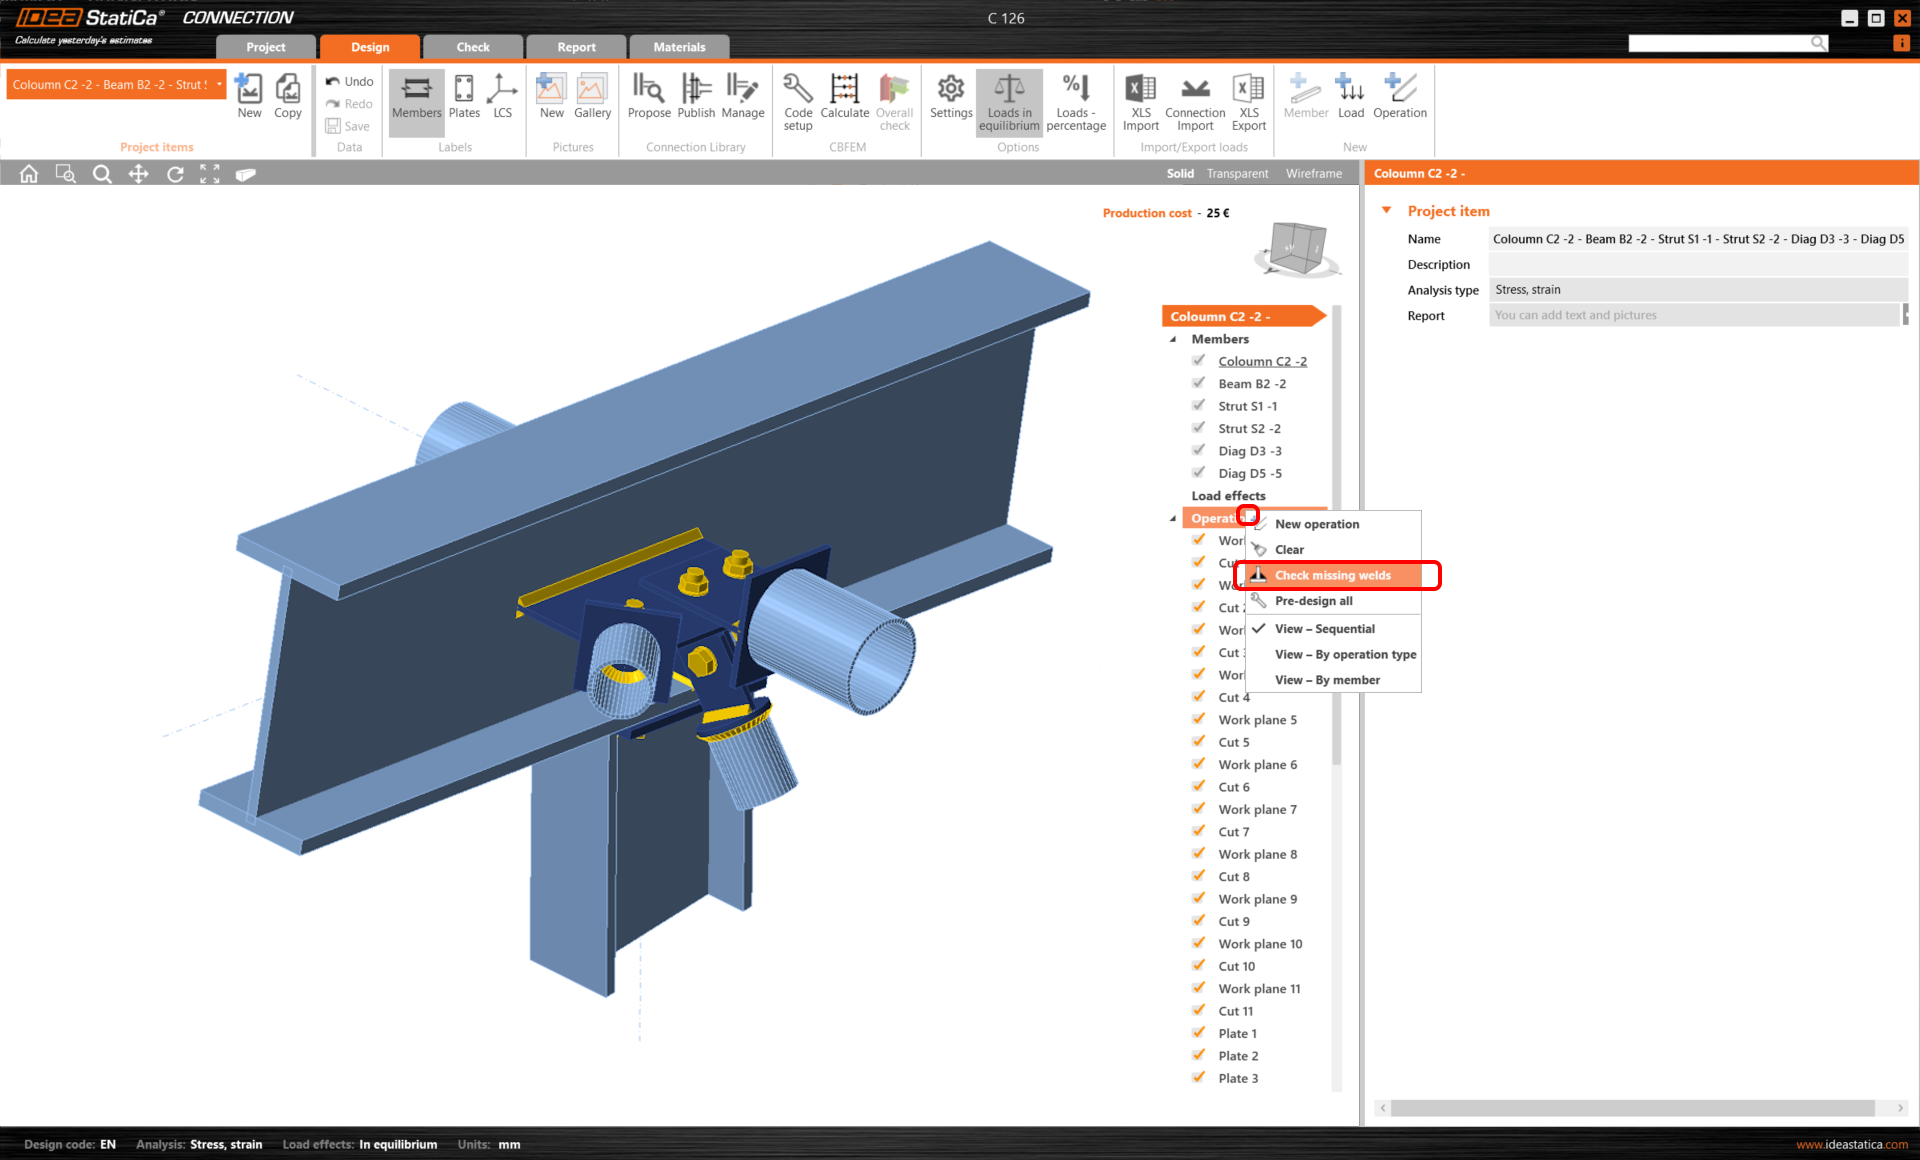
Currently, we've noticed that there are some missing welds in the model, but worry not, as this can be rectified using the 'Check missing welds' function.
Check all the boxes as shown in the following picture, and click OK.
Load effects
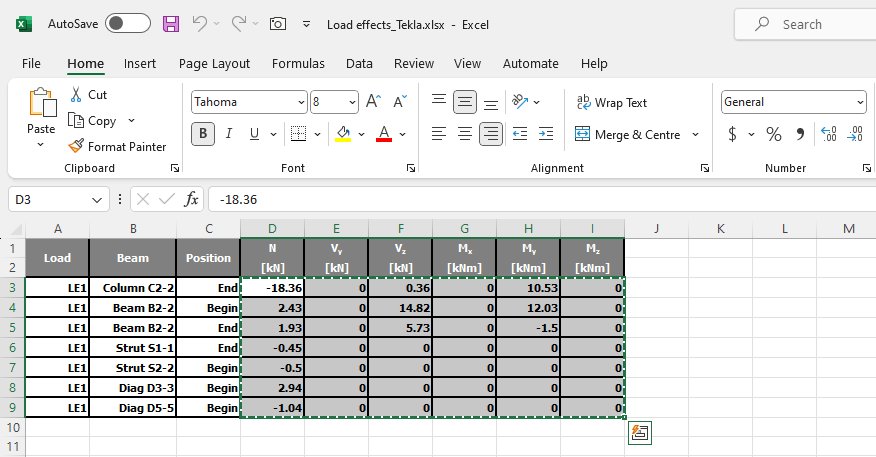
Download the attached Excel sheet with load effects and open it. Select the values of the internal forces in the table and copy them (Ctrl + C).
Then in IDEA StatiCa Connection, select the XLS Import button in the top ribbon.
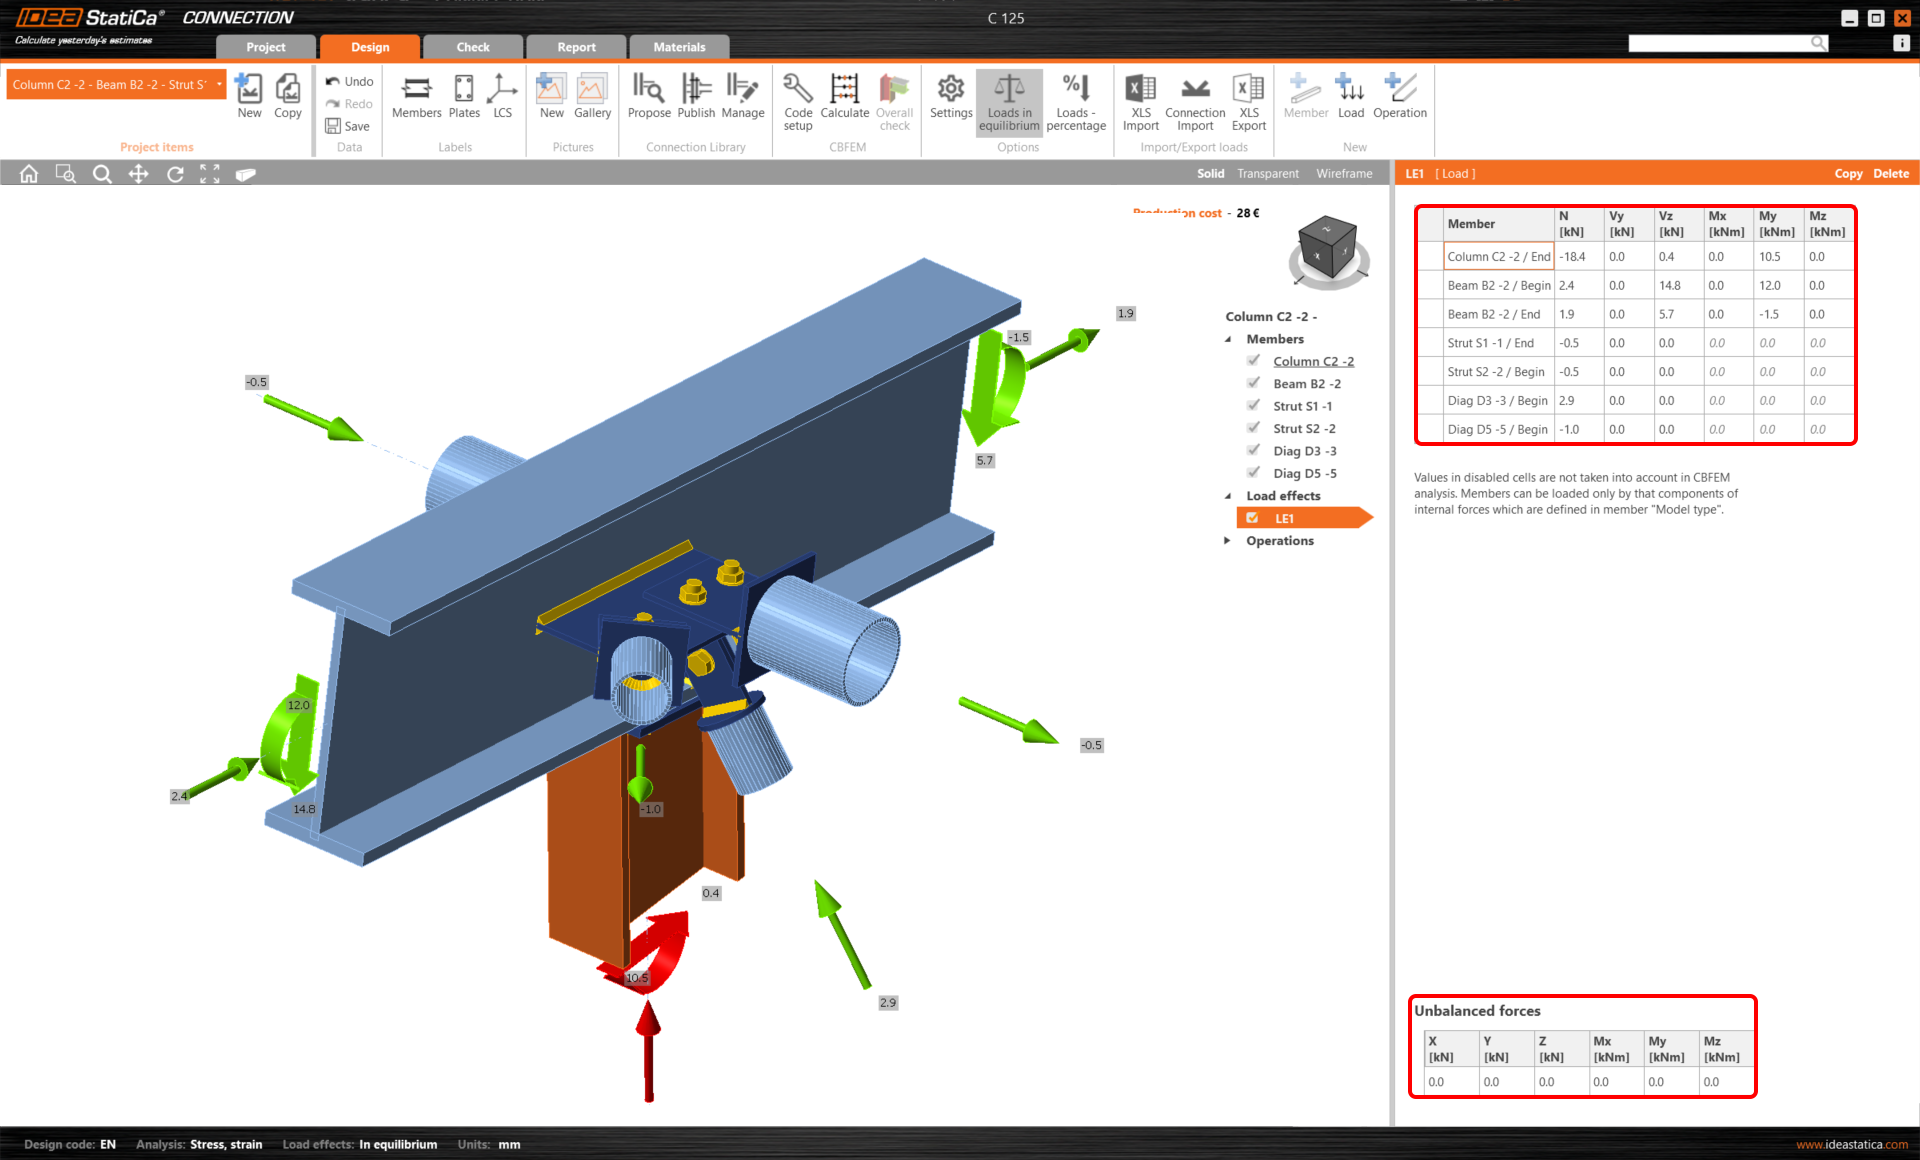
With a right-click, select the first cell and paste (Ctrl + V) the values of internal forces.
Please be aware you need to have the same order of rows and columns in the Excel table as in the Load effects table in the IDEA StatiCa Connection application. If the rows or columns are switched, you will get the incorrect input of internal forces on members.
Design
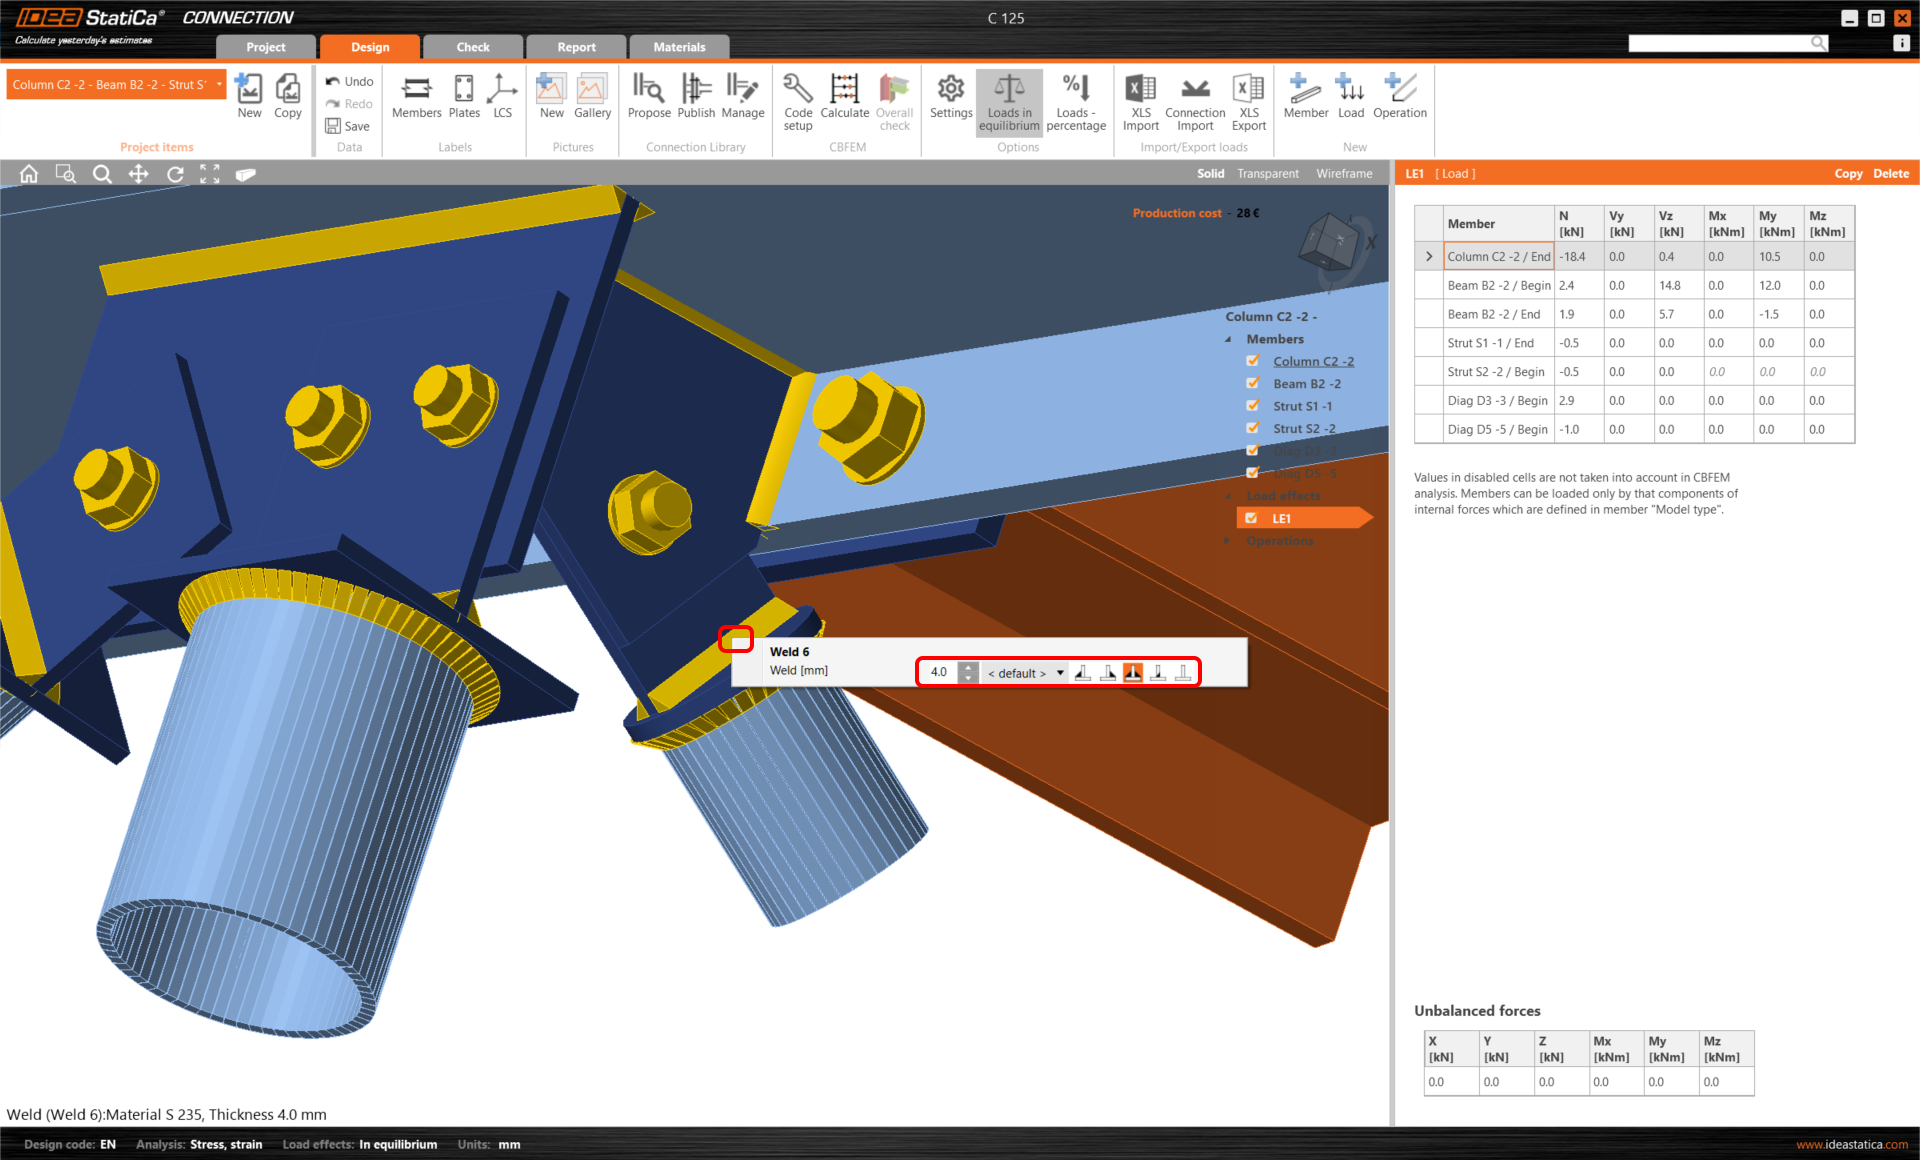
In our imported connection model, we can see that some welds on tube members were incorrectly imported, and need to be corrected.
For member Strut S1-1 change the size of the weld to 4 mm and the front side orientation.
For member Strut S2-2 change the size of the weld to 4 mm and the front side orientation.
For member Diag 3-3 change the size of the weld to 4 mm and the front side orientation.
For member Diag 5-5 change the size of the weld to 4 mm and the front side orientation.
Change weld orientation between Tongue and cap plate to double fillet weld as shown in the following picture.
Change weld operation between Plate 3 and Column C2-2 as shown in the following picture.
After changes, it should look like in the following picture.
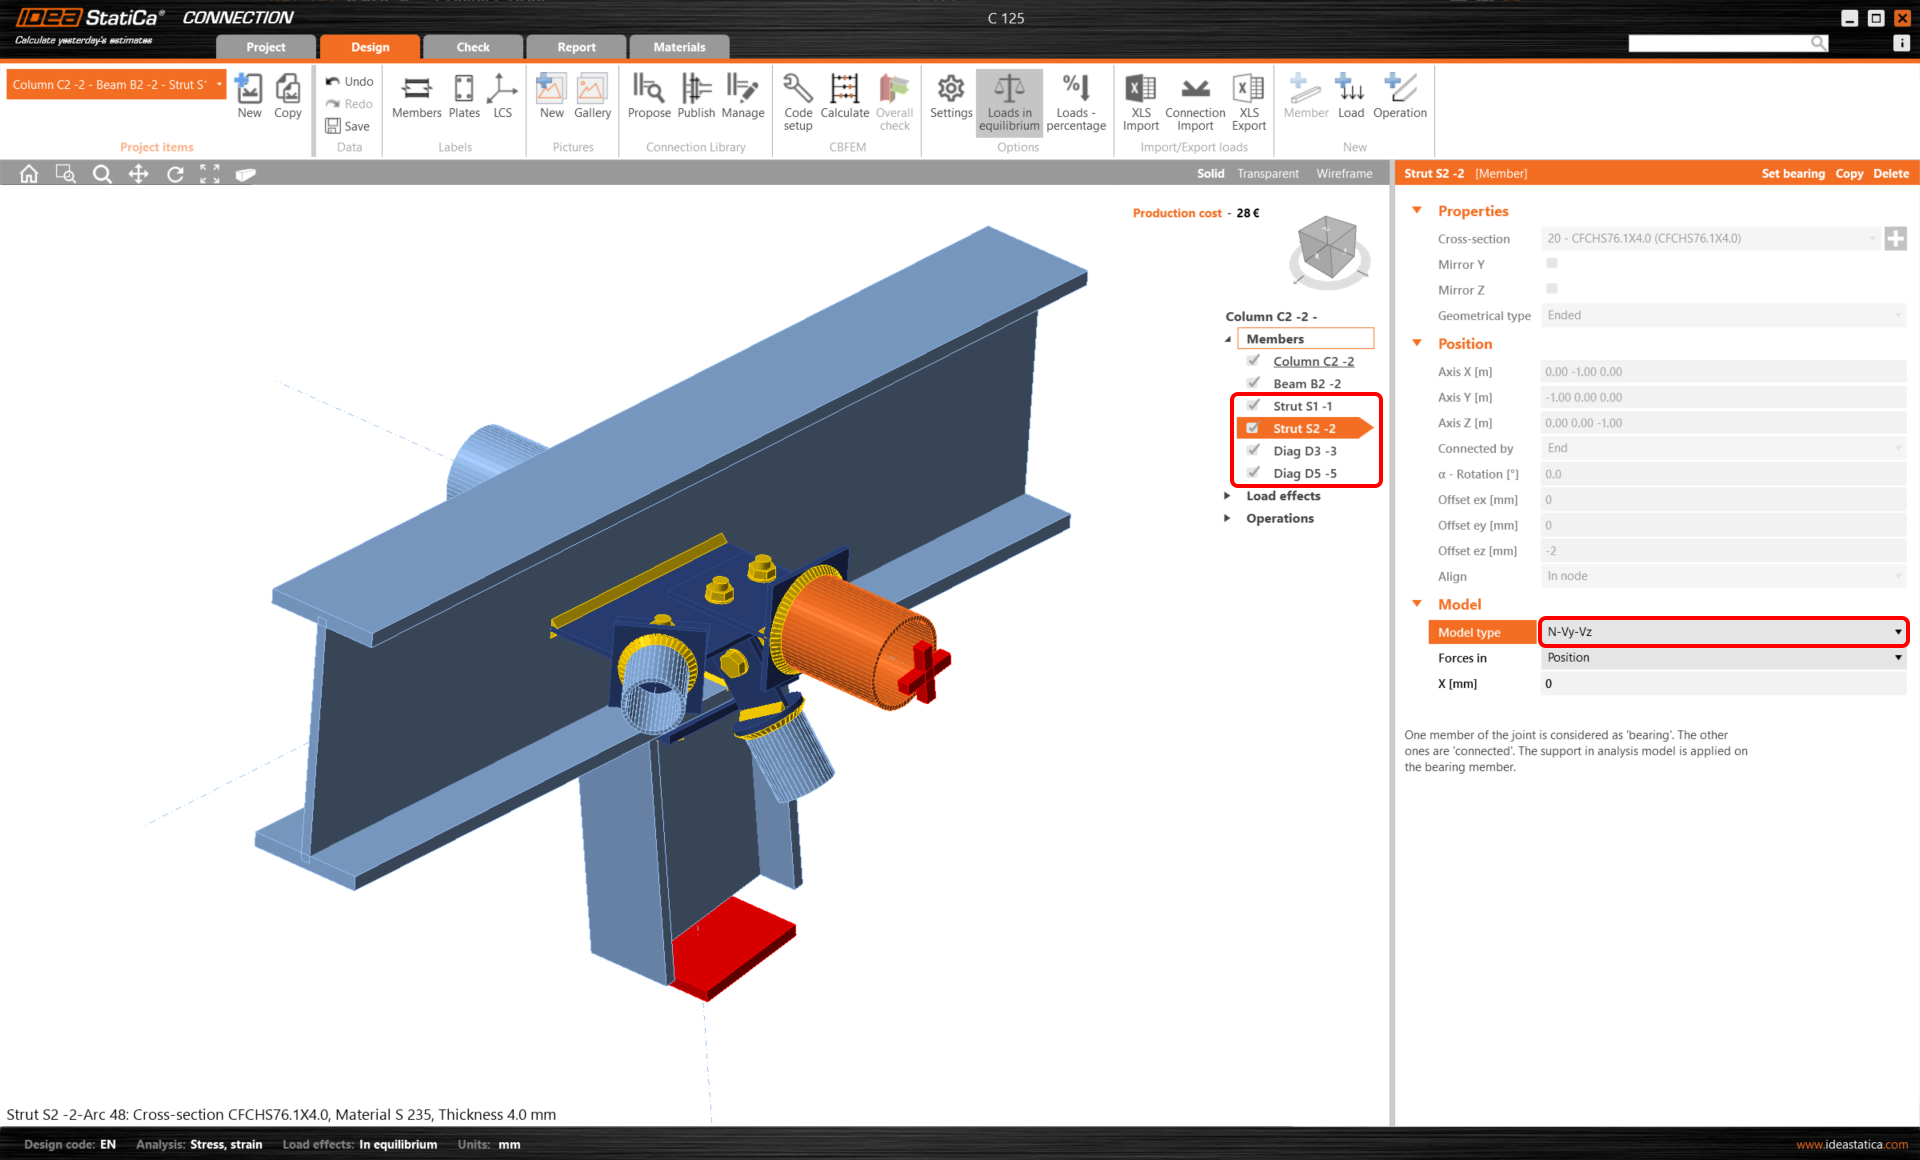
We are going to be using a single bolt connection for the spacing and diagonal bracing member. For this type of connection, we must also change the Model type of the brace member to N-Vy-Vz. Select the members in the list of Members: Strut S1-1, Strut S1-2, Diag D3-3, Diag D5-5, and modify the Model type in the drop-down list.
Code-check and Report
Now run a code-check using the Calculate icon in the CBFEM panel from the top ribbon.
Within IDEA StatiCa Connection you can carry out many different types of analysis and code-checks. For more information please see here.
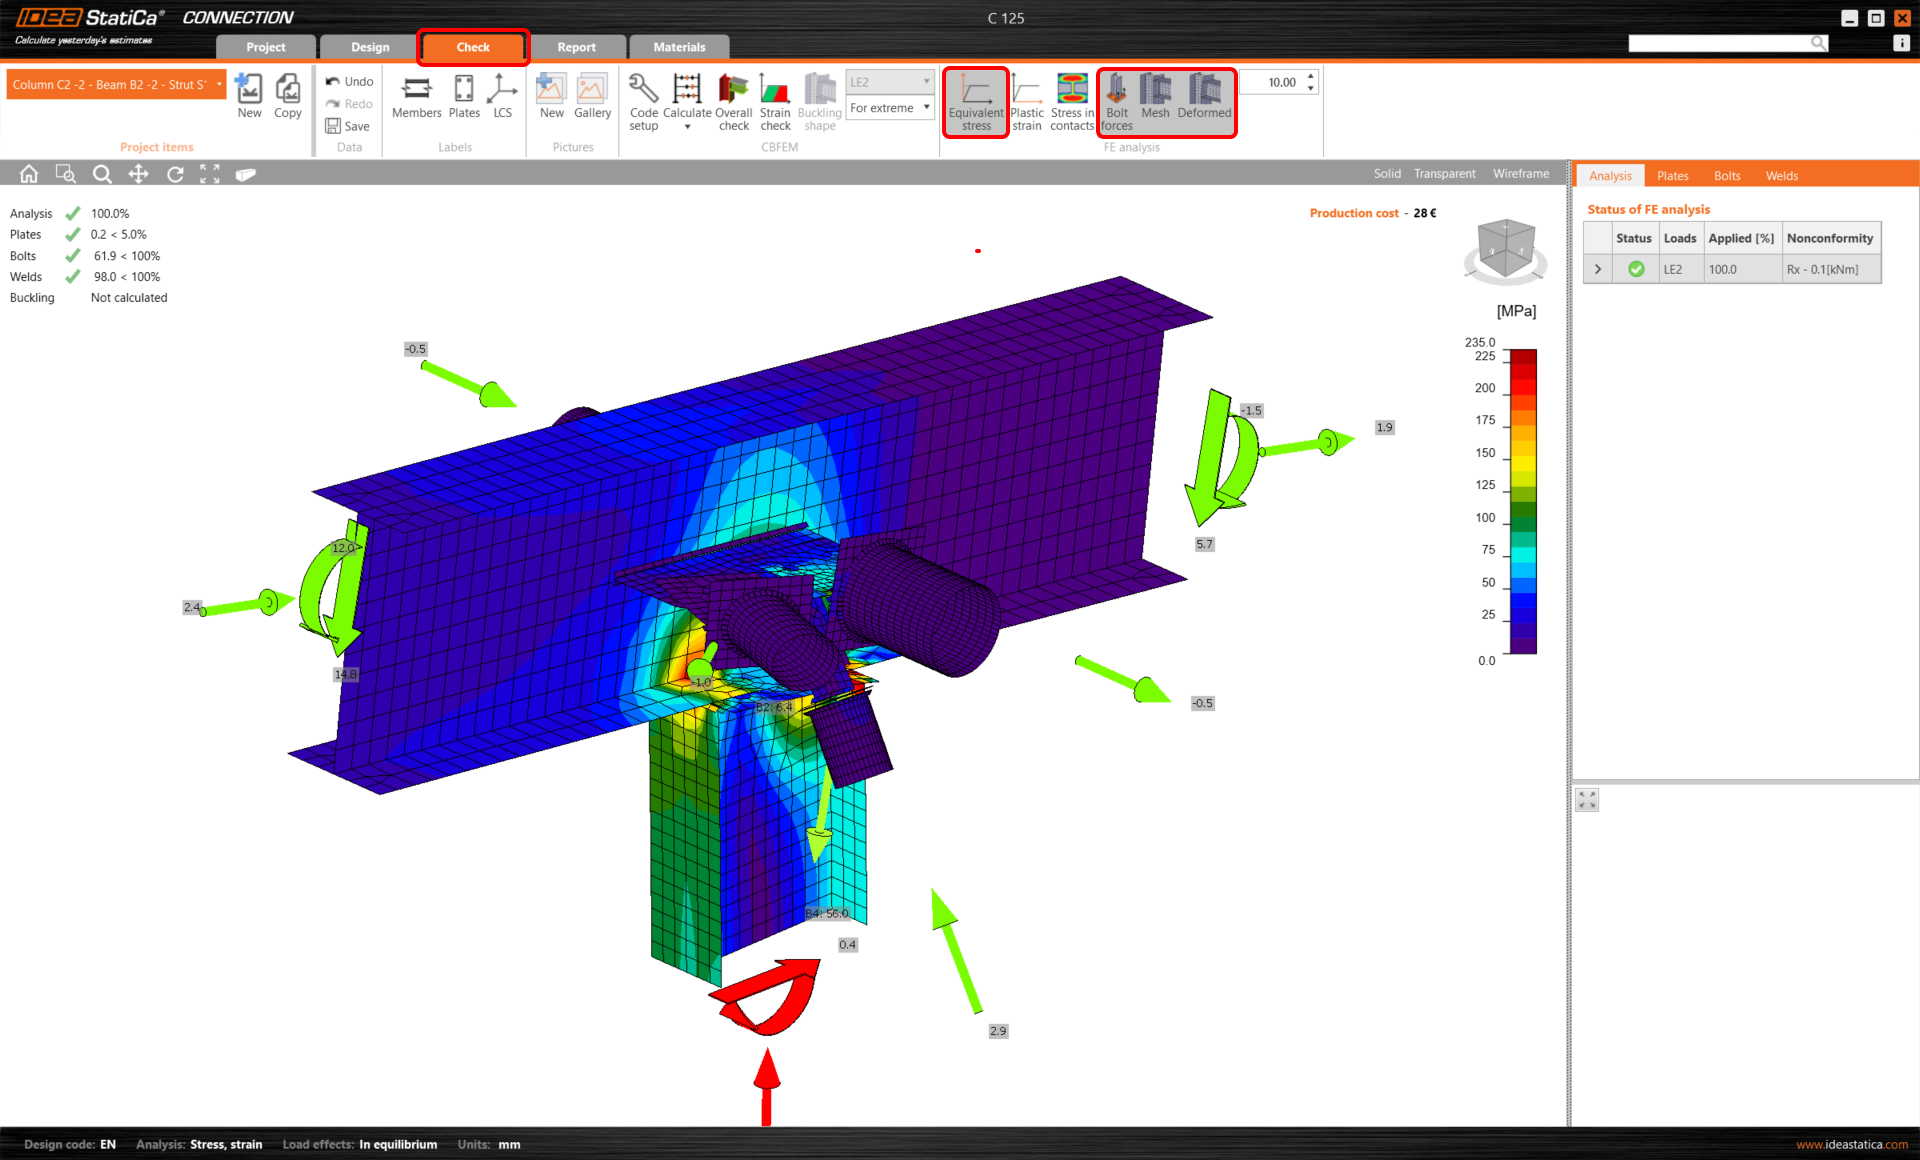
Go to the display tab Check, and activate Equivalent stress, Bolt forces, Mesh and Deformed from the ribbon to get a full picture of what is happening in the joint.
Once the code-check is finished in the Report tab you can create the report containing results and diagrams for your connection model.
The report can be printed or saved in several formats. For more information please see here.
Save and Exit this connection back to Checkbot.
In Checkbot, you will see that there is a green tick next to the connection. This means that the connection is valid and has passed all code-checks. In the Connection panel, you can also see a representation of the connection and a summary of the code-check results.
If multiple connections are present in Checkbot then each must be opened, designed, and code-checked.
You can continue with the design of additional connections using the same approach presented above.
Synchronize model
Sometimes, there are changes to your FEA/BIM model such as different member section sizes or loads. These can be synchronized between Checkbot and the FEA/BIM model.
There are two possible alternatives:
- Synchronize the Current item (if one or more joints are selected)
- Synchronize the whole imported Structural model
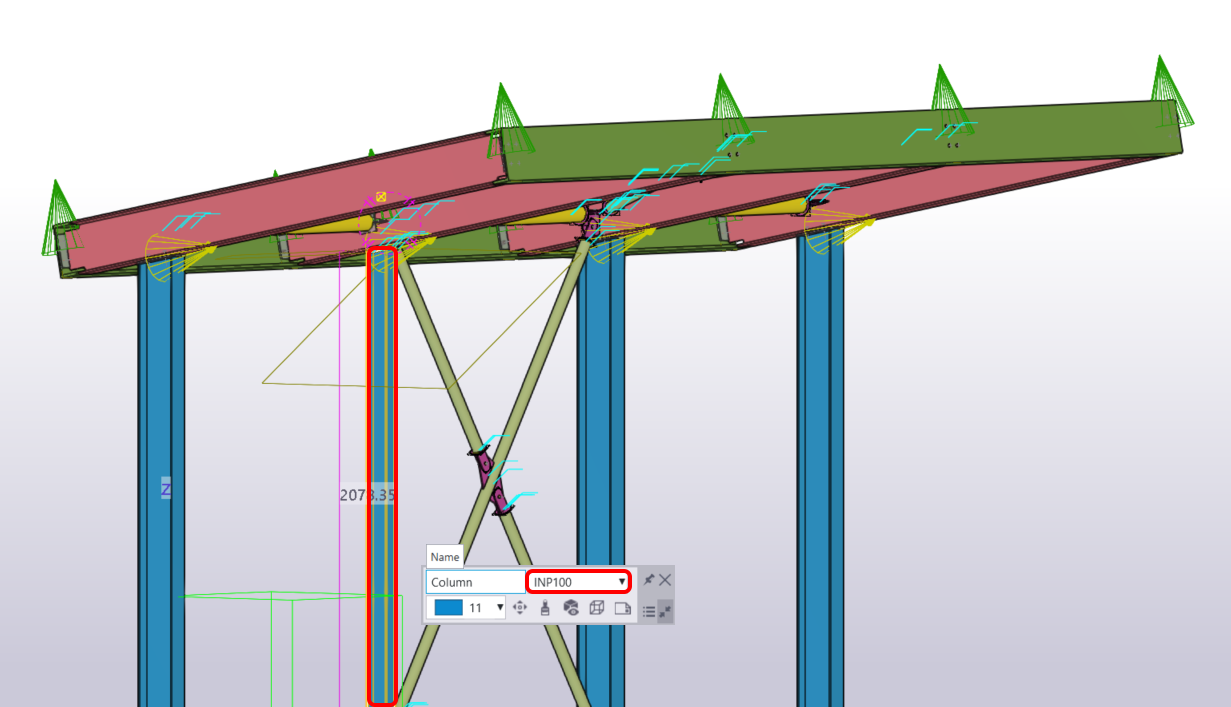
To test this feature you can change a member section size or shape in your BIM application or amend a load case or combination etc: change the selected column to a smaller section.
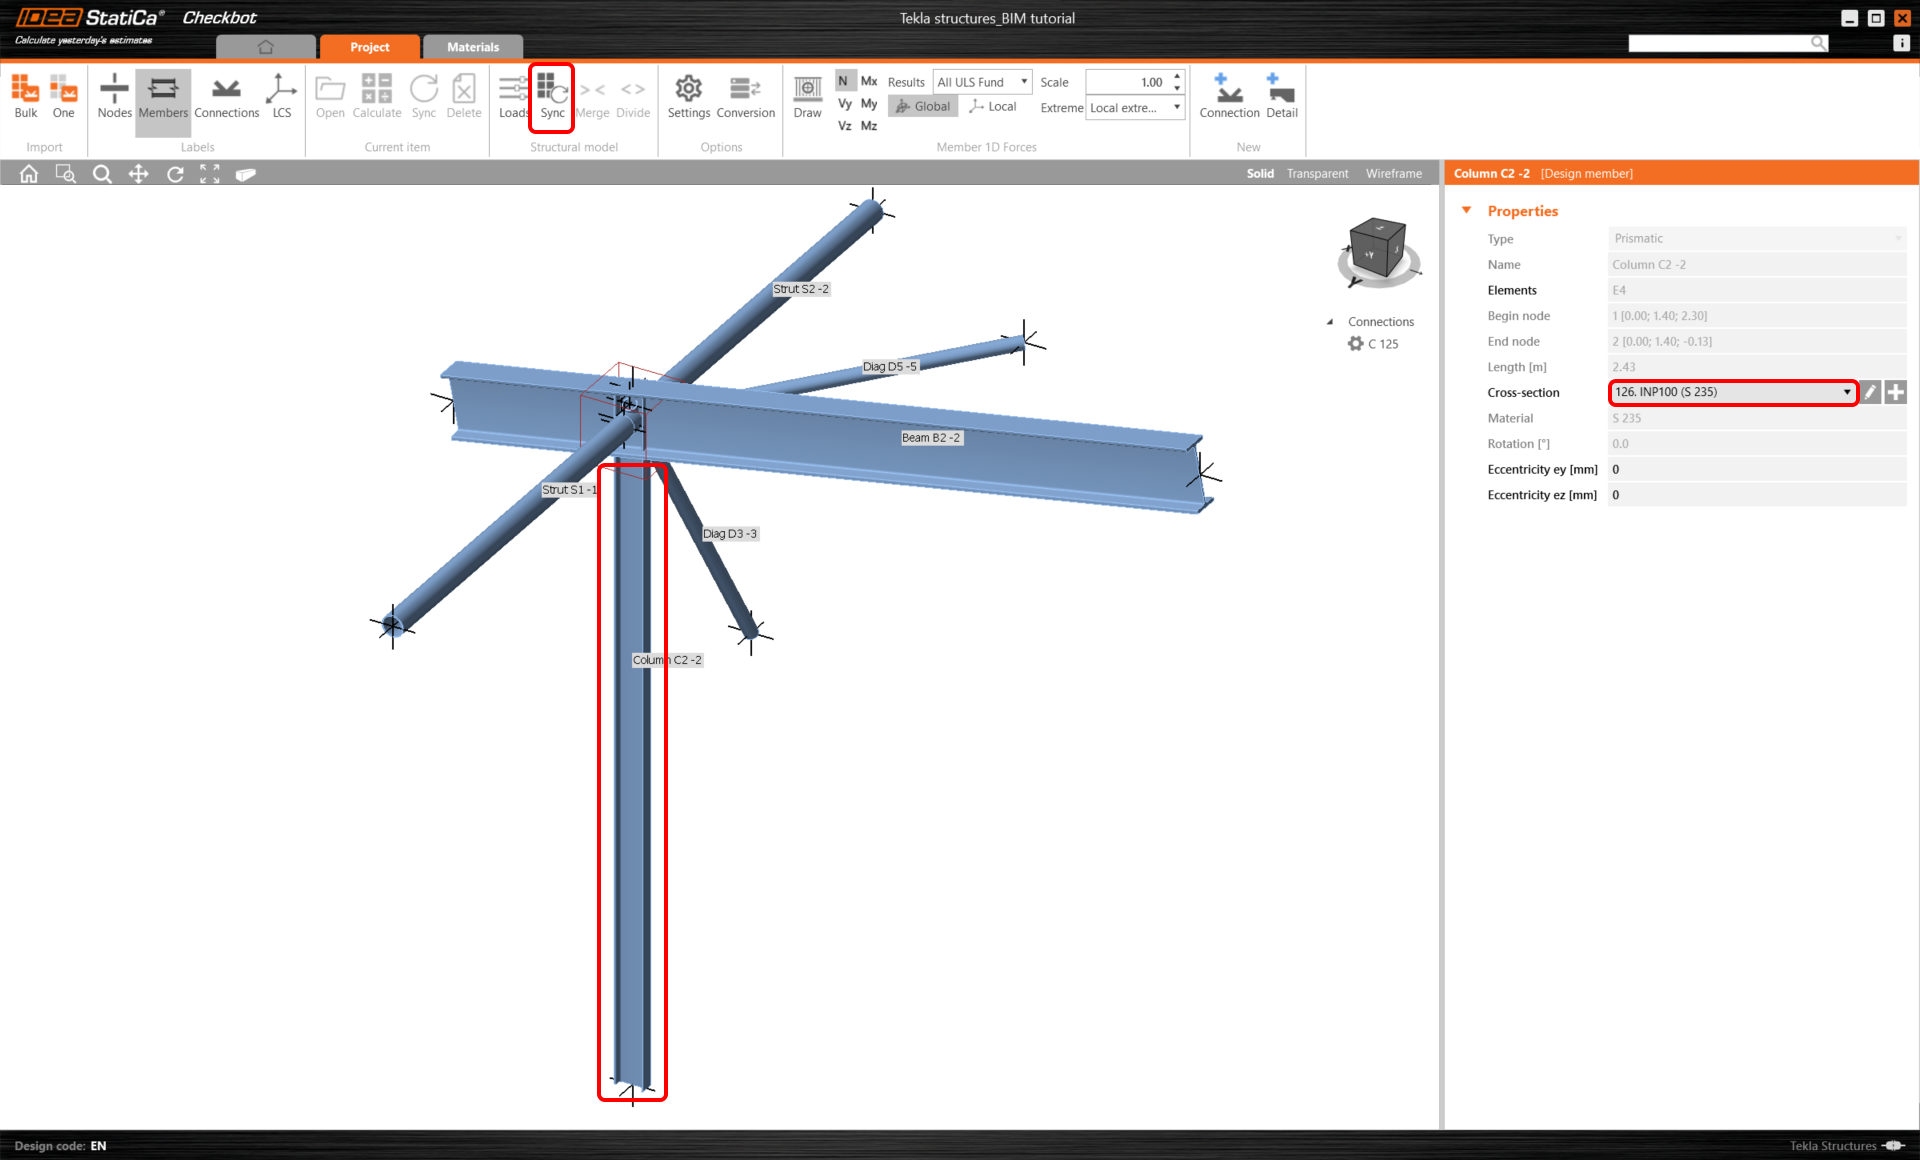
In Checkbot select the designed connections (there may be more than one) and from the Current item panel select Sync.
The Checkbot project will be updated, connection design is preserved but the results will be invalidated. You can see that the column is now updated - matching the change in the BIM model.
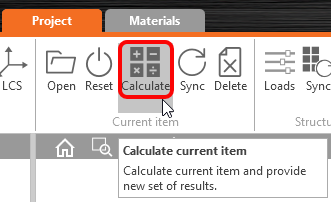
Simply code-check the highlighted connections again by selecting Calculate from the Current item panel. Please remember that bigger changes in the model might require additional validation steps with the affected connections (as above).
If the connections do not give the desired results, then you can open them again to optimize the design (i.e. strengthen if they fail the code-check or lighten if the utilization is too low).
You have successfully linked Tekla Structures with IDEA StatiCa Connection via Checkbot.
For more information about Checkbot, take a look here.
Read more about the known limitations for Tekla Structures BIM link.


