Grasshopper API link - bulk calculation of steel joints
Grasshopper - Instalace pluginu
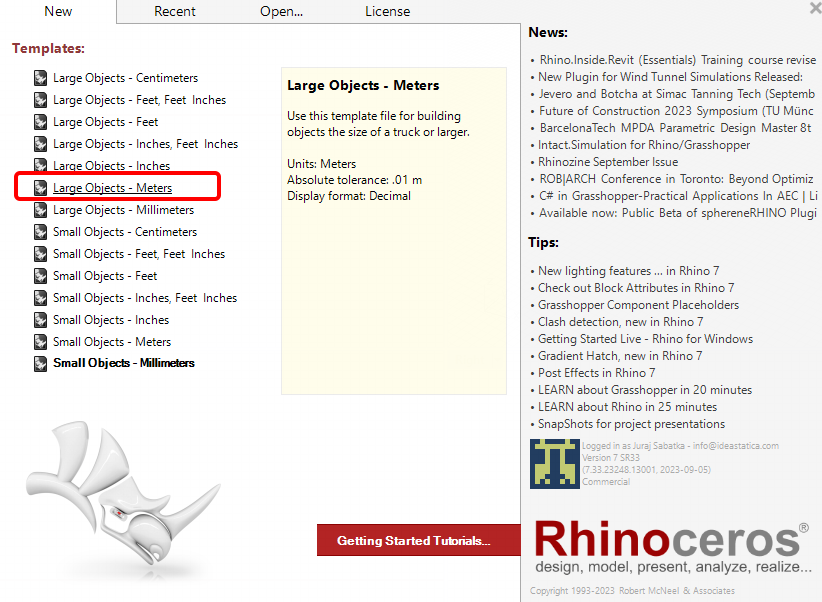
Zkušební verzi programů Rhino3d a Grasshopper můžete získat na webových stránkách Rhino3d. Spusťte program RhinoCeros a vyberte šablonu s velikostí měřítka v Metrech:
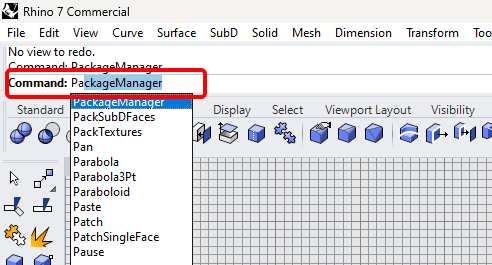
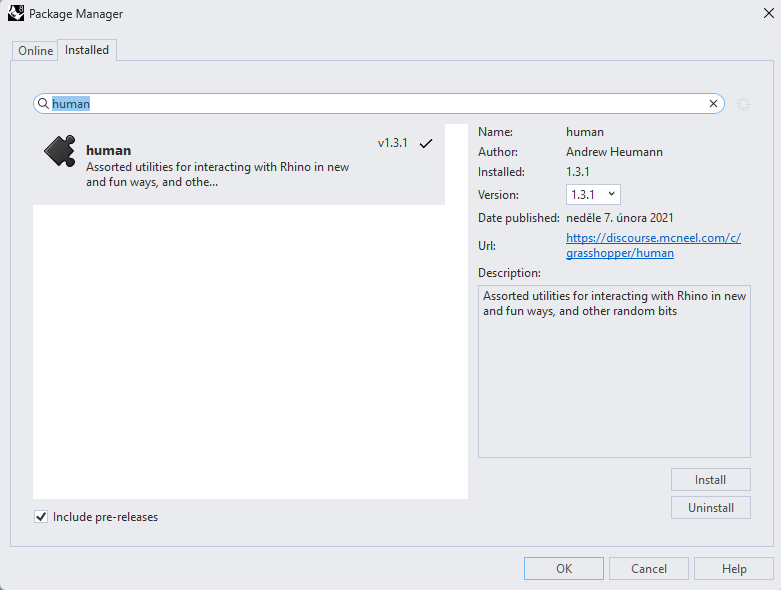
Do příkazového řádku zadejte "Package Manager":
Zobrazí se nové okno; vyberte IDEAStatiCa a klikněte na tlačítko Install. Zásuvný modul se stáhne a nainstaluje. Aby se stal aktivním, je nutné restartovat systém Rhinoceros.

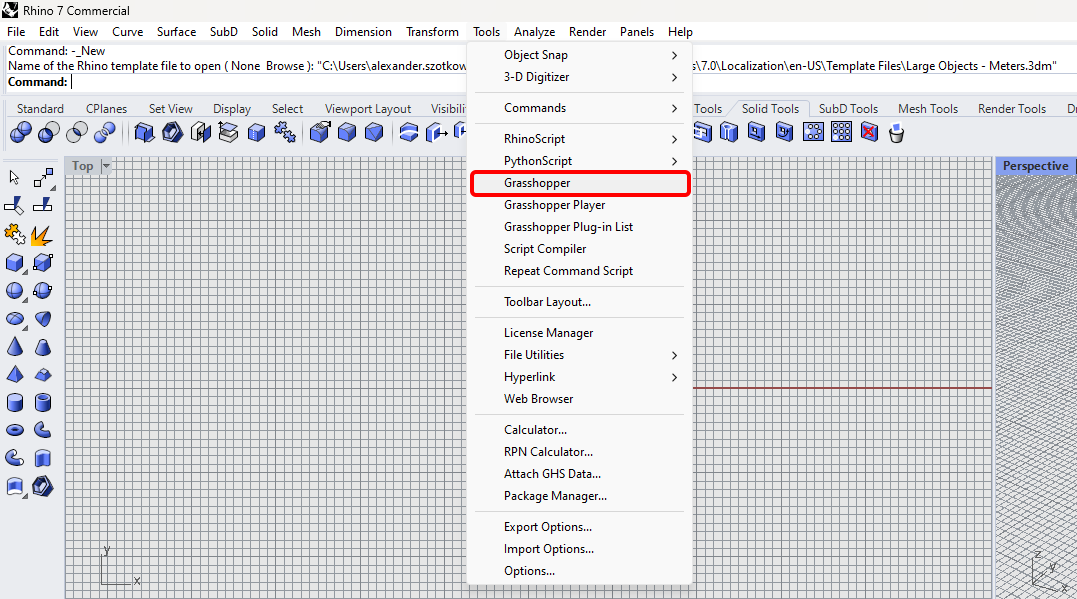
Chcete-li spustit program Grasshopper se zásuvným modulem IDEA StatiCa, vyberte na kartě Rhihoceros položku Tools / Grasshopper.
Jak vidíte, zásuvný modul je již začleněn.

Informace o komponentách a příkazech modulu IDEA StatiCa pro Grasshopper najdete v článku Popis komponent modulu Grasshopper.
HUMAN plugin
In this example, we need to select part of the structure, and for this purpose, you have to install another plugin - HUMAN, which you will use in this tutorial.
IDEA StatiCa Checkbot – import of a structure, design of a joint
Open the attached folder with a structure imported from 3rd party software. Internal forces are included.
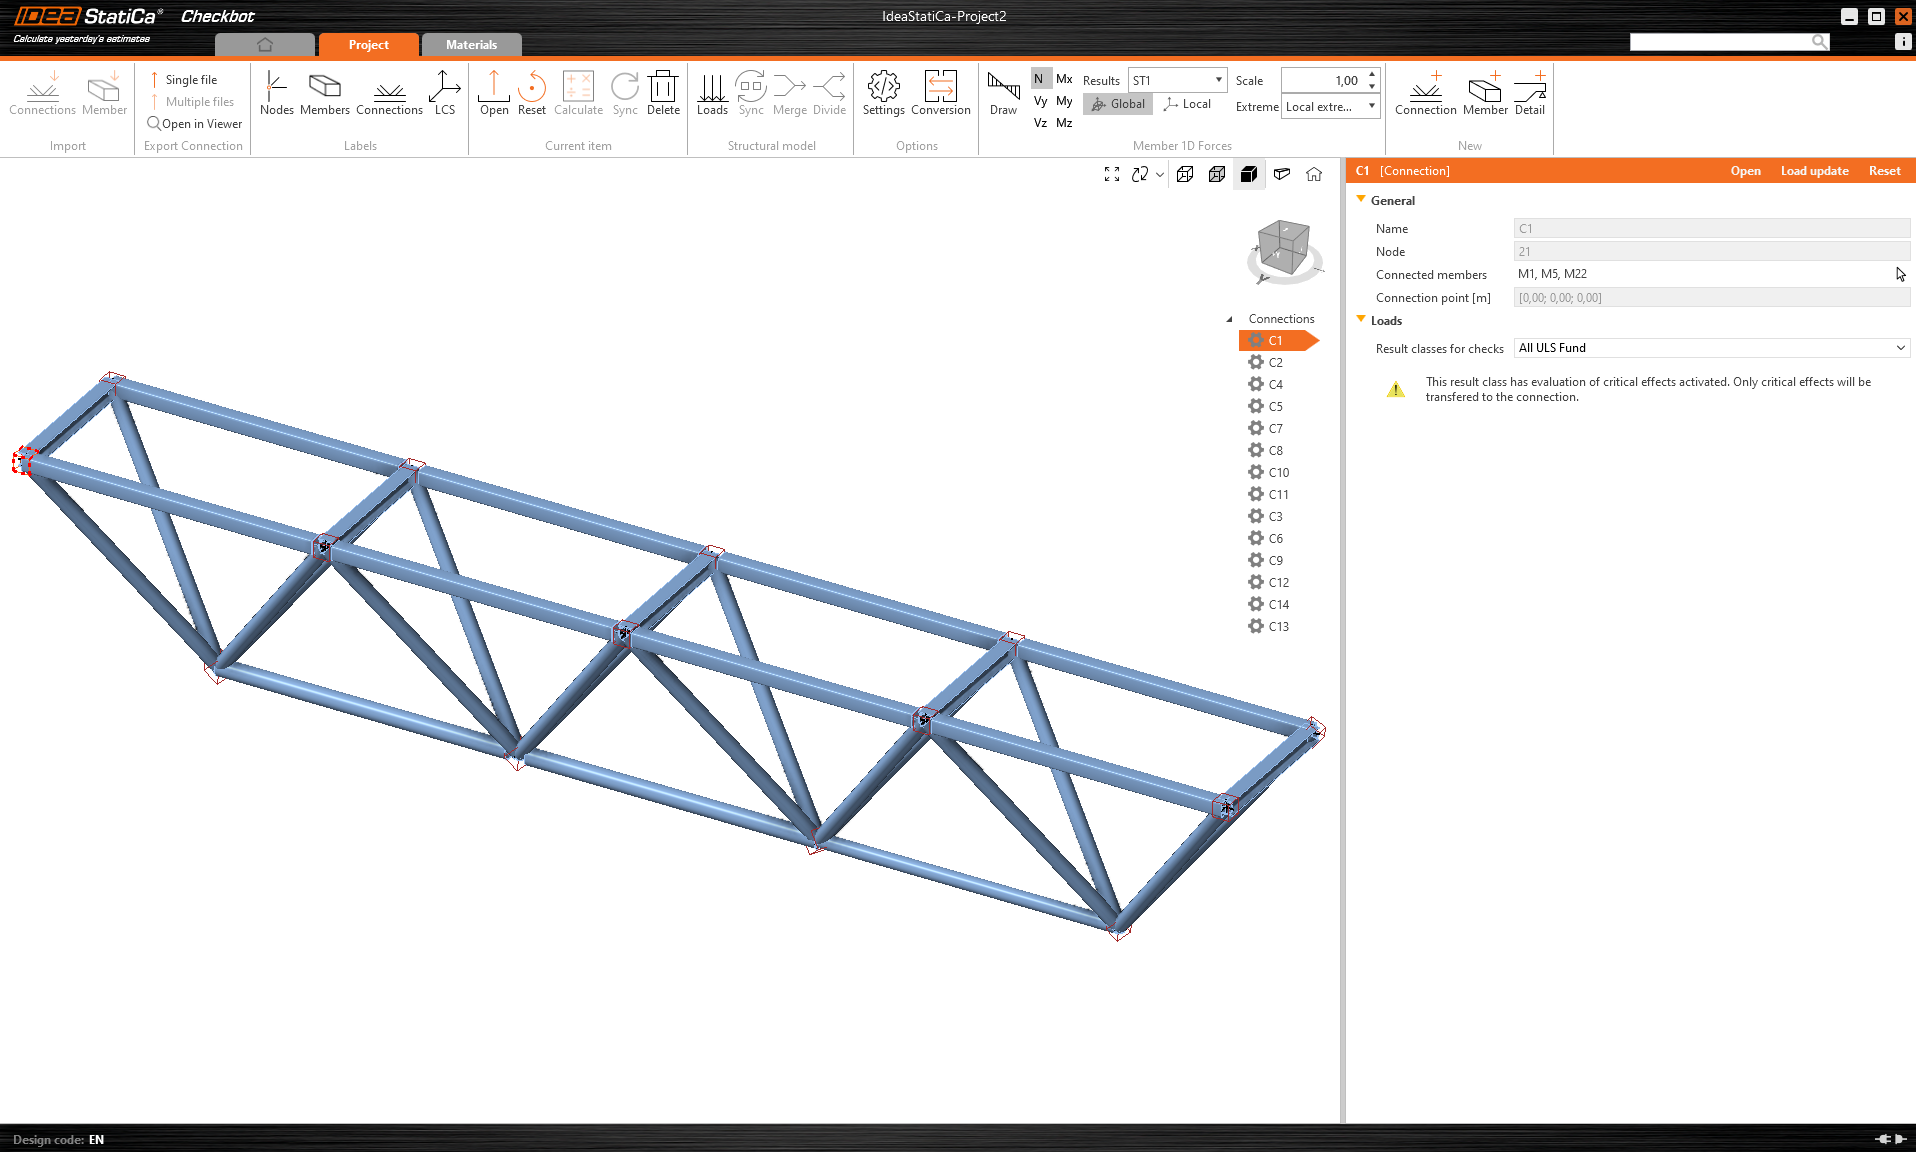
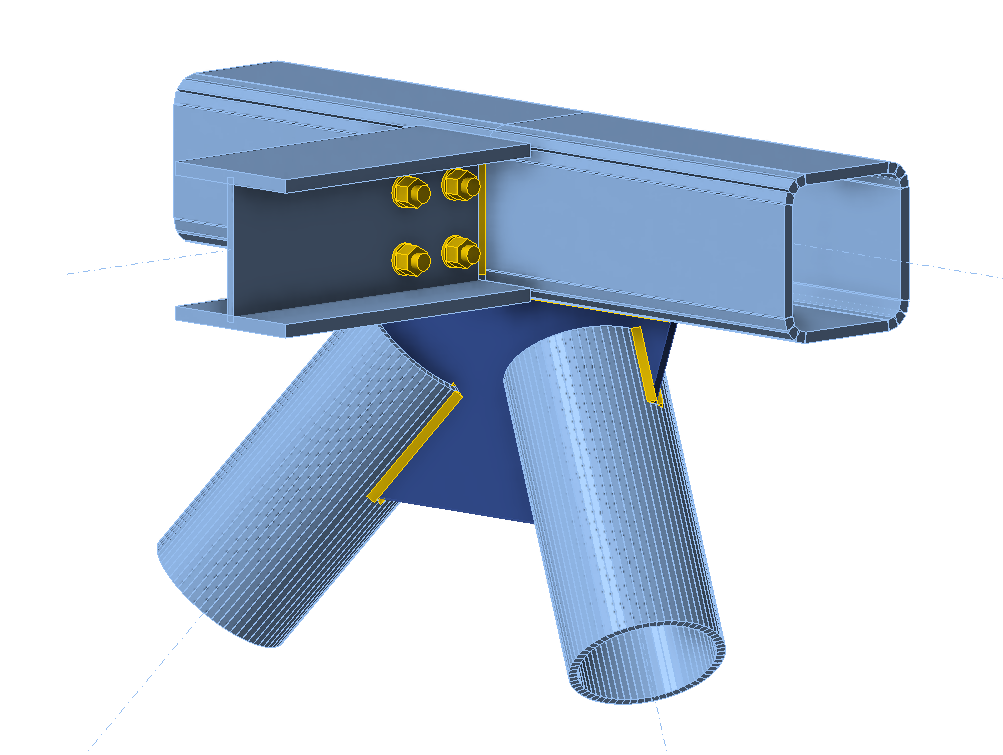
Please select one of the middle joints in the upper belt (e.g., C11) and open it in the IDEA StatiCa Connection.
You can design it correctly according to your needs or use our fully prepared joint here.
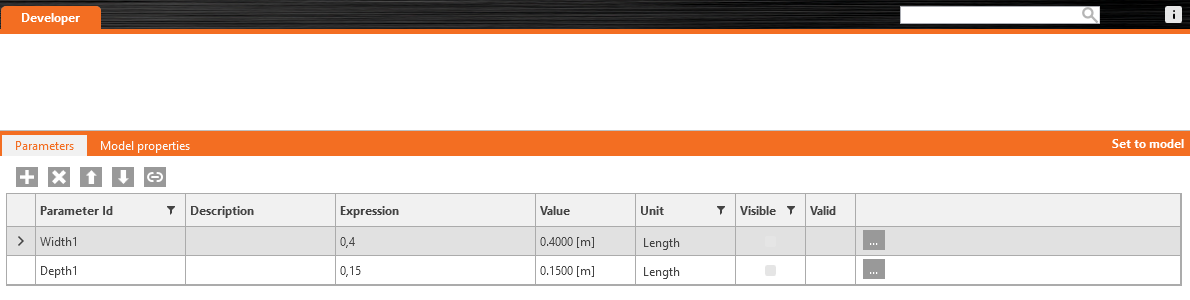
Go to the Developer tab, set the parameters, and link them to the appropriate operation according to the following pictures:

Finaly, store the whole joint as a template *.contemp, used later in Grasshopper.

Grasshopper - import XML file, apply the template
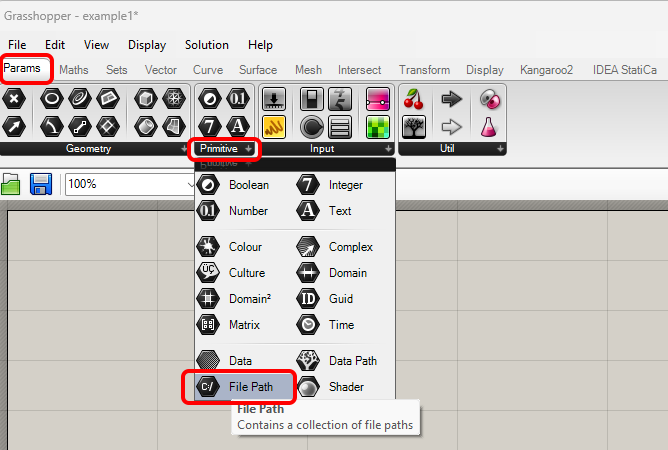
Create a new document, select the tab Params in the upper ribbon, and place the component File Path on the Canvas.
Right-click on the component and select the file import.xml, found in the Checkbot folder. This file contains all the data from the imported structure.
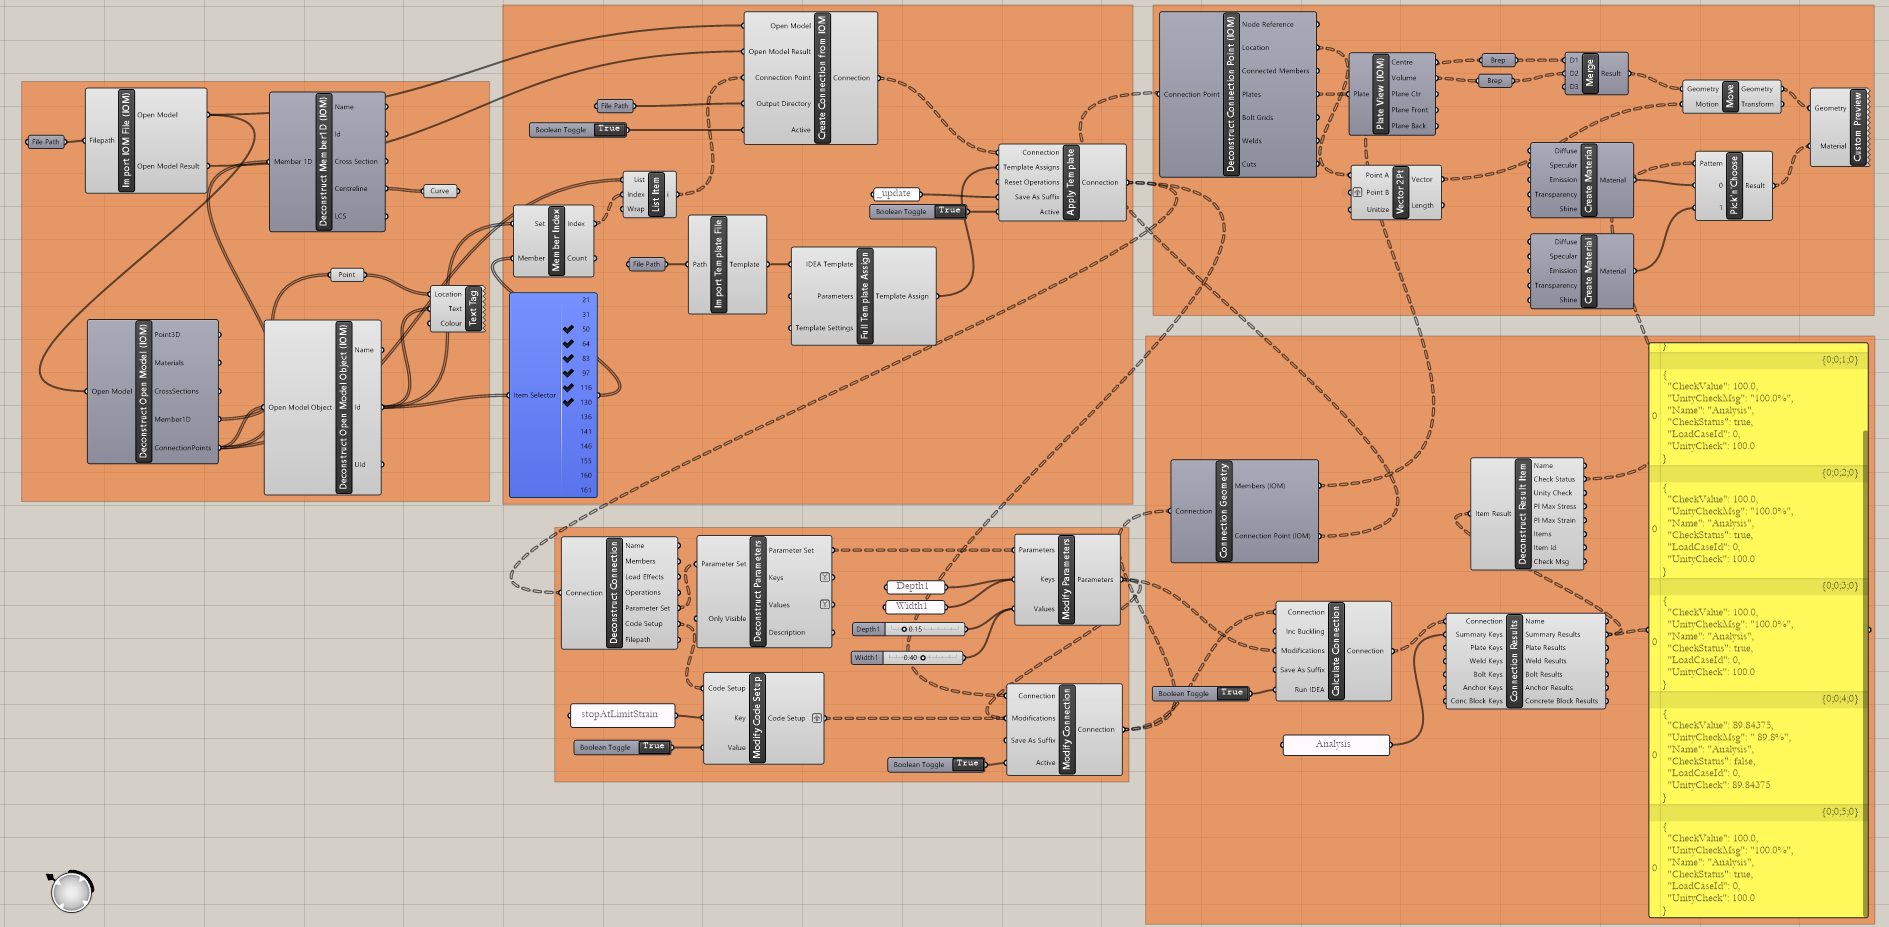
Now, you add the following components to the canvas and connect them as shown in the picture.
Import File and Display structure, including a description of joints in Rhino:
IDEA StatiCa / Open Model / Import IOM File
IDEA StatiCa / Open Model / Deconstruct Open Model
IDEA StatiCa / Open Model / Deconstruct Open Model Object
Params / Geometry / Curve
Params / Geometry / Point
Display / Dimensions / Text Tag
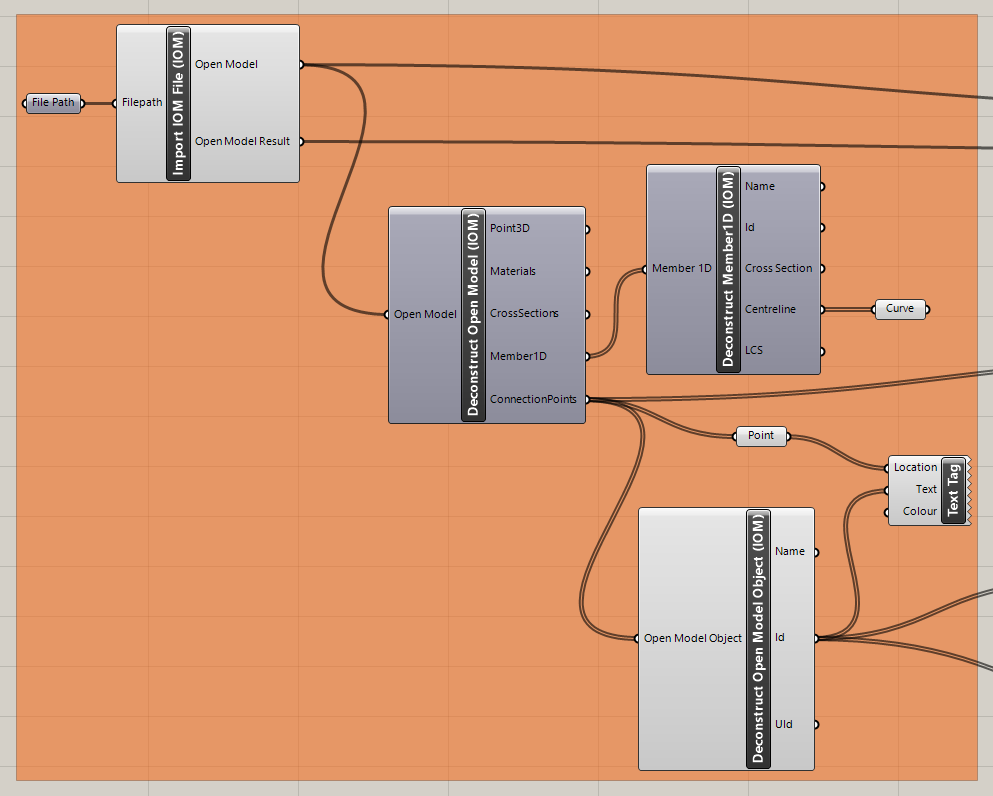
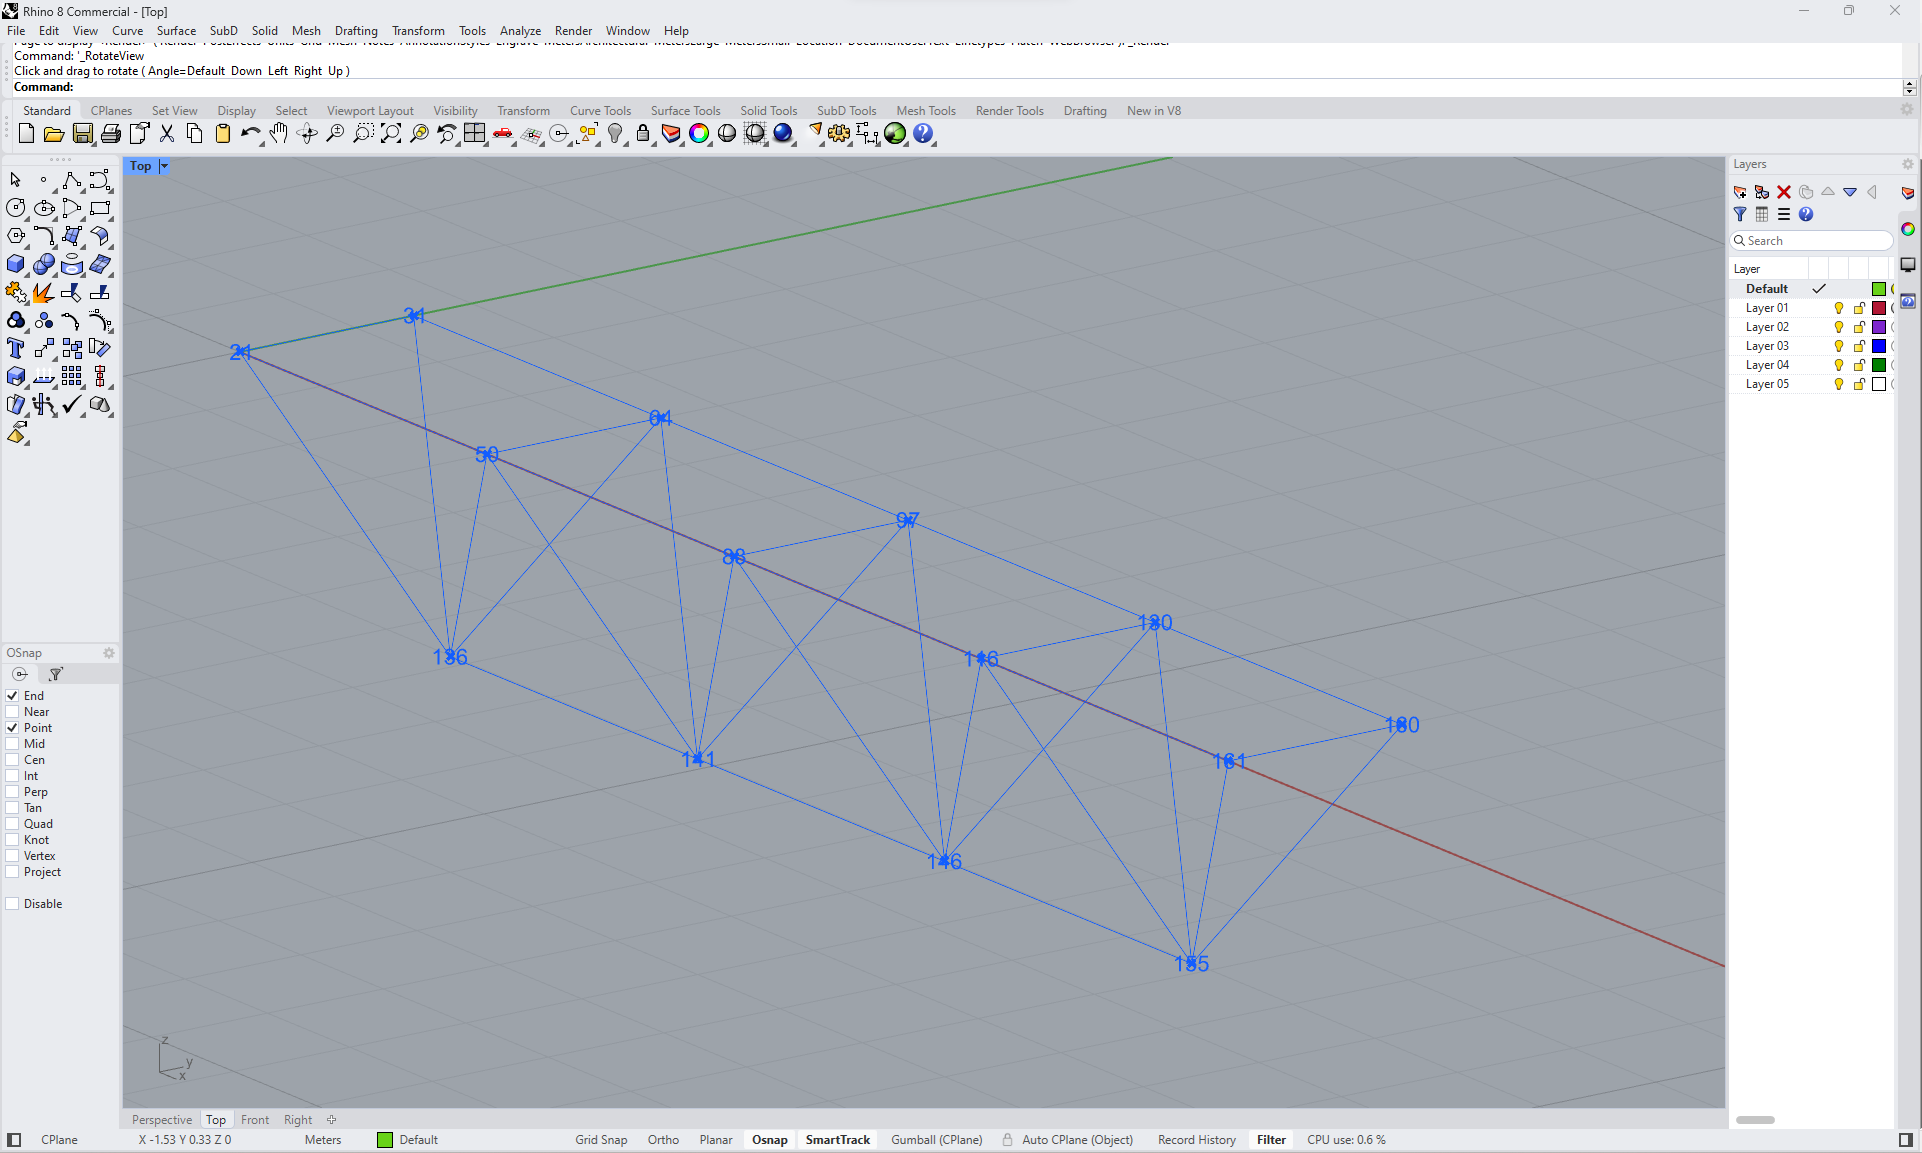
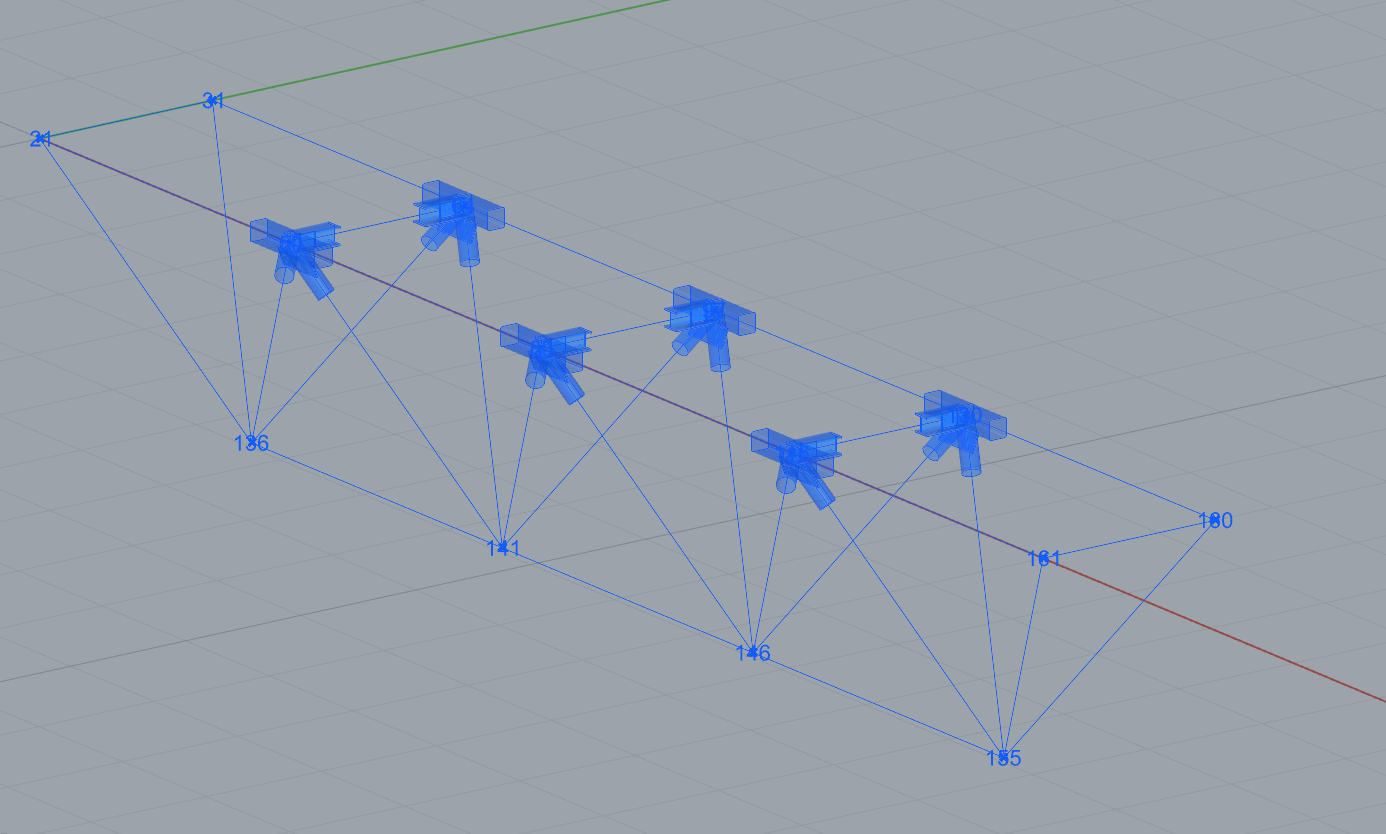
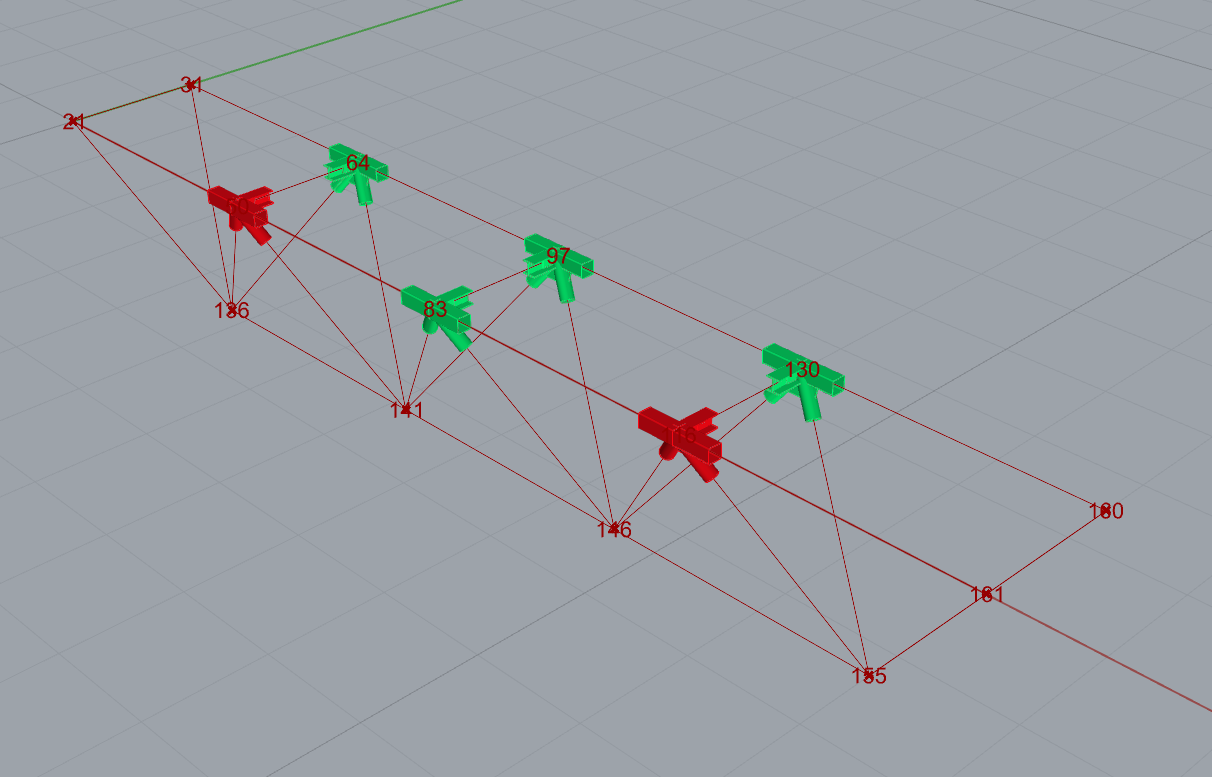
Now you can see the structure in Rhino:
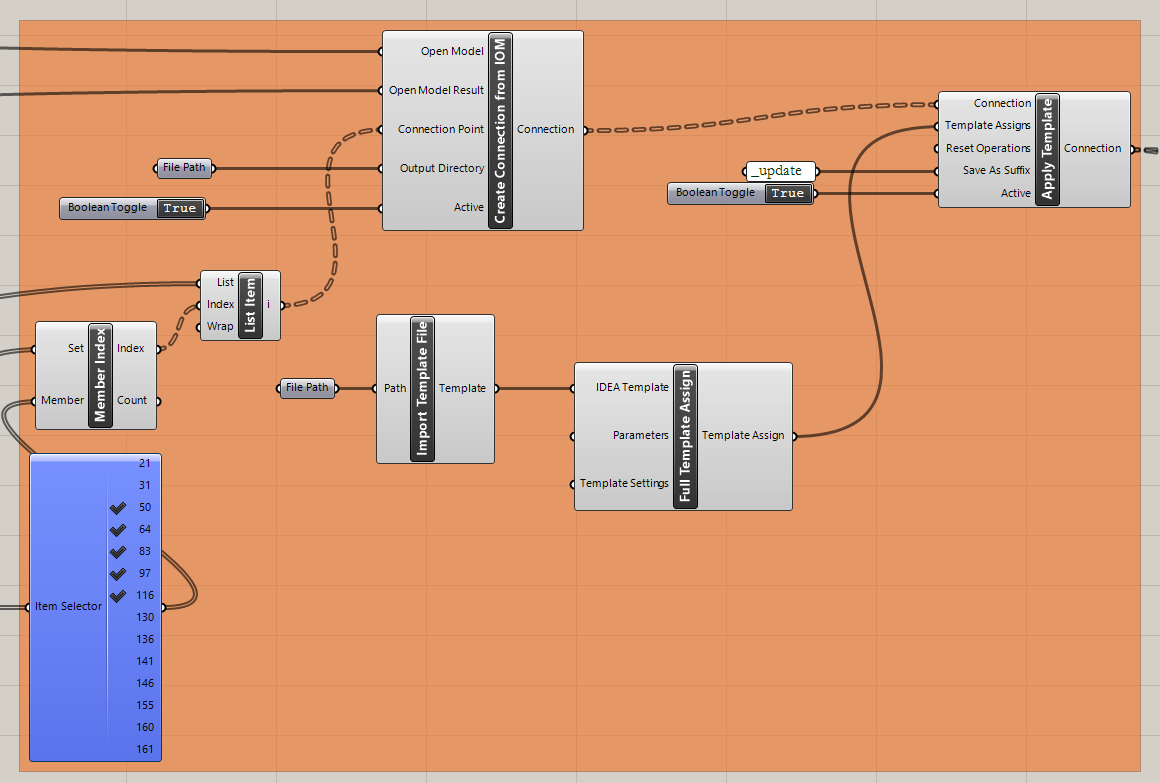
Import the template and apply it to the selected joints:
IDEA StatiCa / Connection / Create Connection from IOM
IDEA StatiCa / Connection / Import Template file
IDEA StatiCa / Connection / Full template Assign
IDEA StatiCa / Connection / Apply Template
Human / Misc / Item Selector
Sets / Sets / Member Index
Sets / Lists / List item
Params / Primitive / File path (import the template)
Params / Primitive / File path (folder, where to store the joints)
Params / Input / Boolean Toggle (2x)
Params / Input / Panel (for creating updated versions of the joint)
Now you can see the structure with selected joints where the template was applied:
Grasshopper - modify parameters and run the calculation
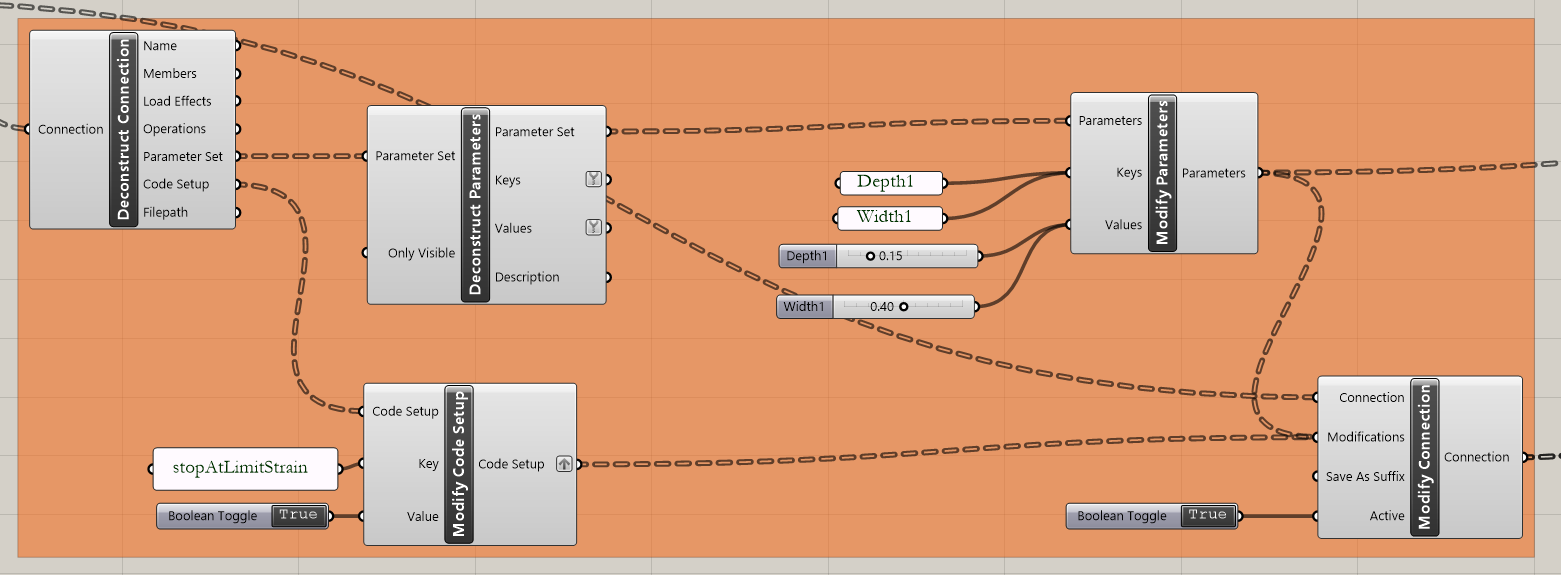
Modify parameters:
IDEA StatiCa / Connection / Deconstruct Connection
IDEA StatiCa / Connection / Deconstruct Parameters
IDEA StatiCa / Connection / Modify Code Setup (to simplify output table)
IDEA StatiCa / Connection / Modify Parameters
Params / Input / Panel (2x Name of the Parameters)
Params / Input / Panel
Params / Input / Boolean Toggle (2x)
Params / Input / Number Slider
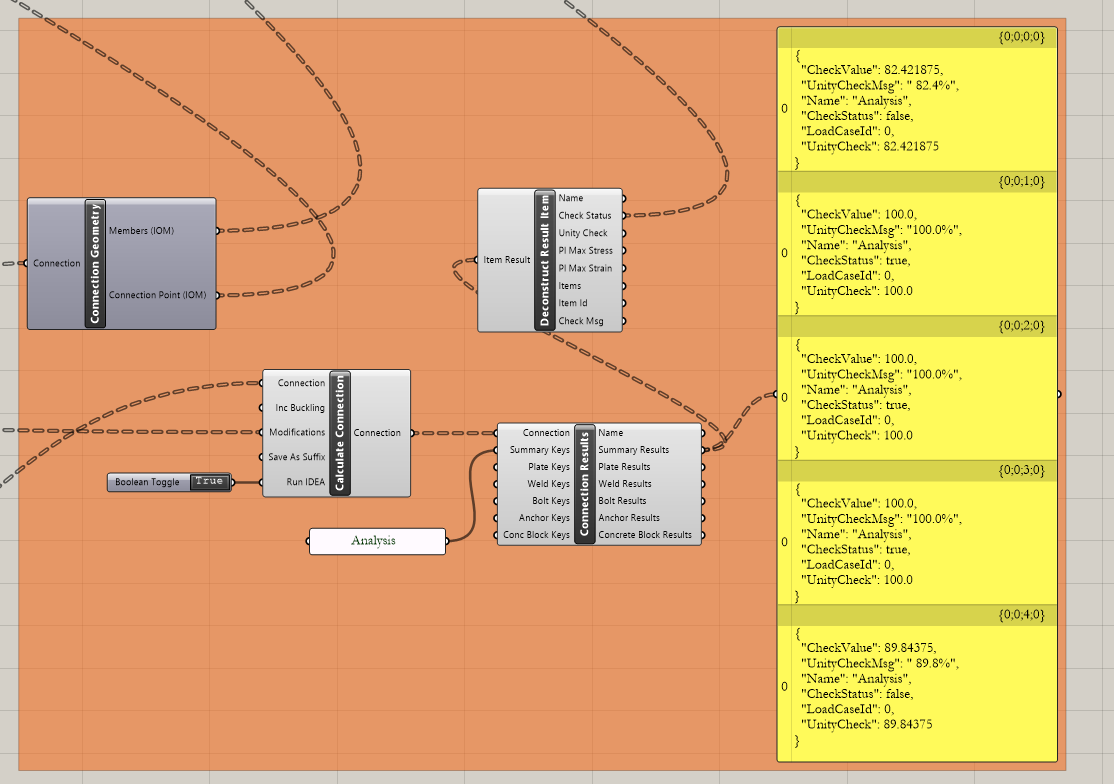
Calculate joints:
IDEA StatiCa / Connection / Calculate Connection
IDEA StatiCa / Connection / Connection Results
IDEA StatiCa / Connection / Connection Geometry (passing data to components for the visualization)
IDEA StatiCa / Connection / Deconstruct Results (passing data to components for the visualization)
Params / Input / Panel (Analysis - to simplify output table)
Params / Input / Panel (Results)
Params / Input / Boolean Toggle
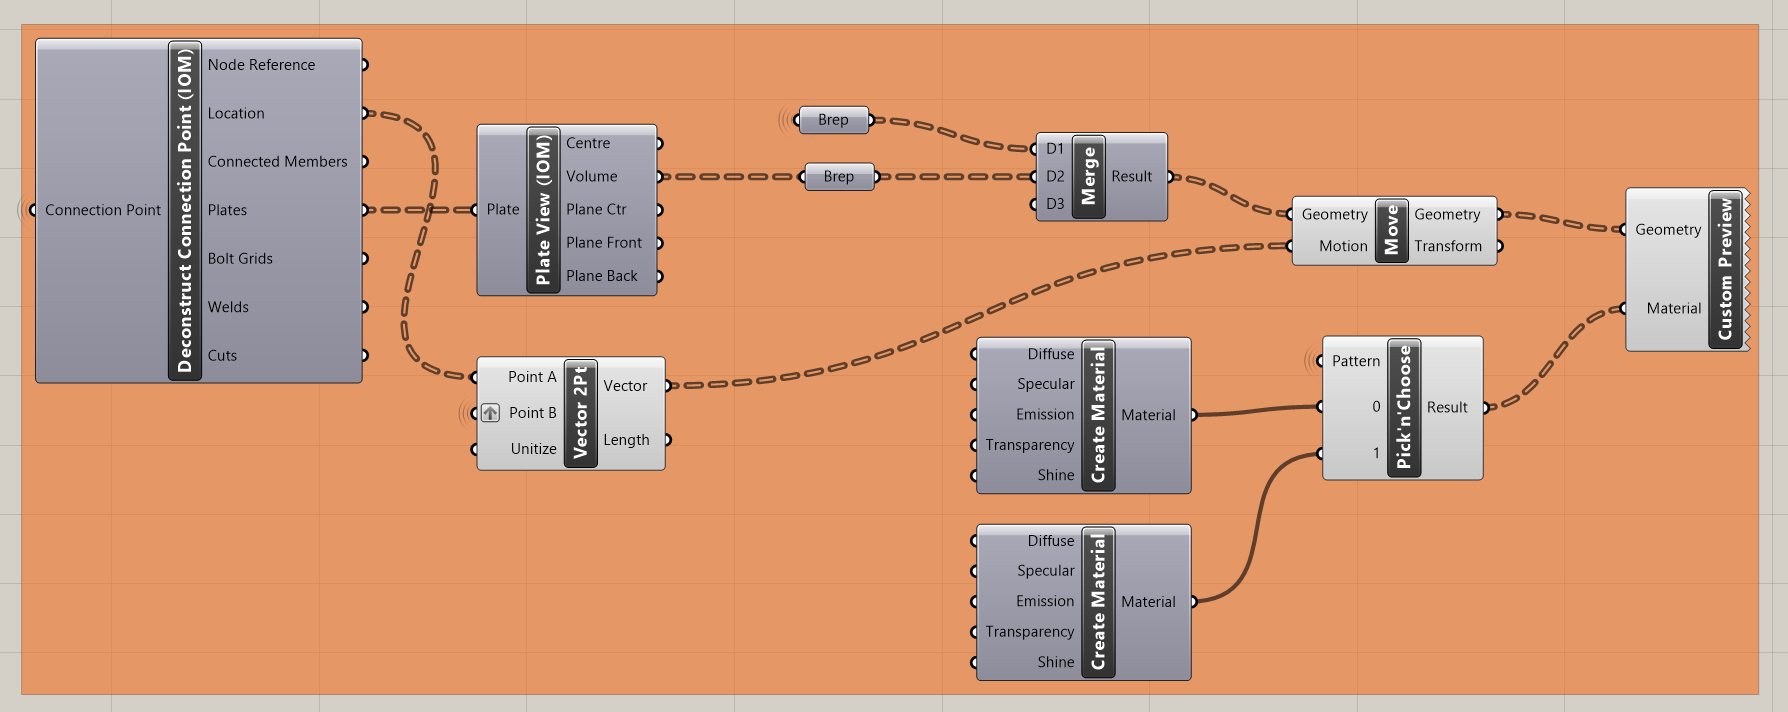
Visualization of results:
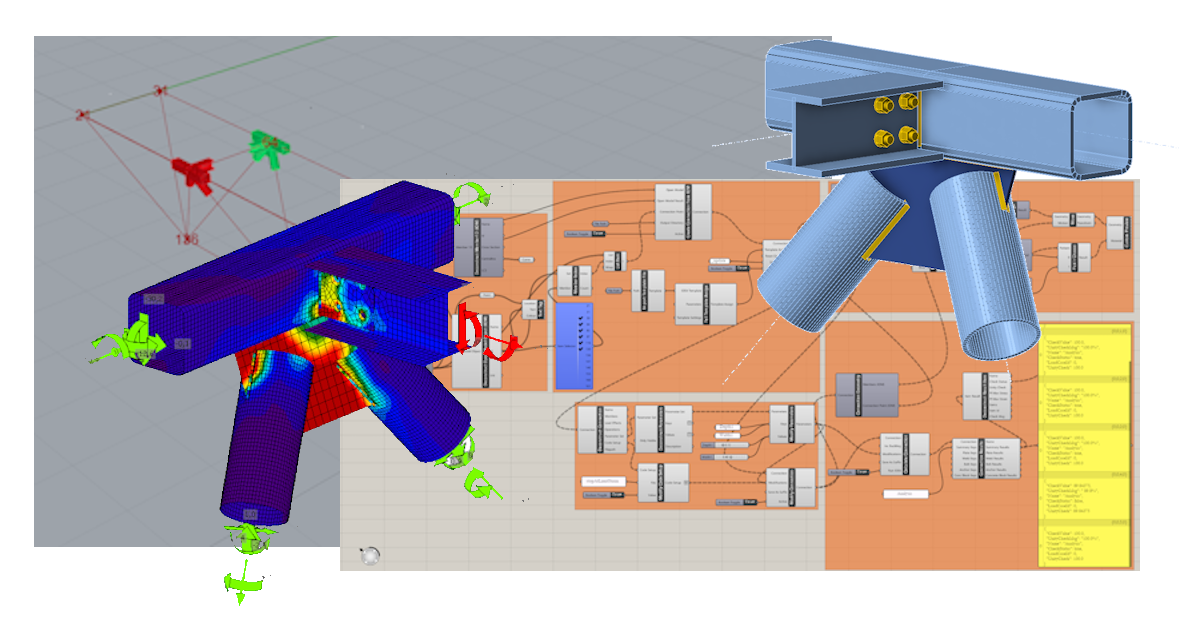
Grasshopper allows you to enhance your results with graphic visualization. The components shown in the next picture allow you to see computed joints in green; the ones that do not pass the checks are then in red.
Here is the whole picture of the Grasshopper file to see the links between the components:
More complex examples can be found in the folder
“%appdata%\McNeel\Rhinoceros\packages\7.0\IDEAStatiCa\0.1.1\Examples.zip”
Přiložené soubory ke stažení
- Connection-template.ideaCon (IDEACON, 76 kB)
- Project2.zip (ZIP, 506 kB)