AxisVM BIM link for structural concrete beam design (EN)
Remark
The link to the Beam app is only possible with IDEA version 24.1.2. and lower.
1 How to activate the link
- Install the latest version of IDEA StatiCa, get it in the Downloads
- Make sure you are using a supported version of AxisVM – updates are published in the BIM section
After installation of both programs, run IDEA StatiCa and start with the item BIM. In the BIM wizard continues with the item Activate your BIM Link... During the process notification "Run as administrator" appears. Please confirm with the button Yes.

Select the software to integrate the IDEA StatiCa BIM link, click the Install button and check the installed status.

2 How to use the link
Open the attached project in AxisVM and run the linear analysis.

Select the beam to export and go through the tab Plugins and start IDEA StatiCa Beam

Create a New project by clicking on the button ECEN.

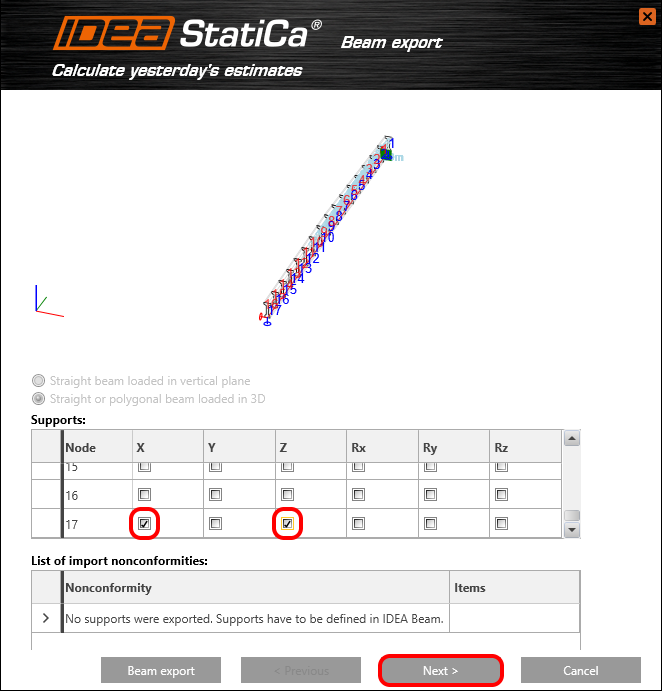
The import wizard is automatically started and continues by clicking on Next.

Now define supports. We start with the definition of support in node 1 as follows:

The second hinge support will be placed into the node 17.
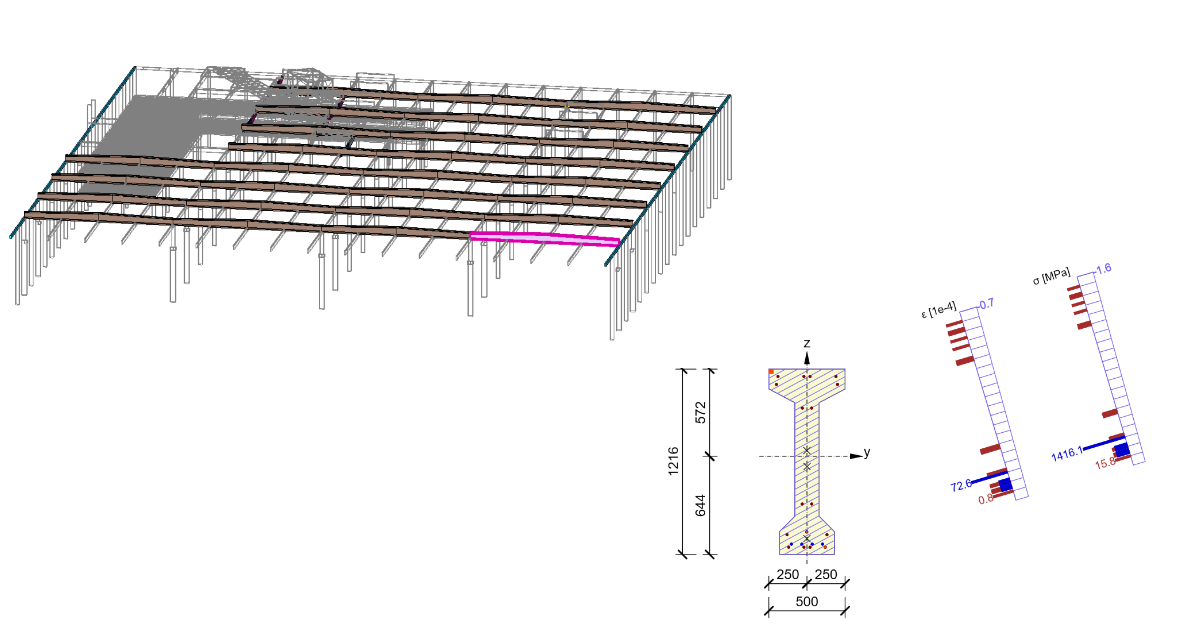
Set a prefabricated concrete beam which will be pre-tensioned and reinforced.

Set calculation of the self-weight according to cross-section and the value of other loads keep zero.

Add all variable load cases which are coming from the AxisVM project. The internal forces will be uploaded as user-defined forces.

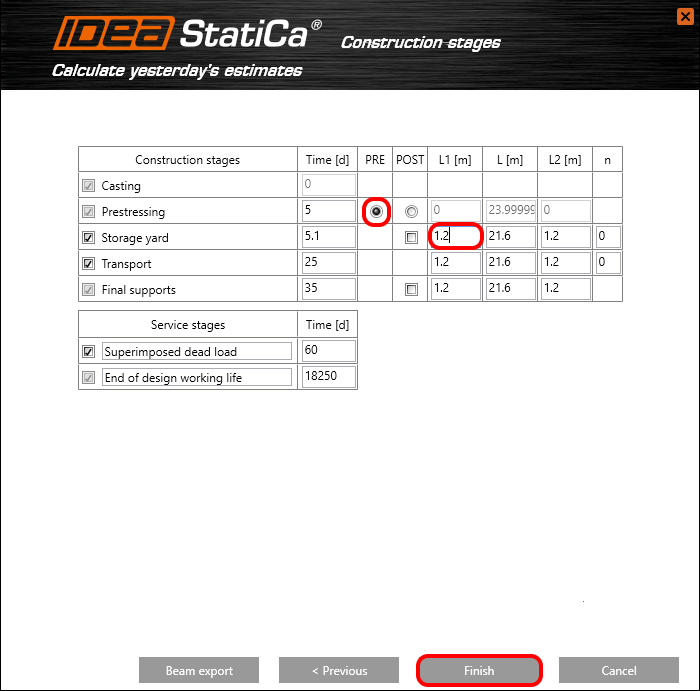
Construction stages are a really important step for the analysis of the beam. For construction stage prestressing we select option PRE(pre-tensioned). During Storage yard and subsequently, the following stages will be changed support distances. Set the distance from the left edge of the beam on 1.2m. The right position of support L2 will set in the same way and the middle distance is automatically recalculated.
Finally, finish the wizard by clicking Finish.
Automatic data transfer is started and IDEA StatiCa Beam with the generated project is launched.
3 Project data
Set the Beam alignment and Support position to the Bottom surface.

4 User-Defined Forces
The variable load cases are exported to IDEA beam as User Defined Forces. For example, observe the shape of the bending moment for load case vítr +y.

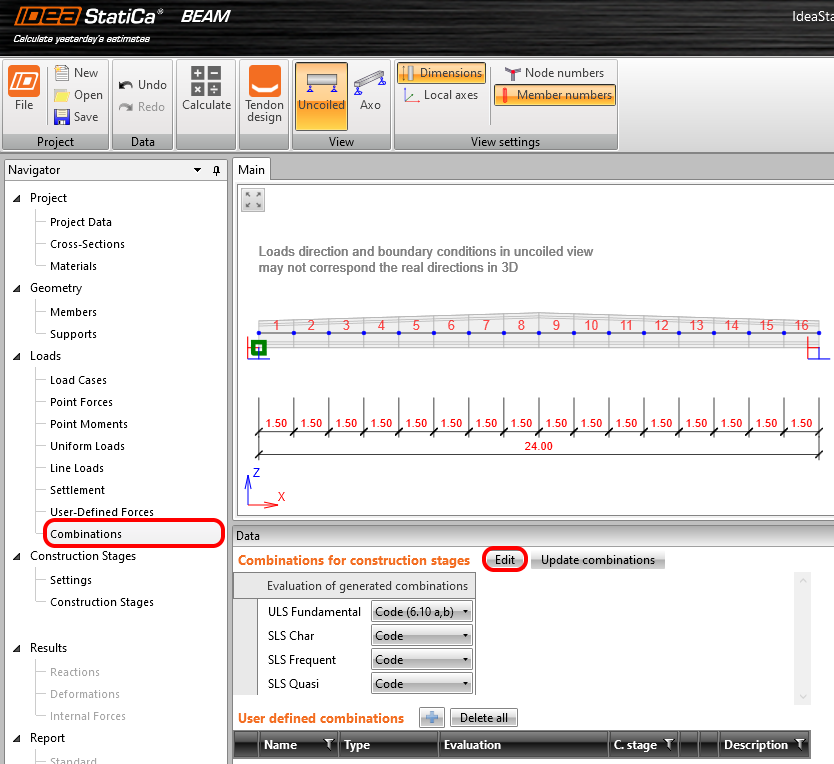
5 Combinations
Let’s define combinations that will be consisted of permanent and variable load cases. Click the button Edit.
We add all variable load cases which are assigned to LG2 (load group 2) to stage End of design working life. All load cases from this group will be added to ULS and SLS combinations.

6 Tendon design
We activate all Construction Stages and run Tendon design to define the geometry of the tendons and the effect of prestressing on the beam.

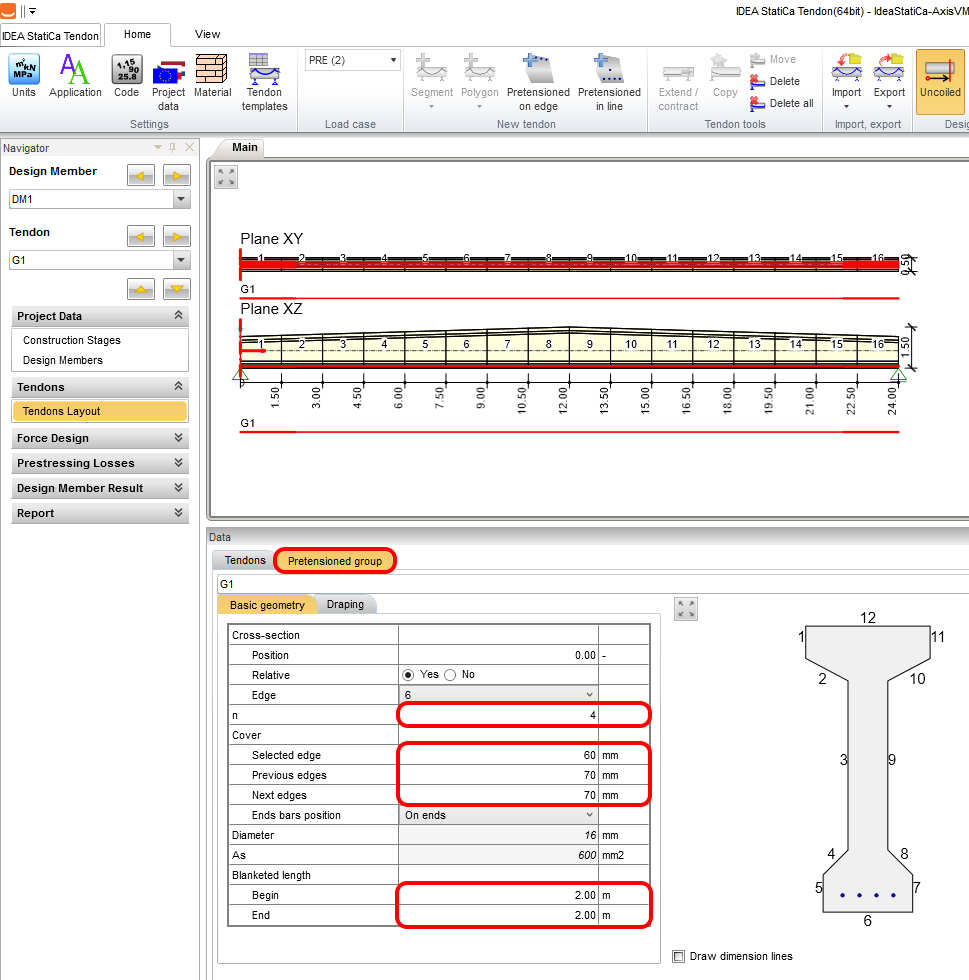
Input the first group of tendons G1 by clicking the icon Pre-tensioned tendons on edge.

Define 4 tendons on the edge 6 and set the cover as follows. For a pre-tensioned beam is usual to reduce the bending moment at the beginning and at the end of the beam. The Blanketed length will be set to 2 m from both sides.
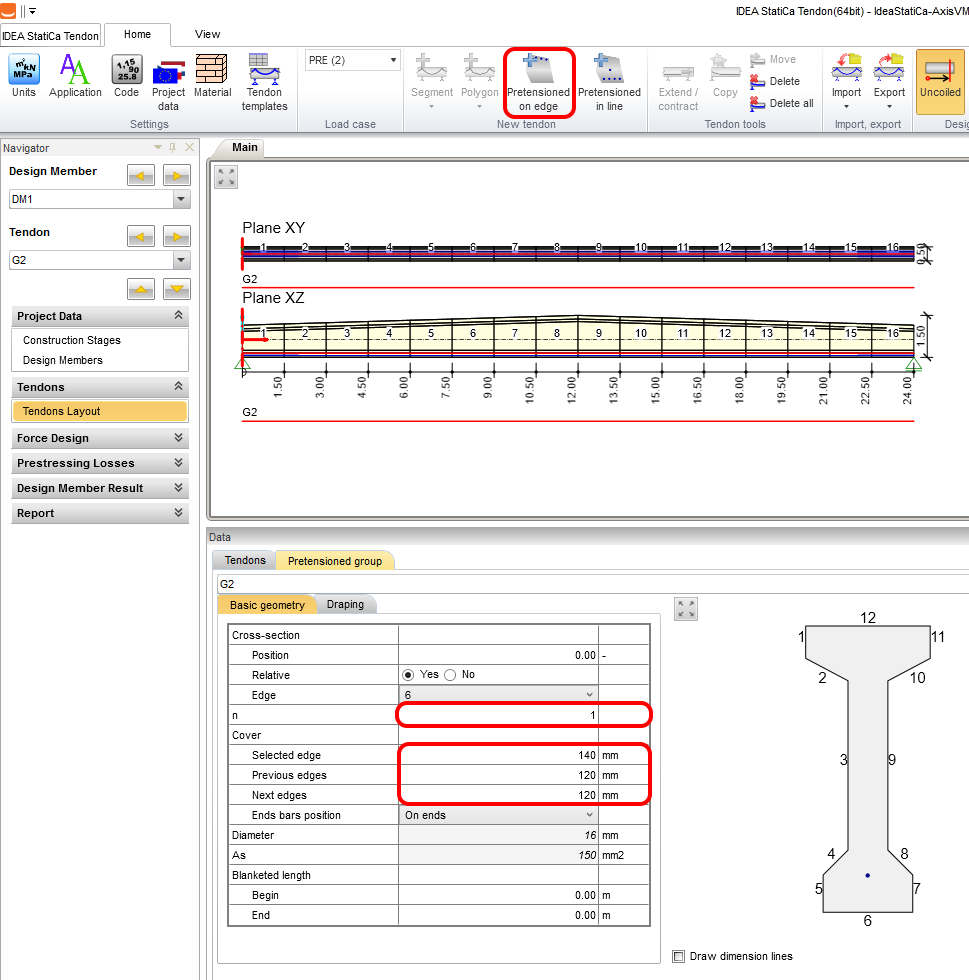
In the same way, we create a second group of tendons G2. Set 1 tendon on edge and change the cover.
Run the analysis to receive the results of short and long-term losses.

After analysis, switch to the group of tendons G1 to investigate the effect of blanketed length on the tendons and the stress check. Close the Tendon designer by the Exit.

Run the analysis to receive the results of reactions, deformations, and internal forces.

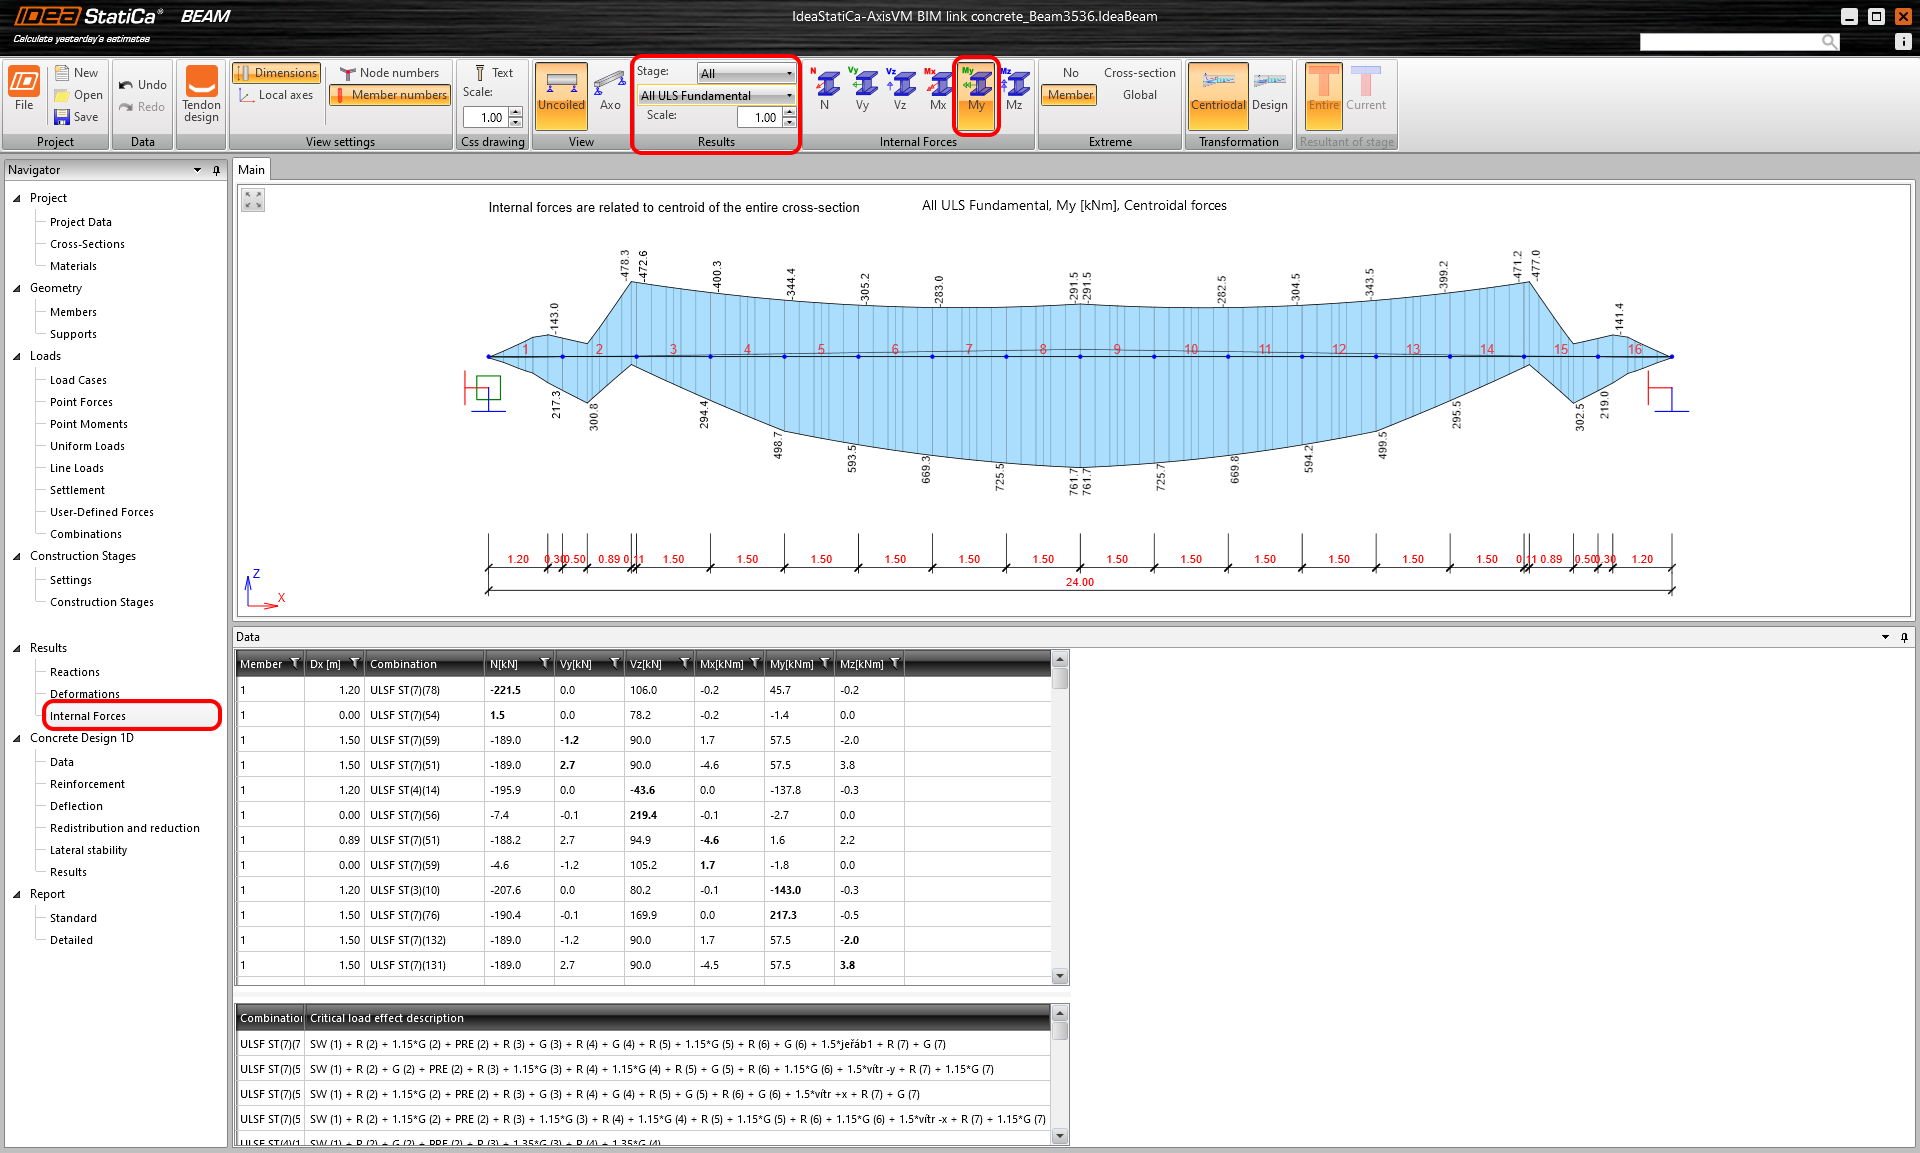
7 Internal forces
Display envelopes of the combinations, increments of permanent load cases, creep and shrinkage, and variable load cases for every construction stage.
8 Data
For beam will be set only one exposure class and unselect the possibility Chlorides. Remaining checks for Detailing and Lateral stability will not be assessed.

9 Reinforcement
The beam was divided into many zones which were adopted from the division of the beam. Apply Detailed button to reinforce the zones.

Apply the first template of reinforcement and keep default settings.
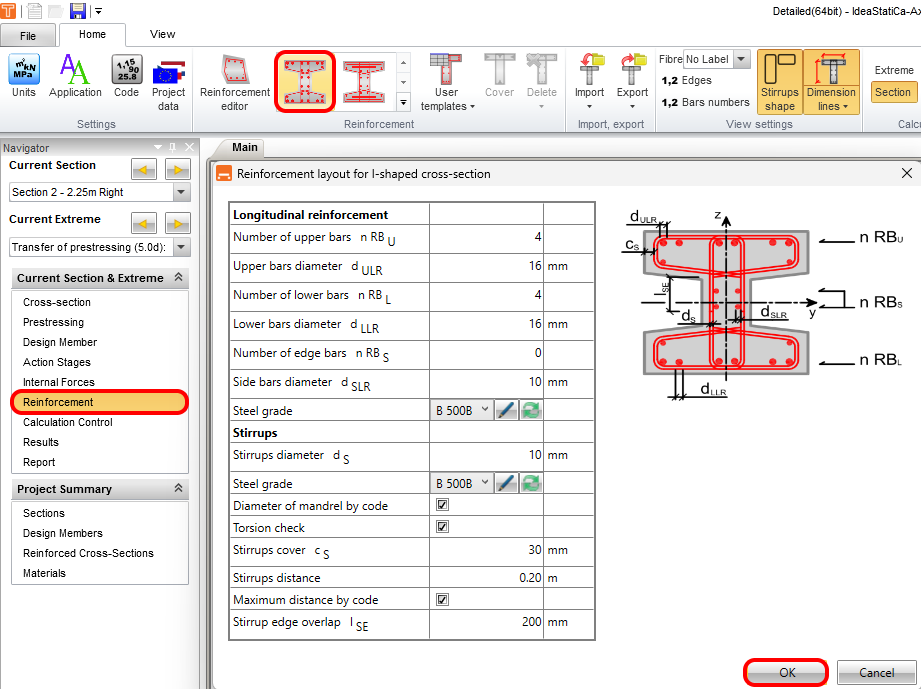
We indicate the main stirrup for torsion and shear and control if this stirrup is active in the shear and torsion. The other stirrups are non-active.

Copy reinforcement to all Reinforced cross-sections with an identical shape. This functionality makes the reinforcement process easier.

Run the Calculation to check the results for all zones.

The cross-sections are reinforced.

10 Deflection
Control short-term and long-term deflection according to the effective time. Let’s check the deflection for the Effective time 28 days. Observe a short-term deflection and increments due to creep and shrinkage and variable load at the end of the design working life for the selected time.

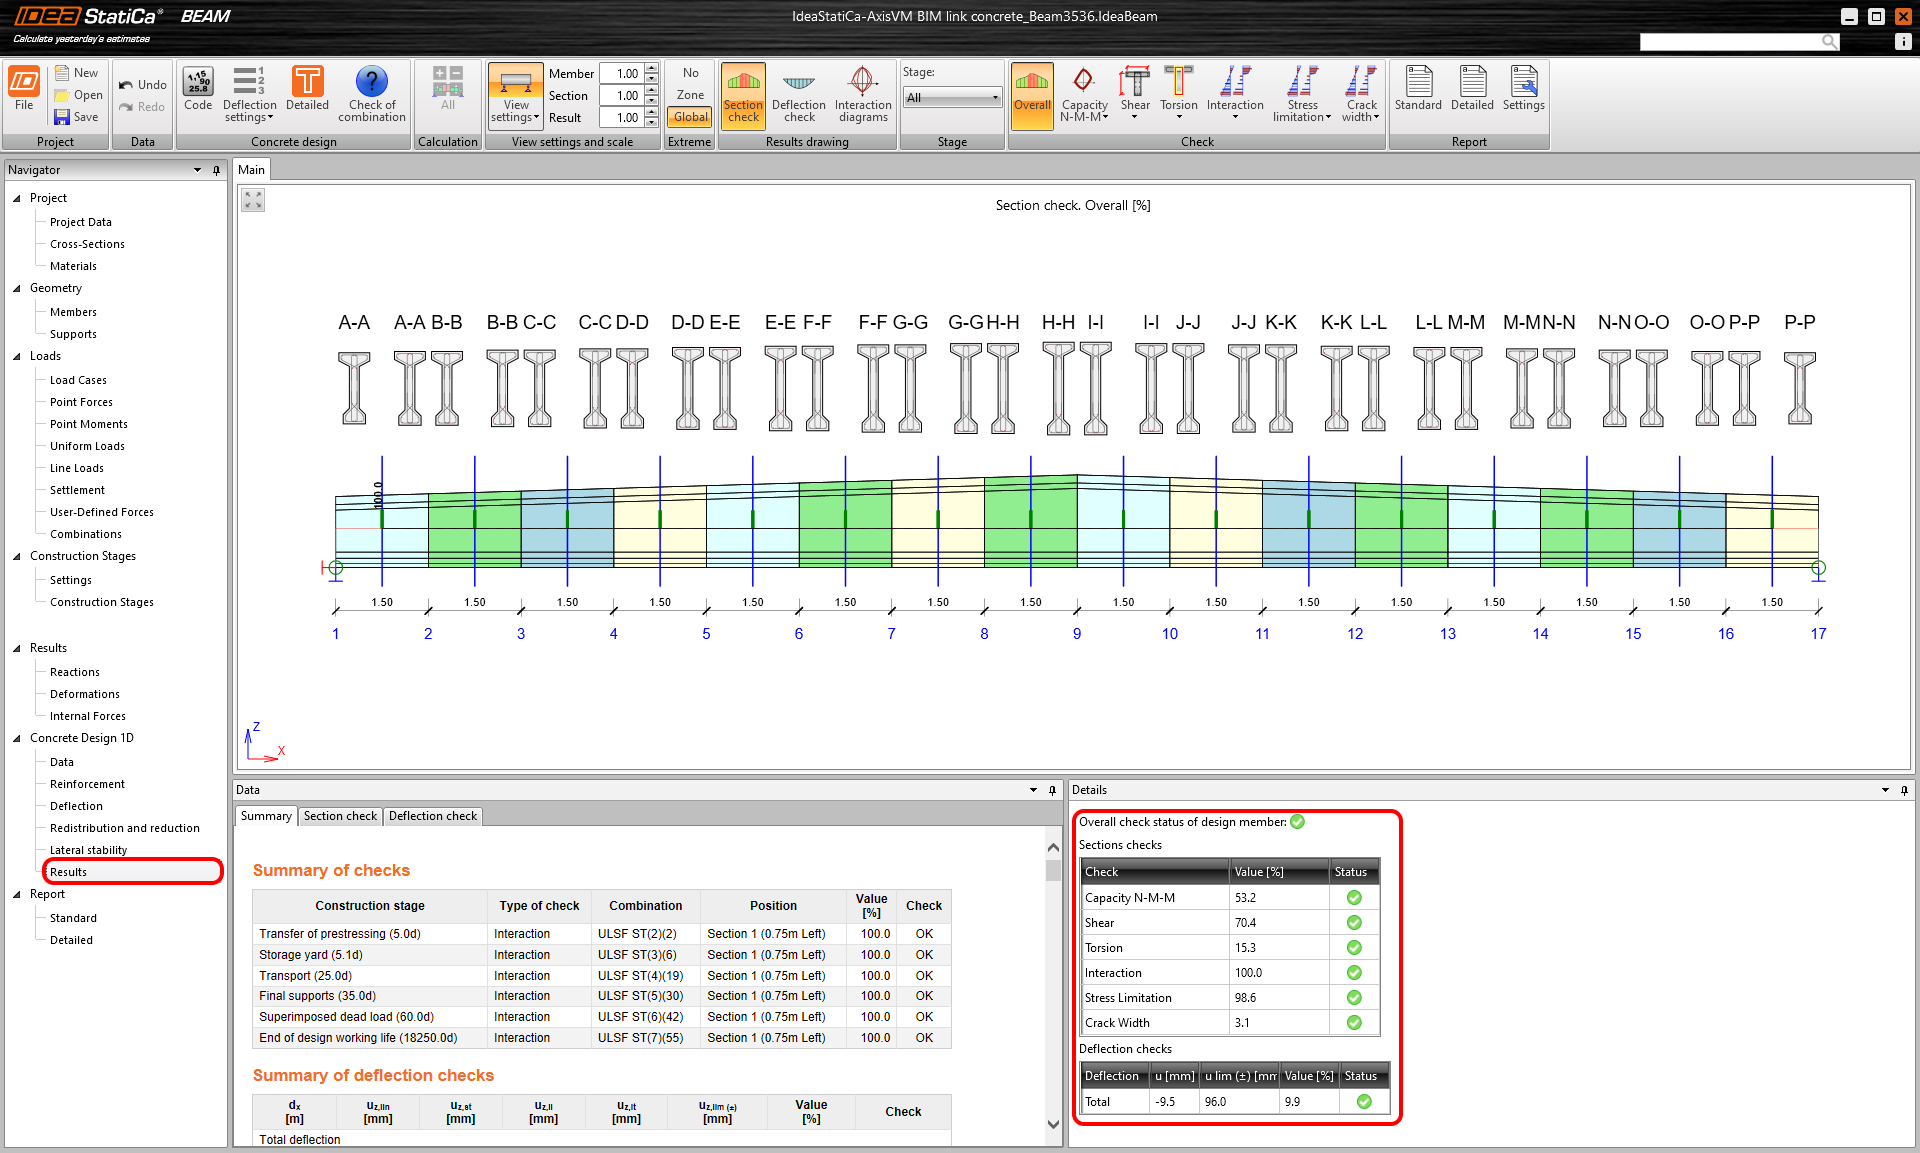
11 Results
Run the analysis by clicking the tab Results. After analysis will appear the tab with a summary overview of the results with maximal utilization for every one of them. IDEA types in the combination and the construction stage, which involves the check with maximal utilization.
12 Report
At last, go to the tab Report. IDEA StatiCa offers a fully customizable report to print out or save in editable format.


You have designed, reinforced and code-checked Pre-tensioned concrete beam according to Eurocode using FEM software AxisVM and IDEA StatiCa.
13 Known limitation
To be able to receive the internal forces from the non–linear analysis to IDEA StatiCa is really important to keep these rules.
At first, run the linear analysis.

Subsequently, run the non–linear analysis. This process guarantees that we will receive the internal forces from combinations and load cases created in Axis VM to IDEA StatiCa.
