ETABS BIM link for steel member buckling analysis (AISC)
1 How to activate the link
- Download and install (as administrator) the latest version of IDEA StatiCa
- Make sure that you are using the supported version of ETABS
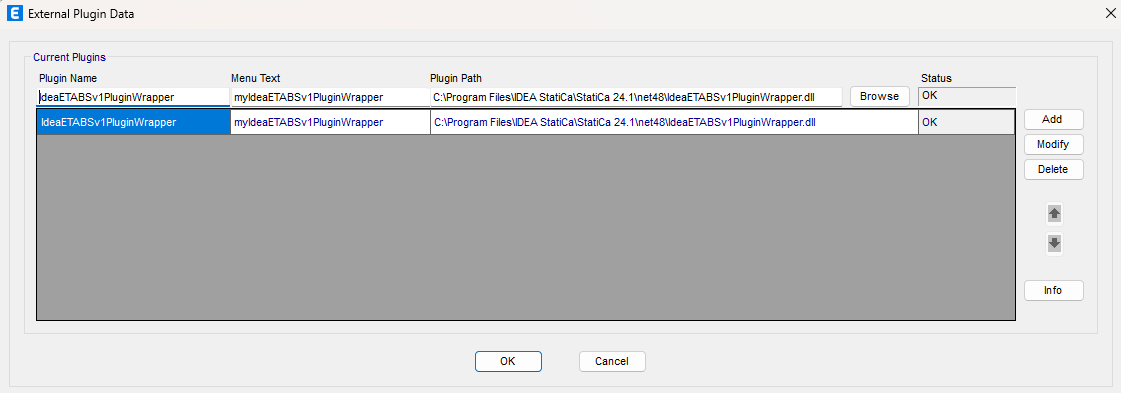
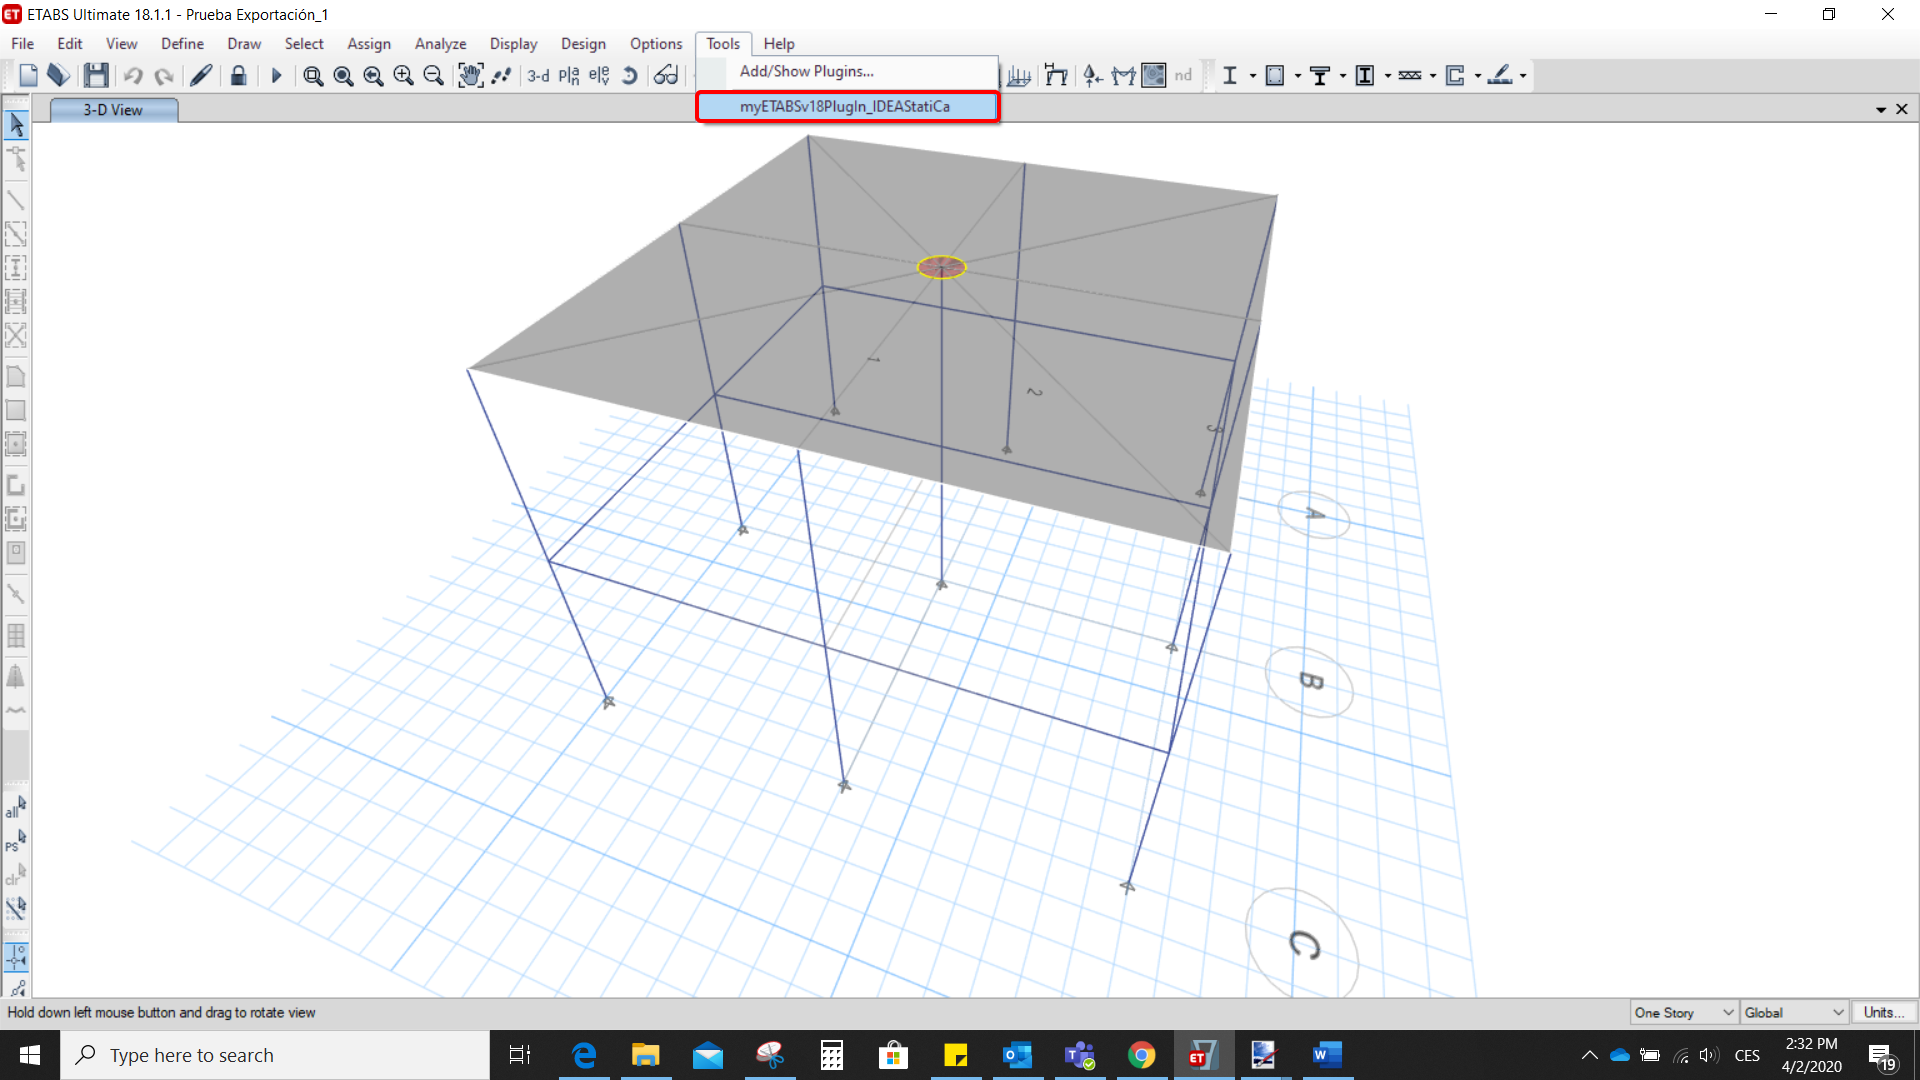
After installation of both programs, start ETABS and Click Tools > Add/Show Plugins to open the Plugin Manager dialog. This option lets you install and add add-ins (programs) to the appropriate places in the ETABS menu.
Browse for
C:\Program Files\IDEA StatiCa\StatiCa 24.1\net48\IdeaETABSv1PluginWrapper.dll
(for older versions of IDEA Statica C:\Program Files\IDEA StatiCa\StatiCa 23.0\IdeaETABSv1PluginWrapper.dll
or C:\Program Files\IDEA StatiCa\StatiCa 22.1\ETABSv18PlugIn_IDEAStatiCa.dll).
You can edit the plugin's name displayed in your dropdown menu as IDEA StatiCa Checkbot, then click Add.
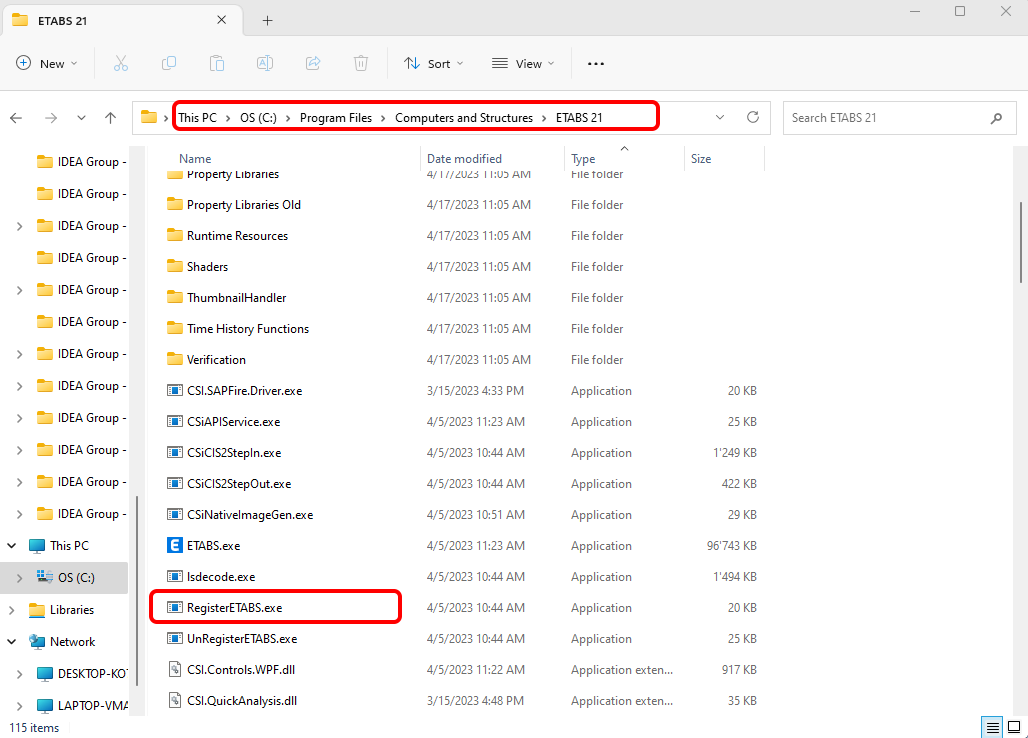
Remark
In case the window with the IDEA StatiCa Checkbot doesn't appear, please go to C:\Program Files\Computers and Structures\ETABS 22 and run as Administrator the file RegisterETABS.exe.
2 How to use the link
Open the attached project in ETABS and run the analysis.
Go to the menu item Tools and run the export command you have just defined.
The Checkbot opens, and first, you need to choose the code.

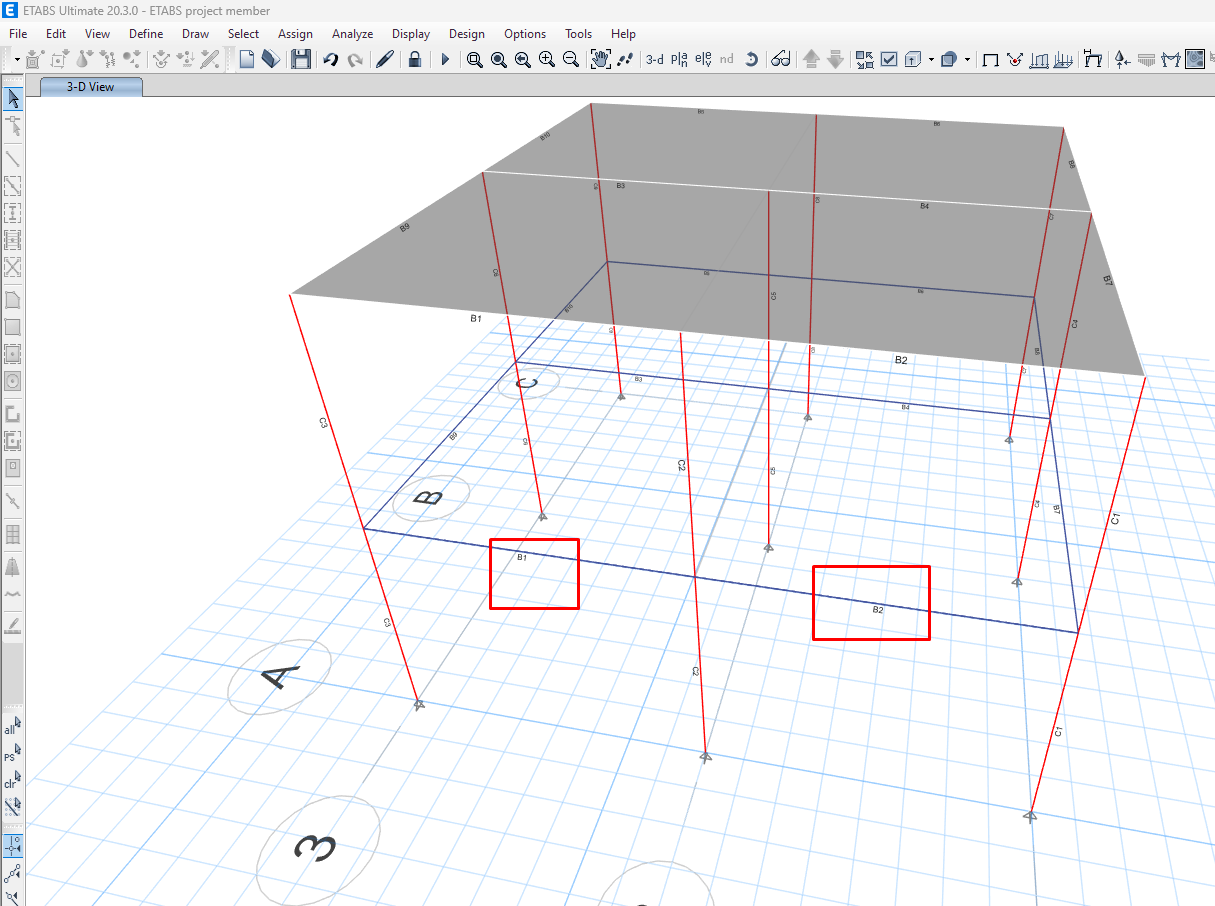
Then you can select the two beams (using Ctrl key) shown in the picture below in the ETABS project for export. The joints connected to the beams will be automatically exported as well.
If the beams are selected, you can click on the Member button in the Checkbot. With this, all the selected beams and their joints from ETABS will be imported into the Checkbot.

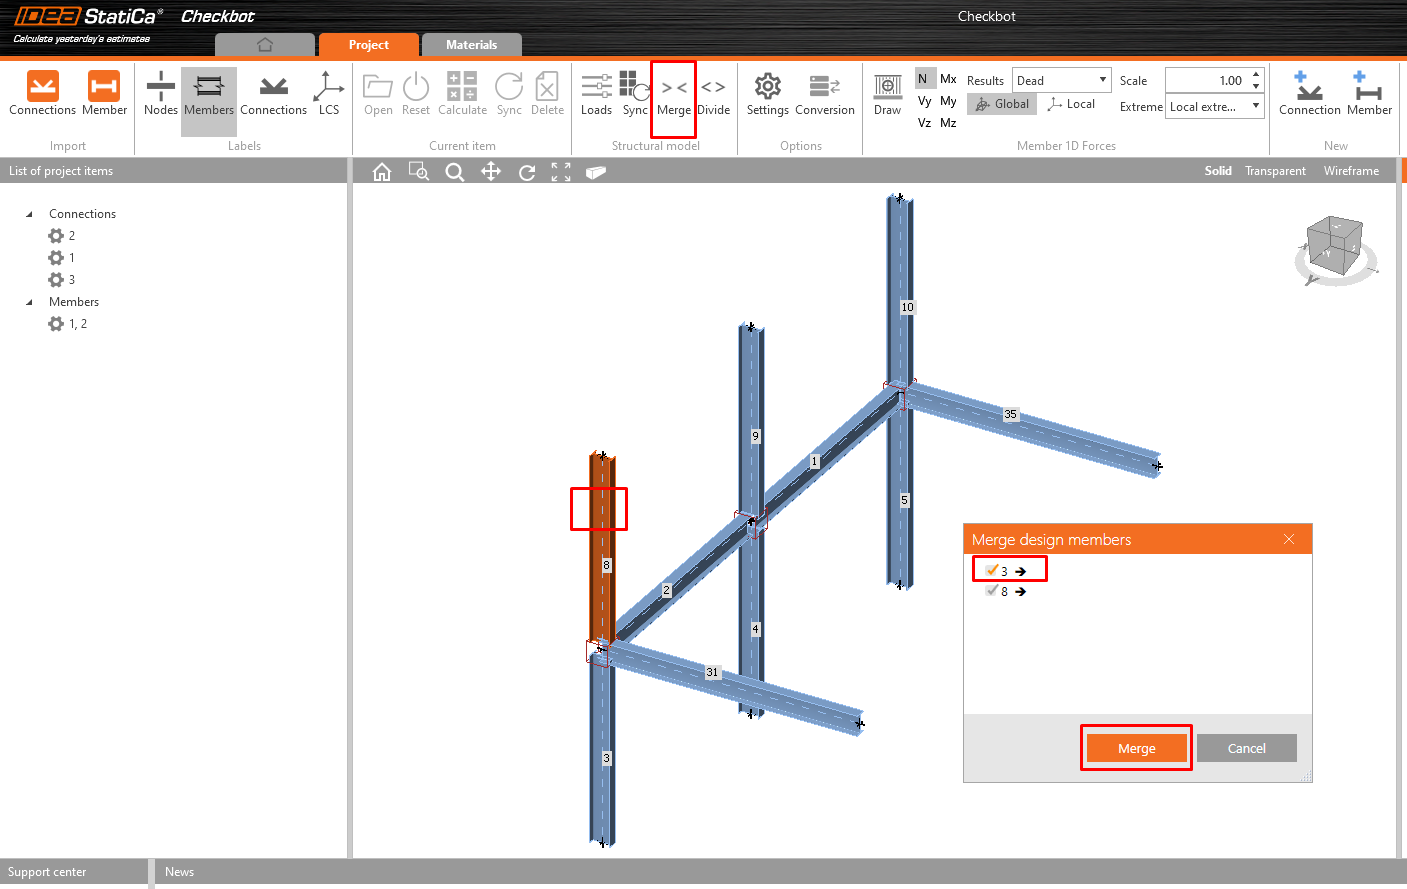
As the columns here in this example are continuous one, we have to merge the belowones and upper parts together. Select the upper part of one of the columns and then click on the button Merge. Do it for all 3 columns.
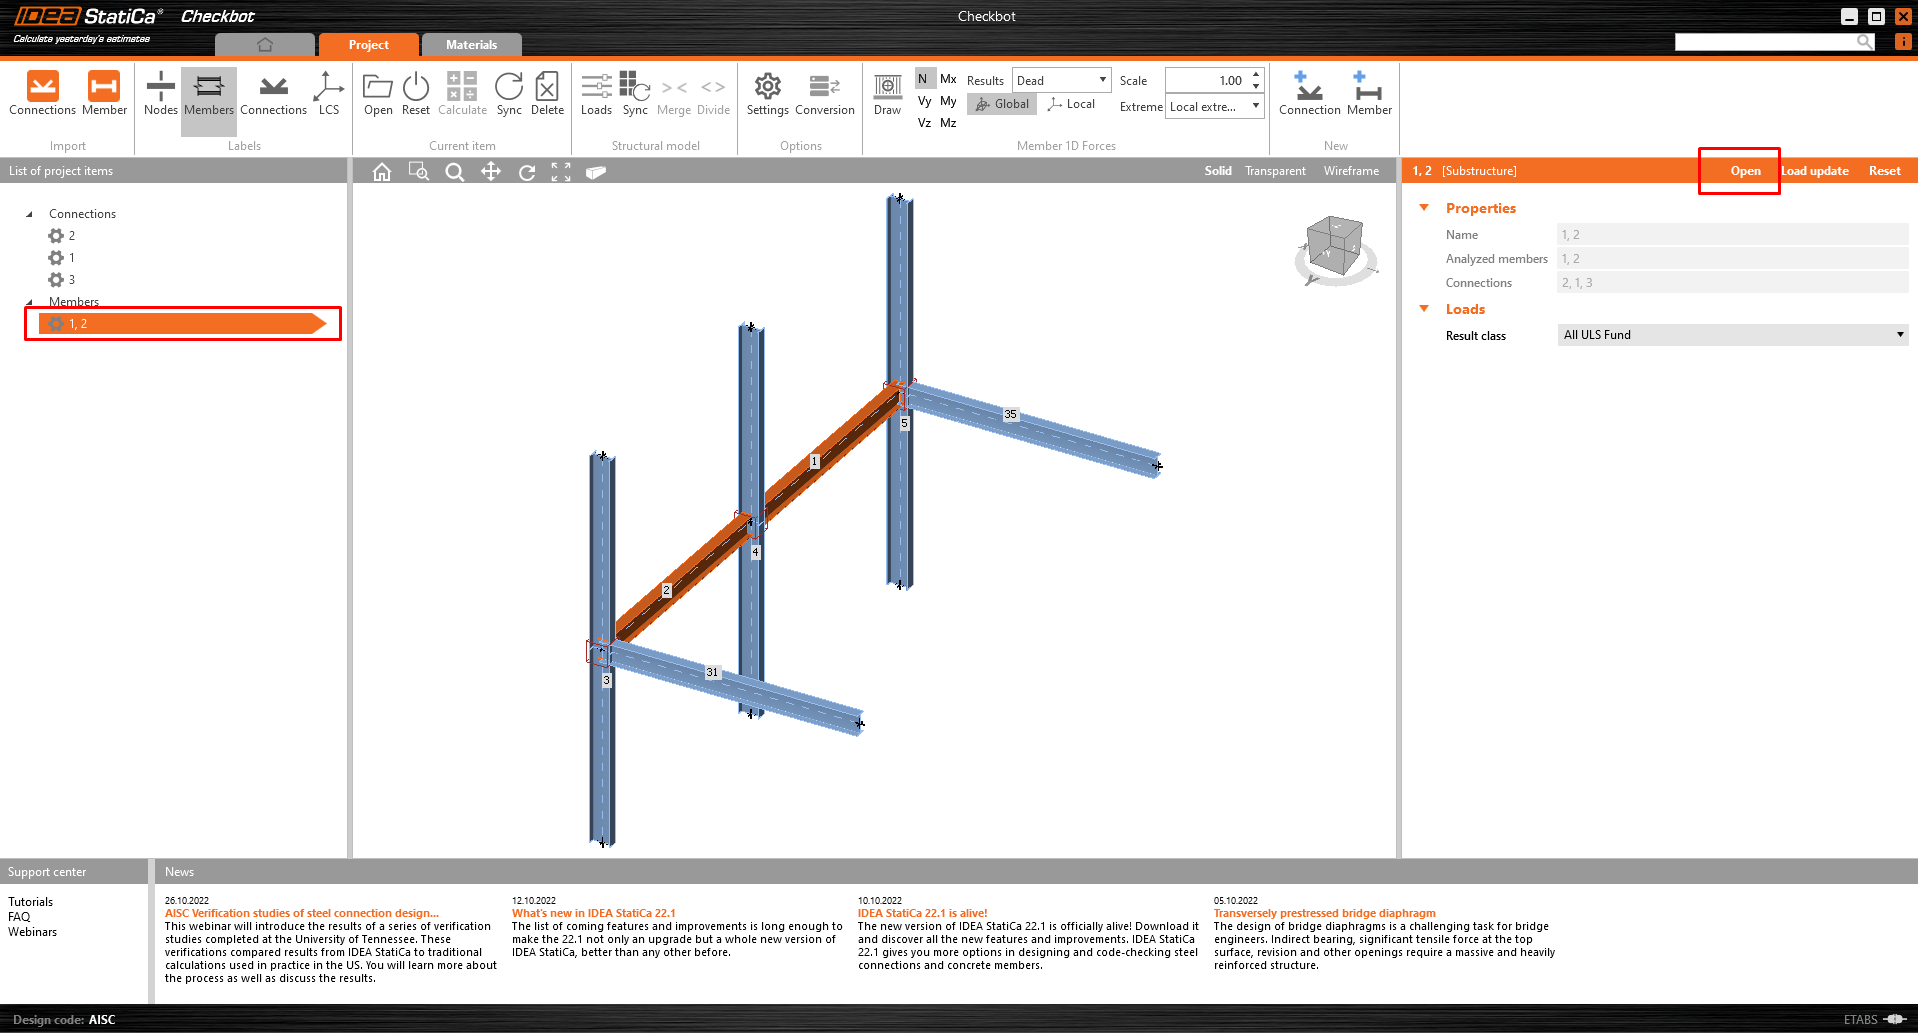
The member is now ready to be opened in IDEA StatiCa Member for the CBFEM analysis.
3 Design
Automatic data transfer is started, and IDEA StatiCa Member with a generated project is launched. All members and load effects were added automatically.
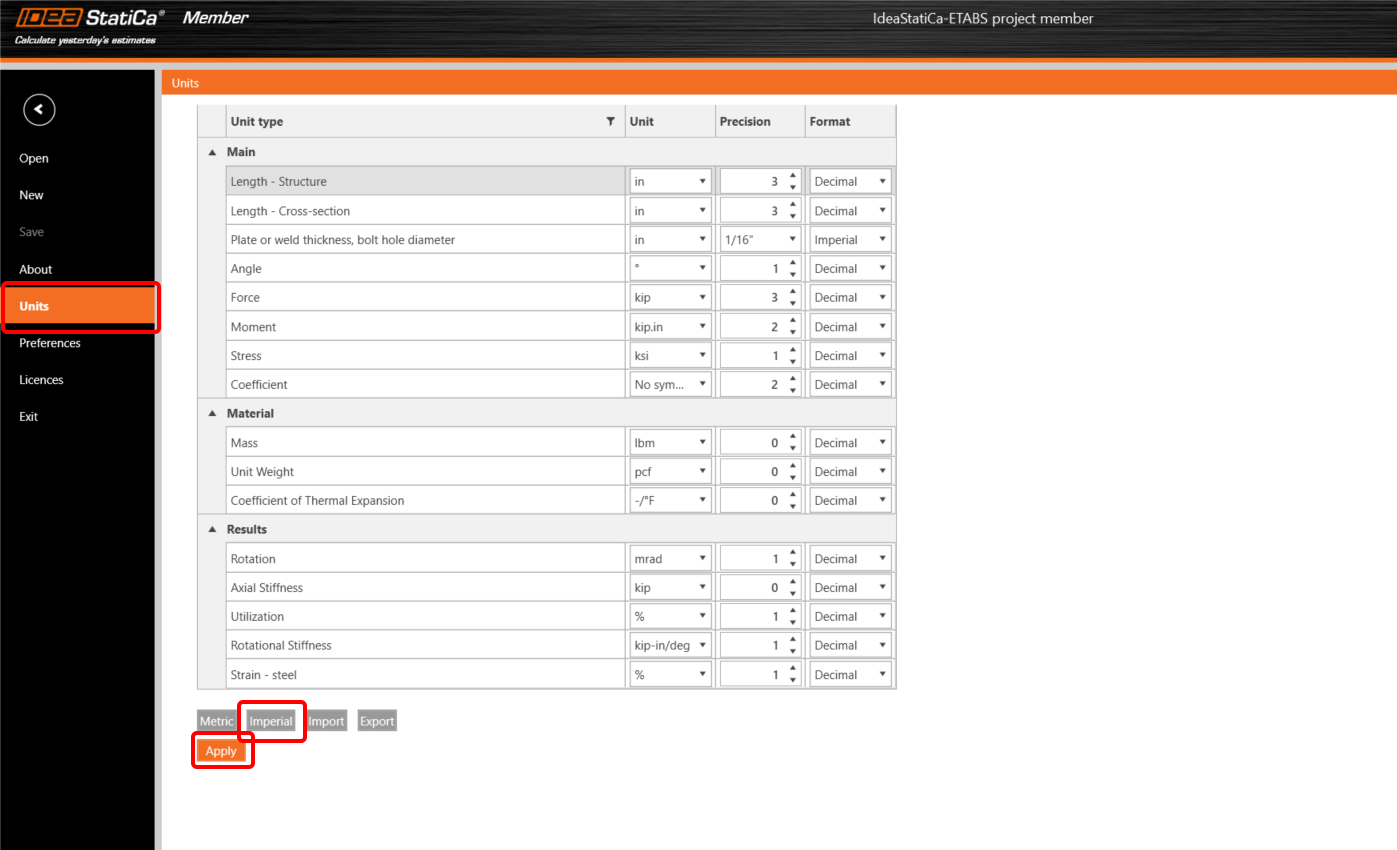
This tutorial works with imperial units. If you use metric units, you can switch them to imperial by clicking in the upper ribbon on Project and then Units in the left menu or check out this article.
To get the analysis of the member, we first have to design all the joints along with the member. You can start with Node 3 when clicking on Edit connection.

Now you will define a set of manufacturing operations to model the connection between members. Right-click on member 2 and select Connect to..

Choose the column and in the new window select the End plate template.
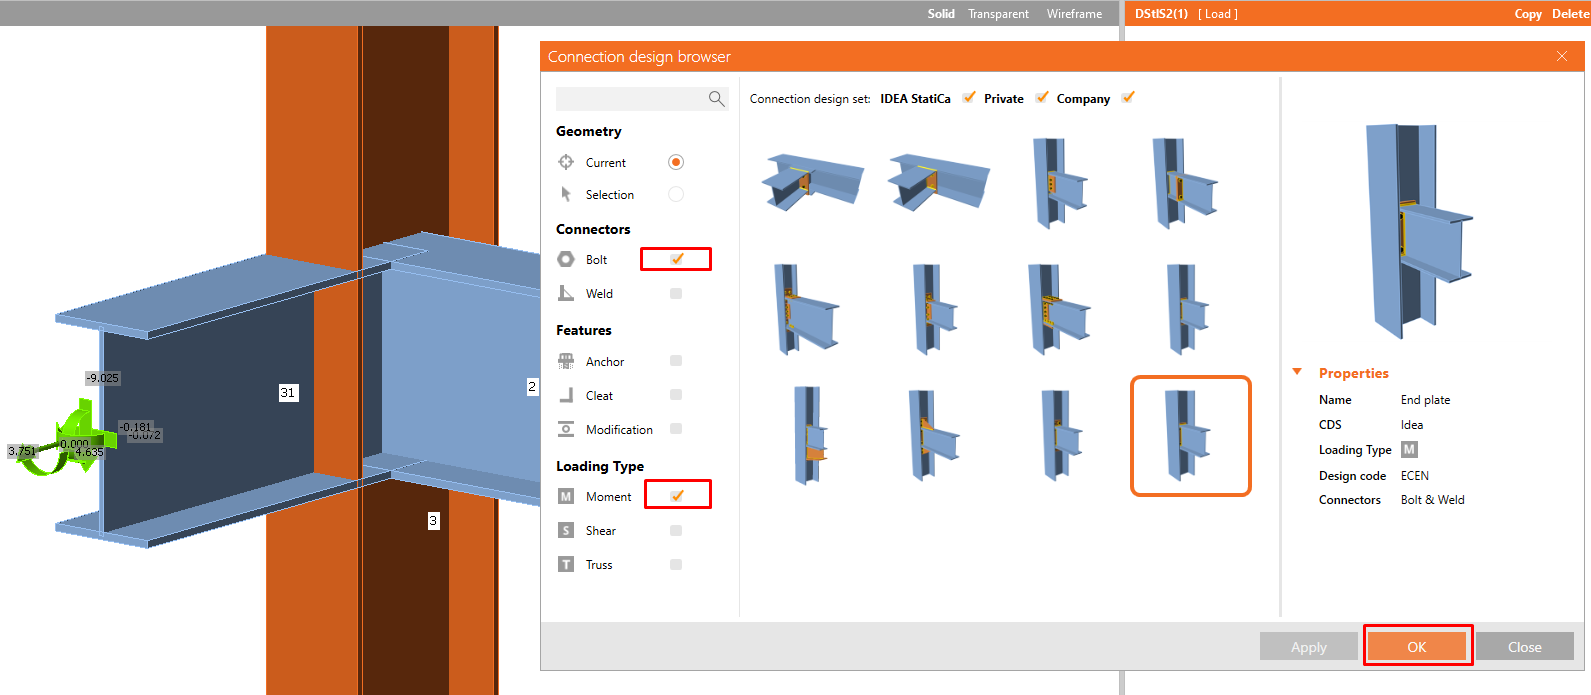
Continue with the setting of the bolts.

Switch of the operation Stiffener created together with the End plate operation.
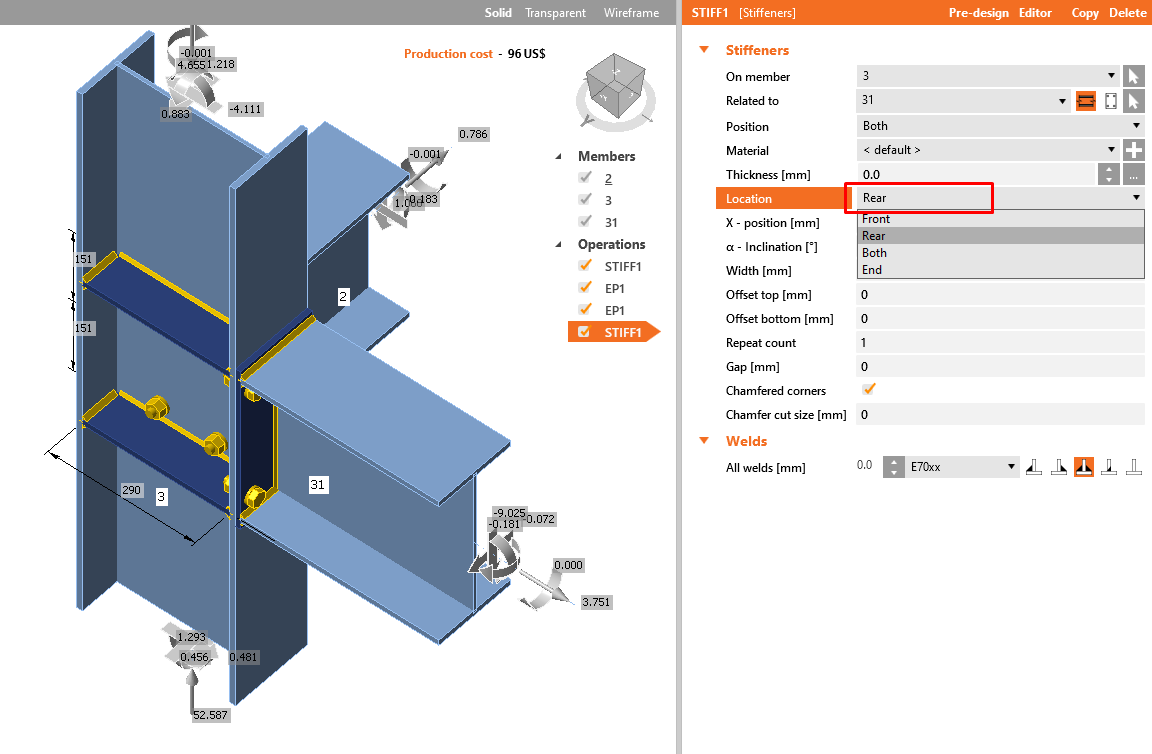
Repeat this operation for member 31.

This operation also added Stiffeners to the joint on both sides. You have to change it only to the Rear location.
Click on the Save button and close the window.
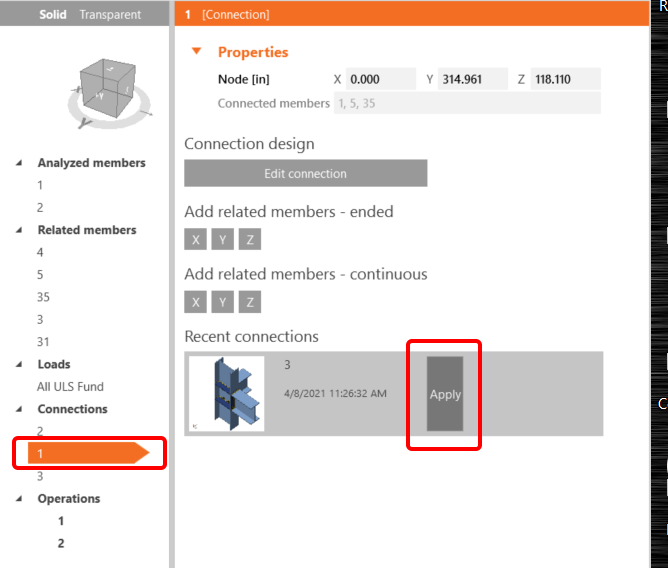
Now you can apply this designed joint to node 1.
For the middle joint please apply the operation Cleat as shown in the following picture.


To complete our member, we must add openings to the web along both beams. We click on item 1 under Operations and select New operation and then Openings. We set the numbers as in the picture.


We do the same for member 2.

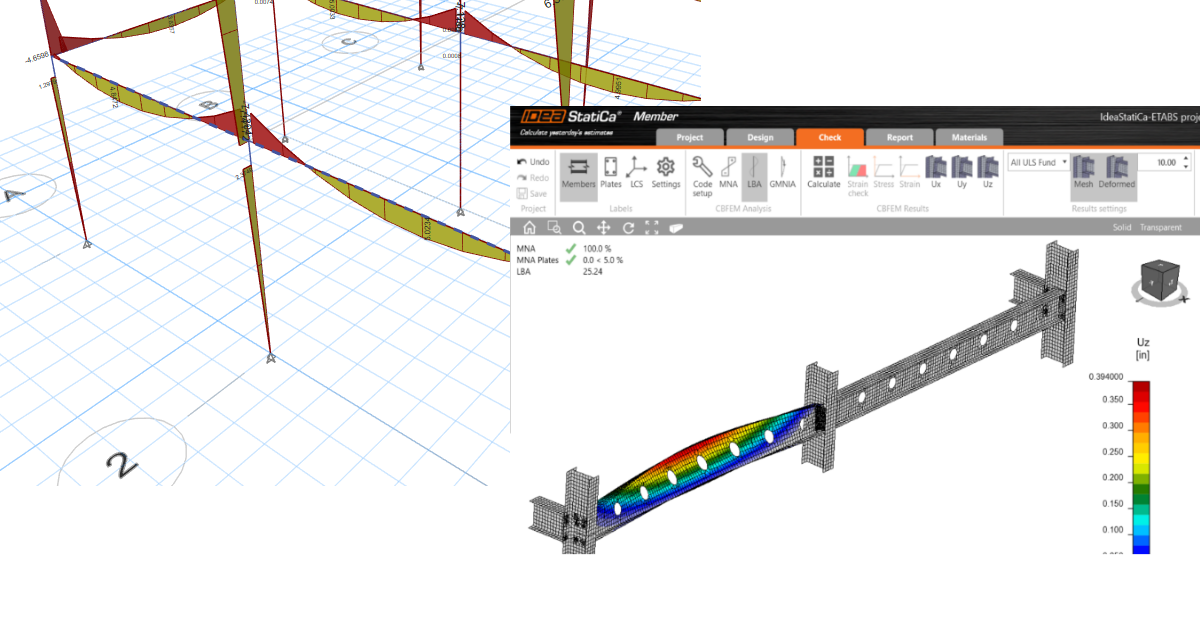
4 Check
The materially non-linear analysis based on CBFEM is started by the icon Calculate from the top ribbon. The analysis model is automatically generated, the calculation is performed, and we can check the results.
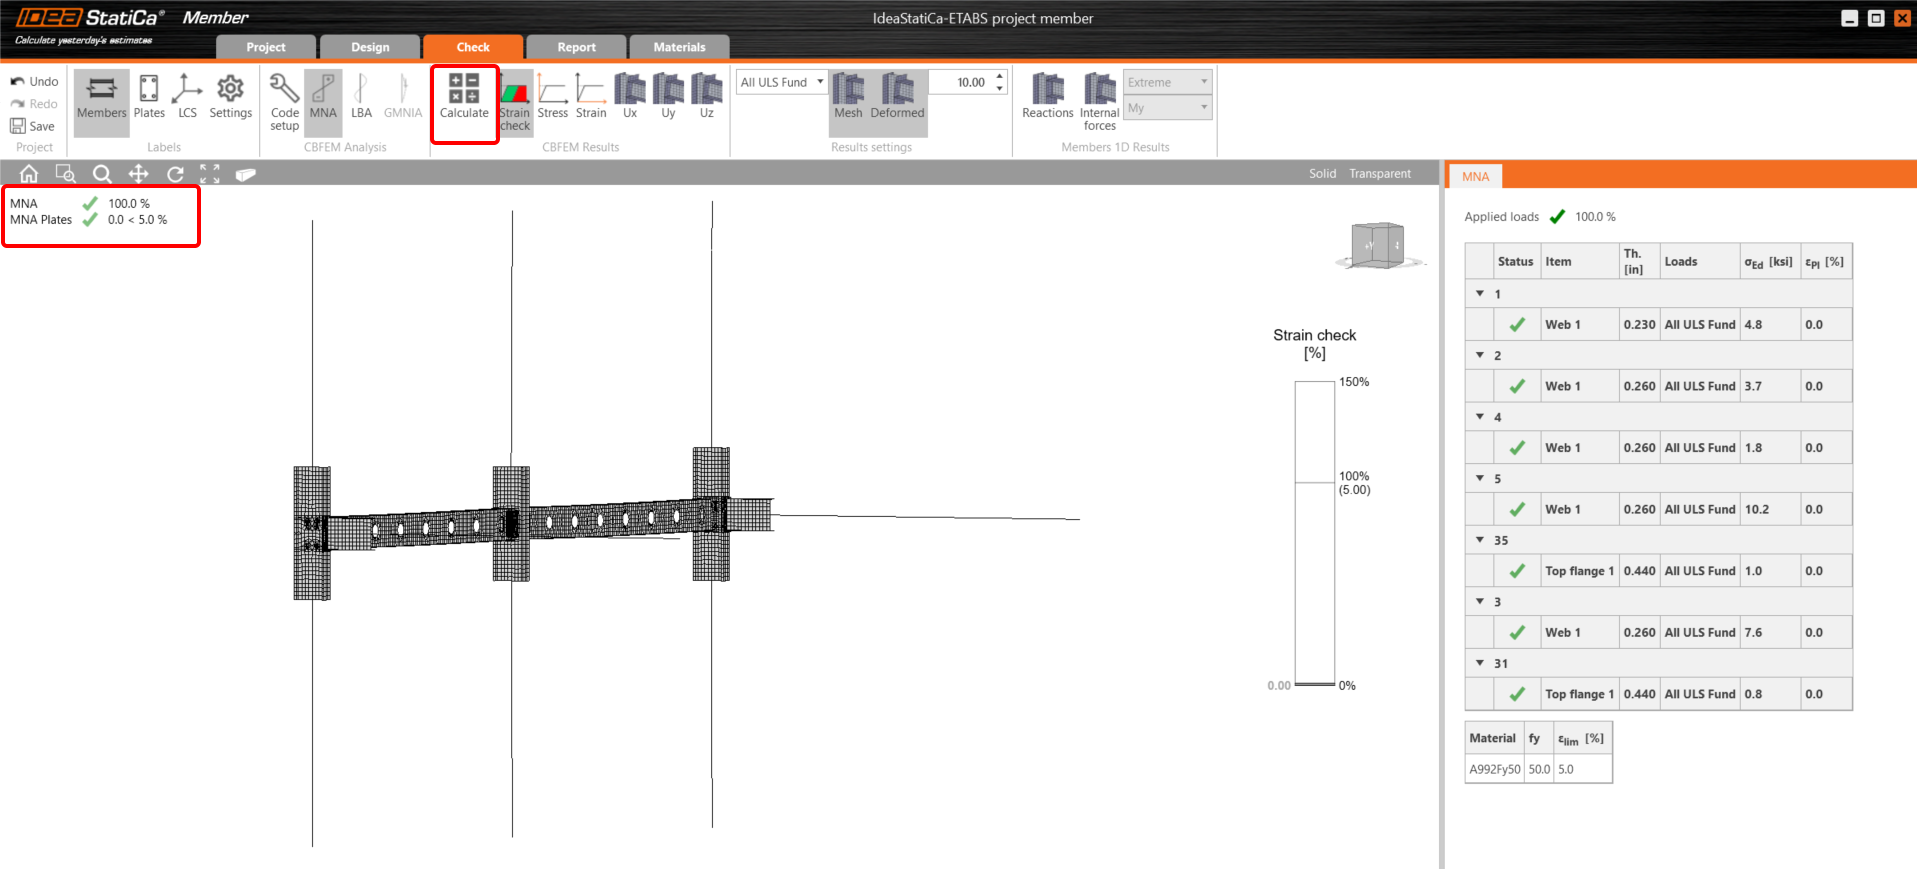
If you want the LBA - Linear buckling analysis, you must select Check in the upper ribbon and click on LBA.

As you can see, the result of this analysis is greater than 15, so it is not necessary to continue with the GMNIA (geometrically and materially nonlinear analysis). For more information, please see the article about imperfections or the Theoretical background.
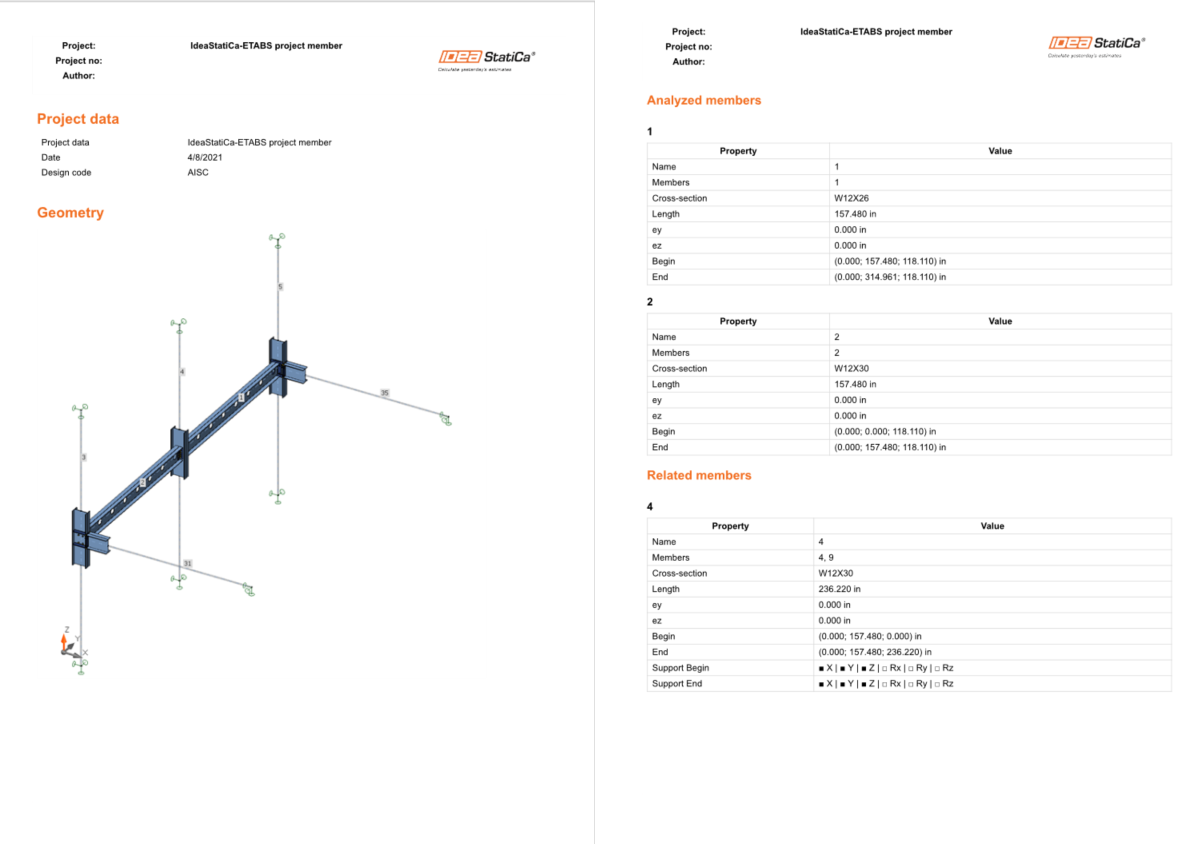
5 Report
At last, we go to the tab Report. IDEA StatiCa offers a fully customizable report to print out or save in an editable format.
Möchten Sie Ihre Fähigkeiten verbessern? Besuchen Sie unseren Campus
Anhänge zum Download
- ETABS project member.zip (ZIP, 118 kB)