We gaan een enkelboutsverbinding gebruiken voor de diagonale schoor. Voor dit type verbinding moeten we ook het Modeltype van de schoorstaaf wijzigen naar N-Vy-Vz. Selecteer de schoor in de lijst met staven en pas het modeltype aan in de vervolgkeuzelijst.

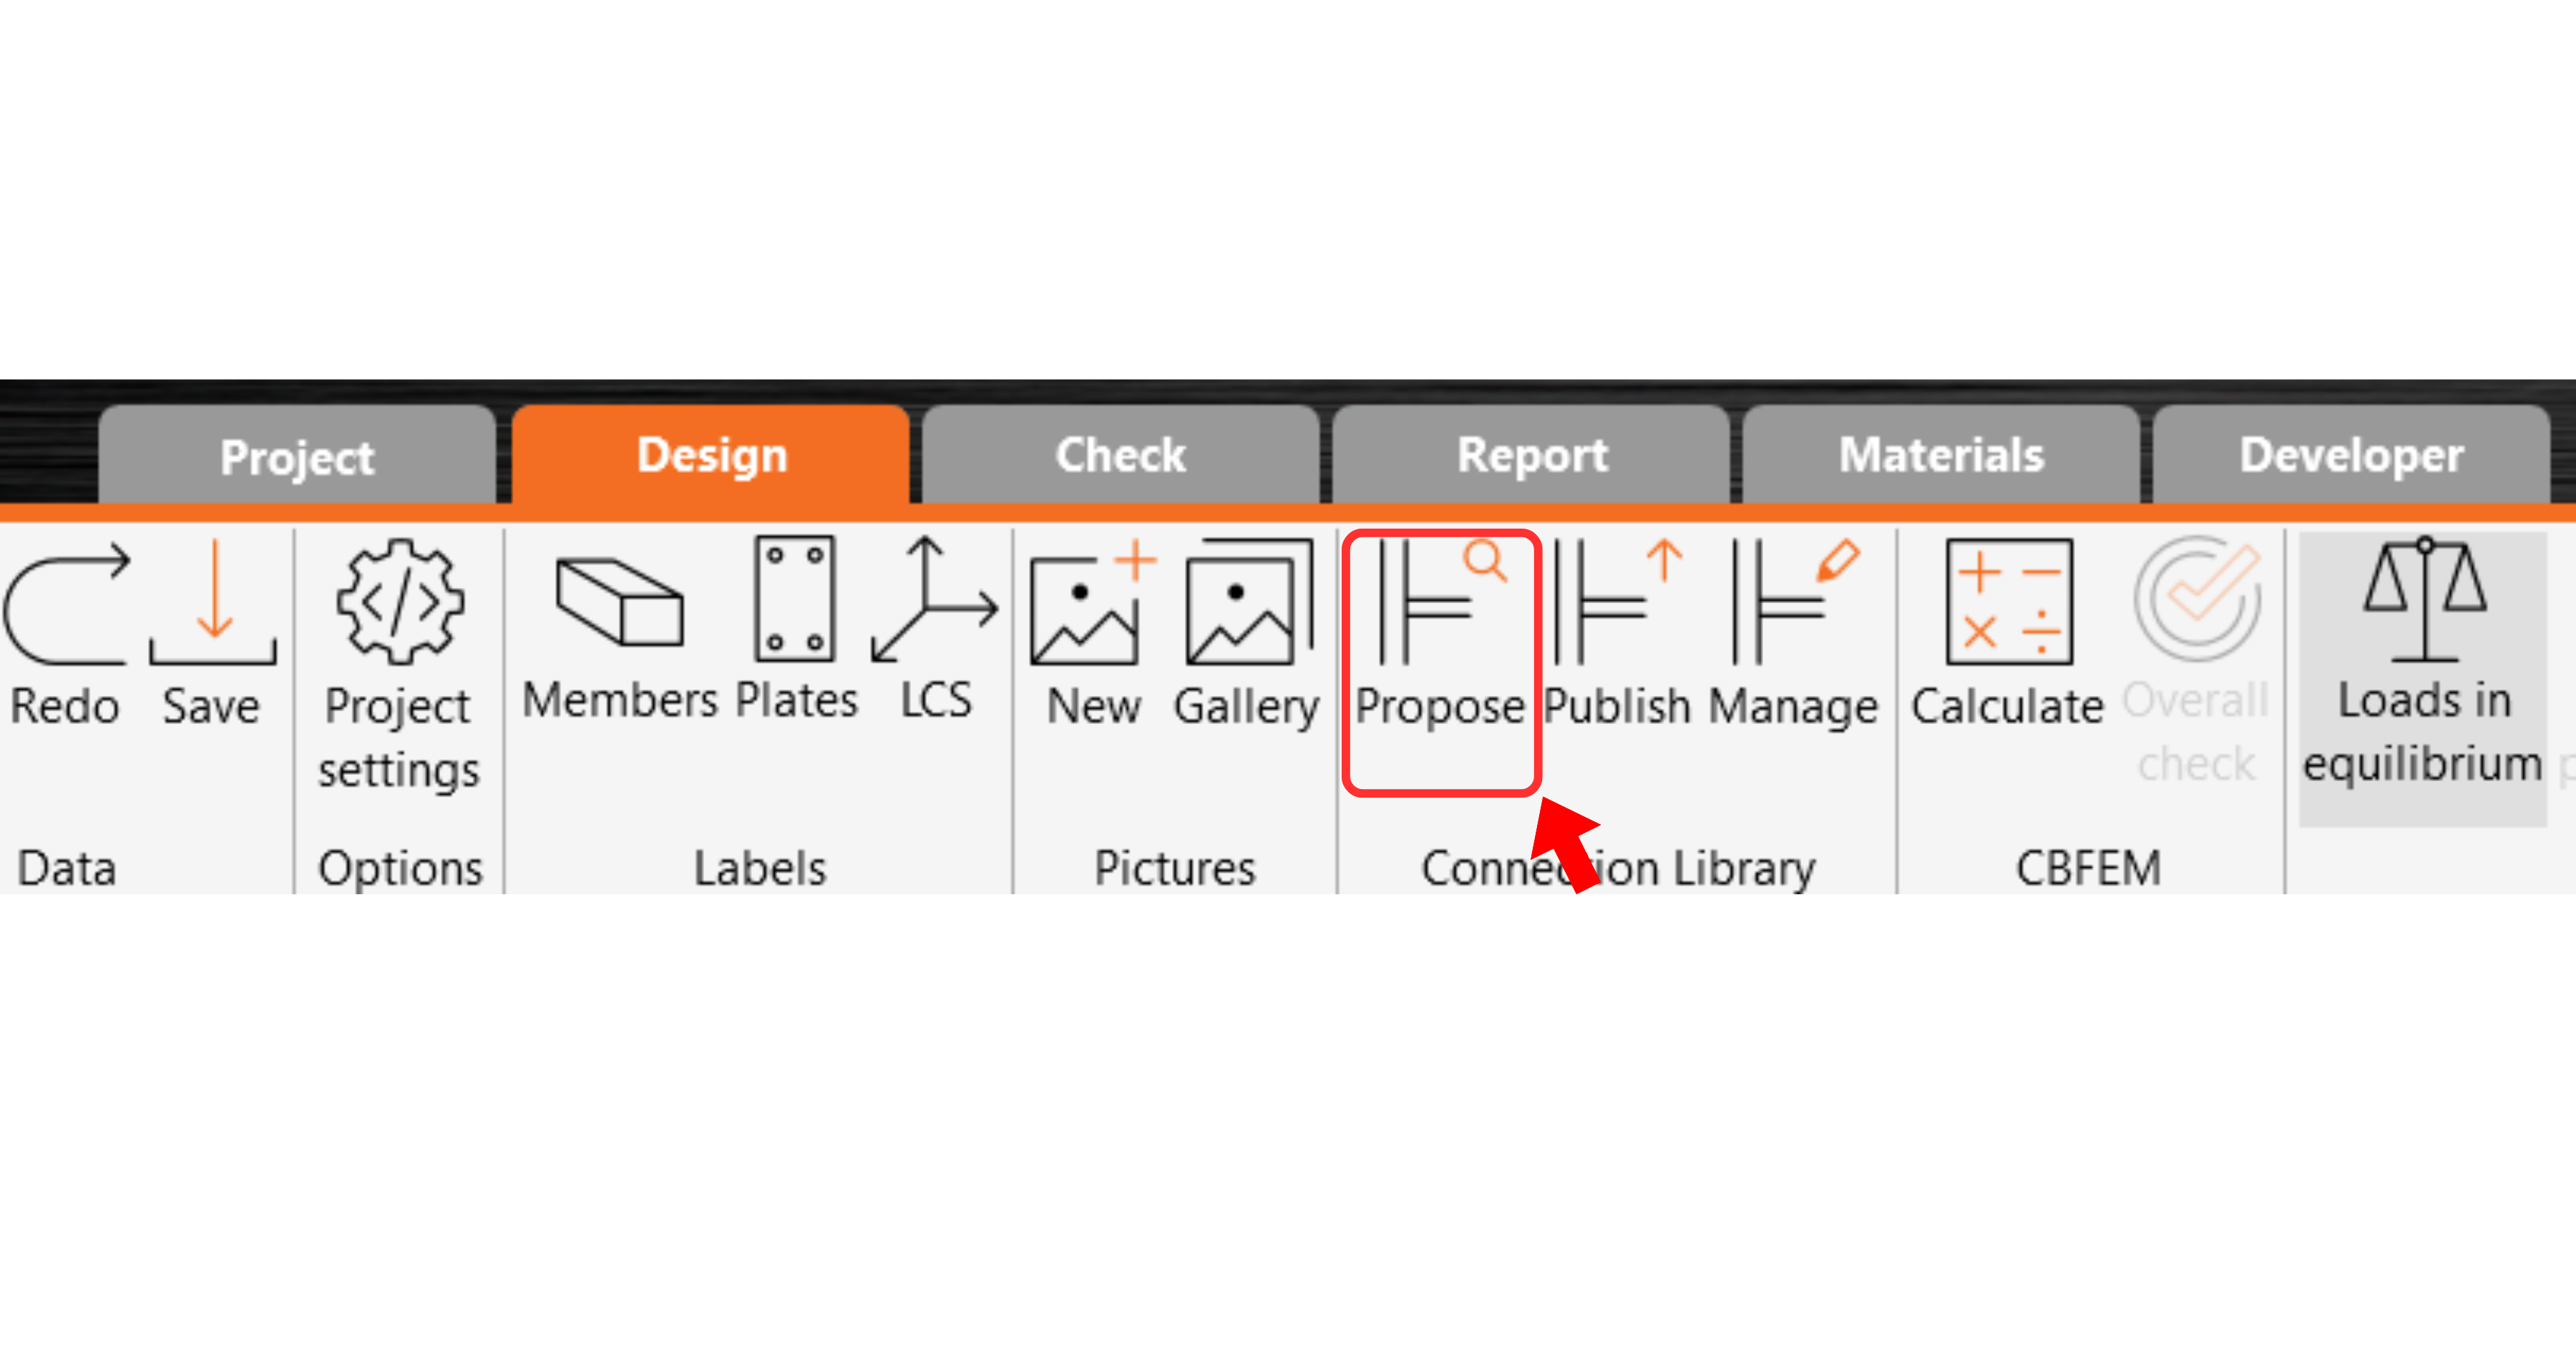
We gaan de Connection Library gebruiken om een verbinding te genereren. Selecteer Stel voor en IDEA StatiCa zal mogelijke oplossingen voorstellen voor de huidige geometrie.
Connection Library toont de mogelijke oplossingen voor de huidige geometrie. Kies de aangeboden template en druk op OK.

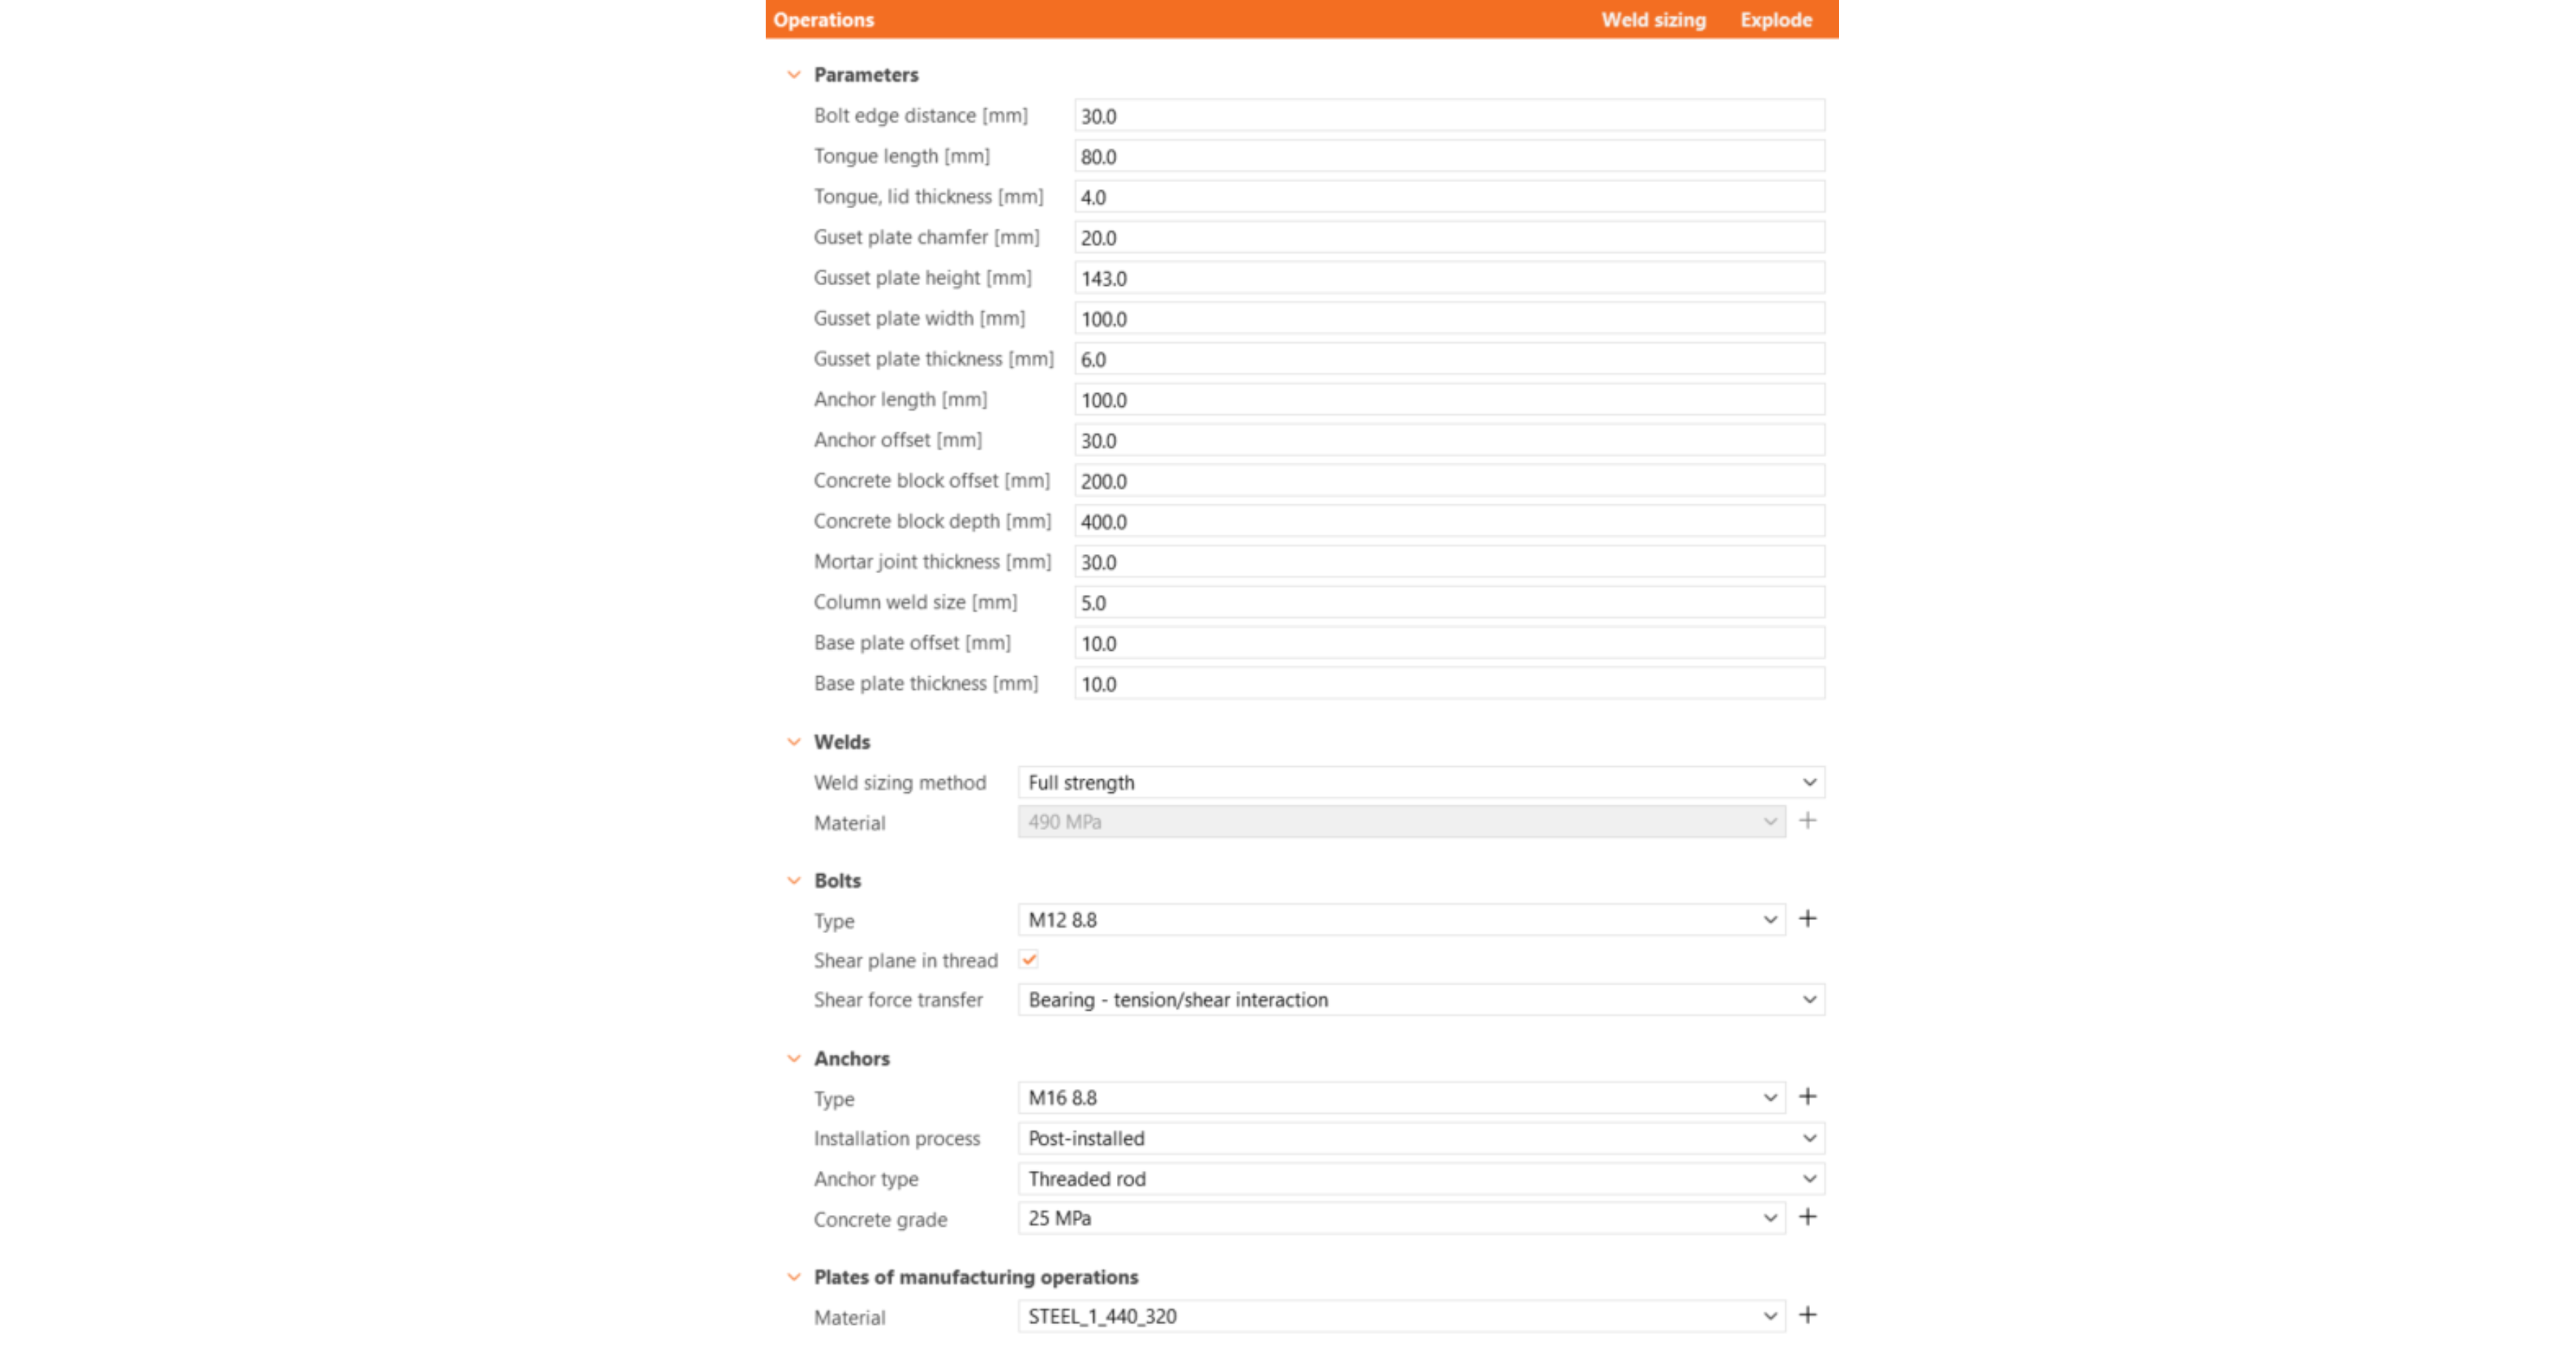
Accepteer de voorgestelde waarden voor de bouten en het betonblok en druk op OK.

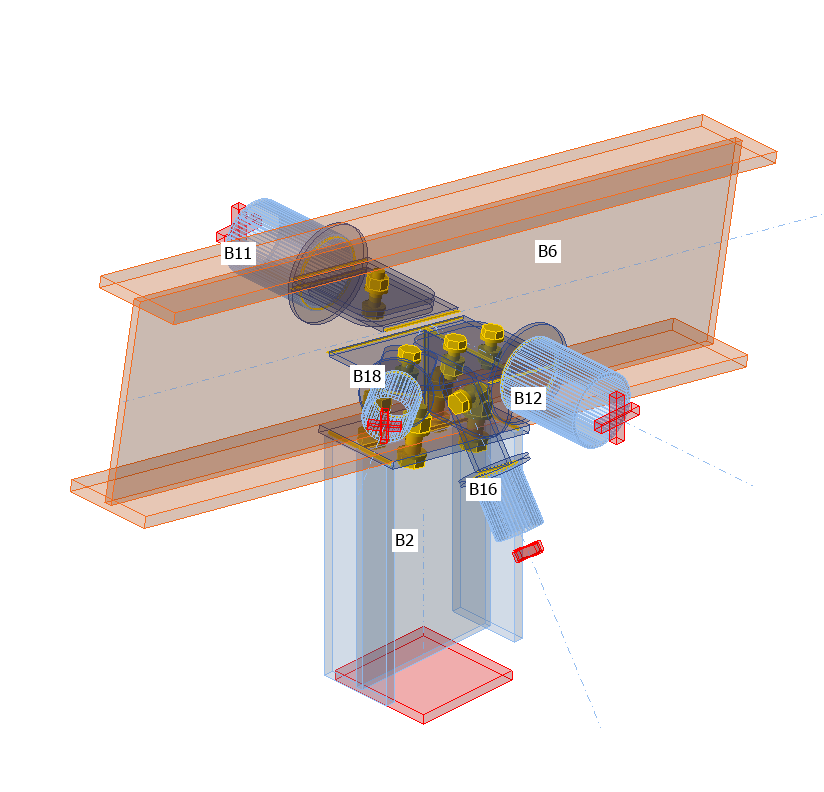
Dit is hoe de initiële verbinding eruitziet.
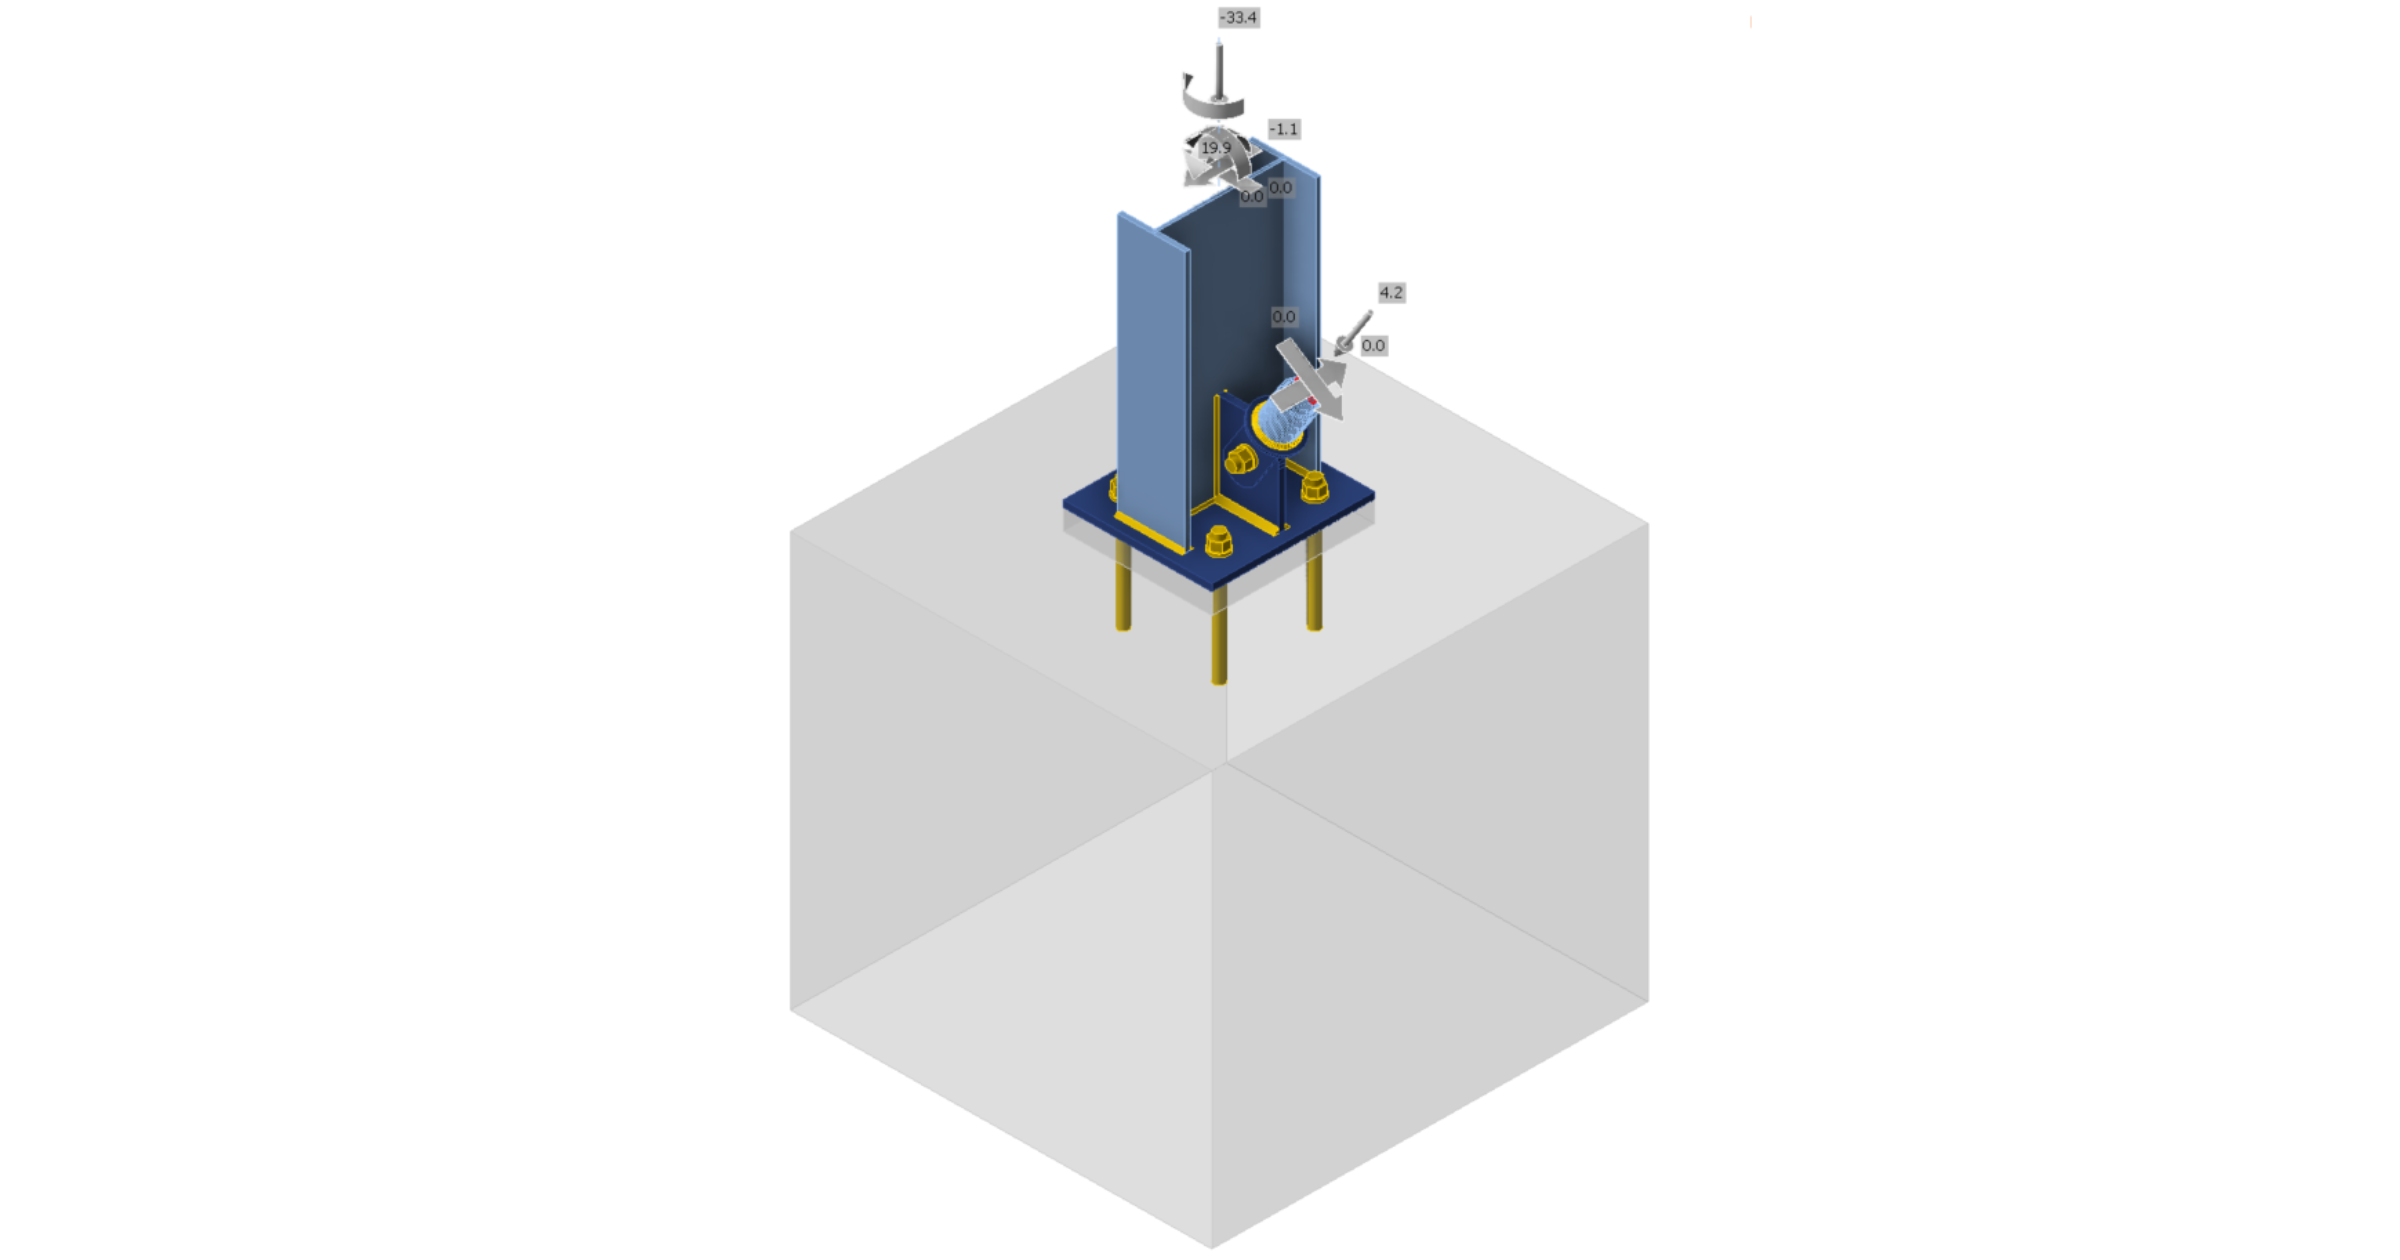
Met deze standaardparameters.
Hiermee is het ontwerp van de verbinding voor de kolomvoetplaat met diagonale schoor voltooid.
Normtoetsing en Rapport
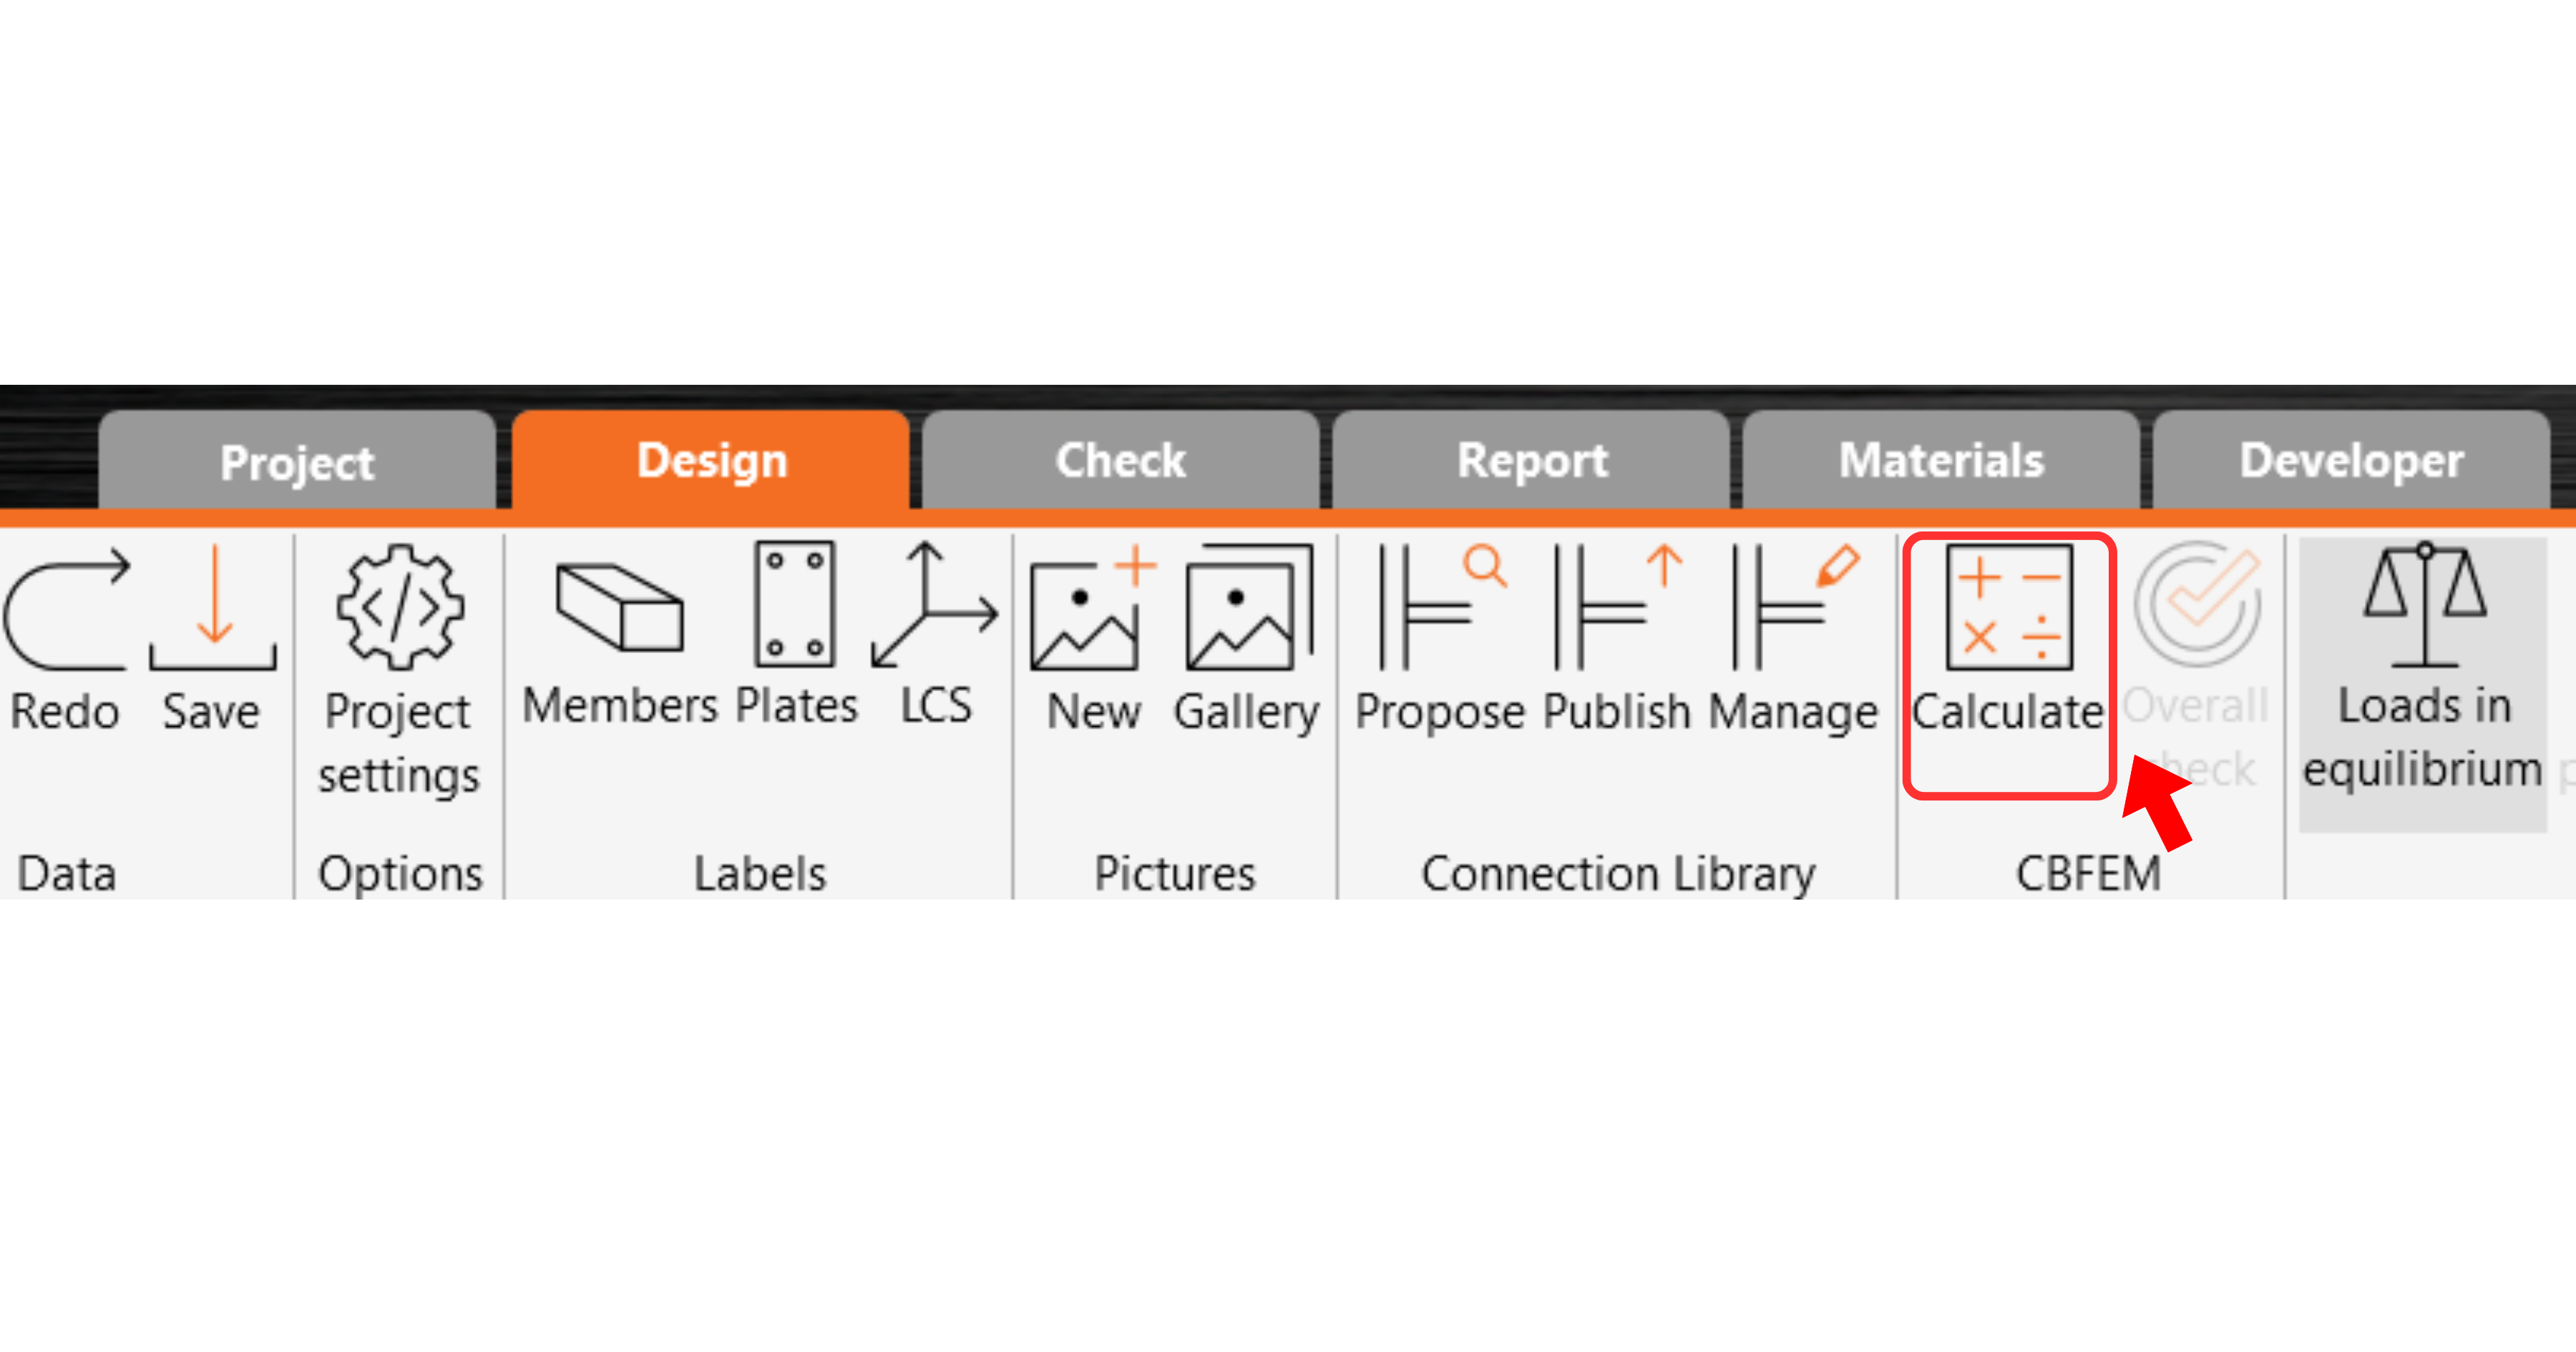
Voer nu een normtoetsing uit met behulp van het pictogram Berekenen in het CBFEM-paneel in het bovenste lint.
Binnen IDEA StatiCa Connection kunt u vele verschillende soorten analyses en normtoetsingen uitvoeren. Voor meer informatie, zie hier.
De resultaten zijn mogelijk niet acceptabel. In dit geval falen de ankers vanwege hun lage rekenwaarde van de capaciteit.
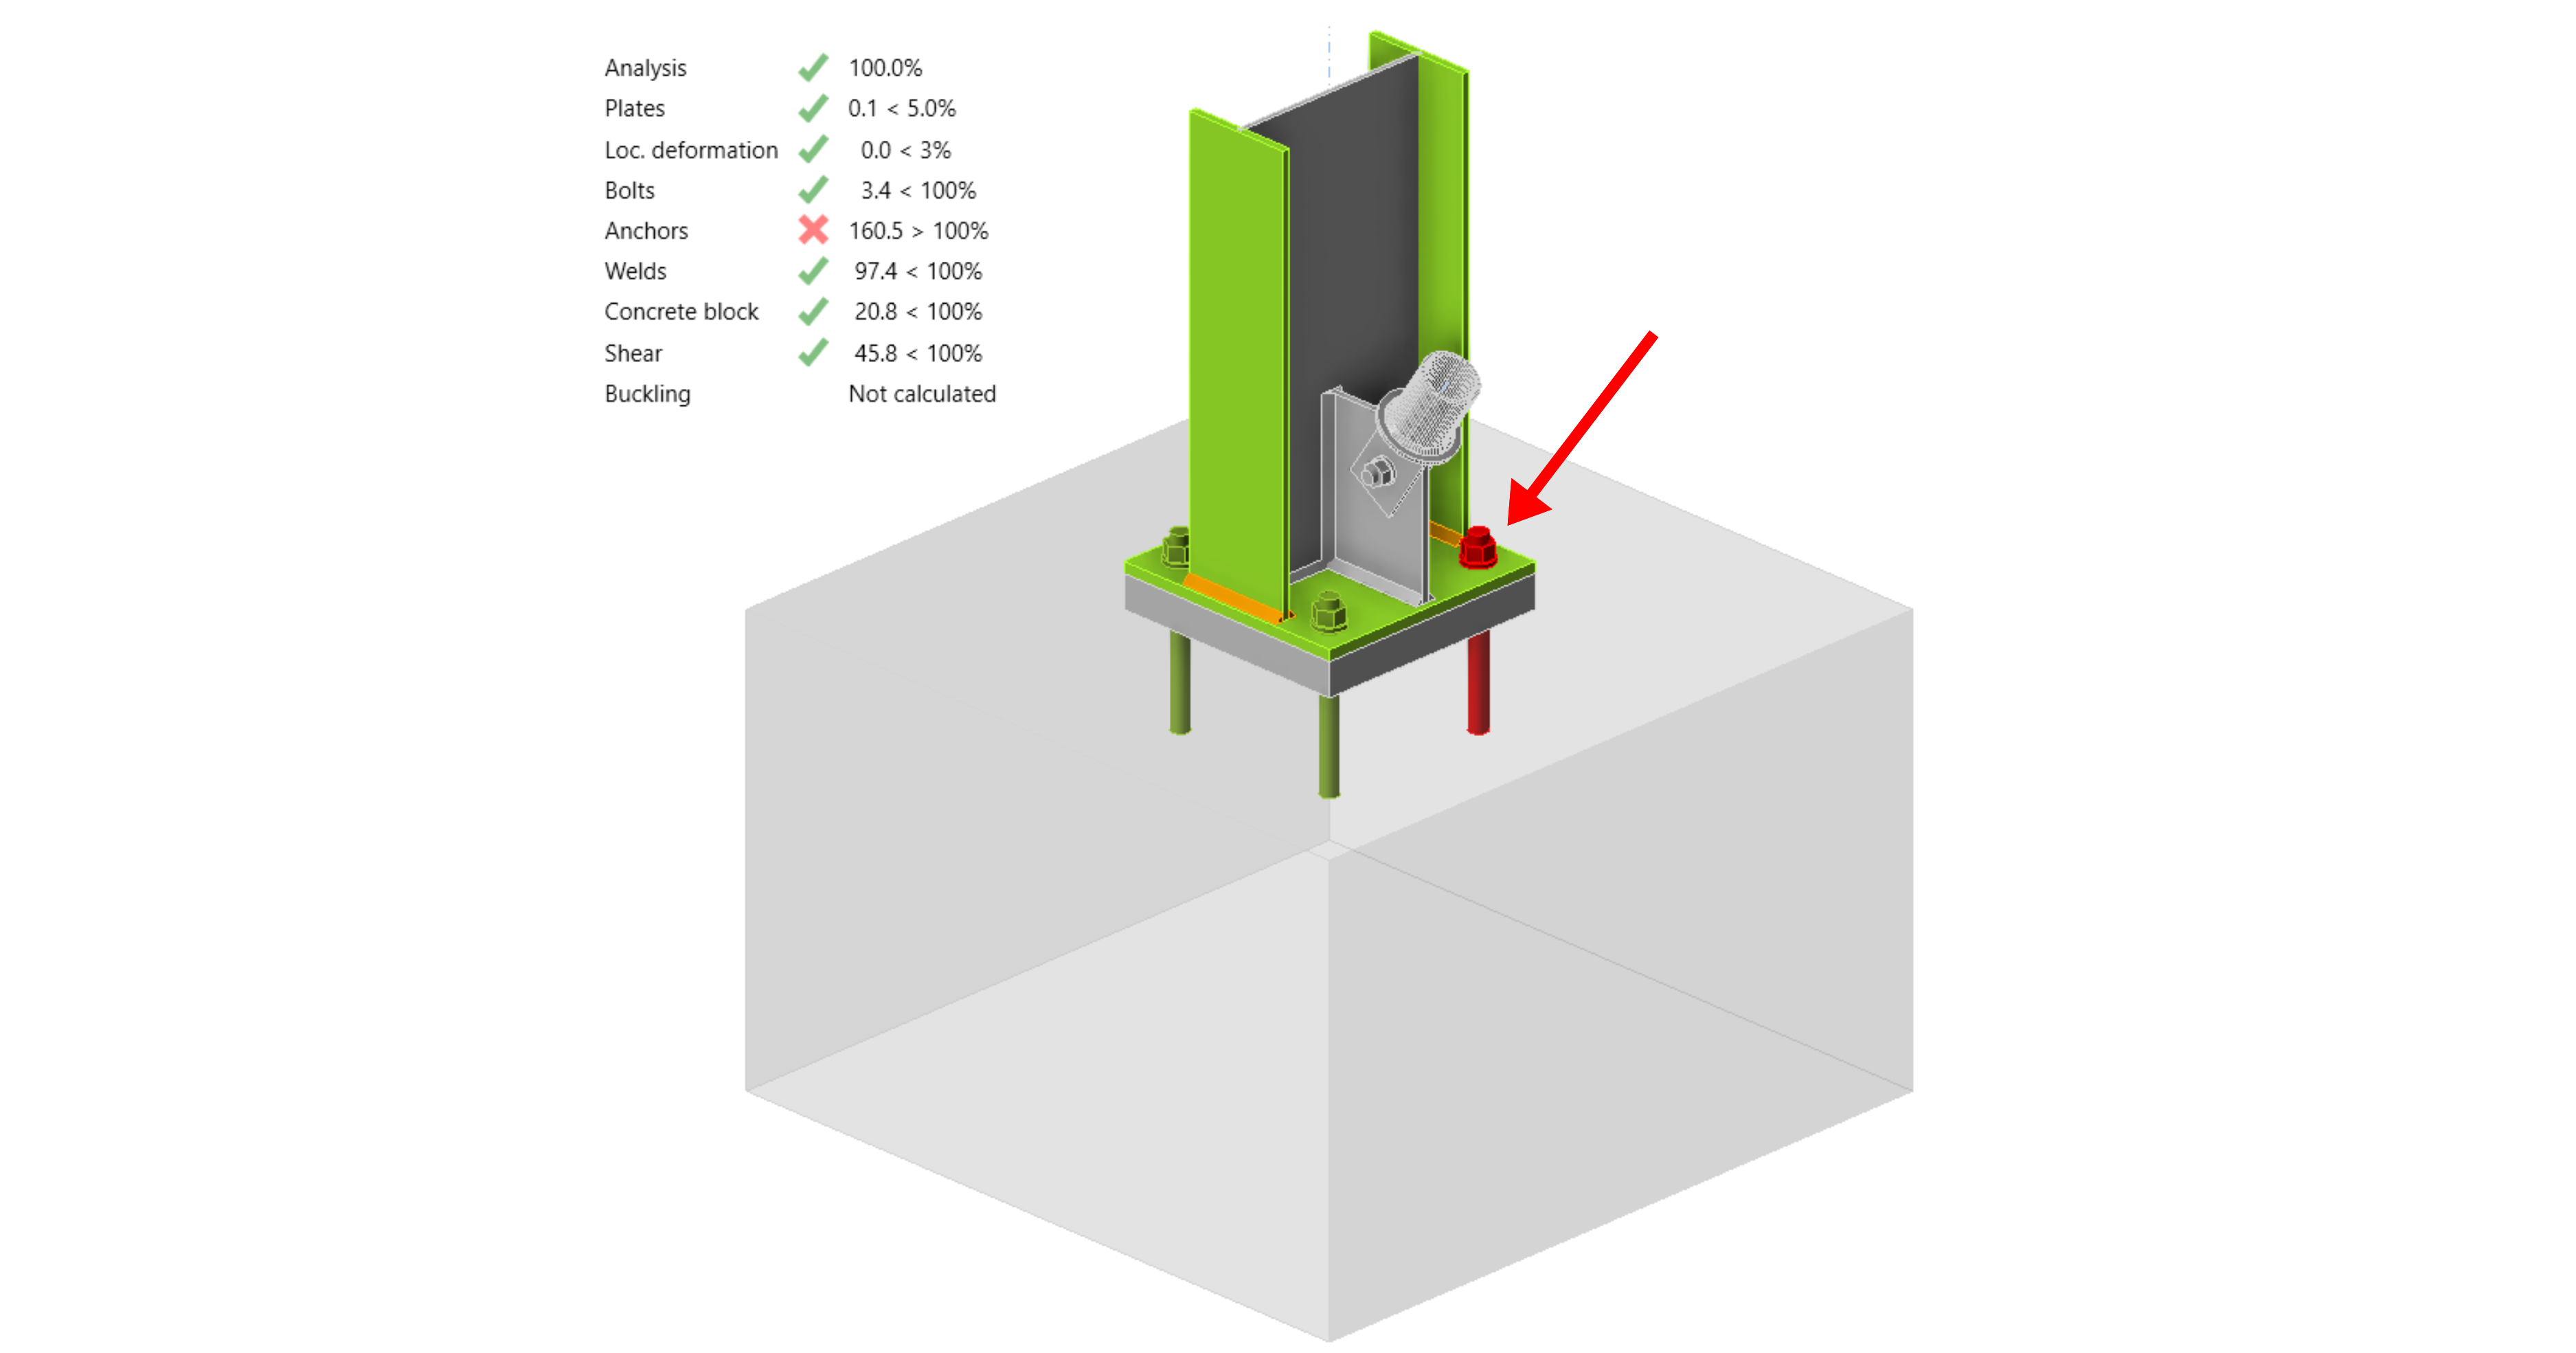
U kunt naar het tabblad Controle gaan om de resultaten te bekijken en de ankers nader te bekijken door de berekening uit te vouwen met het '+'-symbool. U kunt zien dat de ankers falen op trek in het betonblok.

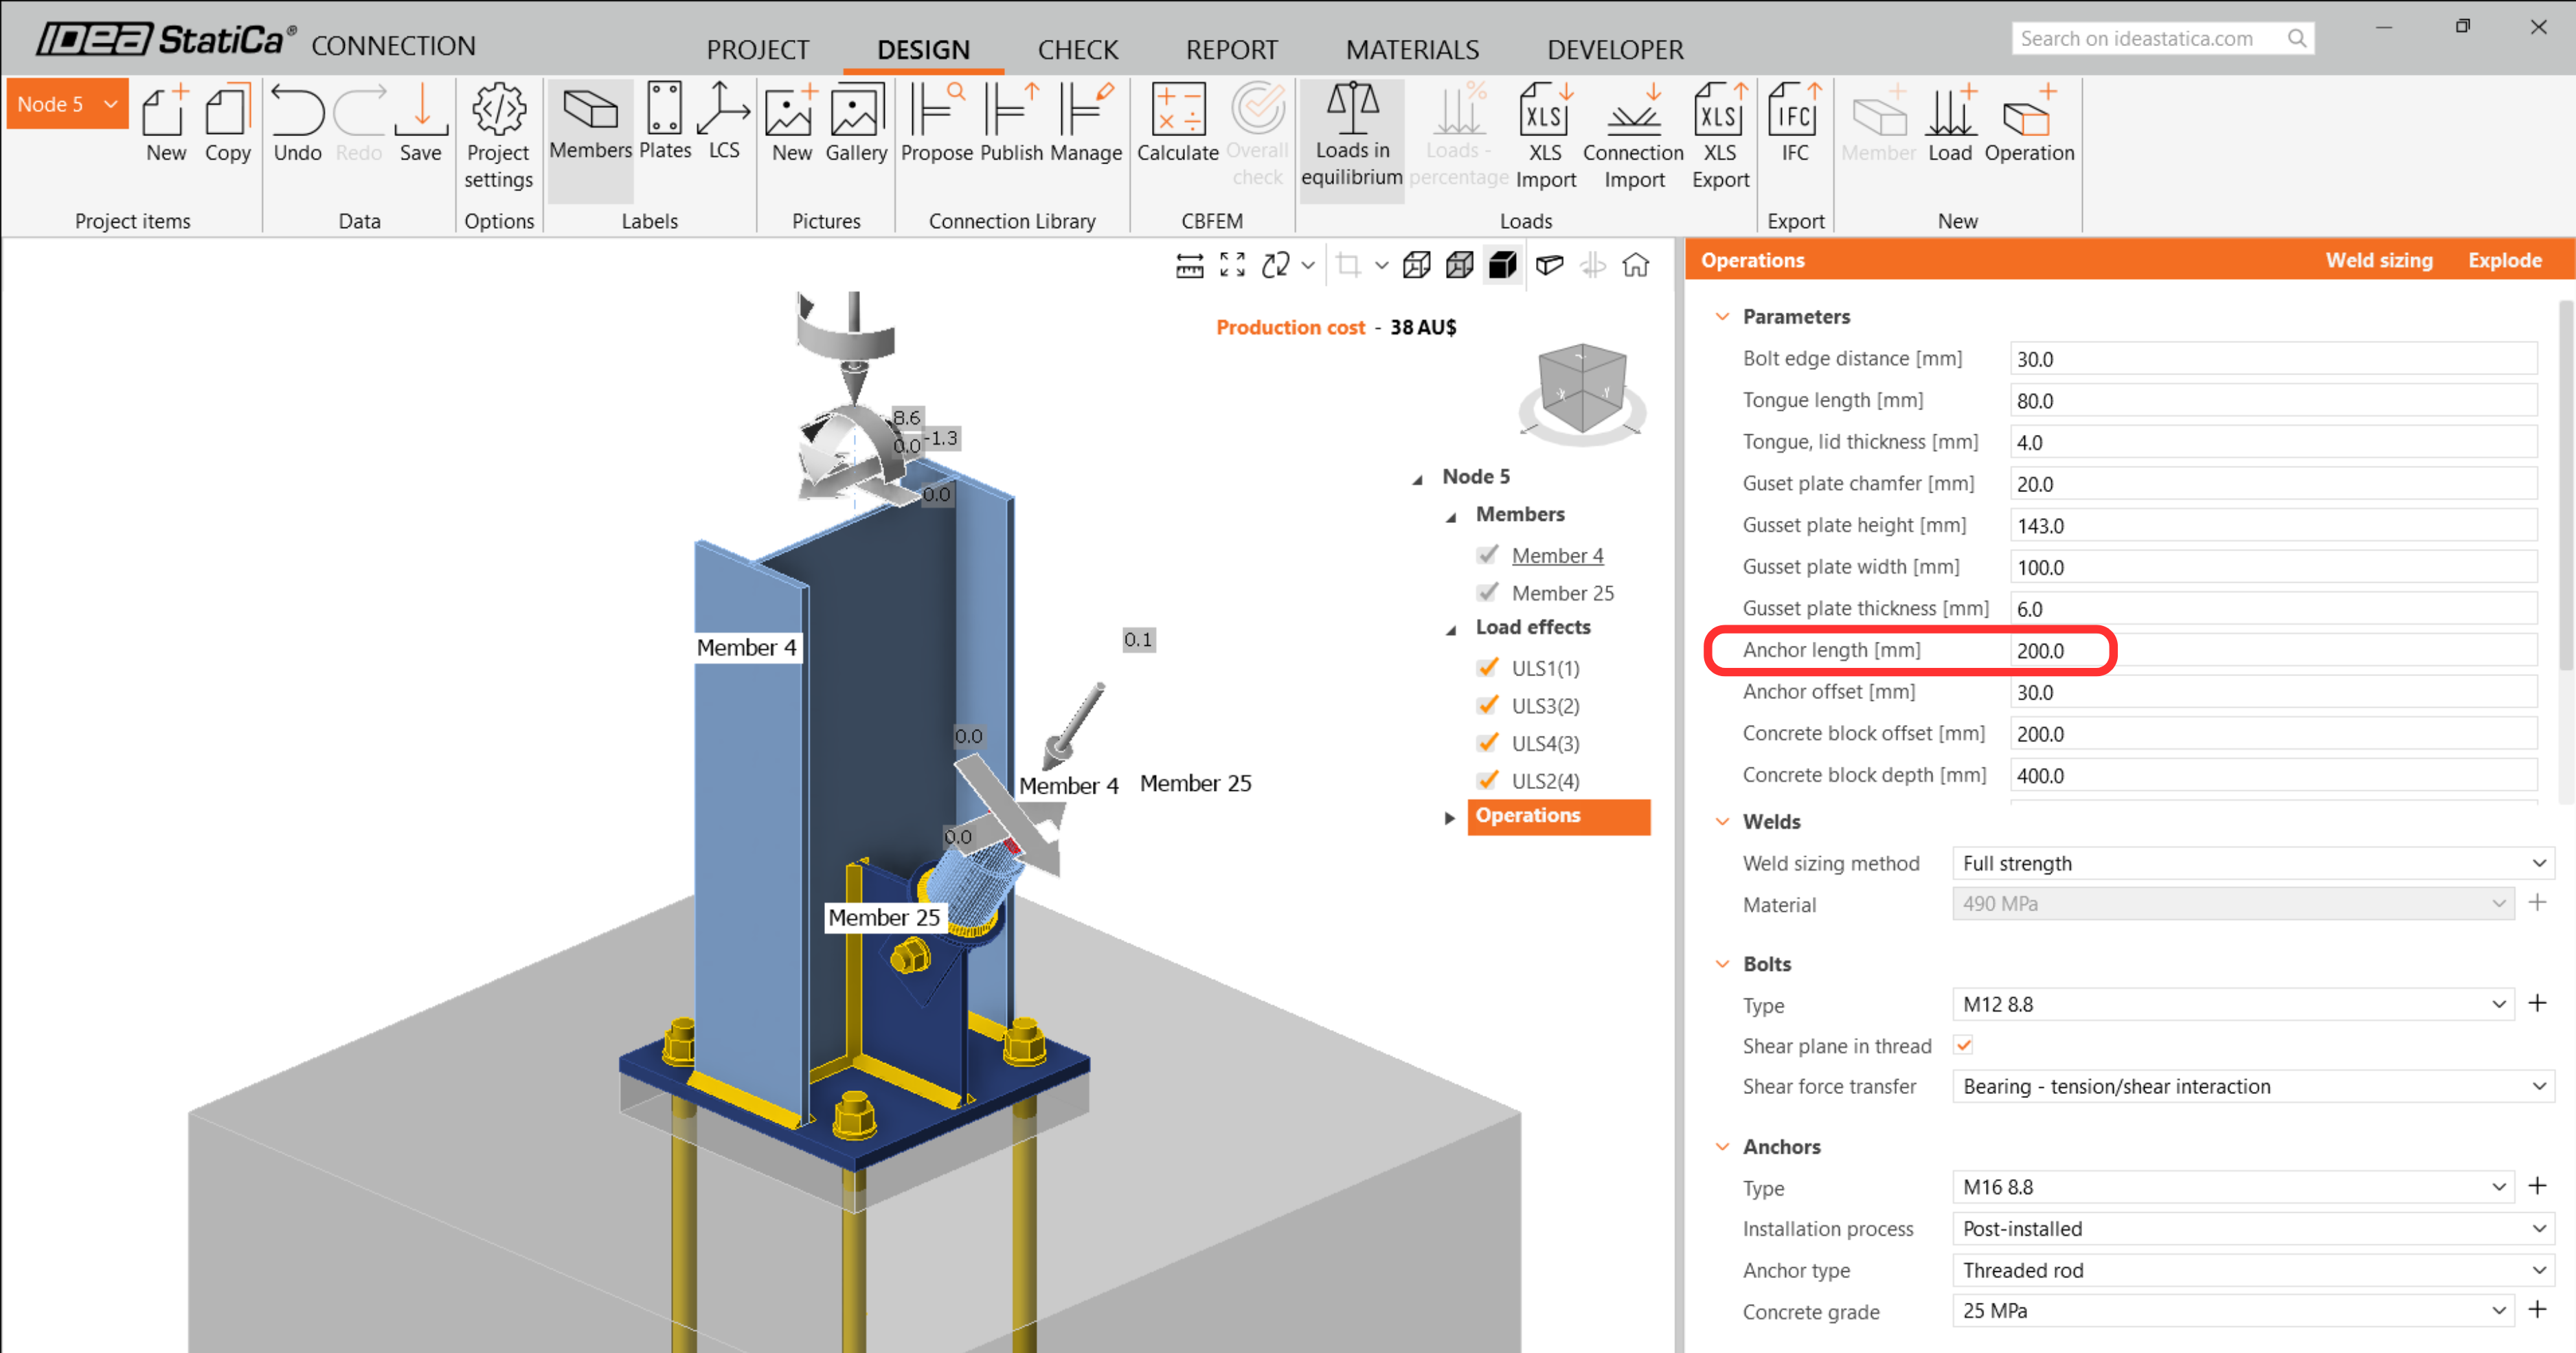
We moeten het ontwerp optimaliseren om de goedgekeurde oplossing te vinden. Ga terug naar het tabblad Ontwerp, klik op Bewerkingen en wijzig de Ankerlengte naar 200 mm.
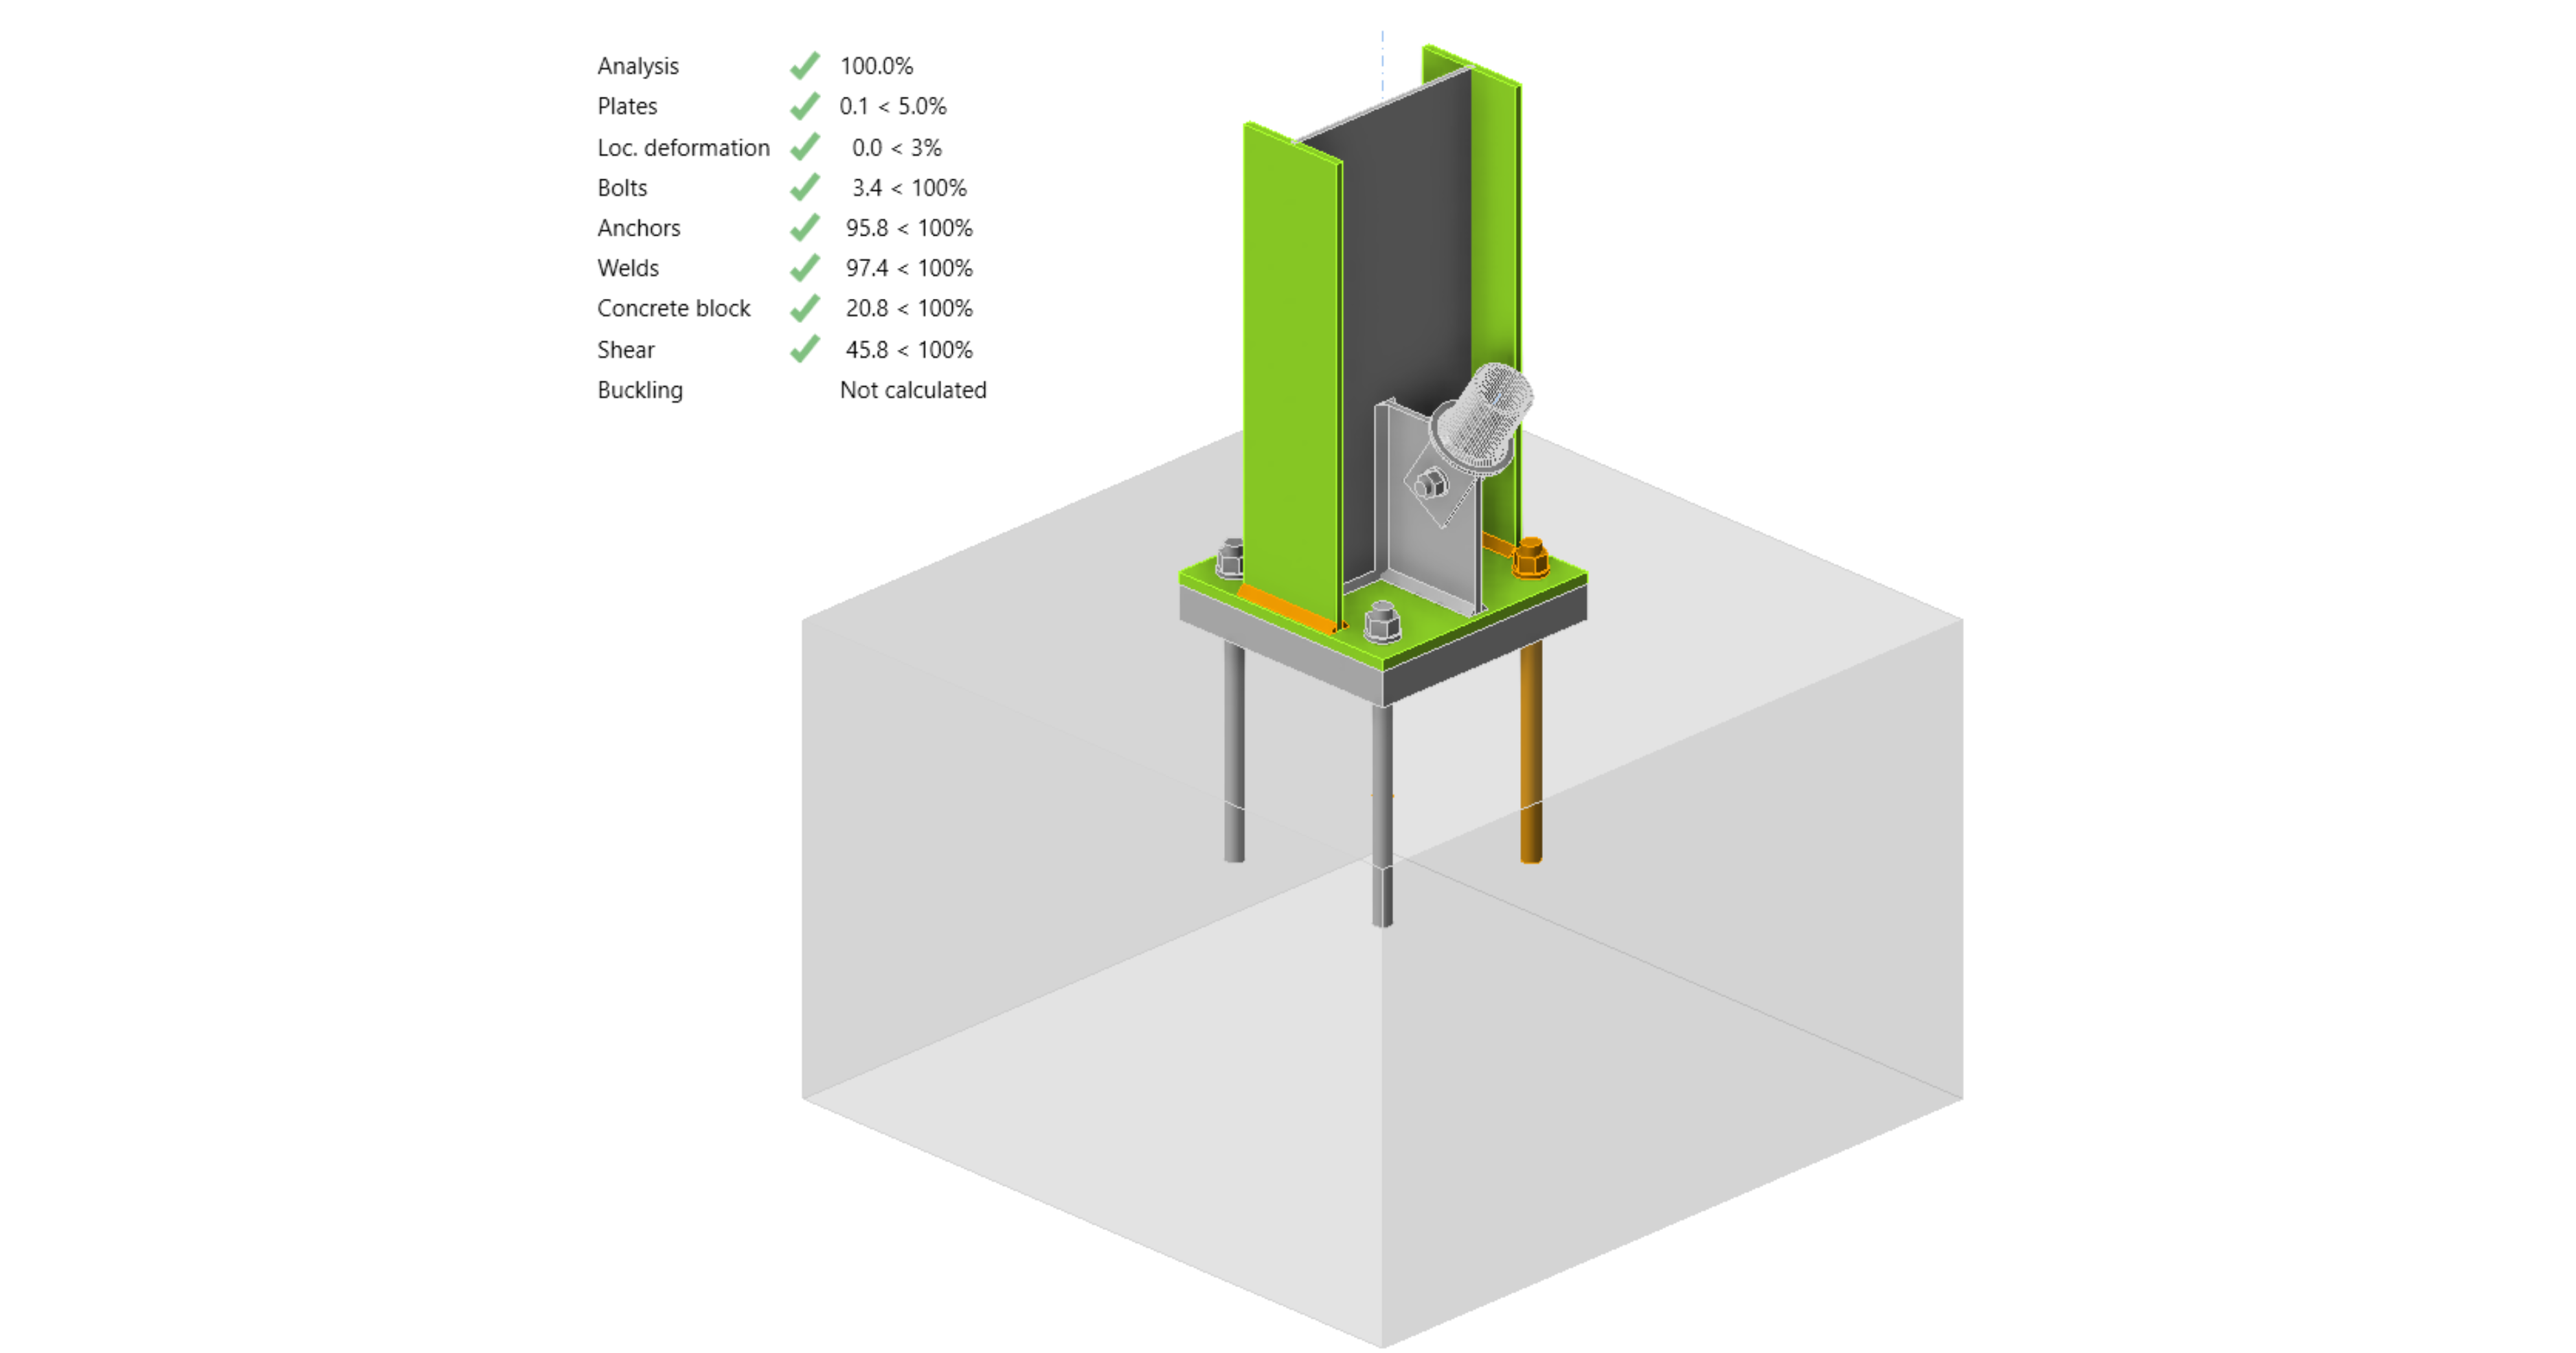
Voer de analyse en normtoetsing opnieuw uit.
Zodra de normtoetsing is voltooid, kunt u in het tabblad Rapport het rapport aanmaken met resultaten en diagrammen voor uw verbindingsmodel.
Het rapport kan worden afgedrukt of opgeslagen in verschillende formaten. Voor meer informatie, zie hier.

Sla op en sluit deze verbinding terug naar Checkbot.
In Checkbot ziet u een groen vinkje naast de verbinding. Dit betekent dat de verbinding geldig is en alle normtoetsingen heeft doorstaan. In het verbindingspaneel kunt u ook een weergave van de verbinding en een samenvatting van de normtoetsingsresultaten zien.

Als er meerdere verbindingen aanwezig zijn in Checkbot, moet elke verbinding worden geopend, ontworpen en normgetoetst.
In het onderstaande voorbeeld kunt u zien dat de voetplaatverbindingen hun respectieve normtoetsingen hebben doorstaan, terwijl de overige verbindingen nog gevalideerd moeten worden.

U kunt doorgaan met het ontwerp van aanvullende verbindingen - Zie hoe u de dakverbinding met schoren modelleert