
How to get started with API - Basics 01
What is API (Application programming interface)
Set of rules and protocols that allow different software applications to communicate with each other. It defines how requests and responses should be structured, enabling developers to use predefined functions or services without understanding their internal workings.
REST API in IDEA StatiCa Connection - is a locally hosted web service that follows REST principles, enabling systems to communicate using standard HTTP methods to perform operations on resources, typically represented in JSON format.
Resources and GITHUB
The source of existing and predefined examples is linked on our GitHub:
How to get started
The tutorial will be introduced in combination with the programming language Python. You can download the latest version of here. You can use many Integrated Development Environments (IDE) as tools for efficient coding, debugging, and testing. Here are some options:
How to run API
The API launcher can be found in the folder where your latest version of IDEA StatiCa is stored. Just run the executive file.
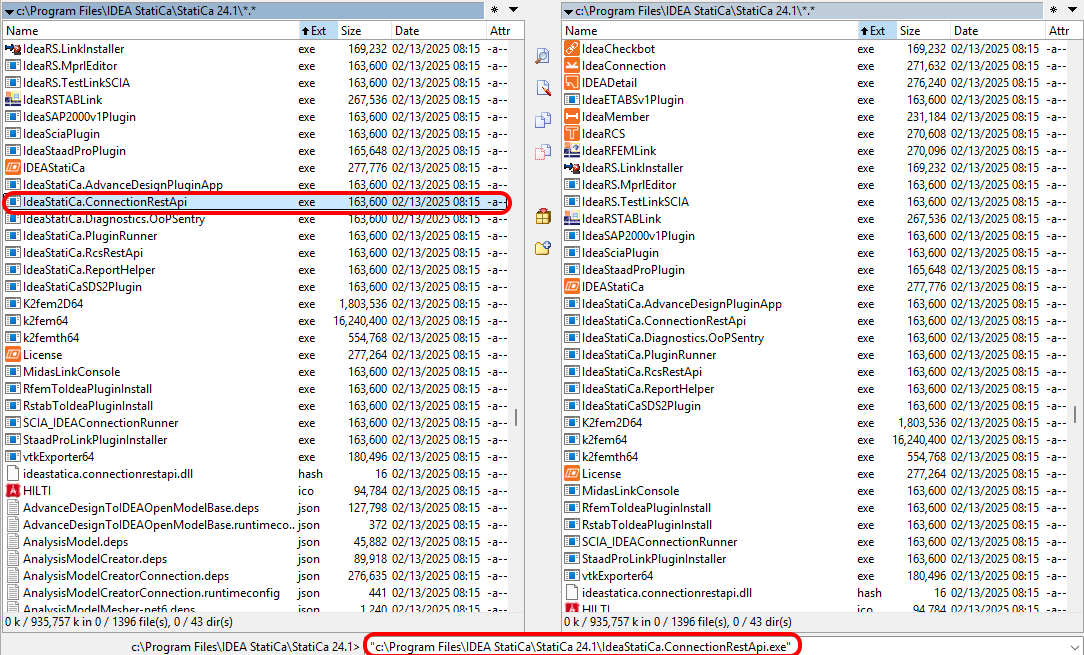
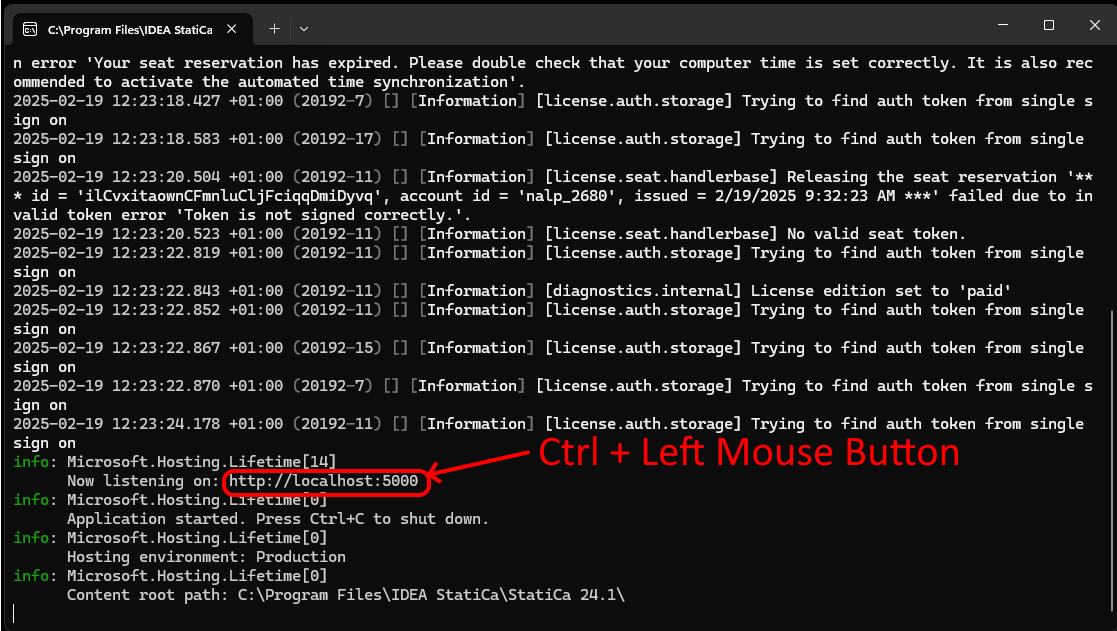
If you run the "IdeaStatiCa.ConnectionRestApi.exe," the CMD ( Command prompt) will discover, and you can see your localhost and open the Swagger app, that enable you see the structure of the code for controlling the API. Press Control + Left Mouse Button to open the Swagger.
The Swagger in the online mode provides you guide about the options of API for Connection design.

How to open Python and install the API package
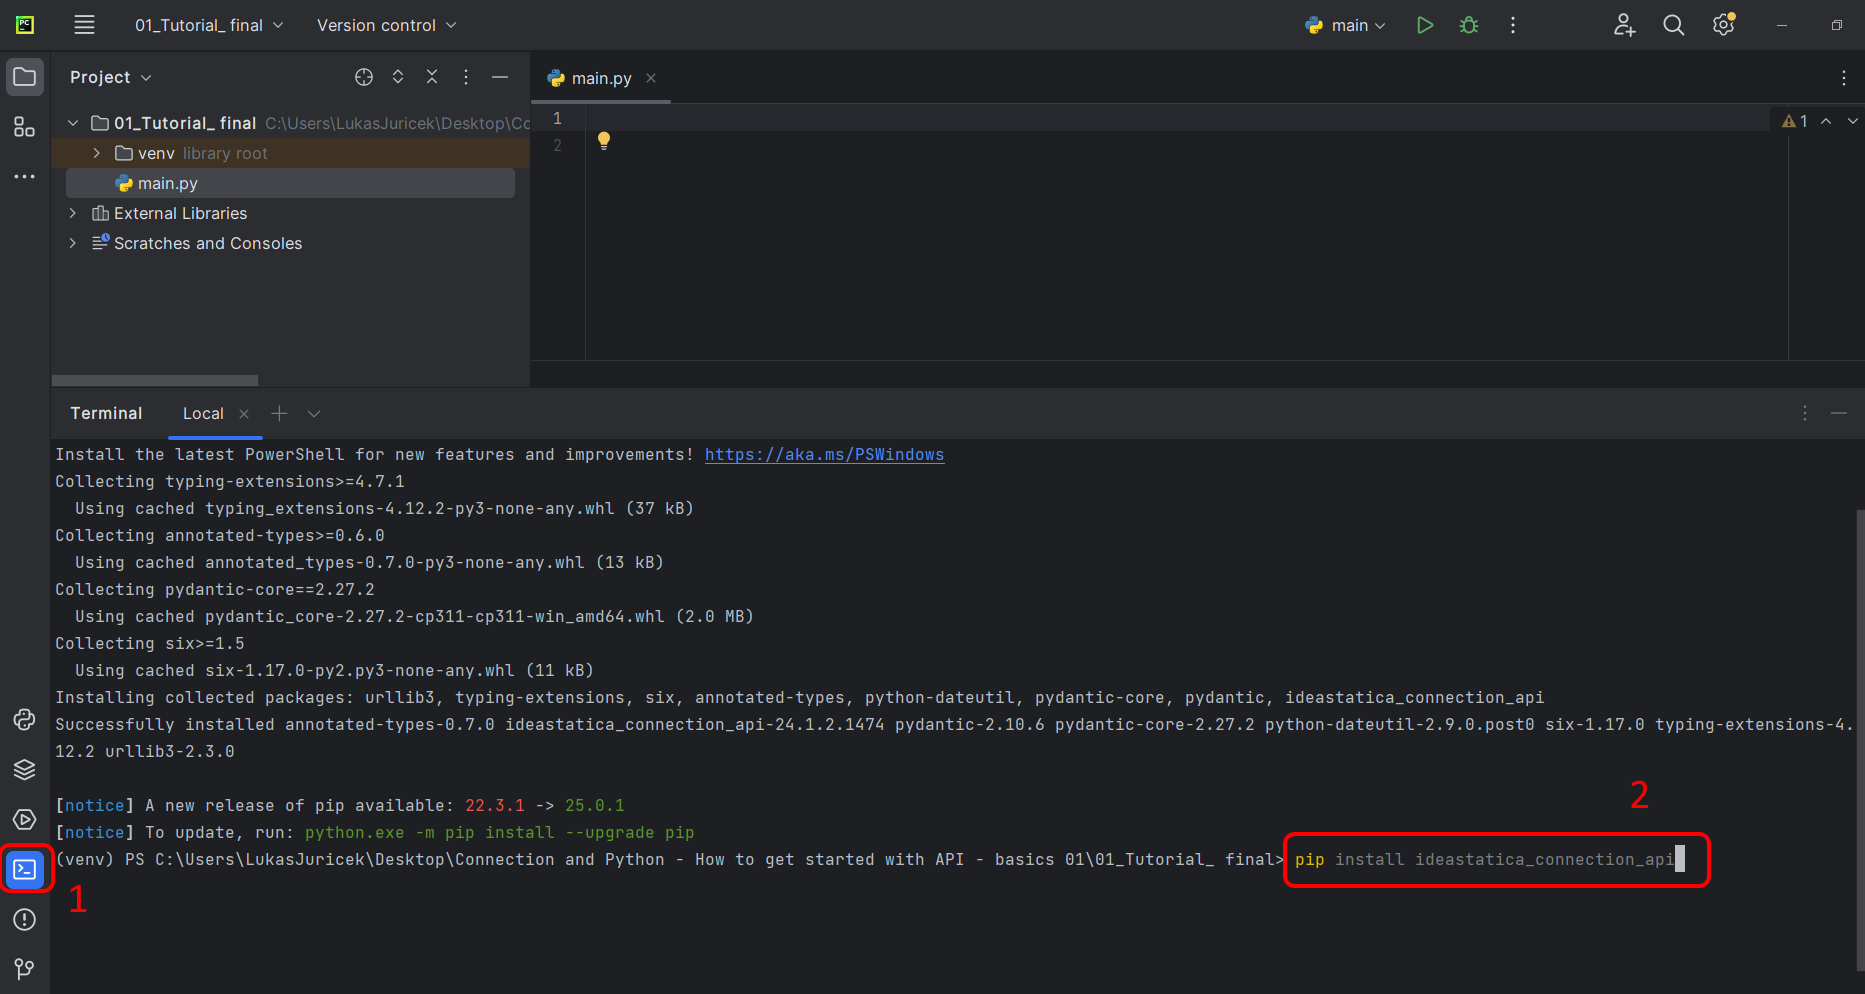
I utilize the Pycharm, which describes all the steps. It works the same way with the other tools. Open up the python and create the New Project.

Install the package " ideastatica_connection_api". Commence with terminal opening and write "pip install ideastatica_connection_api". If you conduct this command, the library for API will be installed.
The aforementioned steps are mandatory to process accordingly. Othewise, the API will not be working adequately.
Open a project in the desktop app
The goal will be to control the simulation and output via the Python interface and read the results directly in the console.
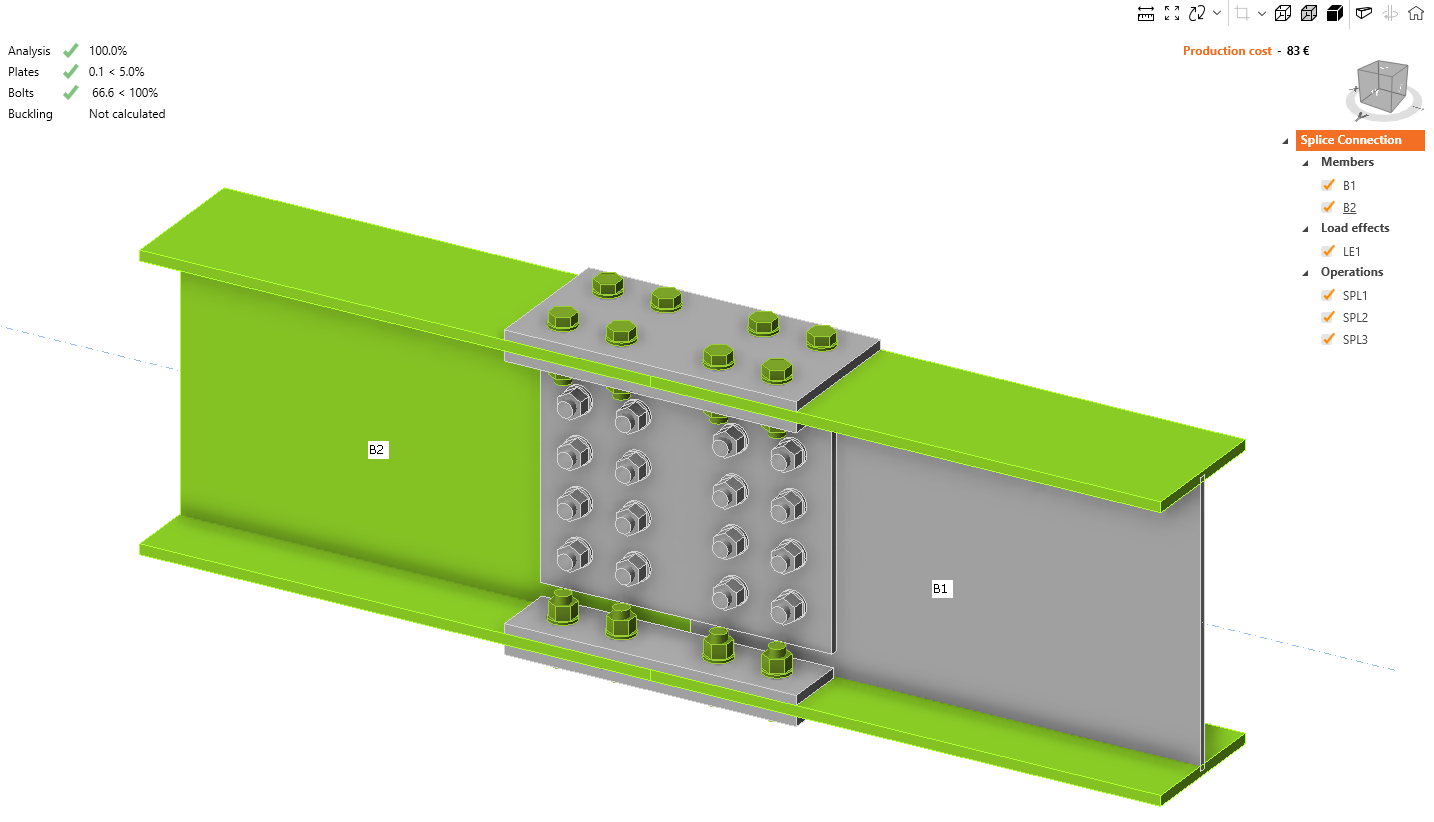
Open the splice connection and run the calculation for LE1 and get the results. As you can whole set of checks is passing. You can proceed to the python.
Python script
Import the packages that will enable the use of calculation and link with the localhost URL.
Source code:
## Import of API package
from ideastatica_connection_api.models.con_calculation_parameter import ConCalculationParameter
## Link with baseUrl
import ideastatica_connection_api.connection_api_service_attacher as connection_api_service_attacher
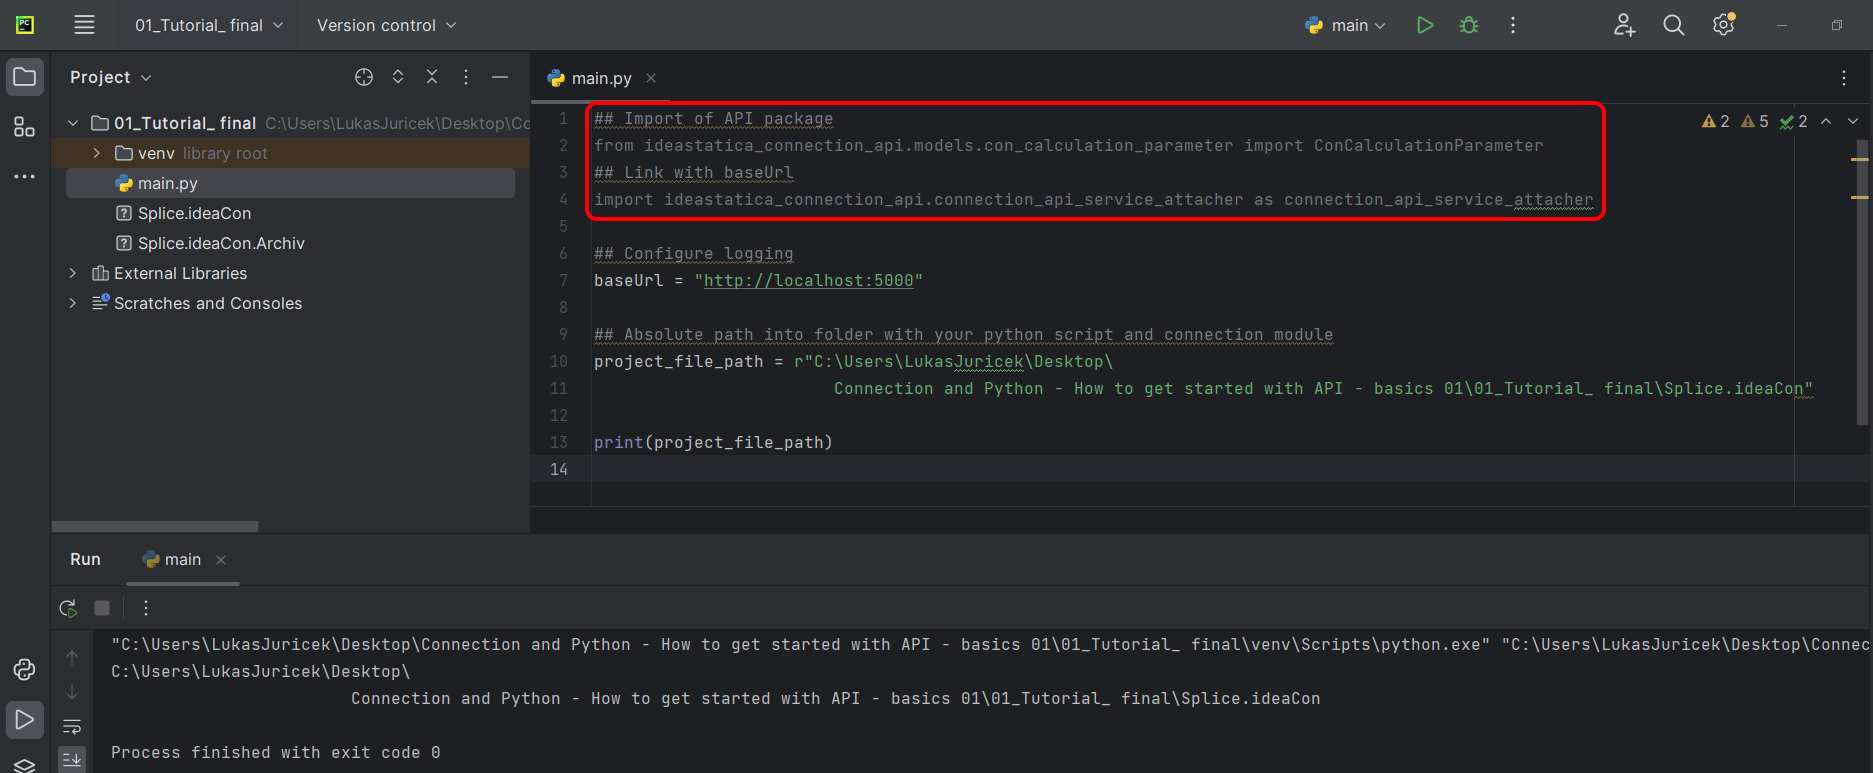
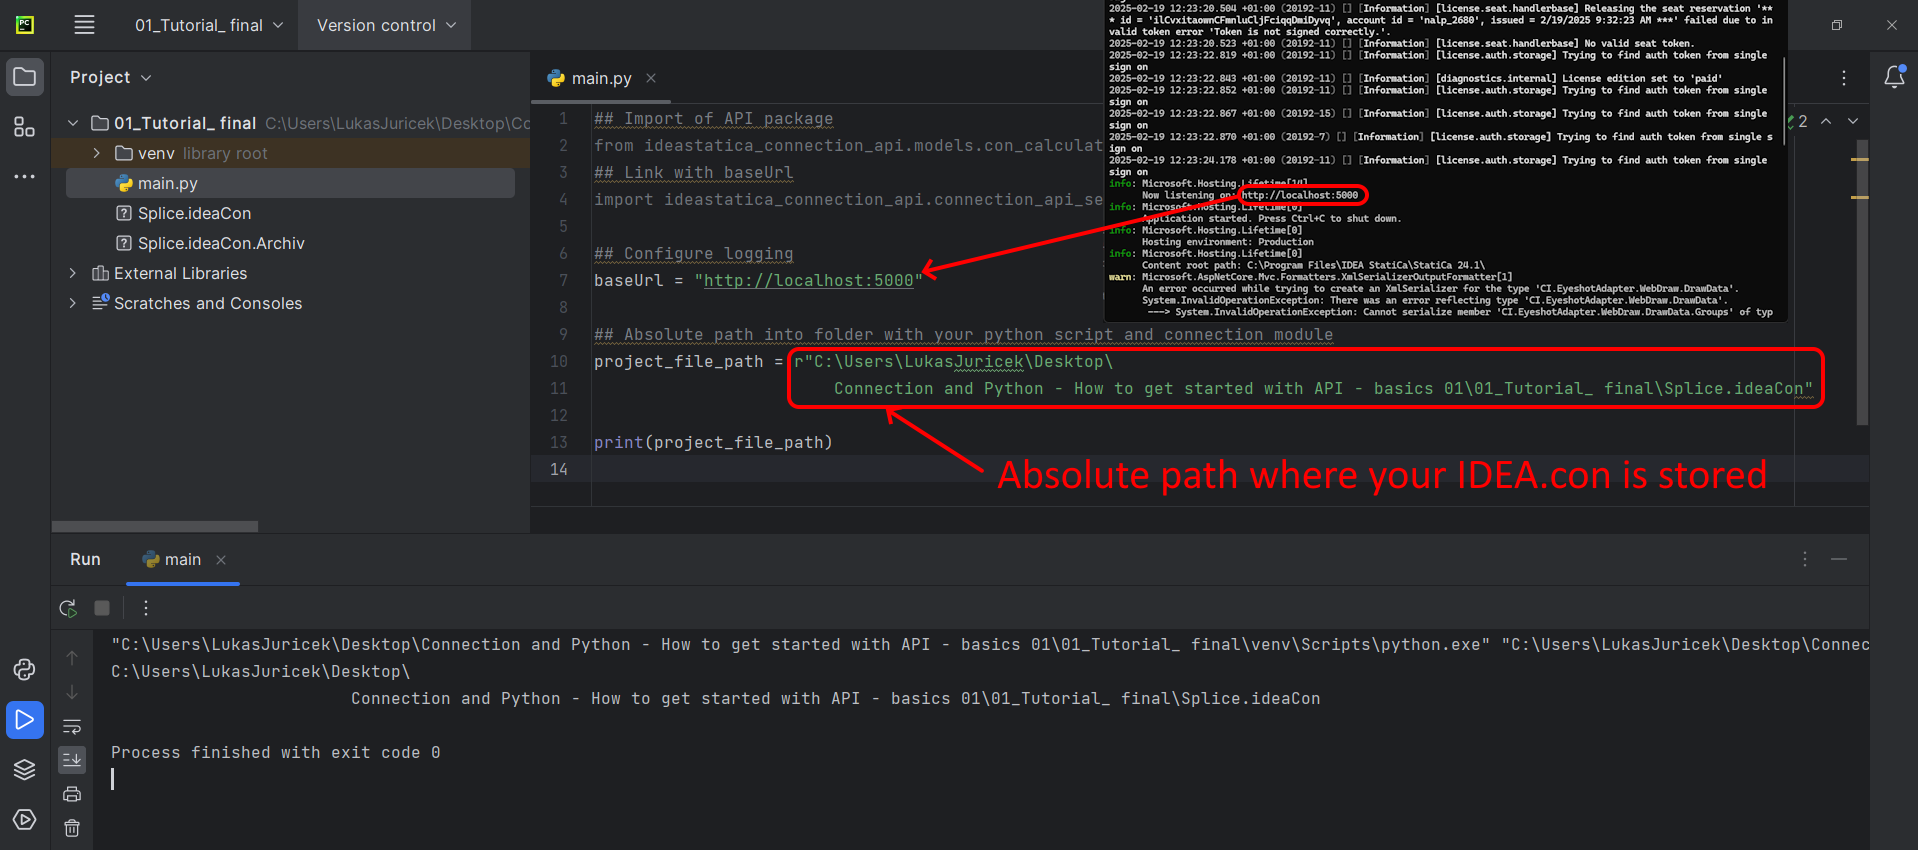
Configure the logging via the variable "baseUrl," which will pull up your localhost. In the second step, pair the absolute path of your IDEA StatiCa Connection file.
Source code:
## Configure logging
baseUrl = "http://localhost:5000"
## Absolute path into folder with your python script and connection module
project_file_path = r'C:\Users\LukasJuricek\Desktop\Connection and Python - How to get started with API - basics 01\01_Tutorial_ final\Splice.ideaCon'
print(project_file_path)
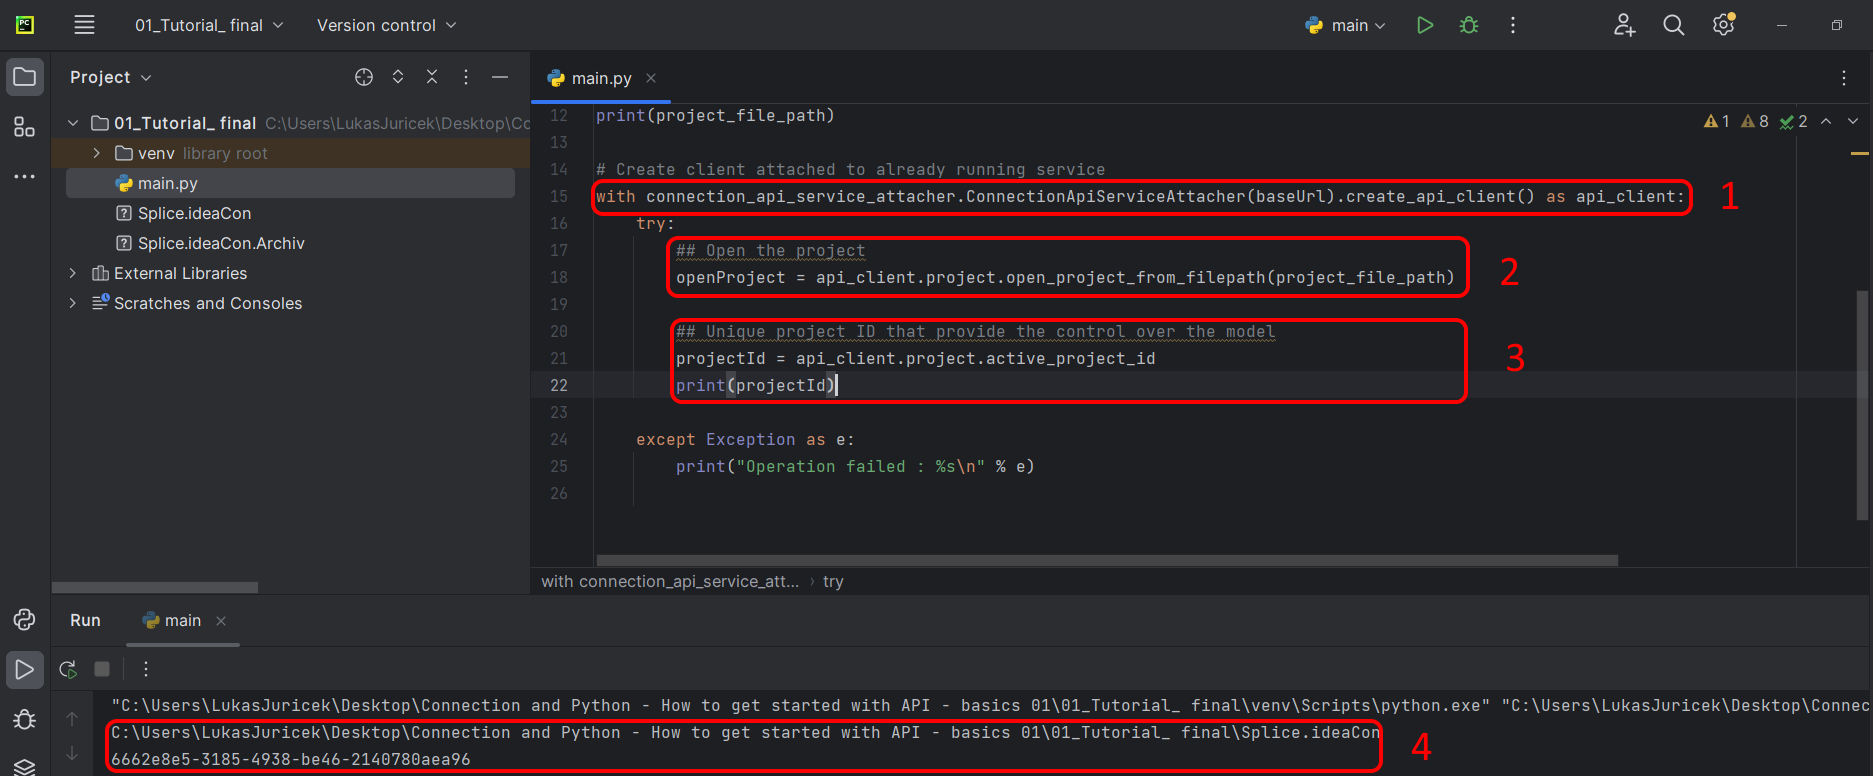
Pair the client with an already running service (1). Use the block try/except - since the try block raises an error, the except block will be executed. In the first phase is neccesary to open up the project (2) and find the project ID of your project that is unique for every IDEA StatiCa project (3). If you run the script you can read out printed path + unique ID (4).
Source code:
# Create client attached to already running service
with connection_api_service_attacher.ConnectionApiServiceAttacher(baseUrl).create_api_client() as api_client:
try:
## Open the project
openProject = api_client.project.open_project_from_filepath(project_file_path)
## Unique project ID that provide the control over the model
projectId = api_client.project.active_project_id
print(projectId)
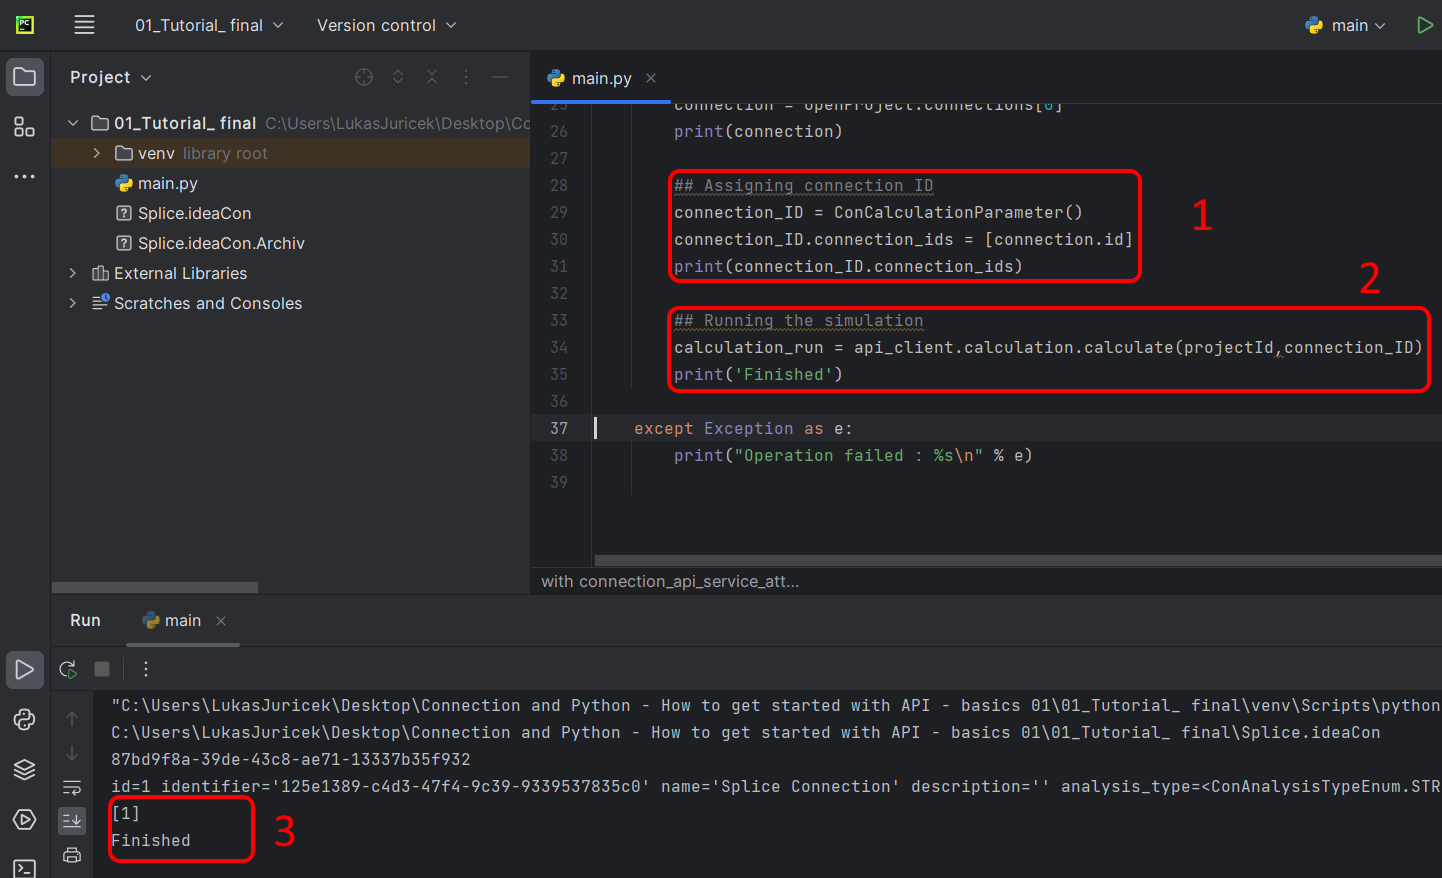
Extract the "connection_ID" that will identify the connection being calculated (1). Run the simulation with the variable "calculation_run," which needs two mandatory parameters outlined in brackets(2). If the simulation happens, you will see the connection ID and information that your analysis has passed (3).
Source code:
## Opening project that will be calculated
connection = openProject.connections[0]
print(connection)
## Assigning connection ID
connection_ID = ConCalculationParameter()
connection_ID.connection_ids = [connection.id]
print(connection_ID.connection_ids)
## Running the simulation
calculation_run = api_client.calculation.calculate(projectId,connection_ID)
print('Finished')
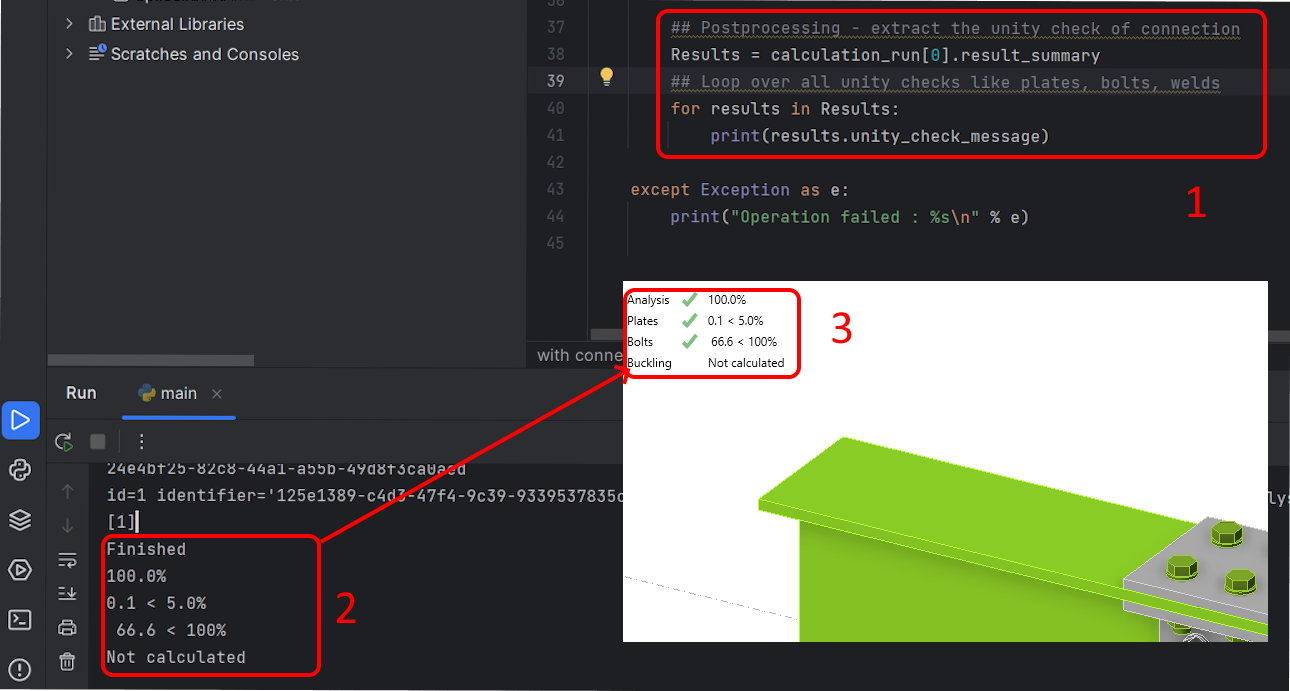
In the final round, you explore how to print the results(1) and how to loop over all the unity checks(2) that are standardly depicted on the desktop(3).
Source code:
## Postprocessing - extract the unity check of connection
Results = calculation_run[0].result_summary
## Loop over all unity checks like plates, bolts, welds
for results in Results:
print(results.unity_check_message)
except Exception as e:
print("Operation failed : %s\n" % e)
Conclusion
You have experience with API for connection design. You have learned what tools need to be installed, how to connect the REST API service, and how to treat with Python code to get the results.