
Grasshopper API link - Cost estimation
Grasshopper - Instalace pluginu
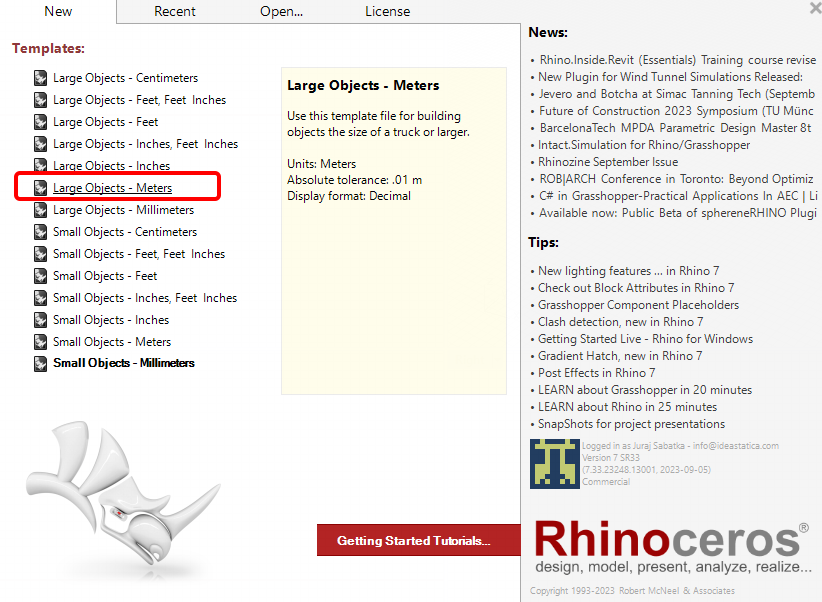
Zkušební verzi programů Rhino3d a Grasshopper můžete získat na webových stránkách Rhino3d. Spusťte program RhinoCeros a vyberte šablonu s velikostí měřítka v Metrech:
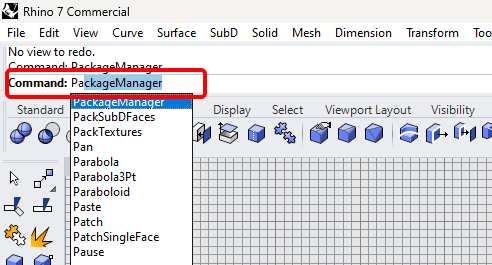
Do příkazového řádku zadejte "Package Manager":
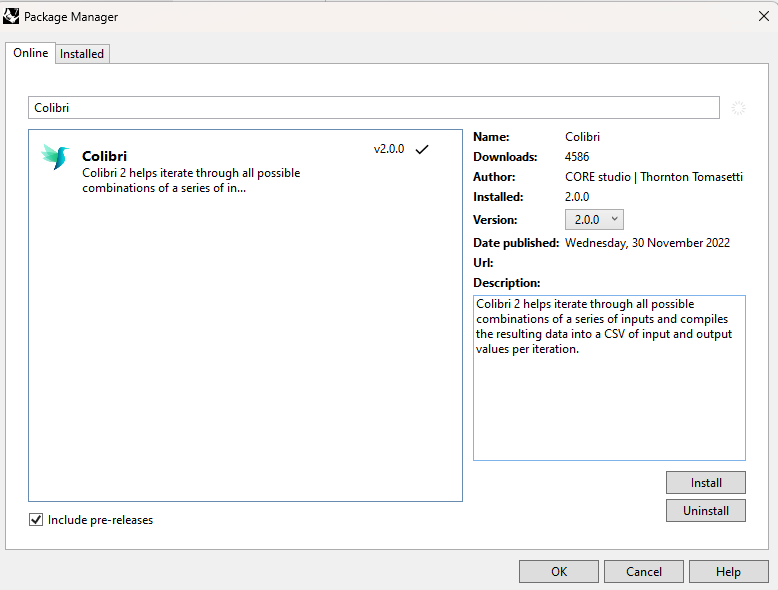
Zobrazí se nové okno; vyberte IDEAStatiCa a klikněte na tlačítko Install. Zásuvný modul se stáhne a nainstaluje. Aby se stal aktivním, je nutné restartovat systém Rhinoceros.

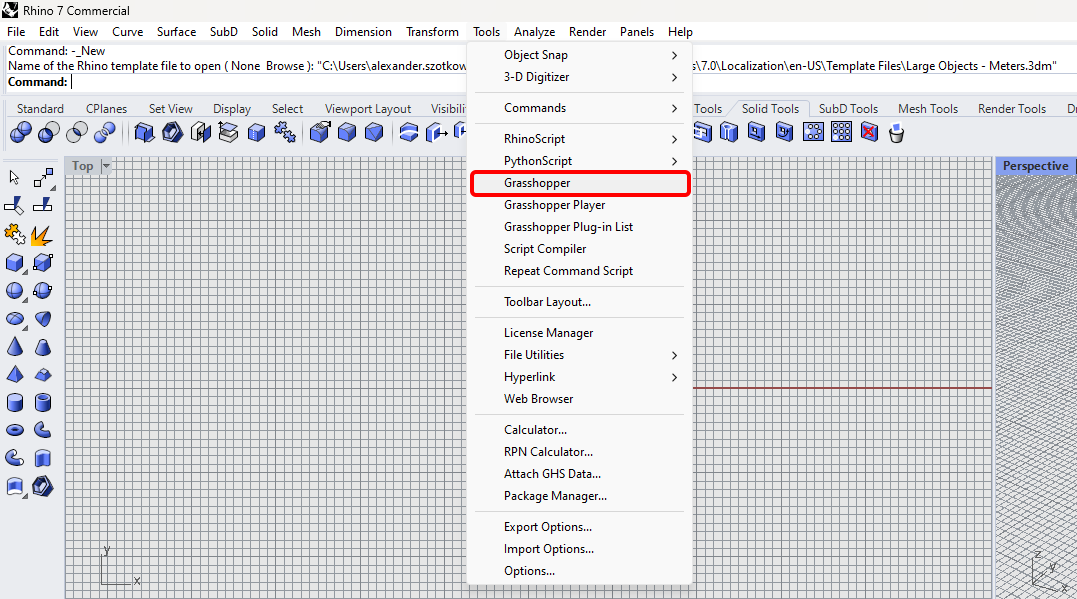
Chcete-li spustit program Grasshopper se zásuvným modulem IDEA StatiCa, vyberte na kartě Rhihoceros položku Tools / Grasshopper.
Jak vidíte, zásuvný modul je již začleněn.

Informace o komponentách a příkazech modulu IDEA StatiCa pro Grasshopper najdete v článku Popis komponent modulu Grasshopper.
Colibri plugin
As Grasshopper can not work with loops, you have to install another plugin - COLIBRI, which you will utilize in this tutorial.
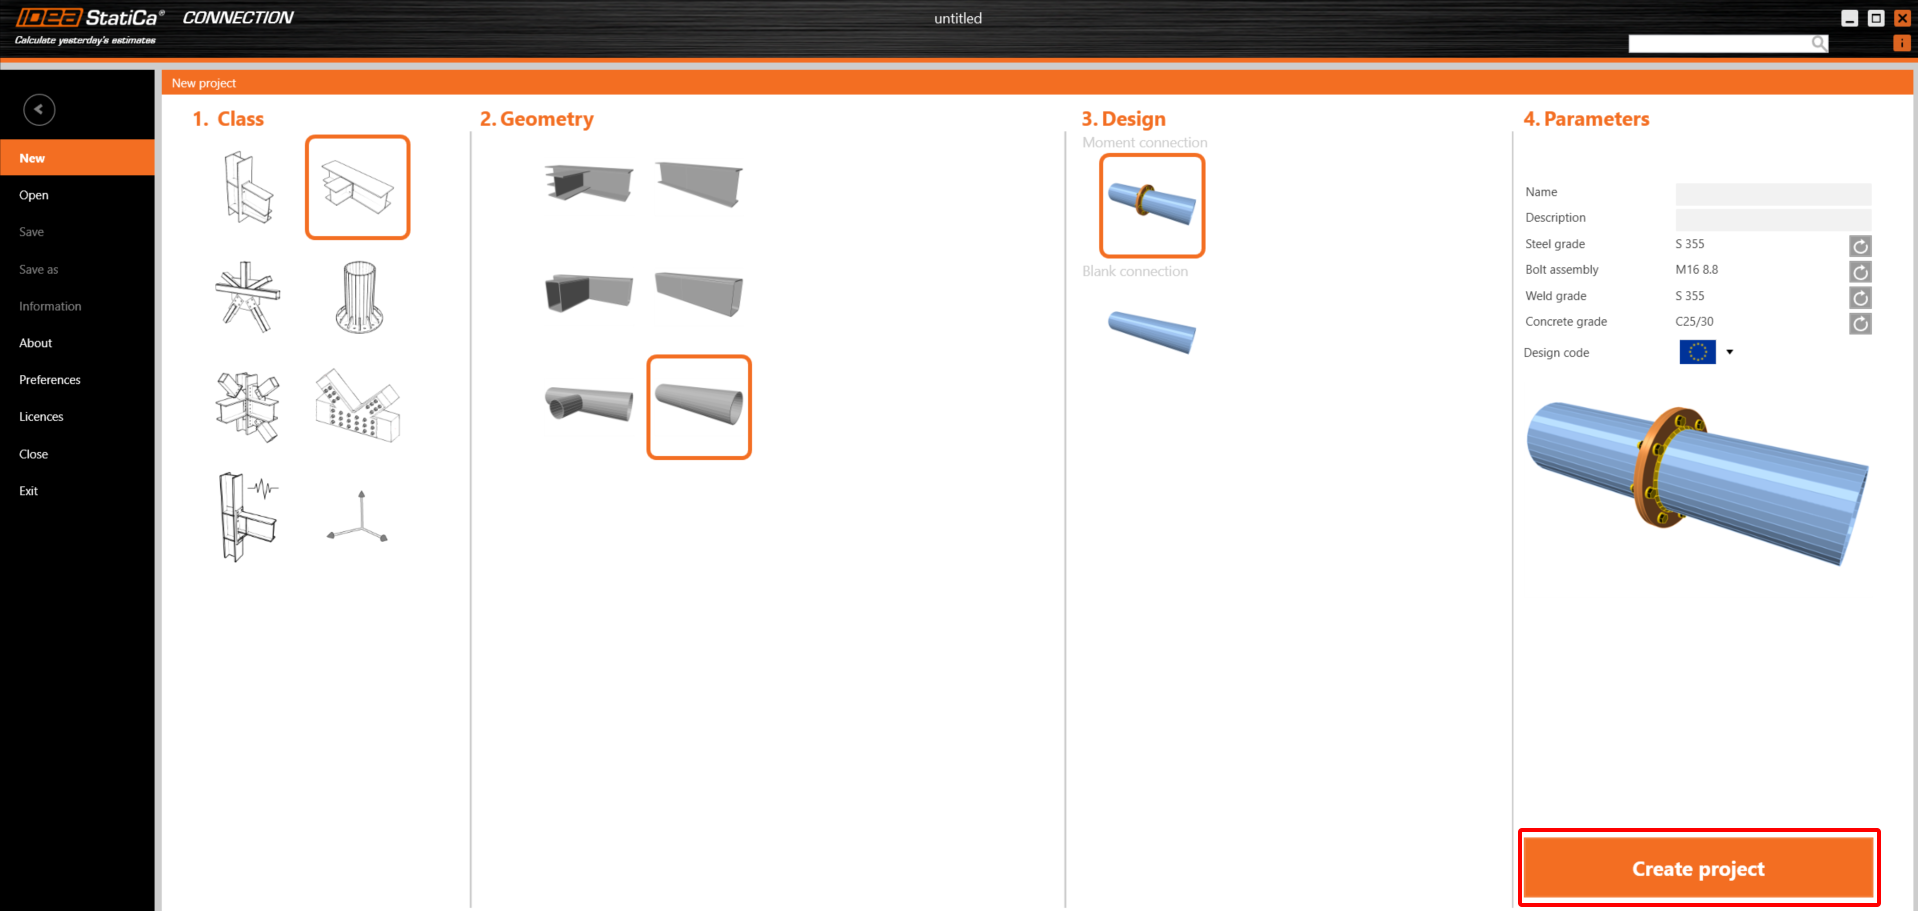
IDEA StatiCa Connection – Design of a joint and set parameters
For the example, you will create a simple moment connection using a template:
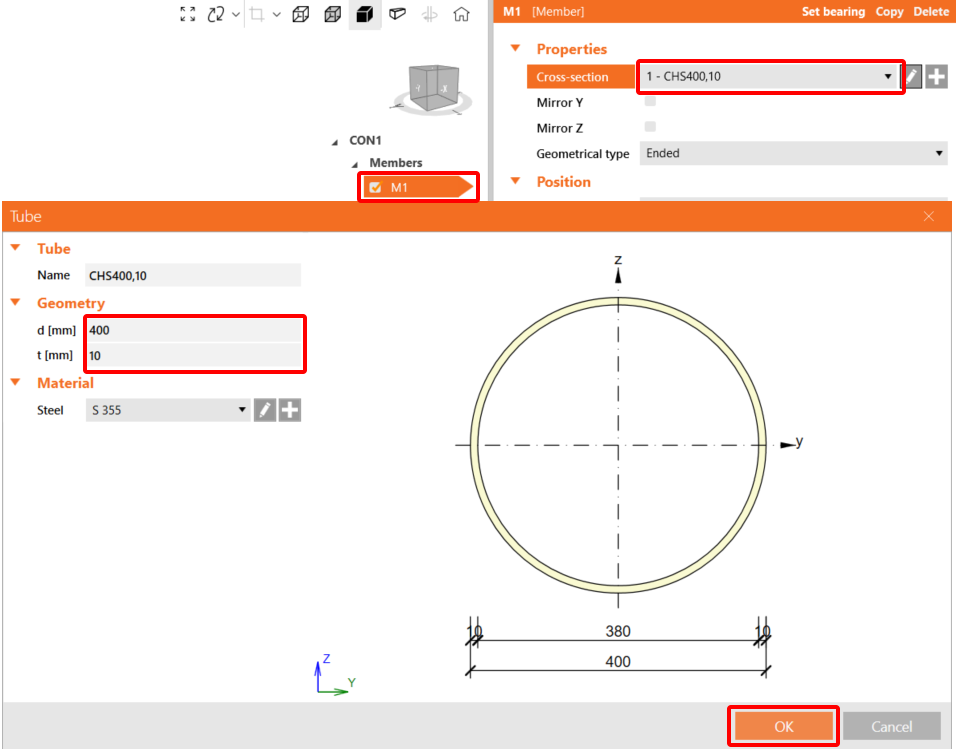
Change both the cross-sections to the CHS400,10.
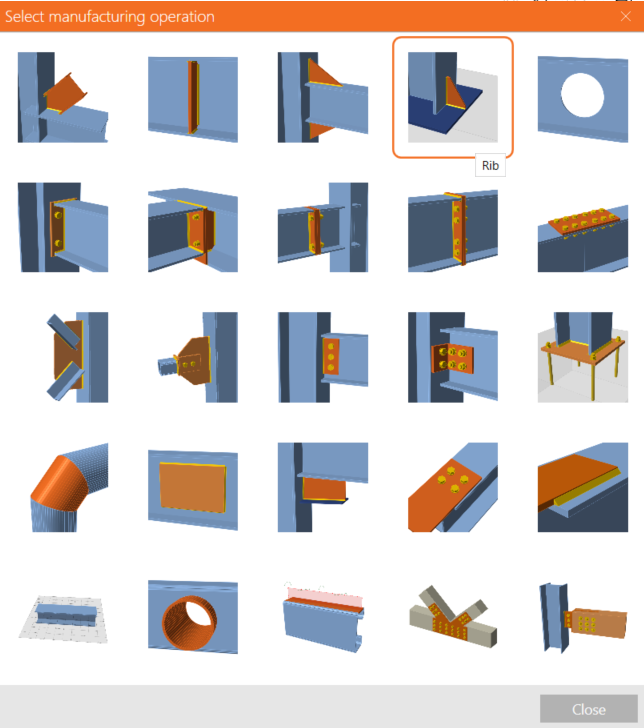
Now change the Plate to Plate Operation according to following picture:

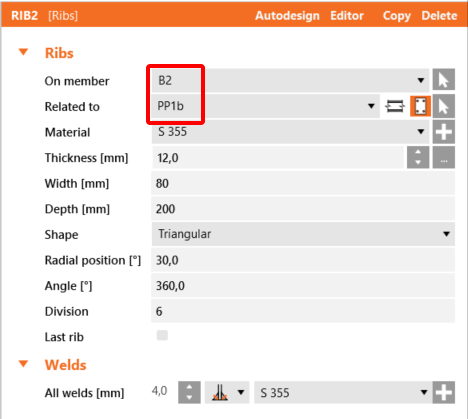
Add operation Rib with actual settings:
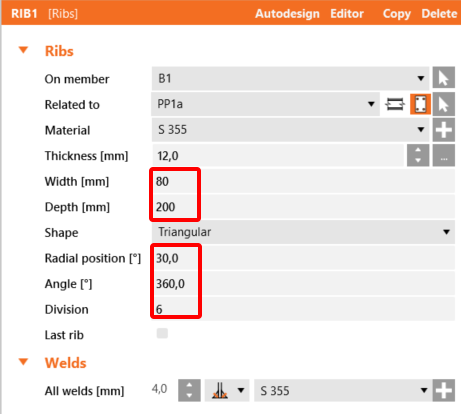
Copy this Operation and set up these values:
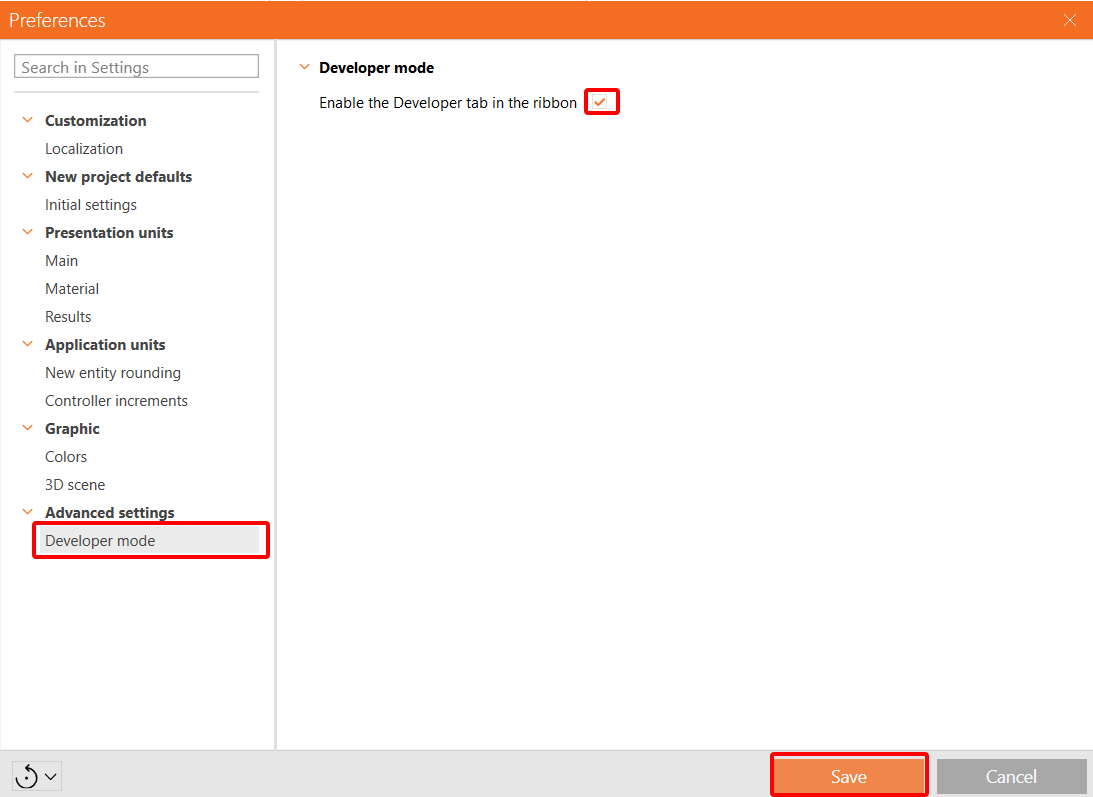
To be able to work with parameters, it is necessary to enable the Developer tab in Preferences / Advance Settings:
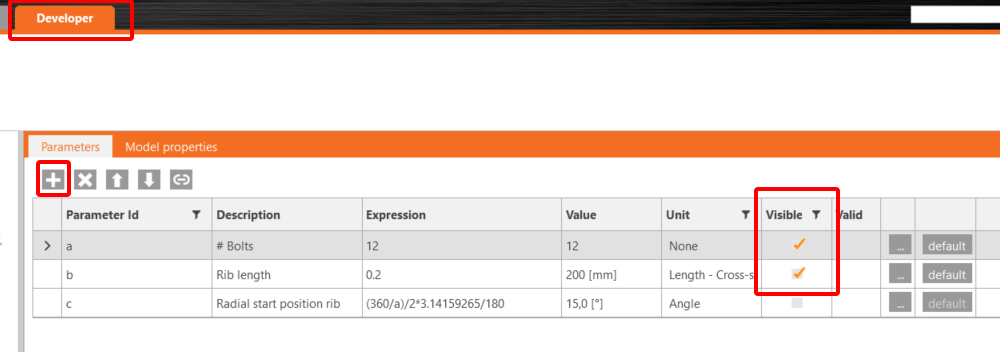
Now, you have to set up three parameters for this connection. Click in the Developer tab on the + button and set the values. The first one will be the diameter of bolts, the second one the length of the rib and the third one the position of the rib. Both parameters a and b set to Visible.
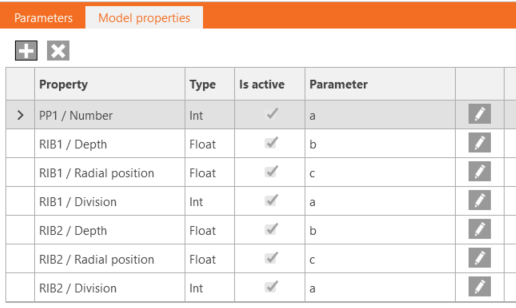
Connect all three parameters with the appropriate values of the corresponding operations.
Finally, you can save this connection under the name Model_costs_template.ideaCon.
Grasshopper - Import of the *ideaCon file and adding components
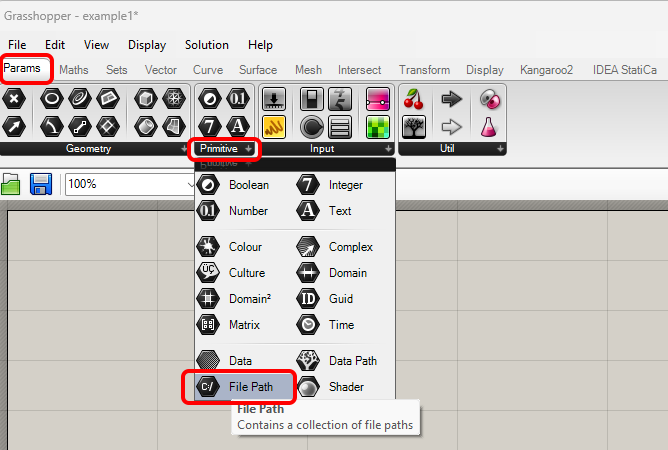
Create a new document, select the tab Params in the upper ribbon, and place the component File Path on the Canvas.
Right-click on the component and select the file Model_costs_template.ideaCon you saved before.
Note: If you open the attached file, you must change this path accordingly.
Check the attached file for all the components, enabling cost estimation.
You can also watch the video, where the workflow is seen.
Here is the final video with running the script.
Přiložené soubory ke stažení
- Model_costs_template.ideaCon (IDEACON, 127 kB)
- Parametric_cost_estimation.gh (GH, 20 kB)